In this tutorial, we’ll explain how to create a semi-realistic flash stick with gradients and simple shapes. We will make our own custom brush to create tattoo style swooshes. Also, we’ll review how to use Global Colors in Illustrator, which allows us to flexibly change the colors of an object on the fly.
本教程,我们会教你使用渐变和简单的形状是如何绘制一个半写实的闪存盘的。制作U盘上的印花图案我们会用到自己创建的自定义笔刷。我们还会教你如何使用Illustrator中的全局色,以使我们非常快地更改一个对象的颜色。
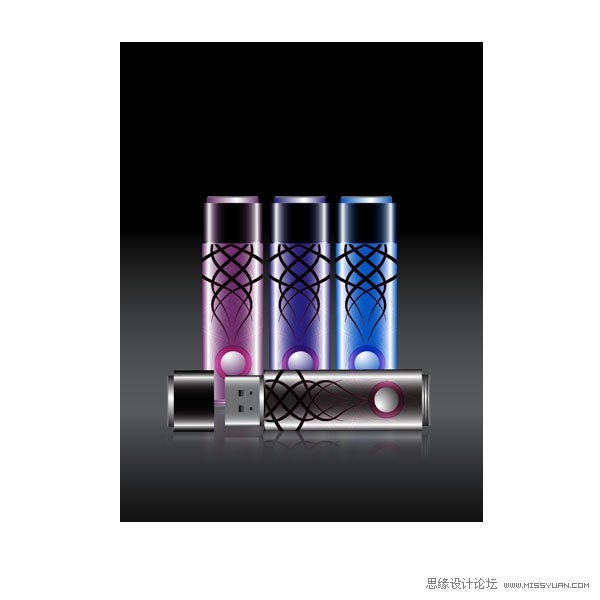
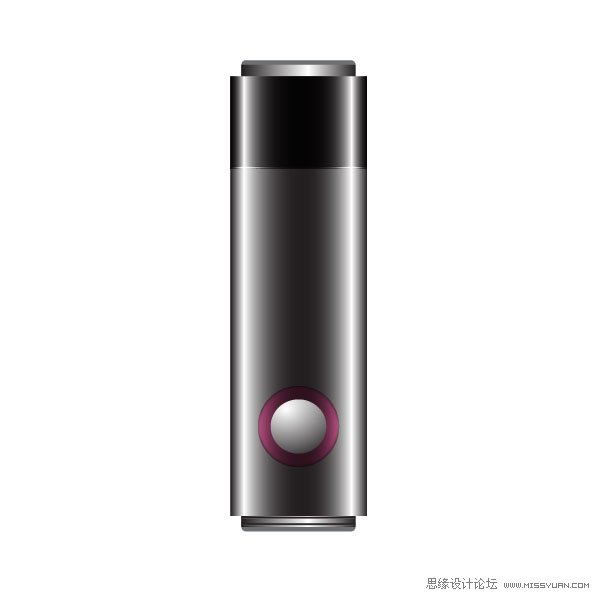
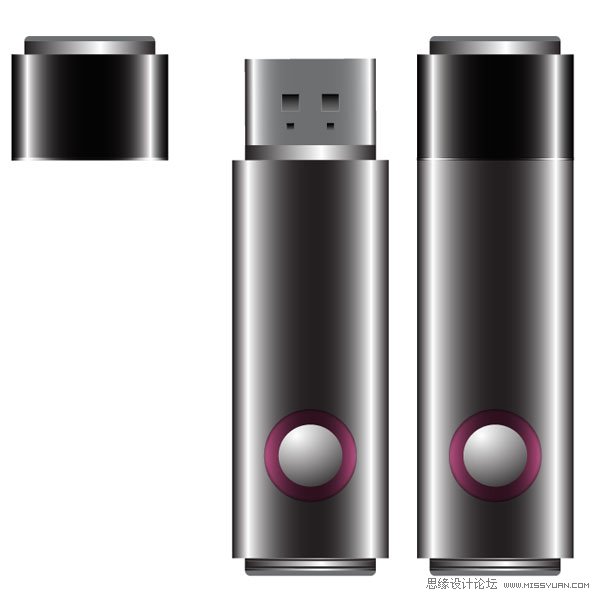
Final Image Preview
To begin with let’s have a look at the image we’ll be creating.
成品图预览
首先让我们先来看一下我们将要绘制的成品图。
Step 1
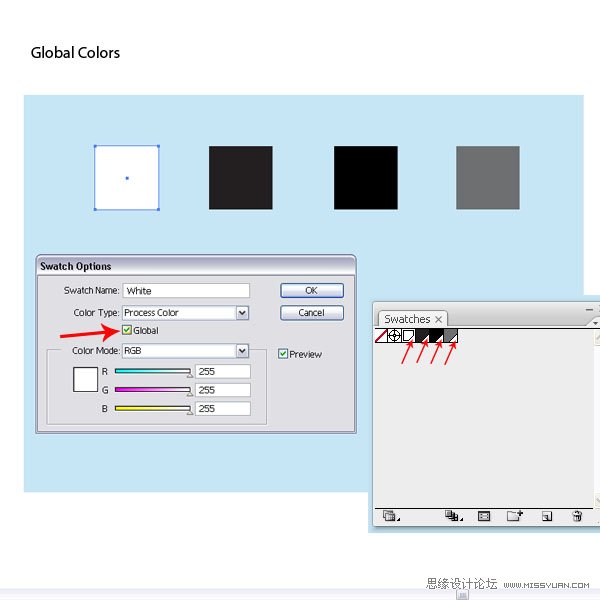
Before we begin, we will have a look at the Swatch Palette. We need to set up our Global Colors right from the start. I picked four colors as a base. I chose a white, black and two grays. Once I added them in my Swatch Palette, I deleted all other color swatches.
Now let’s set up the Global Colors. Double-click on the Color Swatch. In the Swatch Options Menu, select the option Global. Leave the Color Type at Process Color, then click OK. The Color Swatch now has a small white triangle in the bottom right corner. This indicates that the color is now a Global Color. If we apply a Global Color to any object or path, we can later change the color on the fly and it will be applied where the Global Color was added.
1. 在我们开始教学之前,我们先来看一下色板。首先,我们先要设置全局色。我选了4种颜色作为基色,我选了白色,黑色和2个灰色。当我们把这4种颜色拖进色板调板之后,我就可以删除其它不需要的色板了。
现在,我们开始设置全局色。在色板上双击,然后在色板选项窗口中,选择“全局色”选项。颜色的类型保留为印刷色,然后点确定。现在色板的右下角有一个小的白色的三角形,这表示这个颜色现在是全局色了。如果我们把全局色应用到某个对象或者路径时,我们在之后还可以很快地更改原来的颜色,并且应用的还是新增的全局色。
Step 2
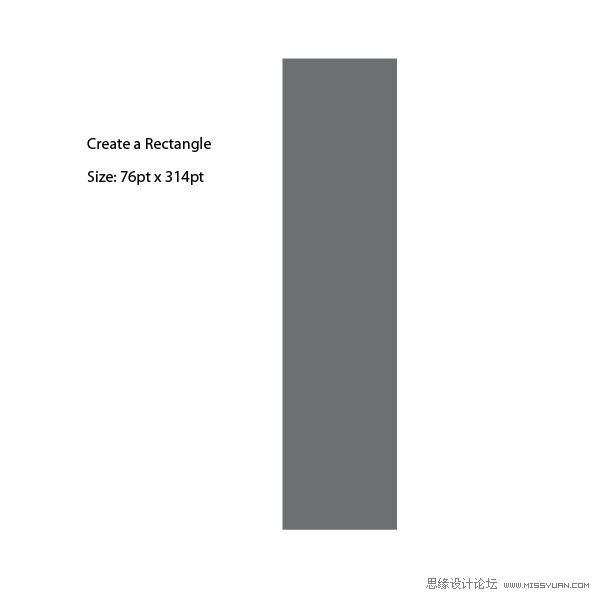
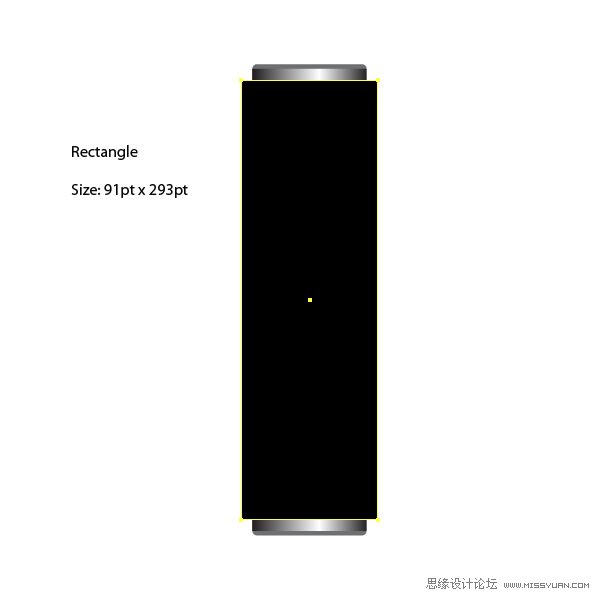
Create a rectangle with the Rectangle Tool (M). Use the size indicated in the image below.
2. 使用矩形工具(M)绘制一个矩形,使用的大小如下图所示。
Step 3
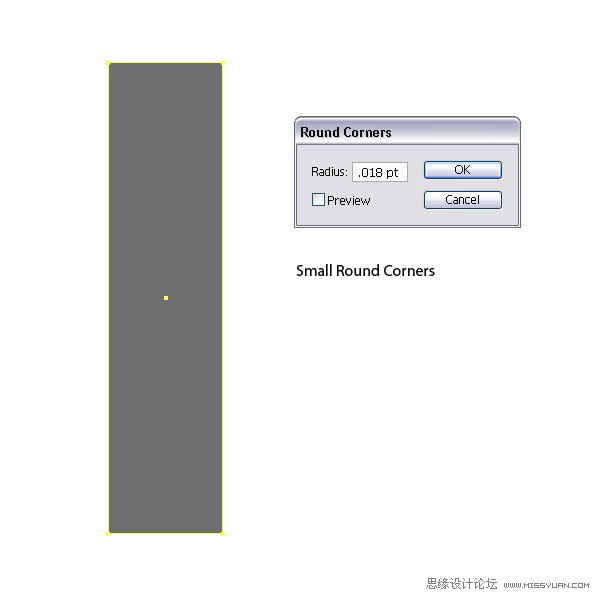
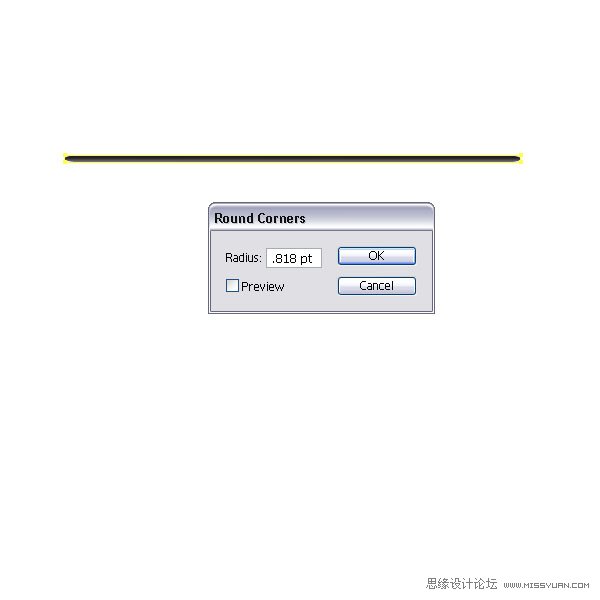
Let’s start creating. Select the object and go to Effect > Stylize > Round Corners and apply a tiny amount to it of .018pt. This will give us small rounded corners.
3. 我们继续绘制。选择矩形对象,然后执行效果菜单>风格化>圆角,圆角半径:0.018pt。
Step 4
Create another rectangle on top of the other one, and use the size as indicated below.
4. 在矩形的上面绘制另一个矩形,使用的大小如下所示。
译者提示:可以Ctrl+C,Ctrl+F复制第3步的矩形,然后在变换调板中点“约束宽度和高度比例”的图标,在高度字段框内输入数值。这样第5步也可省略。

Step 5
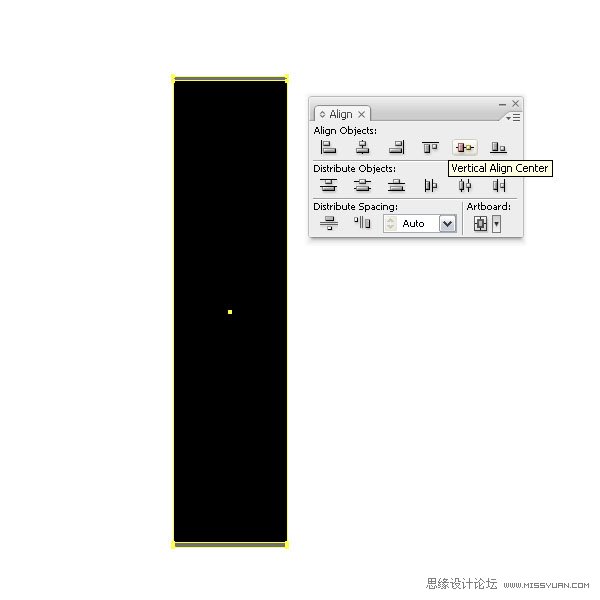
Select both rectangles and align them centered, both horizontally and vertically.
5. 选择这2个对象,居中对齐。
Step 6
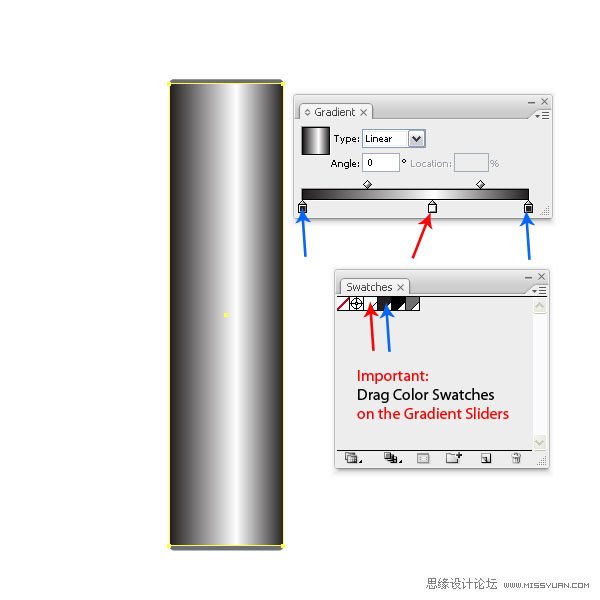
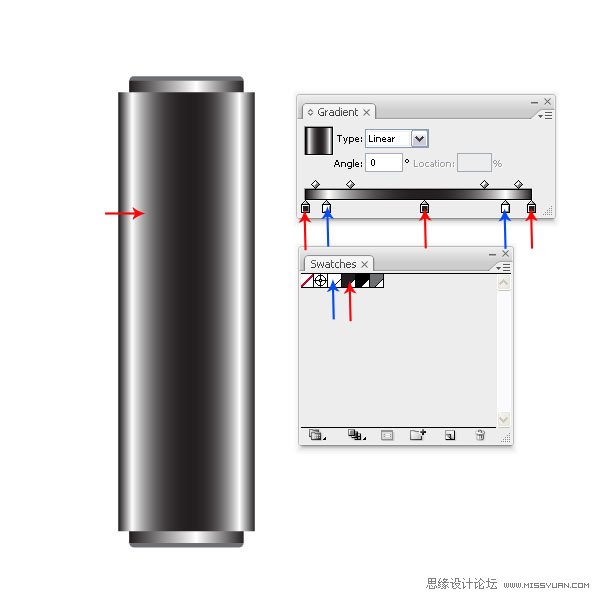
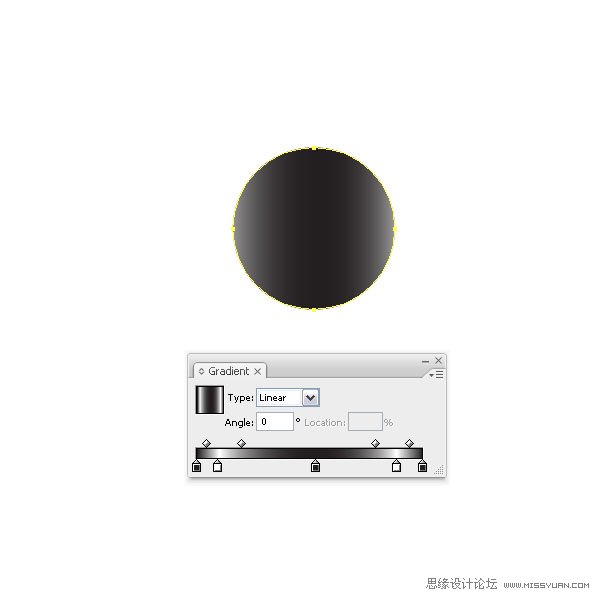
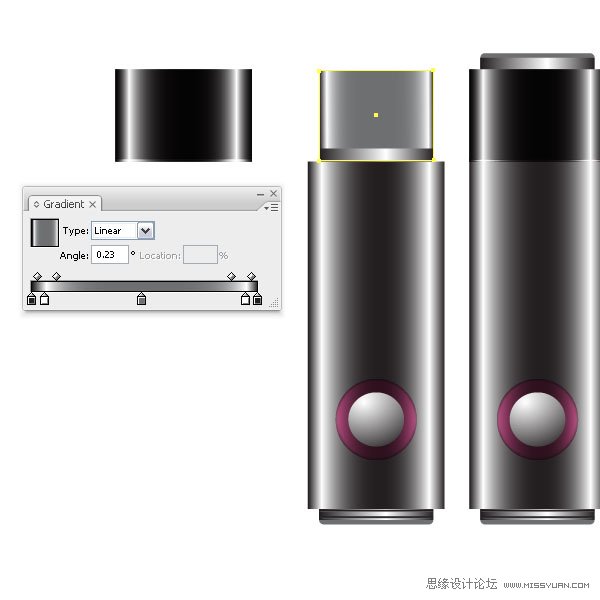
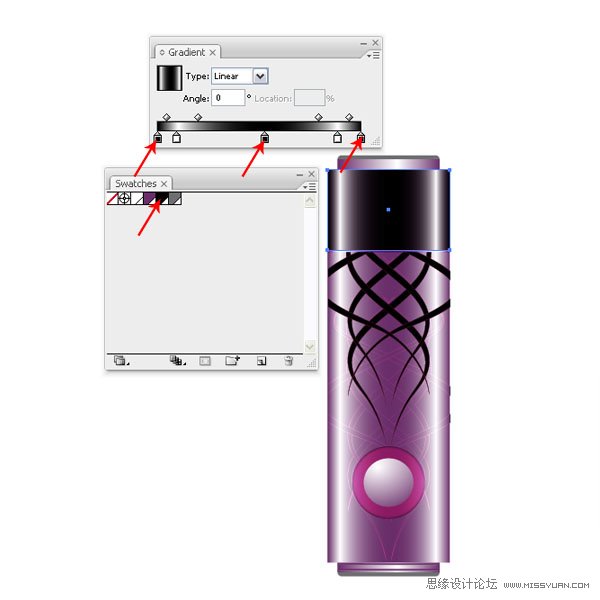
Apply a linear gradient to the second shape. We have to make sure that we use the Global Colors that we have set up. To do so, drag the desired color swatch onto the gradient slider. If one is missed, the color change won’t be applied.
6. 第2个矩形应用线性渐变。我们必须要确定我们使用的是我们之前设置的全局色。选中矩形,切到渐变调板,把想要的色板拖移到渐变的滑动块上。如果没有选中对象的话,渐变将不起作用。
Step 7
Create another rectangle on top and use the size indicated below.
7. 在上面绘制另一个矩形,使用大小如下所示。
Step 8
Apply yet another linear gradient and make sure that you use Global Colors. Align the shape centered to the others.
8. 再应用另一个线性渐变,确定你使用的是全局色。然后所有形状居中对齐。
Step 9
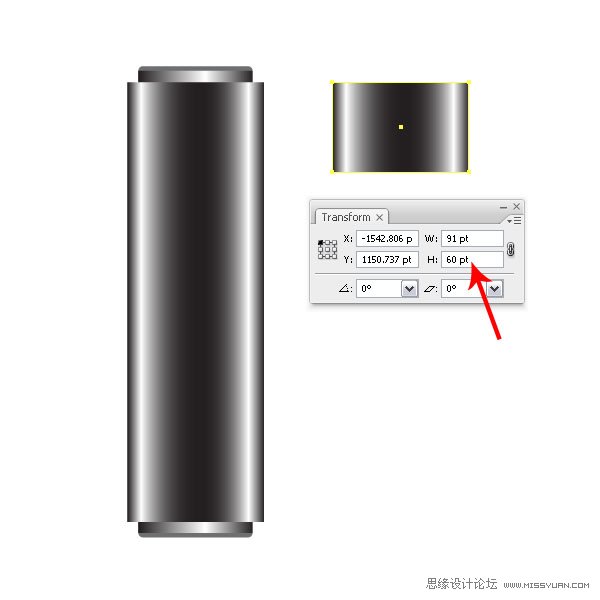
Make a copy of the newly created shape, then transform it to the sizes 91pt by 60pt. You can do so using the Transform Palette. Just type in the numbers while the selection is active.
9. 再制作一个刚刚绘制的矩形的副本,然后更改它的大小为91*60pt,你可以使用变换调板来更改,只要选中对象,然后输入数值就可以。
Step 10
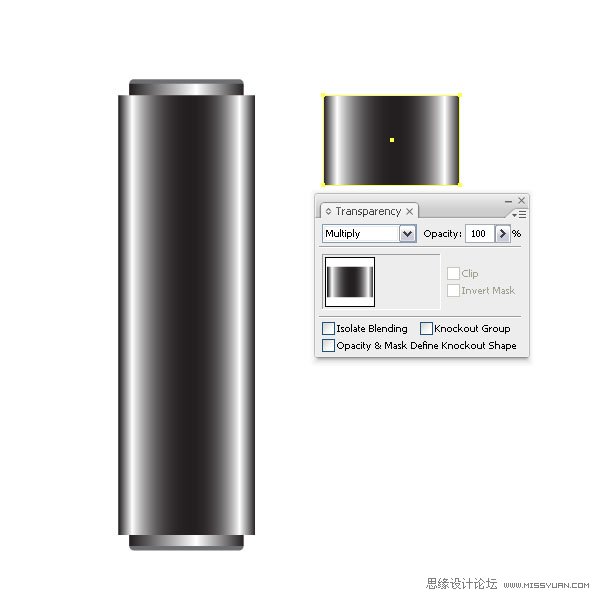
Set the Layer mode of the small rectangle to Multiply.
10. 这个小矩形的混合模式设置为“正片叠底”。
图示Transparency:透明度调板
Step 11
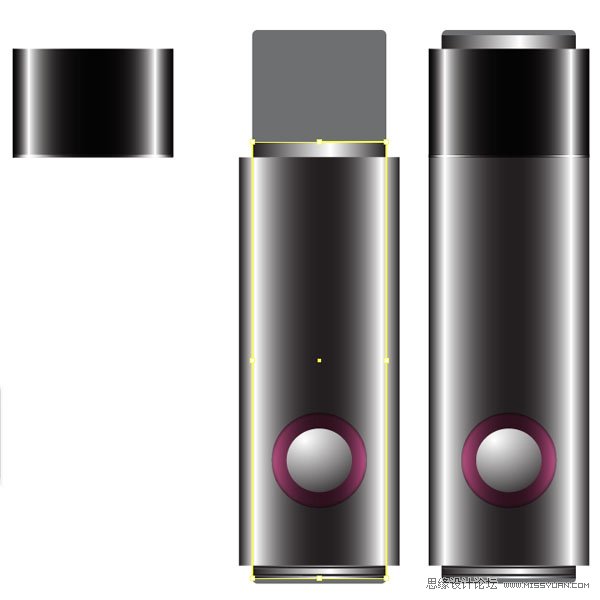
Align it with the bigger rectangle along the top and vertically in the center. This will be our cap.
11. 选中小矩形和大矩形,然后在大矩形上点一下(译者提示:在大矩形上点一下,目的是为了在执行对齐时以大矩形为参考对齐对象),切到对齐调板,点“垂直顶对齐”按钮。这就是U盘的盖子了。

Step 12
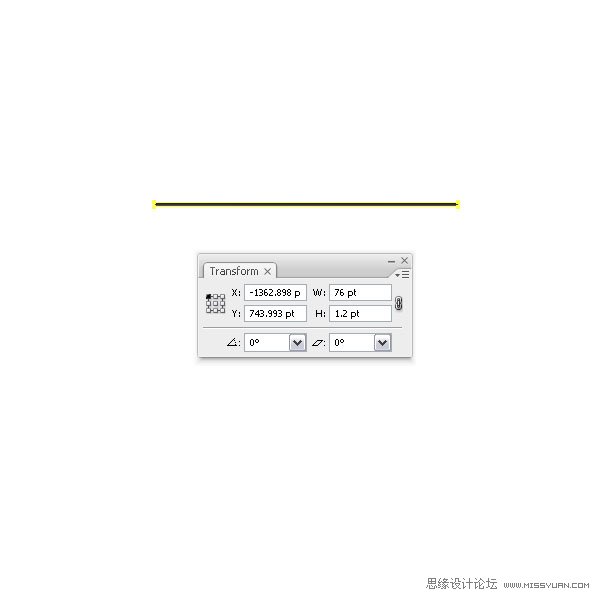
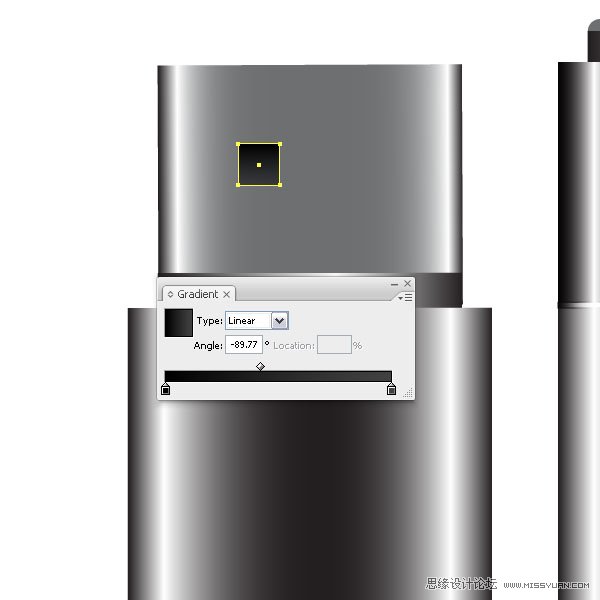
Create a tiny long rectangle with the sizes 76pt x 1.2pt and fill it with a gray linear gradient. Go to Effect > Stylize > Round Corners and choose a radius of .818pt.
12. 绘制一个76*1.2pt的扁长矩形,填充灰色线性渐变,然后执行效果菜单>风格化>圆角,输入圆角半径:0.818pt。
Step 13
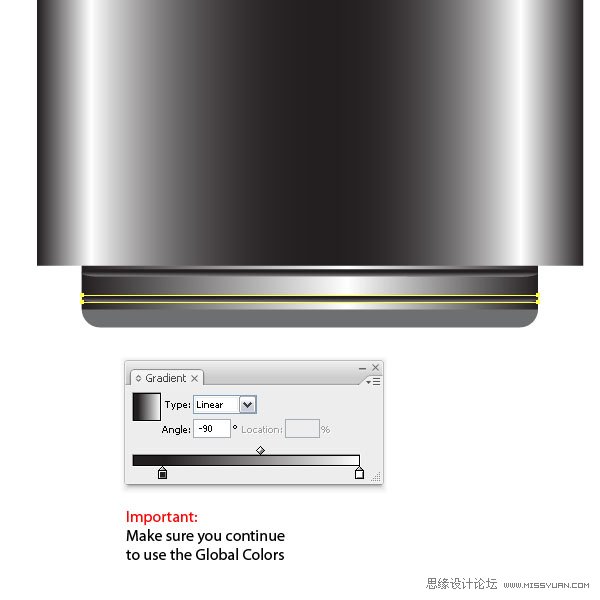
Make a copy of the shape, align them and place them on the bottom of the flash stick shape. They will be a small accent to the bottom part. Again, make sure that the gradients have Global Colors set.
13. 绘制一个扁长矩形的副本,然后使它们和其它形状对齐,然后把它们移到U盘的最下面。它们就是U盘底下小的凸起部分。同样的,确定一下渐变上的颜色使用的是全局色。
Step 14
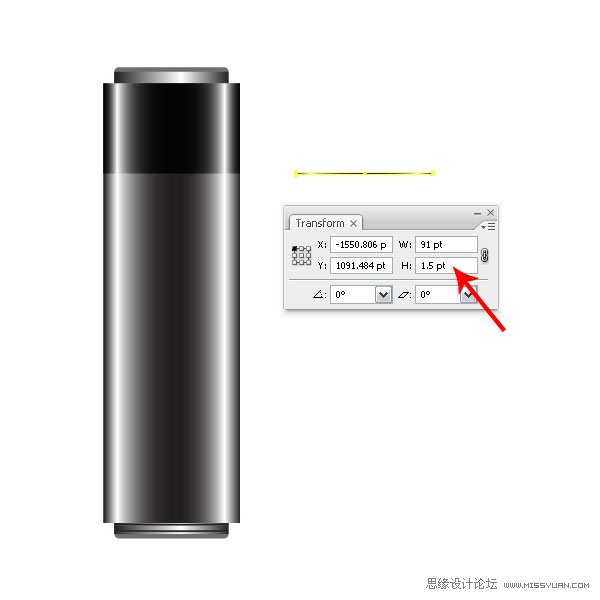
Make a copy of the cap we created in Step 9 and change the height to 1.5pt via the Transform Palette. Keep the gradient, but add a Stroke of 0.25pt in dark gray to it. Set the Layer Mode to Overlay and place it just below the cap shape.
14. 制作一个我们在第9步绘制的盖子的副本,然后切到变换调板,更改高度为1.5pt。渐变保持不变,然后描边颜色设置为深灰色,描边宽度设置为0.25pt。图层混合模式设置为“叠加”,然后把它移到盖子形状的下面。

Step 15
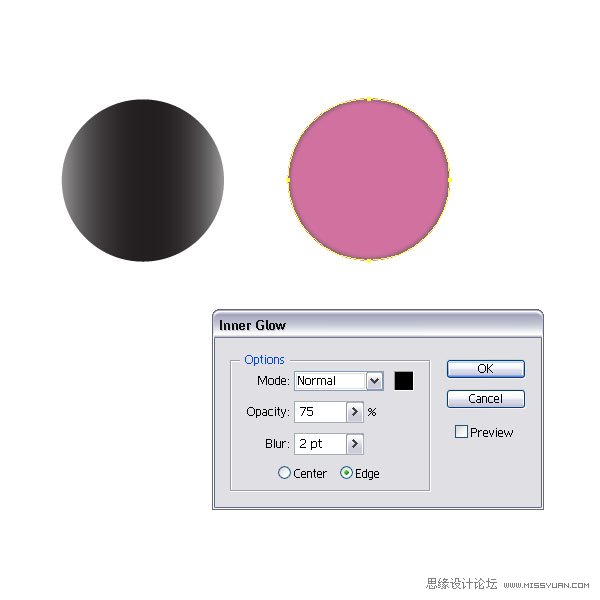
Create a small circle and fill it with the same gradient as the cap shape. Duplicate it and fill it with a pink, or whatever color you prefer. This is not a Global Color, as I don’t want it to change later on. Set the Layer Mode to Overlay at 68%.
15. 绘制一个小圆,填充和盖子形状一样的渐变。然后复制它,填充粉色,或者其它你喜欢的颜色。这里的粉色不是全局色,因为在之后我不会再去更改颜色了。然后图层混合模式设置为“叠加”,透明度:68%。
Step 16
With the pink circle still selected, go to Effect > Stylized > Inner Glow and set: the Mode to Normal, Opacity to 75%, a Blur of 2pt, and the color set to black. Also, center both circles.
16. 粉色的圆仍是选中状态,然后执行效果菜单>风格化>内发光,设置混合模式为“正常”,透明度:75%,模糊:2pt,颜色设置为黑色。然后将这2个圆居中对齐。
Step 17
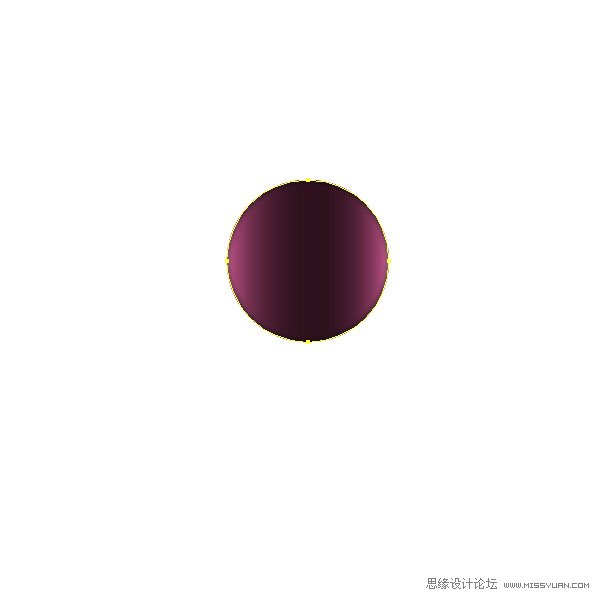
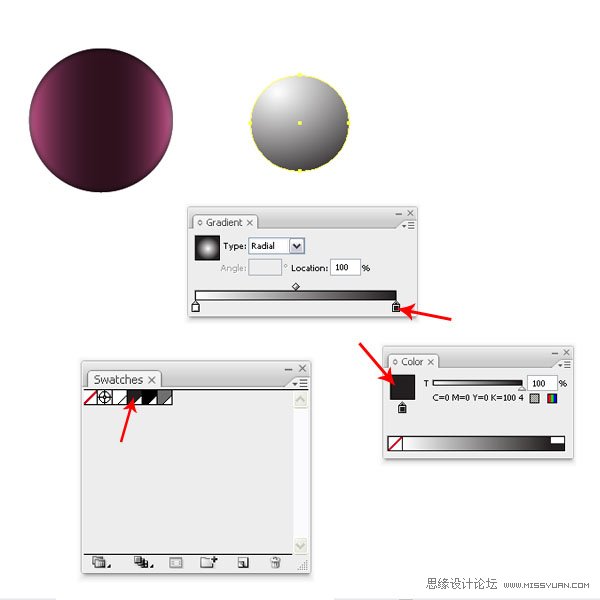
Create another smaller circle and fill it with a radial gray gradient. Don’t forget to use Global Colors. Center all three circles and place them on top of the flash stick.
17. 再制作一个小圆,填充灰色径向渐变。不要忘了使用全局色。将3个圆居中对齐,然后把它们移到U盘的上面。
Step 18
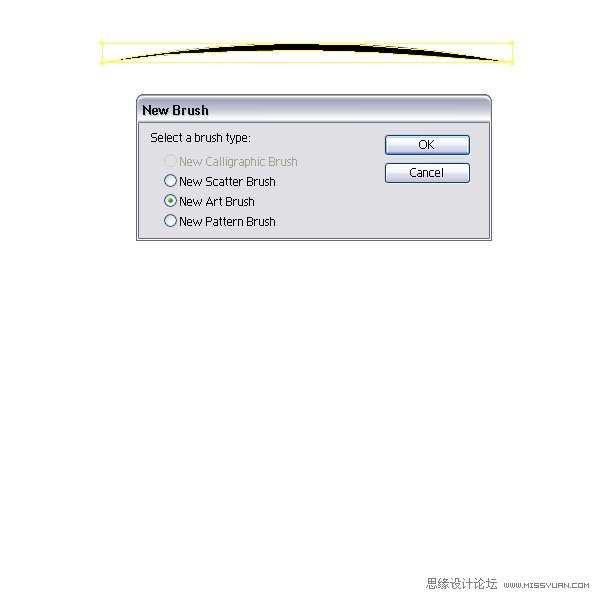
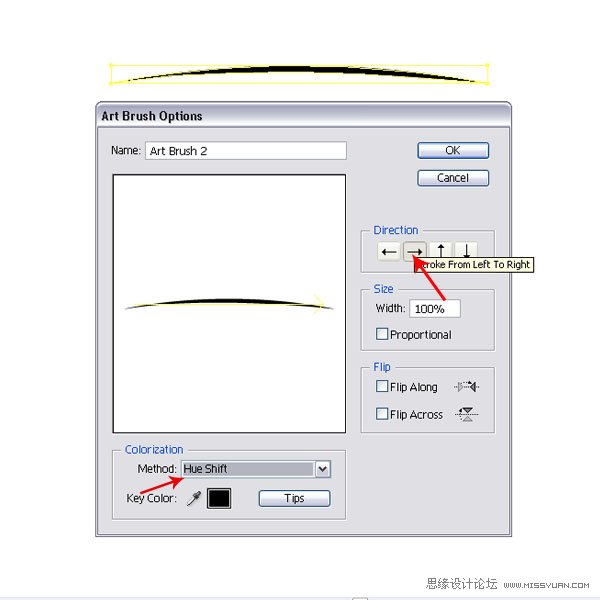
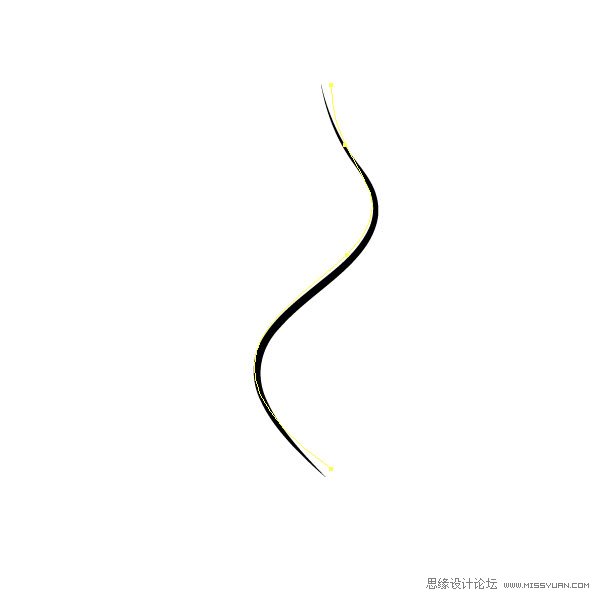
Let’s have some fun and create a custom brush. Draw a path with the Pen Tool (P) and fill it with black. No need for Global Colors here. Then drag it into the Brush Palette and choose New Art Brush from the New Brush Window. Select the Direction: Stroke From Left To Right and set the Colorization Method to Hue Shift.
18. 为了给U盘增添一些亮点,我们DIY了一个自定义的笔刷。使用钢笔工具(P),绘制一个路径,然后填充黑色。这里不需要使用全局色。然后把它拖移到画笔调板里,在新建画笔窗口中,选择新建艺术画笔。选择方向:从左到右描边,着色方法设置为“色相转换”。
Step 19
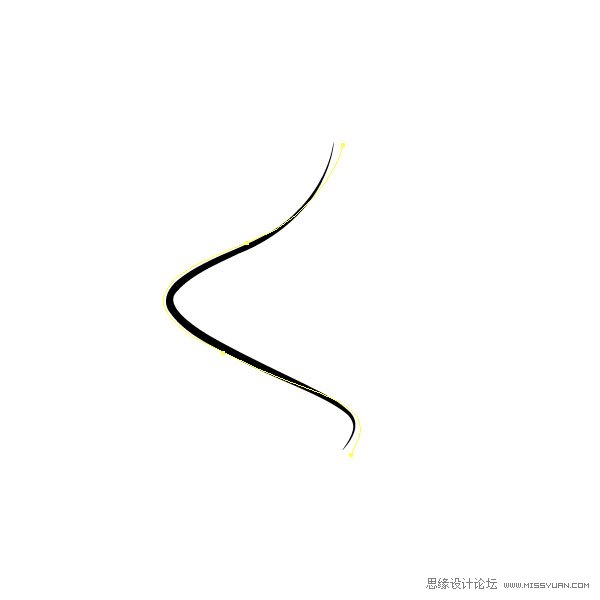
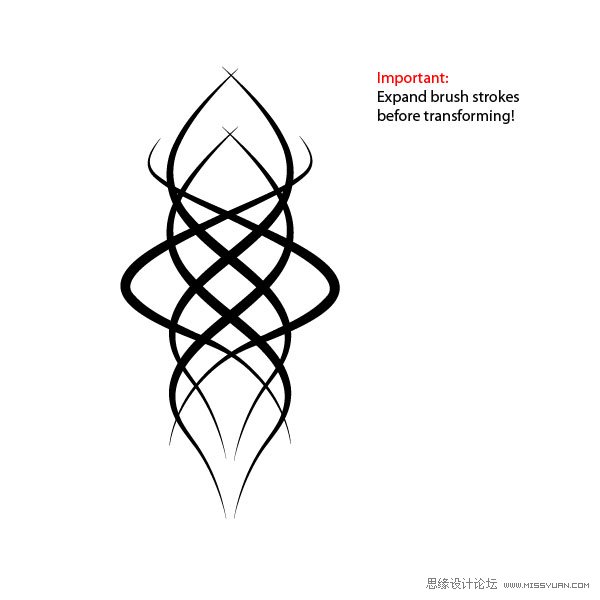
Now create a path with the Pen Tool (P) as you see in the image below, then apply the custom brush. Create another path and do the same. I aligned some of the paths and then mirrored them to built up the tattoo style design. It is important that you expand the brush appearance and click Add to Shape Area in the Pathfinder Palette before rotating or mirroring.
19. 现在使用钢笔工具(P)绘制一条路径,如下图所示,然后应用自定义笔刷。再绘制另一条路径,使用同样的方法应用笔刷。把这些路径组合一下,然后使用镜像,这样就创建出了印花的设计图案。这里有一点很重要,就是在你旋转或者镜像对象前,你要先扩展笔刷外观,然后在路径查找器调板中点“合并”按钮。
Step 20
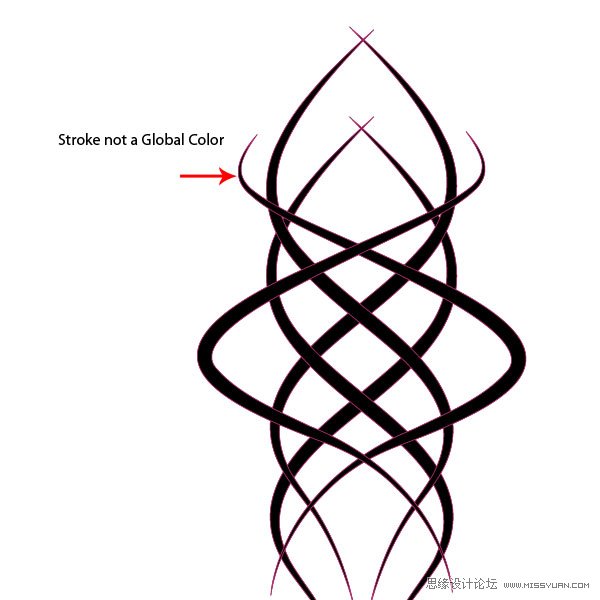
I filled the tattoo shapes with a black (no Global Color) and a pink color (no Global Color) and a Stroke of 0.25pt. You can choose any colors you like.
20. 印花图案填充黑色(黑色不是全局色),并且描边颜色为粉红色(粉红色不是全局色),描边宽度为0.25pt。你也可以选择你喜欢的其它颜色。
Step 21
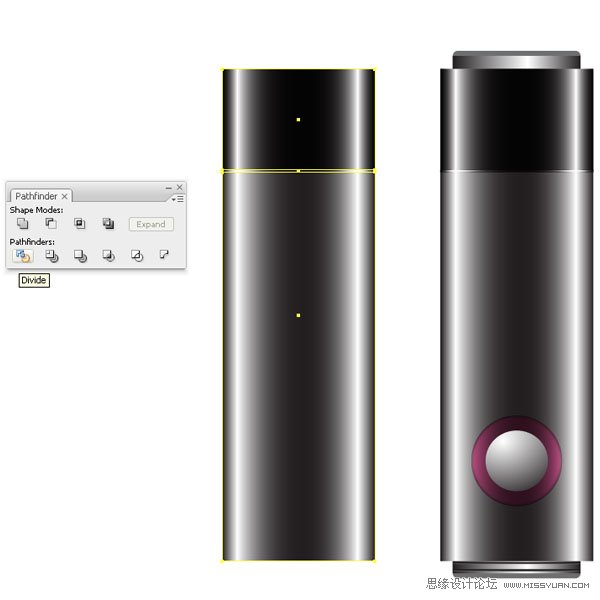
Let’s create the opened flash stick. Duplicate the cap shape, the small band shape and the main shape, then choose Divide in the Pathfinder Palette. Ungroup them and move the cap to the other side. Scale the smaller gradient filled shape with the Scale Tool (E). Also, scale the gray shape with the round corners in height until it is behind the main body shape.
21. 绘制打开盖子的U盘。复制盖子形状,小的条状形状和主体形状,然后在路径查找器调板中点“分割”按钮。把它们全部解散群组,把盖子(包括那个小的条状)移到另一边。使用自由变换工具(E)缩放渐变上的颜色比较少的形状。然后,灰色的圆角矩形缩放到同主体形状旁边(左边)的水平高度一样的高度。
Step 22
Now create a rectangle with the same width as the previously scaled shape, then fill it with a linear gradient. This will be our flash stick tip.
22. 现在绘制一个矩形,宽度同之前缩放的矩形宽度,然后填充线性渐变。这就是我们制作的U盘了。
Step 23
Zoom into the tip part and create a small square and fill it with a linear dark gray gradient. Duplicate it on top (Command + C +F) and scale it (E) slightly bigger than the original. Set the Layer Mode to Screen. This will give us an optical illusion that the tip has a metal cutout. Select both and copy them for the right side. Then create two small squares with a dark linear gradient and place them underneath the others.
23. 放大U盘的上半部,绘制一个小正方形,填充深灰色线性渐变。然后在它上面复制一个(Ctrl+C,Ctrl+F),使用自由变换工具(E),使它比原大小大一点。图层混合模式设置为滤色,这就使得U盘上小孔的底部有一种金属剪影的错觉感。同时选择这2个形状,然后复制它们,然后移到右边。然后绘制2个更小的正方形,填充深灰的线性渐变,然后把它们放在另2个正方形的下面。
Step 24
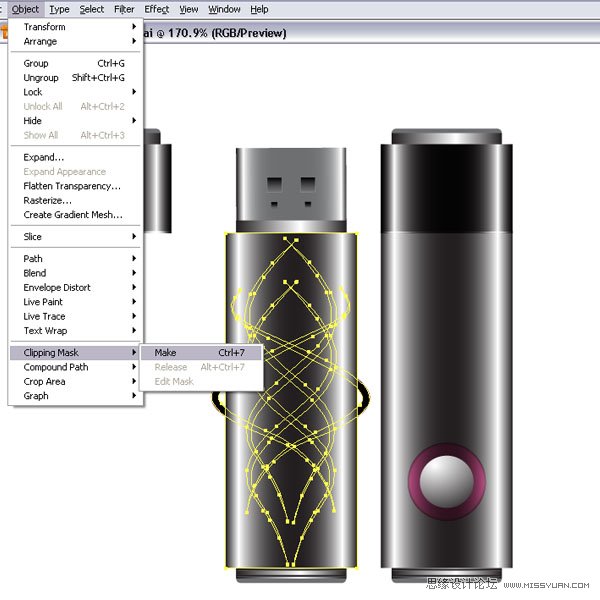
Let’s apply our tattoo style design. Place your tattoo design on top of the flash stick. Then make a copy of the bigger shape and place it on top. Select both, the shape and the tattoo and go to Object > Clipping Mask > Make (Command + 7). This will mask the tattoo design to the flash stick outline.
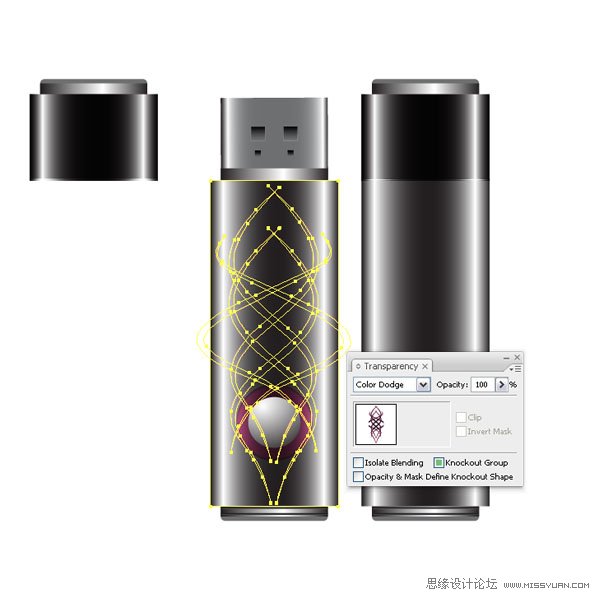
Set the Layer Mode to Color Dodge. Make sure that the circle shapes are on top. I placed another tattoo shape higher and applied another Clipping Mask. I set the Layer Mode to Normal.
24. 现在应用印花设计图案。把印花设计图案放在U盘的上面,然后复制一个大的矩形形状,把它放在印花设计图案的上面。同时选中这2个形状,然后执行对象菜单>剪切蒙版>建立(Ctrl+7)。这样印花设计图案就正好剪切到U盘的外观轮廓。
Step 25
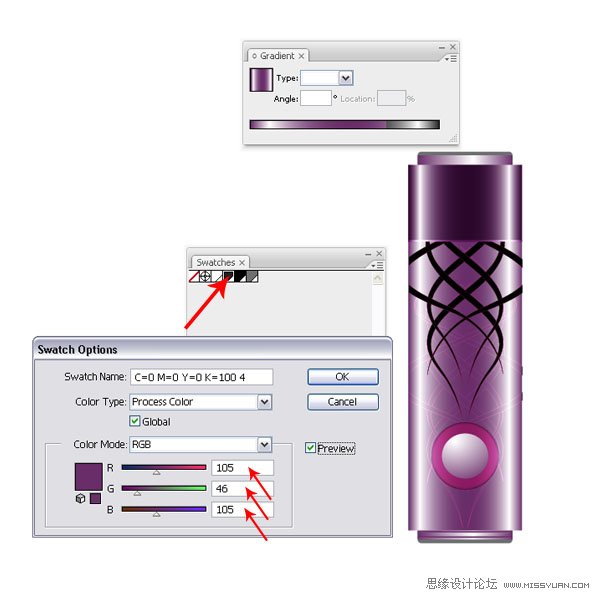
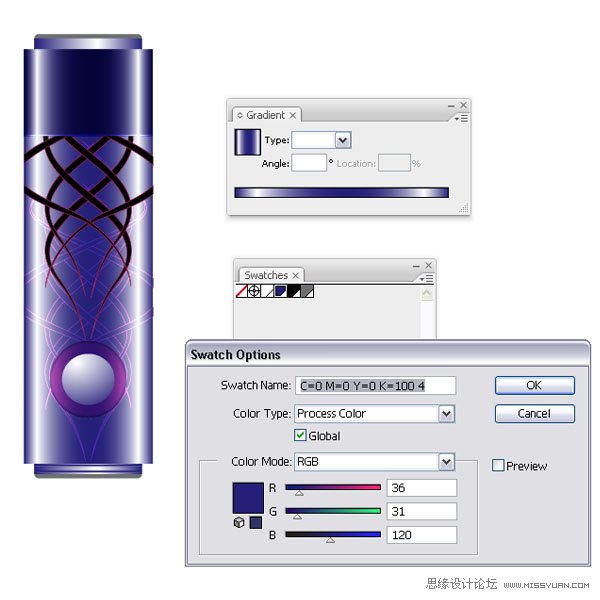
Now we will create another flash stick with different colors. Select your flash stick shapes (you might want to group them). Next, open another document, and paste the shapes onto the artboard. Then open the Swatch Palette and double-click the dark gray color swatch.
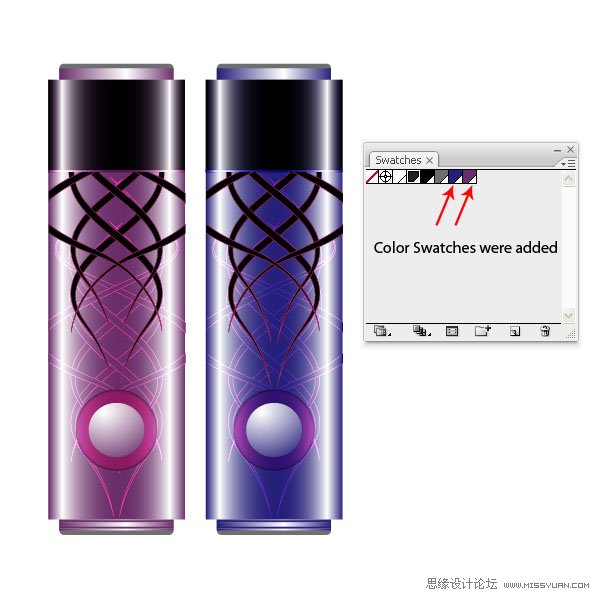
Since I have the document setup in RGB, I have three color sliders. I changed them to the settings you can see in the image below. This will give me a pinkish color. Make sure that you have the Preview selected, that way while you change the color, you can see how the color is instantly applied to your shapes. I changed the cap back to black by dragging the black color swatch back onto the gradient sliders. You can choose whatever color you’d like – experiment a little.
25. 现在我们绘制另一个不同色彩的U盘。选择U盘形状(你可以把这些形状编为一组)。然后,新建文档,把U盘形状粘贴到画板上。然后打开色板调板,在深灰色色板上双击。
当我把文档设置为RGB颜色模式时,我就有了3个颜色块,我把它们更改为如下图所示的设置。按照下图的设置,你会得到一个略带桃红的颜色,确认你选中了预览。当你用这个方法更改颜色时,你会看到颜色是如何快速地被应用到了形状上。然后,恢复U盘盖子的颜色,把黑色色板拖移到渐变滑块上。你可以选择任何你喜欢的颜色-多做一些尝试。
Step 26
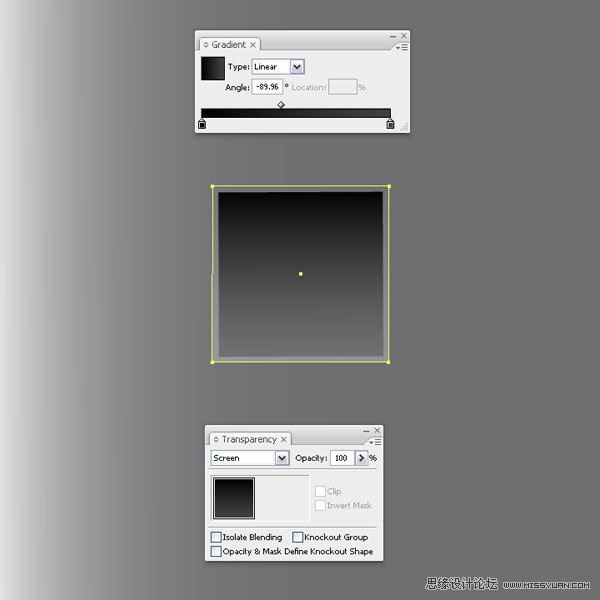
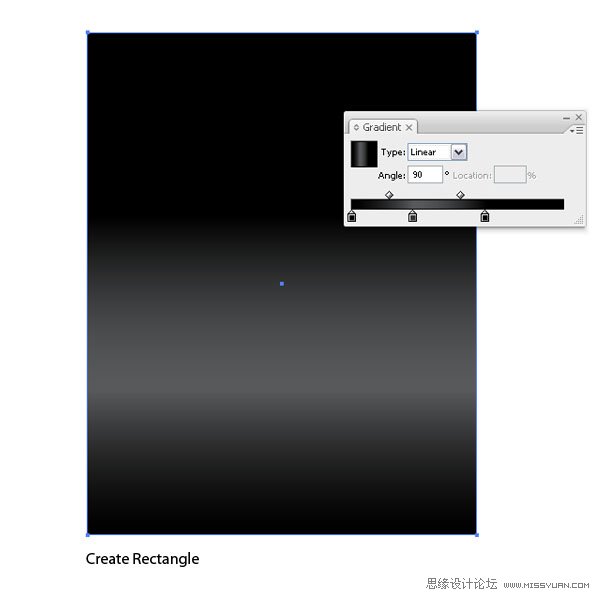
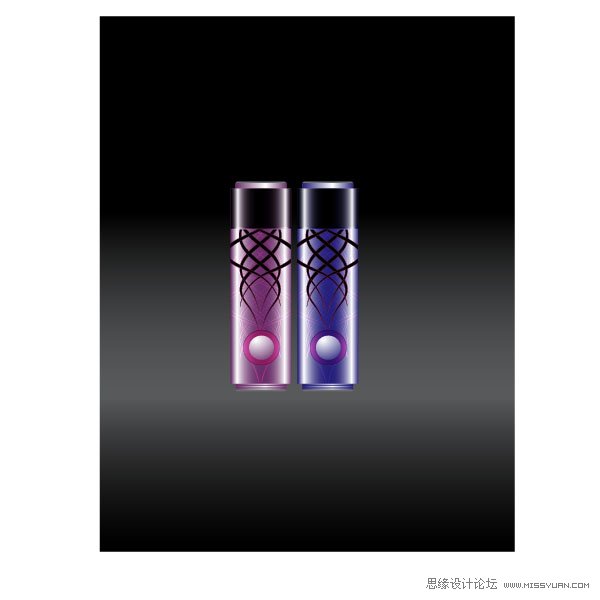
Lets’ create the final image. Create a rectangle in a new document or the just opened one. Fill it with a linear dark gray gradient.
26. 创建最后的图形。新建文档或者就用打开的文档,绘制一个矩形,填充深灰色线性渐变。
Step 27
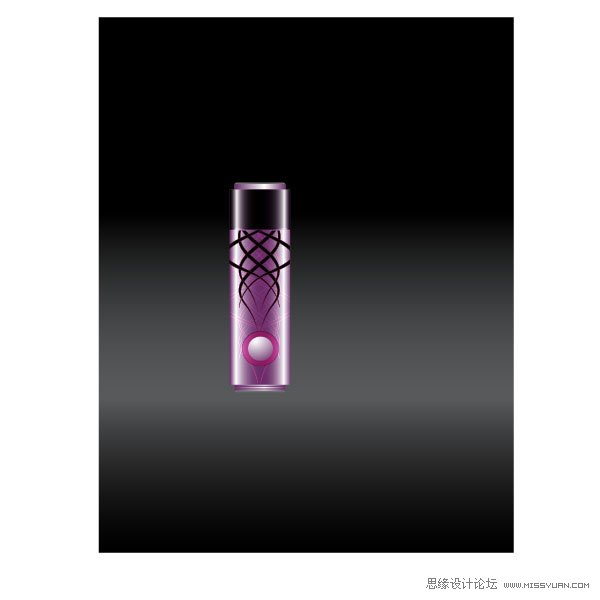
Select your colored flash stick and place it above the background.
27. 选择彩色的U盘,把它放在背景层的上面。
Step 28
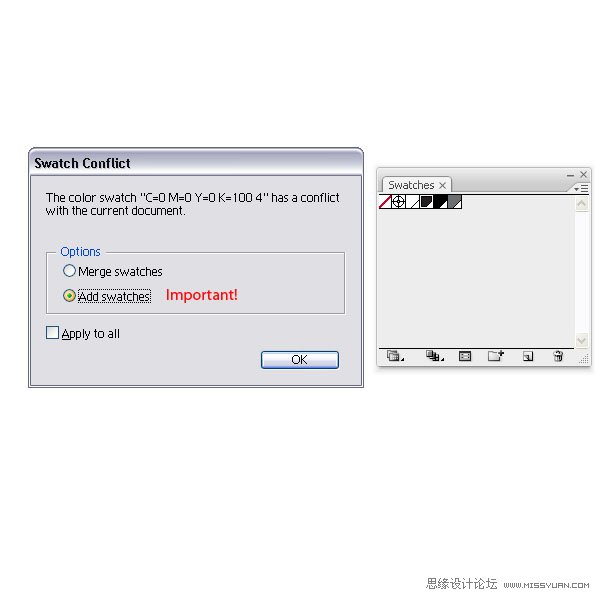
Now, assuming that you created more colored flash sticks and you copy them onto the artboard, a pop up window might appear, which says that there is a Swatch Conflict. Choose in the Options Add swatches, if not you will loose your colors since they think that they share a color swatch. The new color swatches will be added to your Swatch Palette.
28. 现在,假如你绘制了很多的彩色U盘,然后复制在了画板上,这个时候,就会显示弹出窗口,告诉你你遇到了色板冲突的问题,选择“添加色板”选项。如果你不这么做的话,你就会丢失掉一些颜色,因为系统会认为它们共享的是同一个色板。新的色板会添加进色板调板中。
Step 29
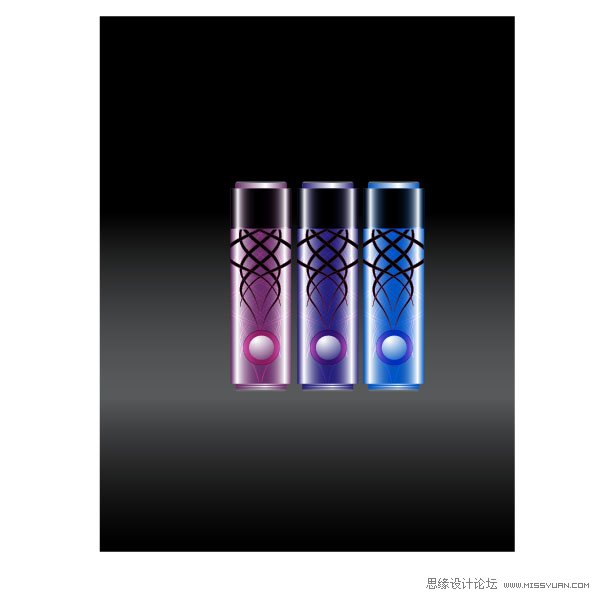
Place your second flash stick next to the other.
29. 将第2个U盘放到第1个的旁边。
Step 30
Copy the third onto the artboard and place all of them side by side.
30. 复制第3个U盘到画板上,然后把它们排在一起。
Step 31
Select all three flash sticks, duplicate them, and reflect them on the horizontal axis (Object > Arrange > Reflect).
31. 选择这3个U盘,然后复制它们,然后水平镜像对称(对象菜单>变换>对称)。
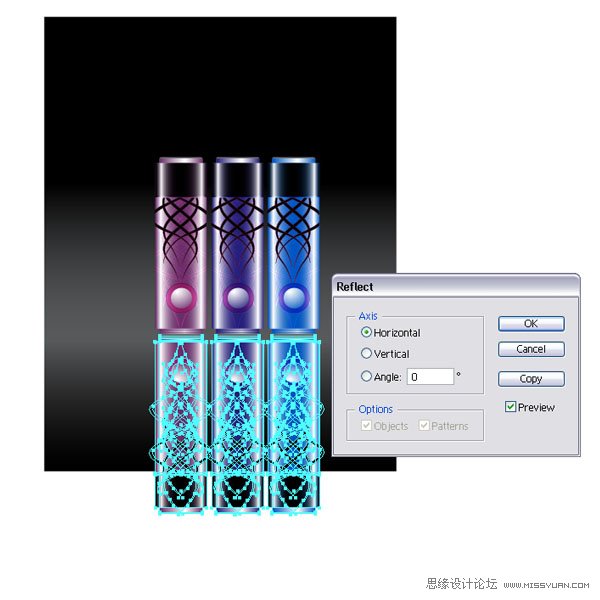
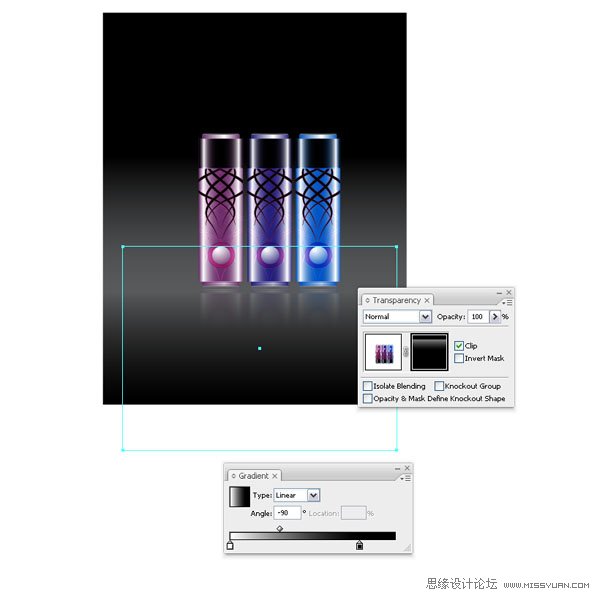
Step 32
Select them and apply an Opacity Mask.
32. 在U盘副本的上面,绘制一个矩形,然后选中矩形和U盘副本,建立不透明剪切蒙版。
Conclusion
Here is my final image. I place the gray flash stick with the open cap in front of the others and applied an Opacity Mask again. I hope this tutorial gave a little insight into Global Colors. If you ever have a bigger project and you set it up with Global Colors, you can easily change the look of your design on the fly.
尾声
下图就是成品图了。我把打开盖子的灰色U盘放在其它形状的前面,然后也是建立不透明剪切蒙版。我希望这篇教程能让你对全局色有一个深入的了解。如果你要做一个更大的工程的话,你就要设置全局色了,这样你就可以很容易而且很快地更改你的设计了。