本文可以转载,但请注明出处https://www.cnblogs.com/hellxz/p/oauth2_impilit_pattern.html
写在前面
在文章OAuth 2.0 概念及授权流程梳理 中我们谈到OAuth 2.0的概念与流程,上一篇文章Spring Security OAuth2 Demo —— 授权码模式简单演示了OAuth2的授权码模式流程,本文继续整理隐式授权模式相关内容
写文不易,如有错误,请在评论区指出,谢谢合作
本文目标
使用相对简易的代码演示隐式授权模式的流程,让其流程更加清晰易懂
隐式授权模式流程回顾
隐式授权模式要求:用户登录并对第三方应用进行授权,直接返回访问token,通过token访问资源
相比授权码模式,它少了一次授权码的颁发与客户端使用授权码换取token的过程
隐式授权模式适用场景
适用场景有以下几个条件:
- 用户参与:使用隐式授权需要与用户交互,用户对授权服务器进行登录与授权
- 单页应用:SPA前端,没有后端或者后端属于授权方
- 客户端密码:访问授权时,不需要带第三方应用secret,前提是资源服务校验token使用的client信息与客户端(第三方应用)不同,且配置了secret
- 前端:必须要有前端,否则无法使用授权功能
- 客户端后端:Options,仅当应用前后端不分离MVC场景
- 资源所属方:授权方
Demo结构
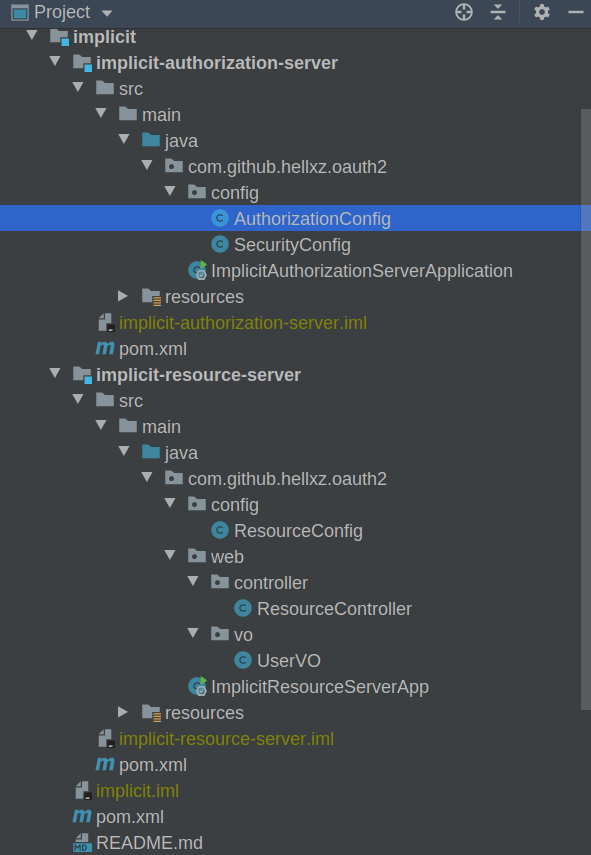
主要还是两个角色,授权服务器与资源服务器两个模块,另外与其他几个demo一样,在父项目中包含一个说明文档
本文以及后续文章的demo均放在GitHub上,欢迎大家Star & Fork,源码地址:https://github.com/hellxz/spring-security-oauth2-learn
Maven依赖
        <!--Spring Security-->
        <dependency>
            <groupId>org.springframework.boot</groupId>
            <artifactId>spring-boot-starter-security</artifactId>
        <https://img.qb5200.com/download-x/dependency>
        <!--Spring Boot Starter Web 所有demo均使用web-->
        <dependency>
            <groupId>org.springframework.boot</groupId>
            <artifactId>spring-boot-starter-web</artifactId>
        <https://img.qb5200.com/download-x/dependency>
        <!-- Spring Security OAuth2 -->
        <dependency>
            <groupId>org.springframework.security.oauth</groupId>
            <artifactId>spring-security-oauth2</artifactId>
            <version>${spring-security-oauth2.version}</version>
        <https://img.qb5200.com/download-x/dependency>
搭建授权服务器
项目启动类不多说,直接贴代码,讲讲主要内容
先说下SecurityConfig
package com.github.hellxz.oauth2.config;

import org.springframework.context.annotation.Bean;
import org.springframework.context.annotation.Configuration;
import org.springframework.security.config.annotation.authentication.builders.AuthenticationManagerBuilder;
import org.springframework.security.config.annotation.web.builders.HttpSecurity;
import org.springframework.security.config.annotation.web.configuration.EnableWebSecurity;
import org.springframework.security.config.annotation.web.configuration.WebSecurityConfigurerAdapter;
import org.springframework.security.crypto.bcrypt.BCryptPasswordEncoder;
import org.springframework.security.crypto.password.PasswordEncoder;

import java.util.Collections;

@Configuration
@EnableWebSecurity
public class SecurityConfig extends WebSecurityConfigurerAdapter {

    @Bean
    public PasswordEncoder passwordEncoder(){
        return new BCryptPasswordEncoder();
    }

    @Override
    protected void configure(AuthenticationManagerBuilder auth) throws Exception {
        // @formatter: off
        auth.inMemoryAuthentication()
                .withUser("hellxz")
                .password(passwordEncoder().encode("xyz"))
                .authorities(Collections.emptyList());
        // @formatter: on
    }

    @Override
    protected void configure(HttpSecurity http) throws Exception {
        http.authorizeRequests()
                .anyRequest().authenticated() //所有请求都需要通过认证
                .and()
                .httpBasic() //Basic提交
                .and()
                .csrf().disable(); //关跨域保护
    }
}
参考了上文的话,这里基本上没有什么变化,除了开启web安全外,重写了认证管理器的用户提供部分、简单配置了所有资源都需要认证
授权服务主要配置AuthorizationConfig
package com.github.hellxz.oauth2.config;

import org.springframework.beans.factory.annotation.Autowired;
import org.springframework.context.annotation.Configuration;
import org.springframework.security.crypto.password.PasswordEncoder;
import org.springframework.security.oauth2.config.annotation.configurers.ClientDetailsServiceConfigurer;
import org.springframework.security.oauth2.config.annotation.web.configuration.AuthorizationServerConfigurerAdapter;
import org.springframework.security.oauth2.config.annotation.web.configuration.EnableAuthorizationServer;
import org.springframework.security.oauth2.config.annotation.web.configurers.AuthorizationServerSecurityConfigurer;

//授权服务器配置
@Configuration
@EnableAuthorizationServer //开启授权服务
public class AuthorizationConfig extends AuthorizationServerConfigurerAdapter {

    @Autowired
    private PasswordEncoder passwordEncoder;

    @Override
    public void configure(AuthorizationServerSecurityConfigurer security) throws Exception {
        //允许表单提交
        security.allowFormAuthenticationForClients()
                .checkTokenAccess("permitAll()"); //参数与security访问控制一致
    }

    @Override
    public void configure(ClientDetailsServiceConfigurer clients) throws Exception {
        // @formatter: off
        clients.inMemory()
                .withClient("client-a") //client端唯一标识
                    .authorizedGrantTypes("implicit") //授权模式标识
                    .accessTokenValiditySeconds(120) //访问令牌的有效期,这里设置120s
                    .scopes("read_user_info") //作用域
                    .resourceIds("resource1") //资源id
                    .redirectUris("http://localhost:9001/callback") //回调地址
                    .and()
                .withClient("resource-server") //资源服务器校验token时用的客户端信息,仅需要client_id与密码
                    .secret(passwordEncoder.encode("test"));
        // @formatter: on
    }
}
因为最复杂的授权码已经有讲过了,这里简单说下,授权配置除了开启授权服务器,并重写认证服务器安全配置(接收客户端提交请求部分)允许客户端进行表单提交;另外配置了一个客户端的信息,包含其标识id、授权模式标识、令牌有效期、回调地址这几个必要的配置;
为了更清晰地区分第三方应用的客户端与资源服务器的客户端,这里额外配置了资源服务的客户端信息
测试授权服务器
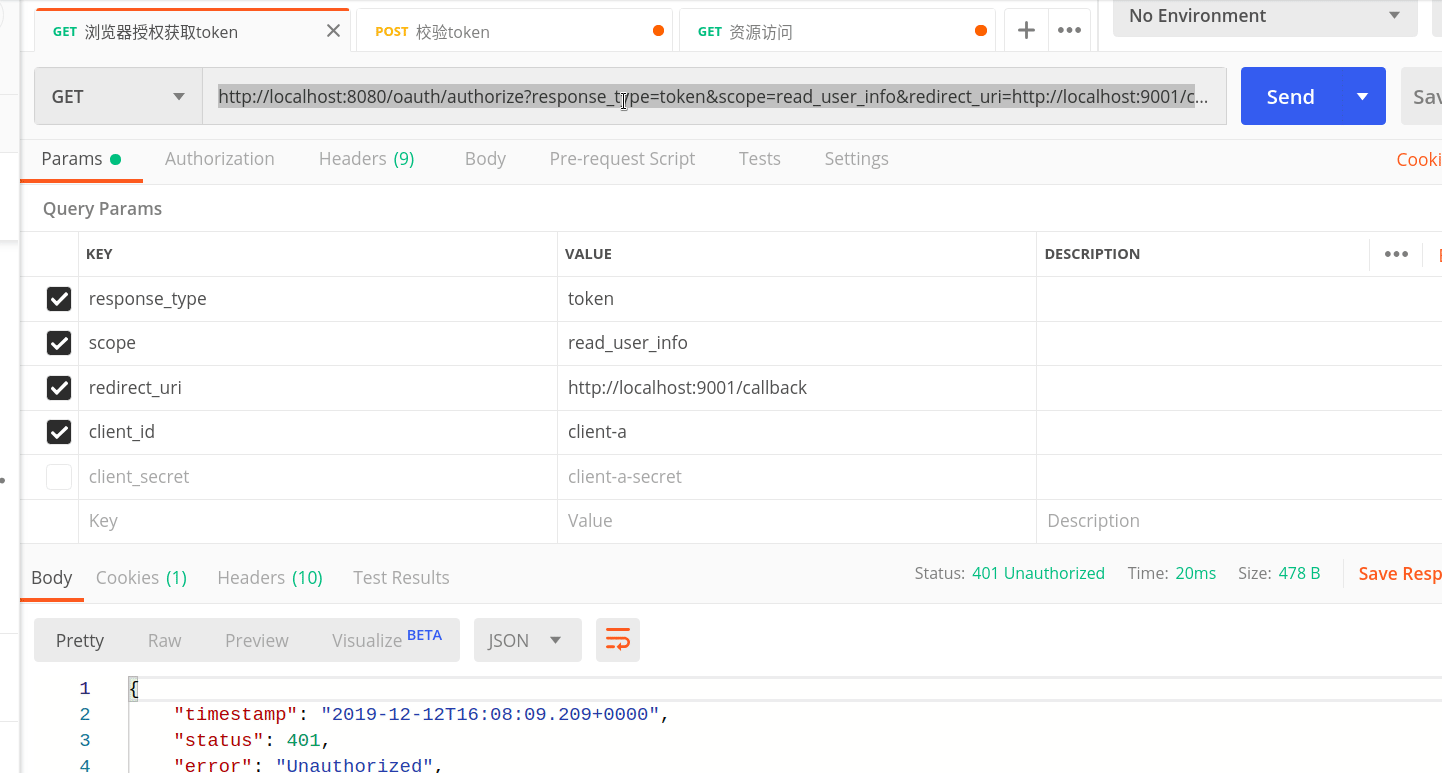
- 获取token
浏览器访问地址:http://localhost:8080/oauth/authorize?client_id=client-a&redirect_uri=http://localhost:9001/callback&response_type=token&scope=read_user_info
请求参数列表:
- client_id=客户端id
- redirect_uri=回调url 一定要与授权服务器配置保持一致,否则得不到授权码
- response_type=token 简化模式必须是token
- scope=作用域 与授权服务器配置保持一致
- state=自定义串(可选)
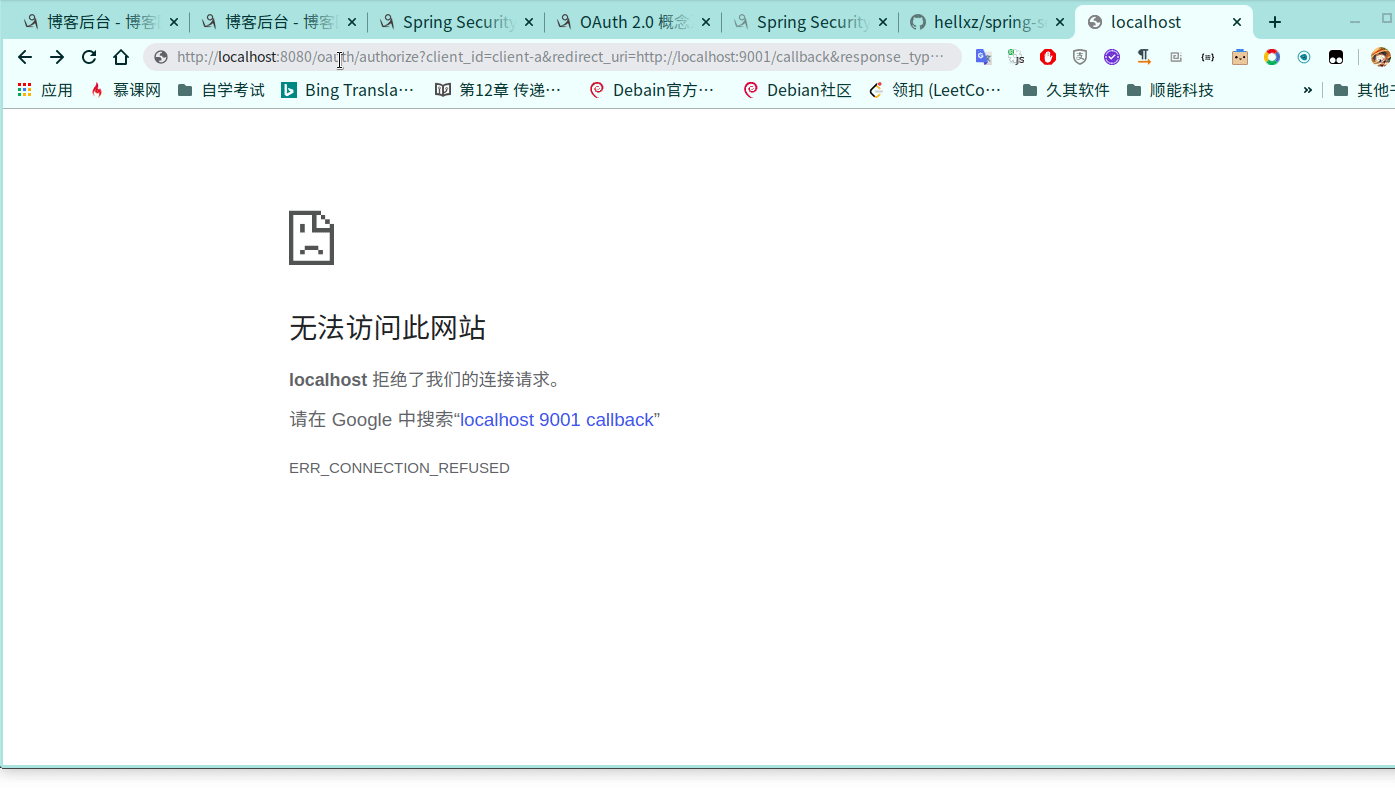
返回响应会回调我们之前输入的回调地址,包含access_token和token类型及过期时间
搭建资源服务器
资源服务器也不复杂,一个资源服务器配置类,一个controller、一个vo,还有启动类(这里就不贴了,详见源码)
ResourceController主要接收用户传来的用户名,返回一个json串,这里用标准错误输出高亮了下登录用户信息
package com.github.hellxz.oauth2.web.controller;

import com.github.hellxz.oauth2.web.vo.UserVO;
import org.springframework.security.core.context.SecurityContextHolder;
import org.springframework.web.bind.annotation.GetMapping;
import org.springframework.web.bind.annotation.PathVariable;
import org.springframework.web.bind.annotation.RestController;

@RestController
public class ResourceController {

    @GetMapping("/user/{username}")
    public UserVO user(@PathVariable String username){
        System.err.println(SecurityContextHolder.getContext().getAuthentication());
        return new UserVO(username, username + "@foxmail.com");
    }
}
UserVO
package com.github.hellxz.oauth2.web.vo;

public class UserVO {
    private String username;
    private String email;

    public UserVO(String username, String email) {
        this.username = username;
        this.email = email;
    }

    public String getUsername() {
        return username;
    }

    public void setUsername(String username) {
        this.username = username;
    }

    public String getEmail() {
        return email;
    }

    public void setEmail(String email) {
        this.email = email;
    }
}
资源服务器配置类ResourceConfig
package com.github.hellxz.oauth2.config;

import org.springframework.context.annotation.Bean;
import org.springframework.context.annotation.Configuration;
import org.springframework.context.annotation.Primary;
import org.springframework.security.config.annotation.web.builders.HttpSecurity;
import org.springframework.security.config.http.SessionCreationPolicy;
import org.springframework.security.crypto.bcrypt.BCryptPasswordEncoder;
import org.springframework.security.crypto.password.PasswordEncoder;
import org.springframework.security.oauth2.config.annotation.web.configuration.EnableResourceServer;
import org.springframework.security.oauth2.config.annotation.web.configuration.ResourceServerConfigurerAdapter;
import org.springframework.security.oauth2.config.annotation.web.configurers.ResourceServerSecurityConfigurer;
import org.springframework.security.oauth2.provider.token.RemoteTokenServices;

@Configuration
@EnableResourceServer
public class ResourceConfig extends ResourceServerConfigurerAdapter {

    @Bean
    public PasswordEncoder passwordEncoder() {
        return new BCryptPasswordEncoder();
    }

    @Primary
    @Bean
    public RemoteTokenServices remoteTokenServices() {
        final RemoteTokenServices tokenServices = new RemoteTokenServices();
        tokenServices.setCheckTokenEndpointUrl("http://localhost:8080/oauth/check_token");
        //这里的clientId和secret对应资源服务器信息,授权服务器处需要配置
        tokenServices.setClientId("resource-server");
        tokenServices.setClientSecret("test");
        return tokenServices;
    }

    @Override
    public void configure(HttpSecurity http) throws Exception {
        //设置创建session策略
        http.sessionManagement().sessionCreationPolicy(SessionCreationPolicy.IF_REQUIRED);
        //@formatter:off
        //所有请求必须授权
        http.authorizeRequests()
                .anyRequest().authenticated();
        //@formatter:on
    }

    @Override
    public void configure(ResourceServerSecurityConfigurer resources) {
        resources.resourceId("resource1").stateless(true);
    }
}
资源服务器相对授权服务器更简单,仅需要开启EnableResourceServer,实现HttpSecurity配置、ResourceServerSecurityConfigurer配置 和 校验token的配置,这里使用远程调用授权服务器的做法;
需要注意的是区分资源服务器client信息和第三方应用客户端信息,之前这里有些模糊,直到著此文时方才发现这两者应区分(隐式授权可以不用密码啊,如果第三方应用等于资源服务器client,在不设置client_secret情况下,会校验失败,无法访问资源)
一般而言,校验token的配置如果是资源服务器自己校验,则需要在
configure(ResourceServerSecurityConfigurer resources)这个方法中添加token存储(tokenStore)的位置等信息
使用token访问资源
结束
最近比较忙,抽时间整理代码时发现:我对OAuth2的资源服务器与授权服务器的client配置有些模糊,现在已经清晰多了,并且及时修改了demo。如果本文对你有帮助,欢迎点推荐,Github点Star :happy:
OAuth2系列demo仓库地址:https://github.com/hellxz/spring-security-oauth2-learn
纸上得来终觉浅,觉知此事要躬行。愿大家共勉
本文可以转载,但请注明出处https://www.cnblogs.com/hellxz/p/oauth2_impilit_pattern.html

