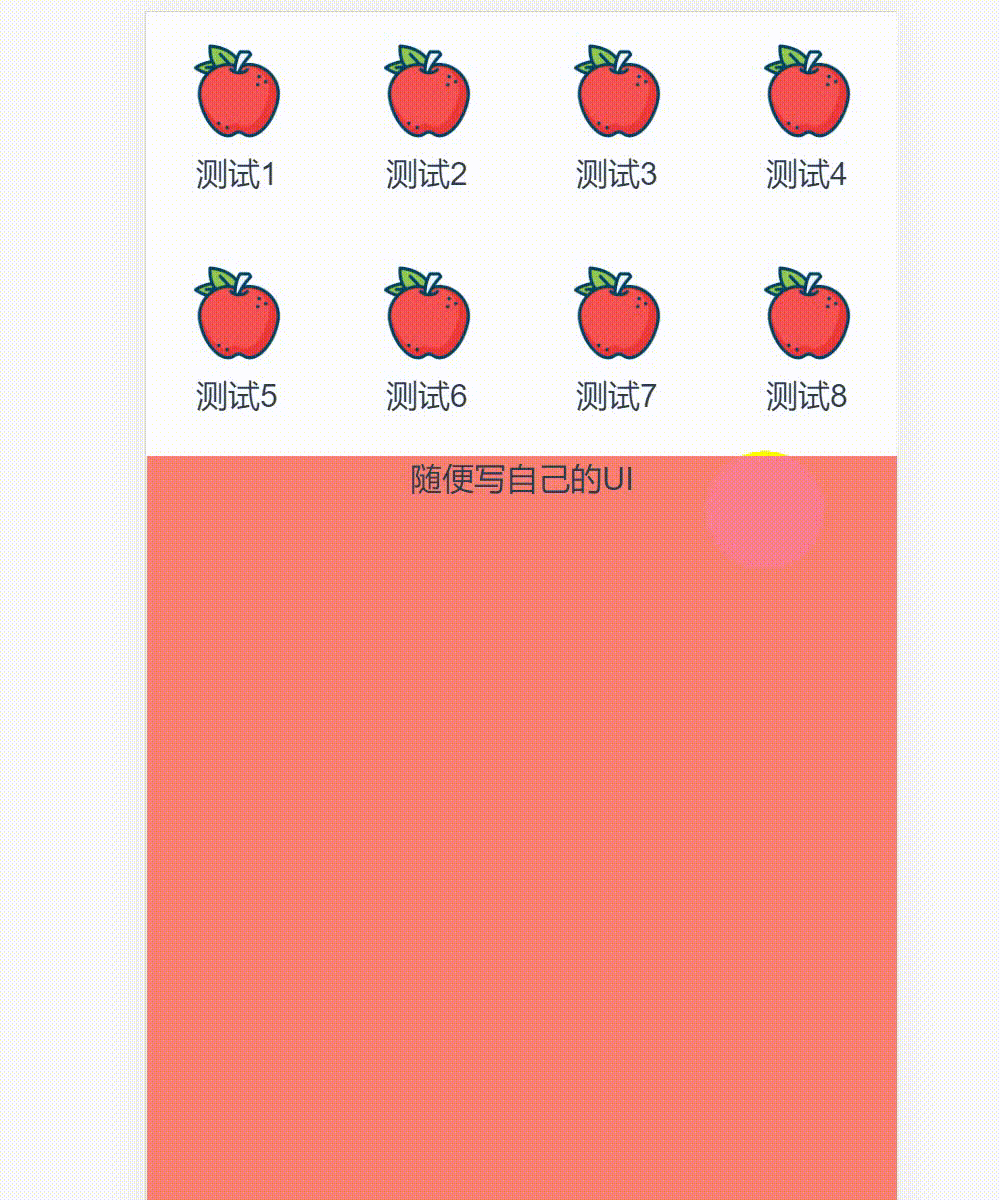
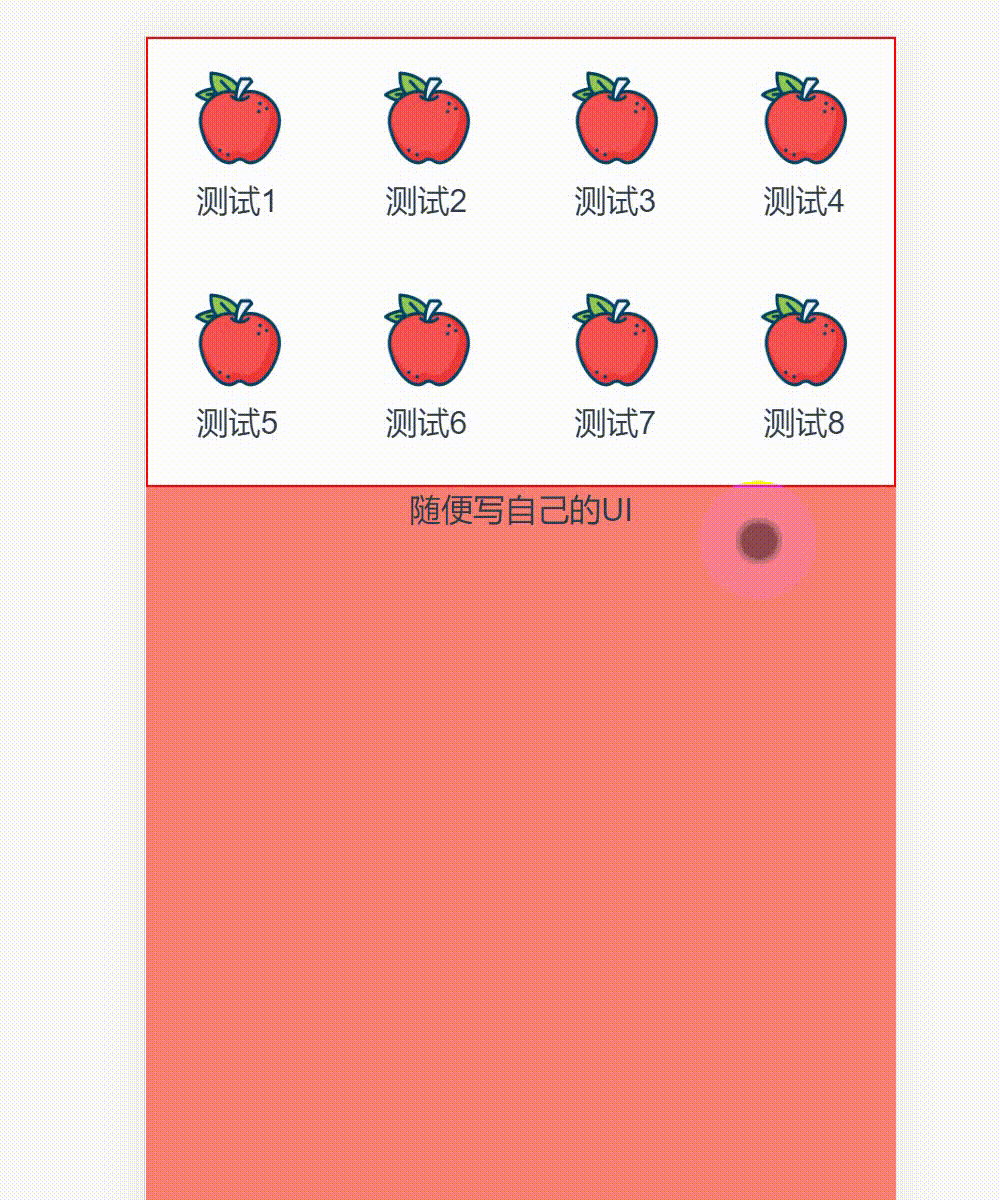
先看案例,使用vue+swiper实现,slide不同高度时,动态计算盒子高度,让其下方高度自适应的效果
首先搭建vue项目,这里不做过多说明,然后安装swiper
npm install swiper --save-dev
1. js部分:初始化swiper组件,vue要在mounted生命周期中进行初始化,代码如下:
import Swiper from 'swiper'
import { TweenMax, Power2 } from 'gsap'
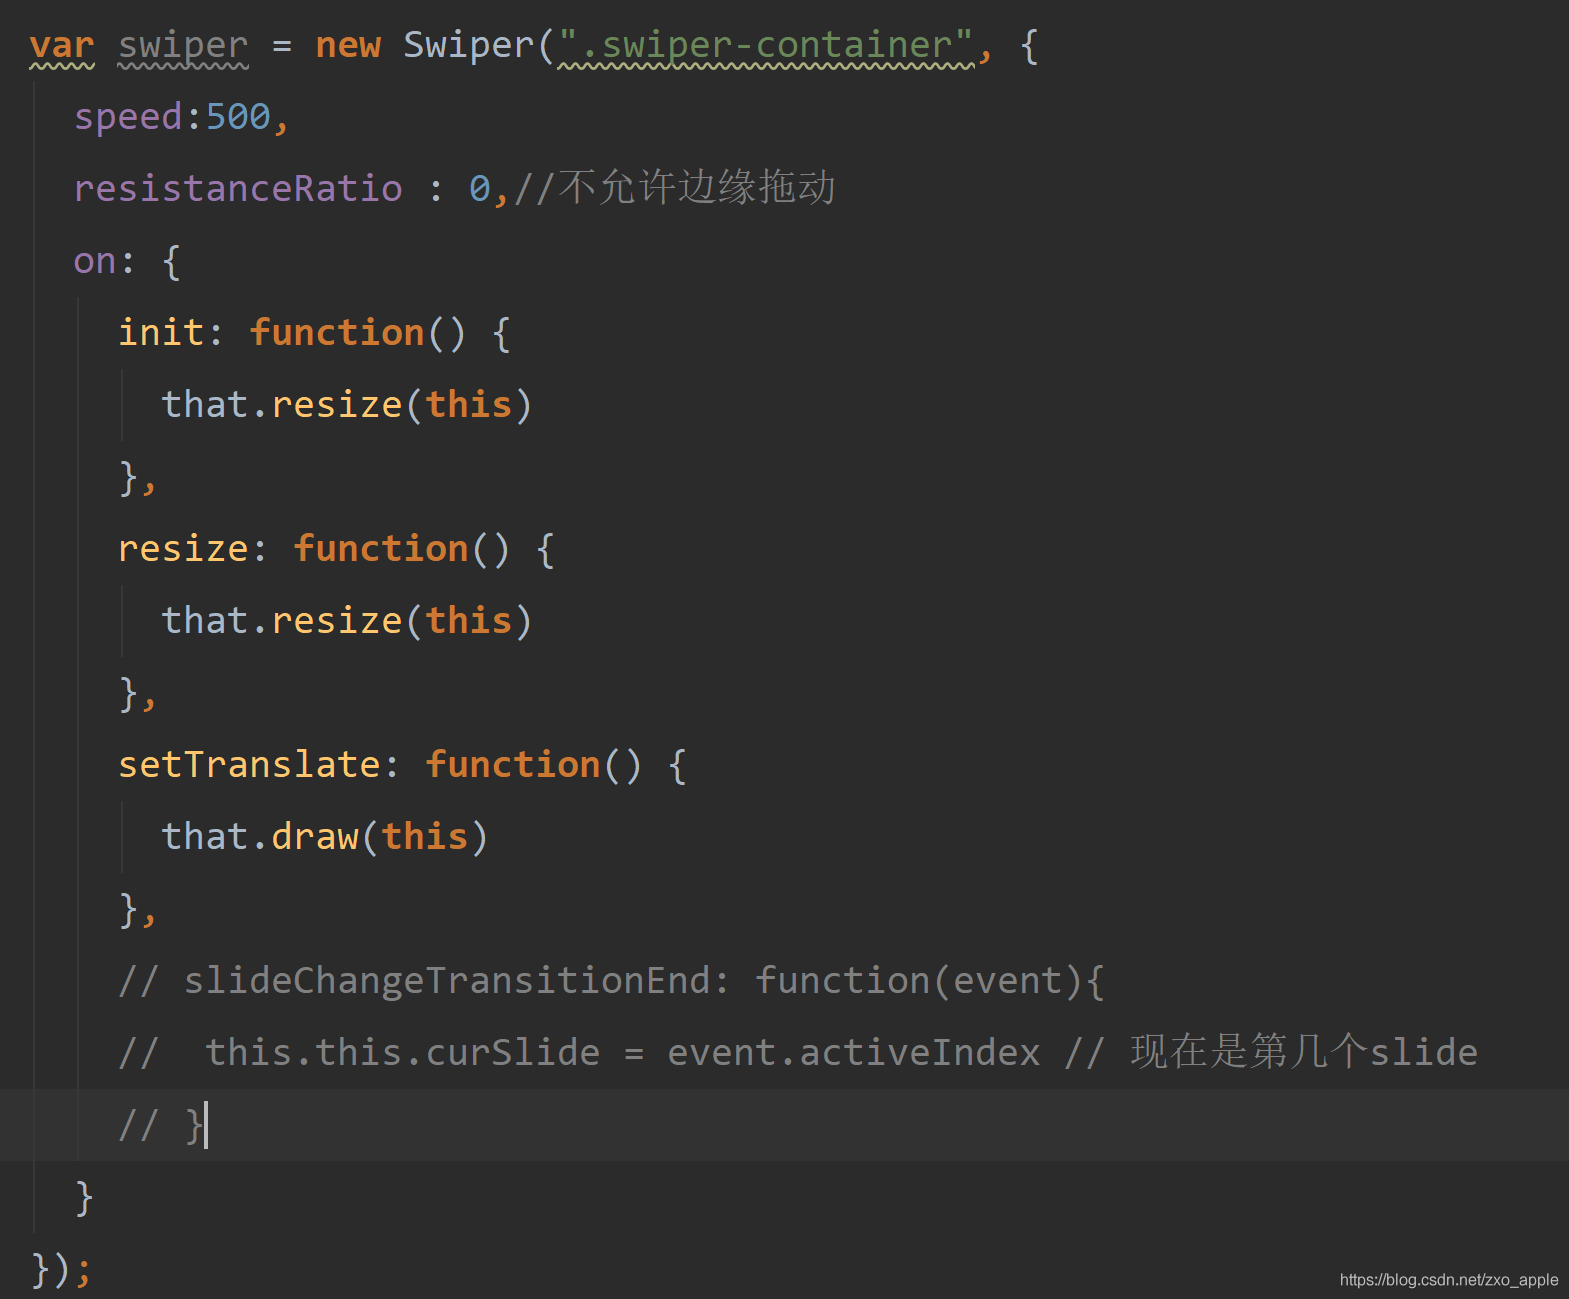
初始化时调用resize函数,计算屏幕容器的宽高,代码如下
// 重新计算屏幕宽高
resize(swiper) {
	this.clientWidth = document.documentElement.clientWidth||document.body.clientWidth;
	this.clientHeight = document.documentElement.clientHeight||document.body.clientHeight;
	this.draw(swiper)
},
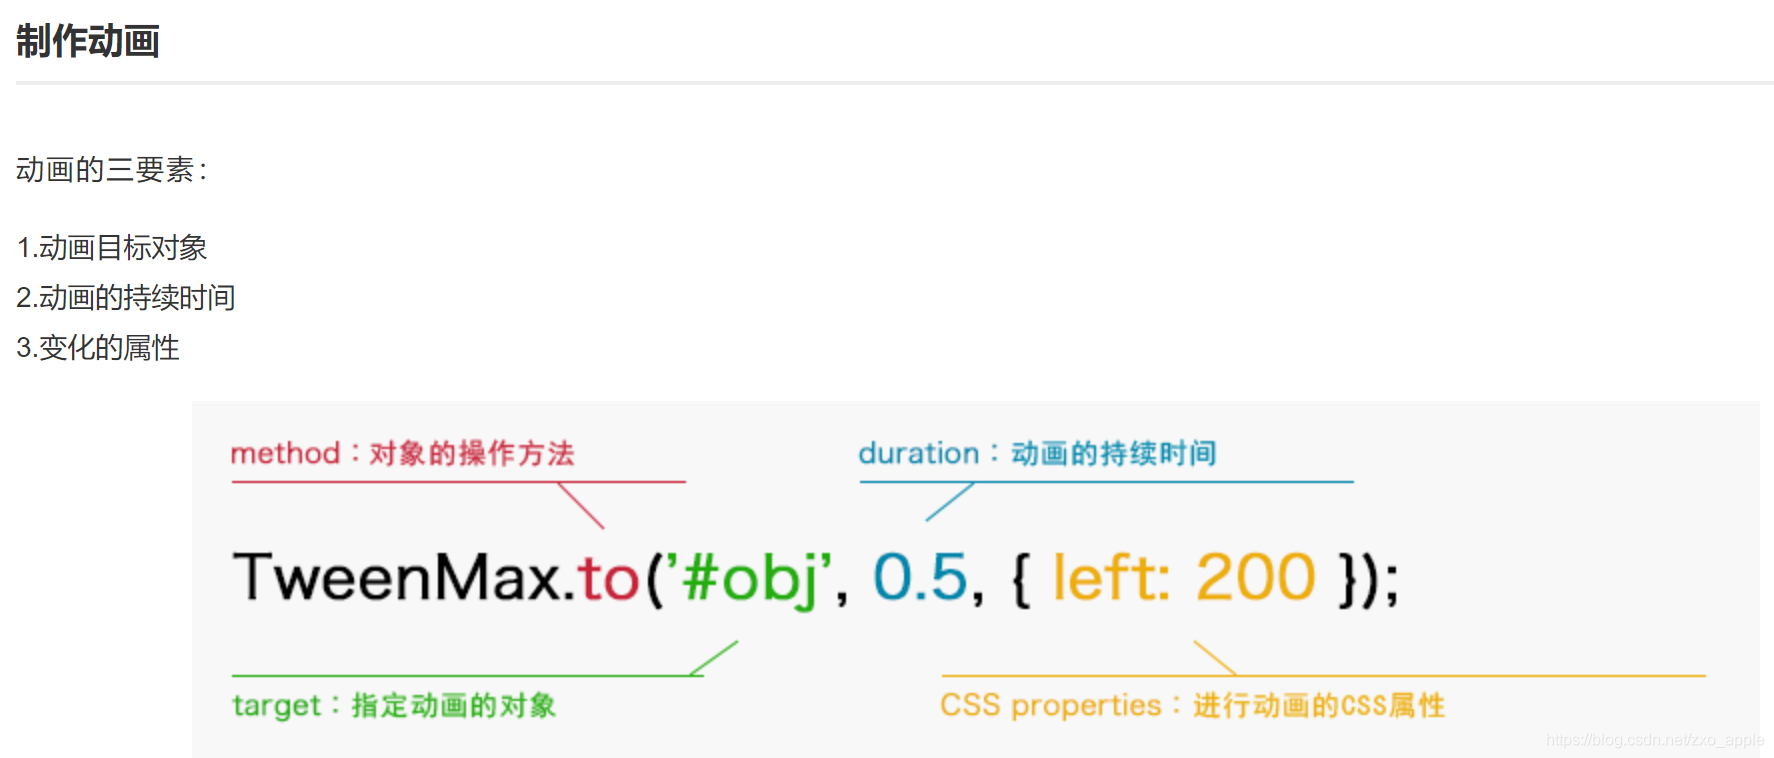
计算完后调用draw函数,根据滑动slide,动态计算轮播容器的高度;注意这里引用了TweenMax框架,使用前需要安装,详细使用方法可参考官网TweenMax
npm install gsap -D
先大概看下TweenMax使用方法
// 动态计算swiper-container高度
			draw(swiper) {
				TweenMax.to(this.tweenObj, 0.5, {translate: swiper.translate, ease: Power2.easeOut,
					onUpdate: () => {
						let translate = this.tweenObj.translate
						// 左边slide索引
						let iLeft = Math.floor(-translate / this.clientWidth)
						if (iLeft > this.slidesLength) {
							iLeft = this.slidesLength
						}
						// 右边slide索引
						let iRight = iLeft + 1
						if (iRight > this.slidesLength) {
							iRight = this.slidesLength
						}
						for(let i=0; i< this.swiperSlide.length; i++){
							//图片宽度满屏时,每个图片的高度
							this.swiperSlide[i].fullHeight = this.clientWidth/this.swiperSlide[i].getBoundingClientRect().width * this.swiperSlide[i].getBoundingClientRect().height;
						}
						//移动比例 移动过程中高度变化 0~1~0的变化规律
						let percent = Number((-translate / this.clientWidth).toFixed(5)) - iLeft
						//根据左右图片和移动比例得出相应高度
						let currentHeight = (this.swiperSlide[iRight].fullHeight - this.swiperSlide[iLeft].fullHeight )*percent + this.swiperSlide[iLeft].fullHeight
						// 轮播容器高度
						swiper.el.style.height = currentHeight +'px'
					}
				})
			}
2.html部分
<!--仿携程轮播效果-->
	<div class="swiper-demo">
		<div class="swiper-container">
			<div class="swiper-wrapper">
			<!--这里一定要加高度,不然会出问题!!!-->
				<div class="swiper-slide" style="height: 222px;">
					<div class="wrap" v-for="(item, index) in category1" :key="index">
						<img src="../assets/wish.png" alt="">
						<span>{{item.name}}</span>
					</div>
				</div>
					<!--这里一定要加高度,不然会出问题!!!-->
				<div class="swiper-slide" style="height: 400px;">
					<div class="wrap" v-for="(item, index) in category2" :key="index">
						<img src="../assets/wish.png" alt="">
						<span>{{item.name}}</span>
					</div>
				</div>
			</div>
		</div>

		<div style="background: salmon; height: 80vh">随便写自己的UI</div>
	</div>
注意:swiper-slide一定要加高度,不然会出问题
3.css部分
.swiper-slide {
		width: auto;
		height: 100%;
		display: flex;
		flex-wrap: wrap;
		justify-content: space-between;
	}
	.wrap {
		width: 24%;
		height: 100px;
		display: flex;
		flex-direction: column;
		align-items: center;
		justify-content: center;
	}
	img {
		width: 60px;
	}
这样就实现了一个高度自适应的轮播效果了,三个及以上也没问题啦,喜欢点个关注吧,嘻嘻~