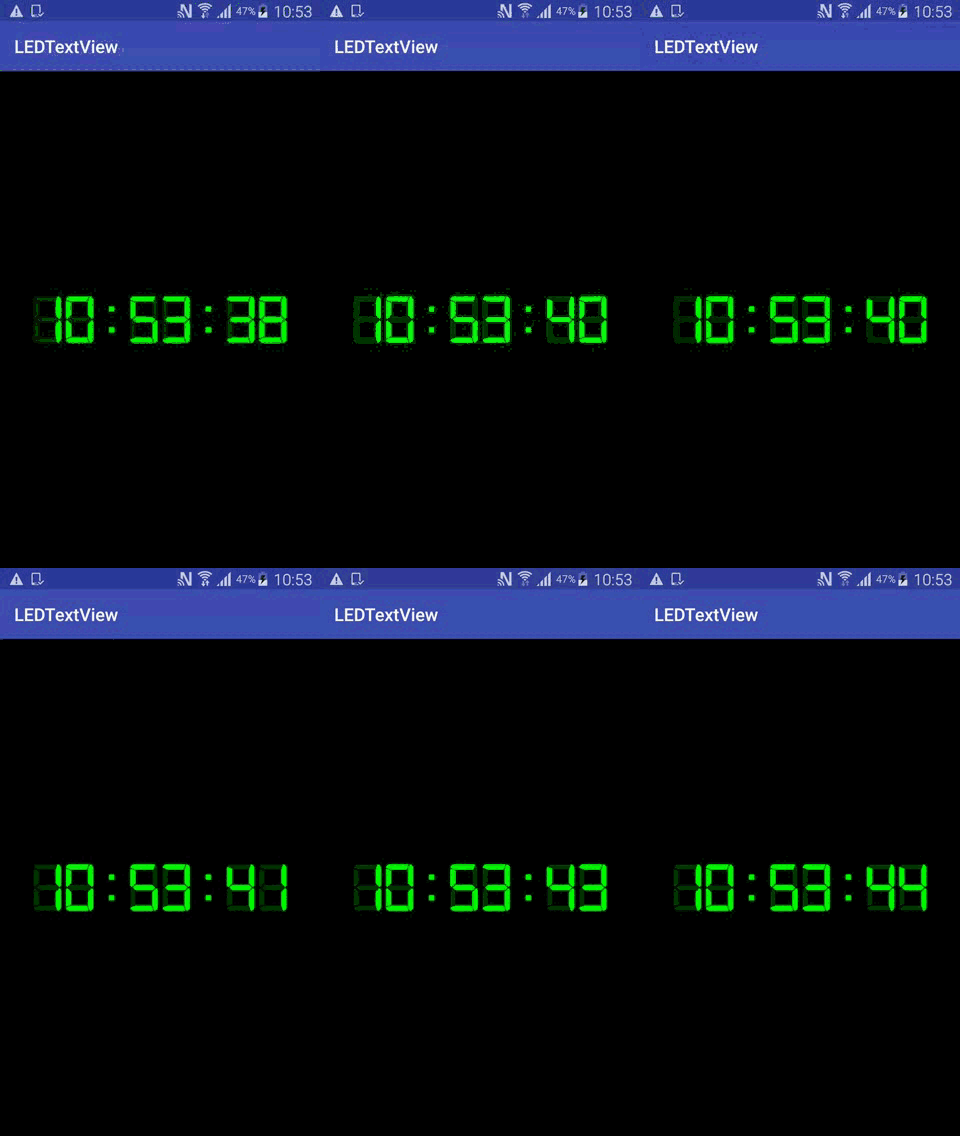
大家好,这一篇博客来教大家一个类似于LED闹钟显示屏样式的小案例,UI比较美观,文末会提供下载相关资源地址供大家下载,首先我们来看一看这个案例的运行效果。

正常运行在手机中时,效果很流畅,gif上可能是由于录制完转码的时候,速度调快了,所以看上去速度比较快,这都是小事情,接下来我们来看看源码是如何实现的。
1.代码很简单,主要是利用xml布局文件的几个属性,并且通过设置我们特定的字体就能很容易的实现我们看到的效果啦,首先我们创建一个类LedTextView继承自TextView。
public class LedTextView extends TextView {

 private static final String FONTS_FOLDER = "fonts";
 private static final String FONT_DIGITAL_7 = FONTS_FOLDER
  + File.separator + "digital-7.ttf";

 public LedTextView(Context context) {
 super(context);
 init(context);
 }

 public LedTextView(Context context, AttributeSet attrs) {
 super(context, attrs);
 init(context);
 }

 public LedTextView(Context context, AttributeSet attrs, int defStyle) {
 super(context, attrs, defStyle);
 init(context);
 }

 private void init(Context context) {
 AssetManager assets = context.getAssets();
 final Typeface font = Typeface.createFromAsset(assets,
  FONT_DIGITAL_7);
 setTypeface(font);
 }

}
这里我们设置了我们特定的字体样式digital-7.ttf。
2.下面我们看看布局文件是如何写的
<?xml version="1.0" encoding="utf-8"?>
<RelativeLayout xmlns:android="http://schemas.android.com/apk/res/android"
 android:layout_width="match_parent"
 android:background="#000000"
 android:layout_height="match_parent">

 <com.eloancn.ledtextview.LedTextView
  android:layout_centerInParent="true"
  android:layout_width="wrap_content"
  android:layout_height="wrap_content"
  android:layout_gravity="center"
  android:text="88:88:88"
  android:textColor="#3300ff00"
  android:textSize="80sp" />

 <com.eloancn.ledtextview.LedTextView
  android:layout_centerInParent="true"
  android:id="@+id/main_clock_time"
  android:layout_width="wrap_content"
  android:layout_height="wrap_content"
  android:layout_gravity="center"
  android:shadowColor="#00ff00"
  android:shadowDx="0"
  android:shadowDy="0"
  android:shadowRadius="10"
  android:textColor="#00ff00"
  android:textSize="80sp" />

</RelativeLayout>
可以看到,我们主要是在上面一层的TextView控件上设置了以下几个属性
android:shadowColor="#00ff00"
android:shadowDx="0"
android:shadowDy="0"
android:shadowRadius="10"
并且设置了指定的颜色,这样就能实现LED发光字的效果。
3.下面我们再来看看MainActivity是如何实现的,代码很简单,主要是获取当前时间,分别截取时分秒赋给我们的textView。
public class MainActivity extends AppCompatActivity {
 private static final String DATE_FORMAT = "%02d:%02d:%02d";
 private static final int REFRESH_DELAY = 500;

 private final Handler mHandler = new Handler();
 private final Runnable mTimeRefresher = new Runnable() {
  @Override
  public void run() {
   final Date d = new Date();
   mTextView.setText(String.format(DATE_FORMAT, d.getHours(),
     d.getMinutes(), d.getSeconds()));
   mHandler.postDelayed(this, REFRESH_DELAY);
  }
 };

 private TextView mTextView;

 @Override
 public void onCreate(Bundle savedInstanceState) {
  super.onCreate(savedInstanceState);
  setContentView(R.layout.activity_main);

  mTextView = (TextView) findViewById(R.id.main_clock_time);
 }

 @Override
 protected void onResume() {
  super.onResume();
  mHandler.post(mTimeRefresher);
 }

 @Override
 protected void onStop() {
  super.onStop();
  mHandler.removeCallbacks(mTimeRefresher);
 }
}
怎么样,代码是不是很简单就实现了呢,大家赶快试一试吧!
字体资源下载地址:Android实现LED发光字效果