前阵子发现了个有意思又好用的框架——okHttp。由于课程设计需要,无意间发现了这个框架,打算利用此框架与后端交互,可以参考前后端分离的项目,把android当做前端,springboot当做后端,以下是二者的简单交互。
(1)android网络框架之OKhttp
一个处理网络请求的开源项目,是安卓端最火热的轻量级框架,由移动支付Square公司贡献(该公司还贡献了Picasso)
用于替代HttpUrlConnection和Apache HttpClient
(2)okHttp优势
允许连接到同一个主机地址的所有请求,提高请求效率
共享Socket,减少对服务器的请求次数
通过连接池,减少了请求延迟
缓存响应数据来减少重复的网络请求
减少了对数据流量的消耗
自动处理GZip压缩
(3)OKhttp的功能
get,post请求
文件的上传下载
加载图片(内部会图片大小自动压缩)
支持请求回调,直接返回对象、对象集合
支持session的保持
逻辑控制:LoginActivity.java
import androidx.appcompat.app.AppCompatActivity;

import android.os.Bundle;
import android.util.Log;
import android.view.View;
import android.widget.Button;
import android.widget.EditText;
import android.widget.TextView;

import com.campus.book.R;
import com.campus.book.entity.User;
import com.campus.book.util.http.OKHttpUtil;
import com.google.gson.Gson;

public class LoginActivity extends AppCompatActivity {
//这个url可以通过cmd中输入    ipconfig   IPv4 地址即为本地电脑的地址   8081为后端的端口号
    private String baseUrl="http://192.168.xxx.1:8081";

    private TextView tv=null;
    EditText userId = null;
    EditText pwd = null ;
    Button login=null;
    private Button registry=null;
    @Override
    protected void onCreate(Bundle savedInstanceState) {
        super.onCreate(savedInstanceState);
        setContentView(R.layout.activity_login);

        setTitle("登录");
        tv=findViewById(R.id.tv);
        login = (Button)findViewById(R.id.login);
        registry = (Button)findViewById(R.id.registry);
        userId=(EditText) findViewById(R.id.userId);
        pwd=findViewById(R.id.pwd);
        login.setOnClickListener(new View.OnClickListener() {
            @Override
            public void onClick(View view) {

                String id = userId.getText().toString();
                String password=pwd.getText().toString();
                User user=new User(id,password);
                Gson gson=new Gson();
                String json=gson.toJson(user);
                String args[]=new String[]{"user","login"};
                String res= OKHttpUtil.postSyncRequest(baseUrl,json,args);
                Log.d("同步:",res);
                res= OKHttpUtil.postAsyncRequest(baseUrl,json,args);
                Log.d("异步:",res);
            }
        });

        registry.setOnClickListener(new View.OnClickListener() {
            @Override
            public void onClick(View view) {

                String args[]=new String[]{"user","getUser","123"};
                String res= OKHttpUtil.getSyncRequest(baseUrl,args);
                System.out.println("同步:"+res);

                String args1[]=new String[]{"user","getUser","123"};
                 res= OKHttpUtil.getAsyncRequest(baseUrl,args1);
                System.out.println("异步:"+res);

            }
        });
    }
}
布局方式:activity_login.xml
<?xml version="1.0" encoding="utf-8"?>
<LinearLayout xmlns:android="http://schemas.android.com/apk/res/android"
    xmlns:app="http://schemas.android.com/apk/res-auto"
    xmlns:tools="http://schemas.android.com/tools"
    android:orientation="vertical"
    android:layout_width="match_parent"
    android:layout_height="match_parent"
    tools:context=".activity.LoginActivity">
<TextView
    android:layout_width="match_parent"
    android:layout_height="wrap_content"
    android:id="@+id/tv"
    android:text="内容:"/>
    <FrameLayout
        android:layout_width="wrap_content"
        android:layout_height="wrap_content">

        <ImageView
            android:id="@+id/mainBg"
            android:layout_width="wrap_content"
            android:layout_height="wrap_content"
            android:background="@drawable/login" />
<!--@drawable/login改成相应的背景图-->
        <TableLayout
            android:layout_width="350dp"
            android:layout_height="match_parent"
            android:stretchColumns="*"
            android:layout_marginBottom="150sp"
            android:layout_gravity="center" >

            <TableRow android:layout_height="match_parent">
                <EditText
                    android:id="@+id/userId"
                    android:layout_column="0"
                    android:layout_span="2"
                    android:hint="请输入手机号"
                    android:textColorHint="#FFFFFF"
                    android:textColor="#FFFFFF"
                    android:textCursorDrawable="@drawable/cursor_color"
                    android:textSize="15sp" />
            </TableRow>

            <TableRow android:layout_height="match_parent" >
                <EditText
                    android:id="@+id/pwd"
                    android:inputType="textPassword"
                    android:layout_column="0"
                    android:layout_span="2"
                    android:hint="请输入密码"
                    android:textColorHint="#FFFFFF"
                    android:textColor="#FFFFFF"
                    android:textCursorDrawable="@drawable/cursor_color"
                    android:textSize="15sp" />
            </TableRow>

            <TableRow android:layout_height="match_parent">
                <Button
                    android:id="@+id/login"
                    android:layout_height="wrap_content"
                    android:textColor="#FFFFFF"
                    android:background="#000000"
                    android:layout_margin="8dp"
                    android:textSize="15sp"
                    android:text="登录" />
                <Button
                    android:id="@+id/registry"
                    android:layout_width="wrap_content"
                    android:layout_height="wrap_content"
                    android:textColor="#FFFFFF"
                    android:background="#000000"
                    android:layout_margin="8dp"
                    android:textSize="15sp"
                    android:text="注册" />
            </TableRow>

        </TableLayout>

    </FrameLayout>

</LinearLayout>
其中,cursor_color.xml在drawable中。
<?xml version="1.0" encoding="utf-8"?>
<shape
    xmlns:android="http://schemas.android.com/apk/res/android"
    android:shape="rectangle" >
    <size android:width="2dp" />
    <solid android:color="@android:color/black" />
</shape>
(1)数据库
表user

(2)springboot中的controller层
如何搭建springboot工程就不再赘述了(如有需要,可留言,后续可发搭建教程),可自行参考其他文章。
@RestController
@RequestMapping("//user")
public class UserController {
	@Autowired
	private UserService userService;

	//Gson gson= JsonBean.getGson();
    static Gson gson=new GsonBuilder().serializeNulls().create();
	@GetMapping("/list")
	public List<User> list() {
		return this.userService.list();
	}

	@PostMapping("/login")
	public User login(String json){
		User result=null;
		User user=null;
		User user1=null;
		try{
			user=gson.fromJson(json,User.class);
		}catch (Exception e){
			e.printStackTrace();
		}
		user1=userService.getById(user.getUserId());
		if(user1!=null){//存在该账户
			if(user1.getPassword().equals(user.getPassword())){//密码正确
				result=user1;
			}else{//密码错误

			}
		}else{//不存在该账户

		}
		return result;
	}

	@GetMapping("/getUser/{id}")
	public User getUser(@PathVariable("id") Serializable id){
		User user=userService.getById(id);
		if(user!=null){//存在

		}else{//不存在

		}
		return user;
	}
}
运行(交互)效果
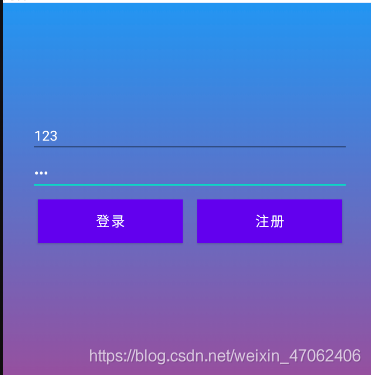
(1)点击“登录”按钮,发起post请求
android端

后端
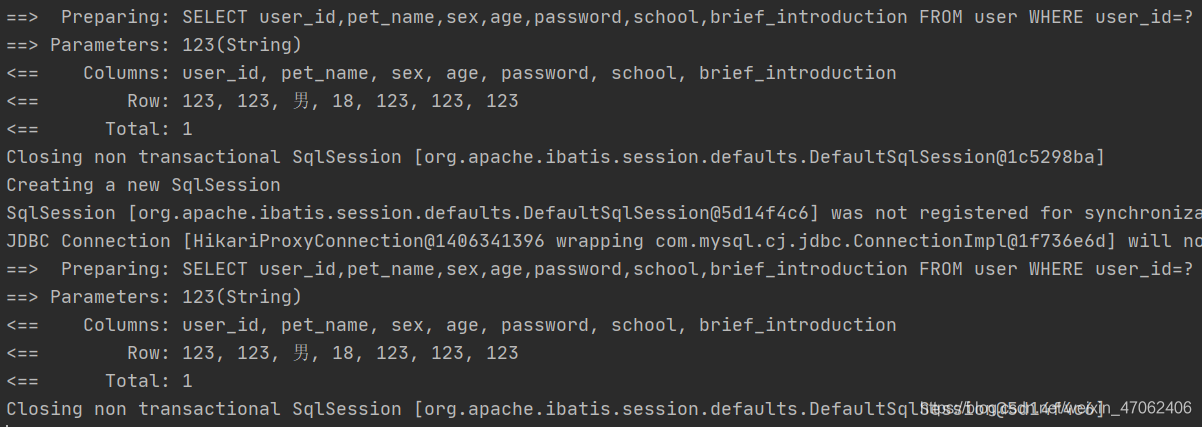
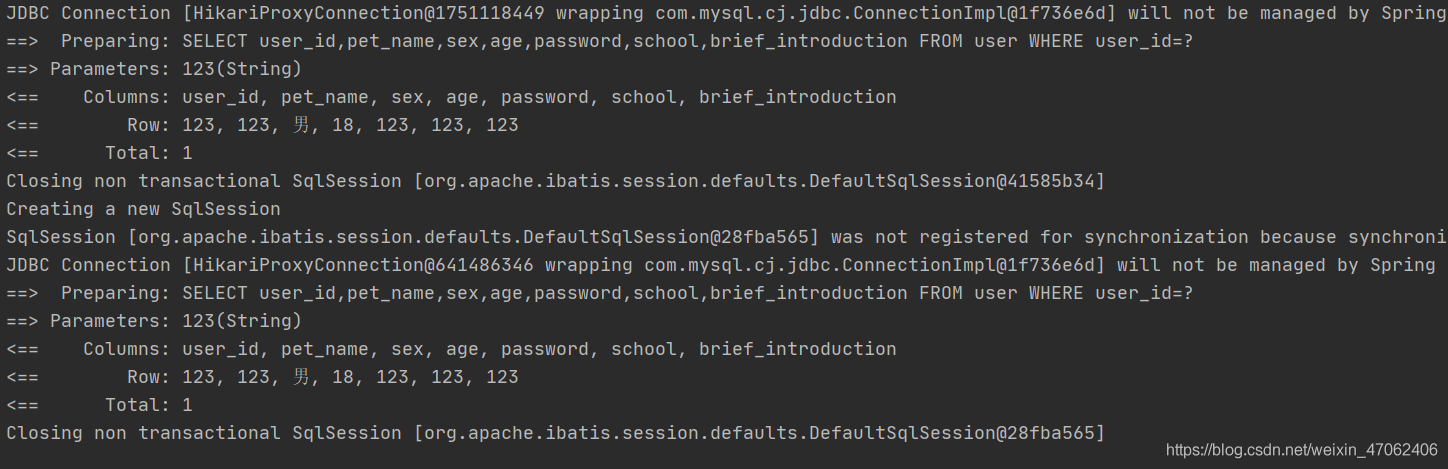
(2)点击“注册”按钮发起get请求
android端

后端
这样就达到了前后端分离的效果,是不是很神奇!可以愉快的和小组成员分开进行开发啦!
在Android端中用到了个人结合需要编写的okHttp的工具类,可参考上篇文章:okHttp的get和post请求的简单封装与使用

