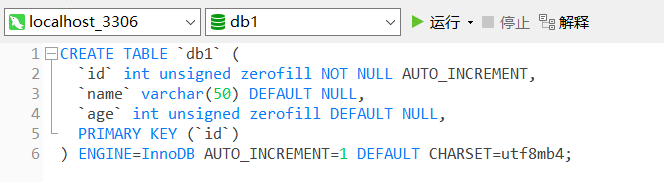
CREATE TABLE `db1` (
  `id` int unsigned zerofill NOT NULL AUTO_INCREMENT,
  `name` varchar(50) DEFAULT NULL,
  `age` int unsigned zerofill DEFAULT NULL,
  PRIMARY KEY (`id`)
) ENGINE=InnoDB AUTO_INCREMENT=1 DEFAULT CHARSET=utf8mb4;
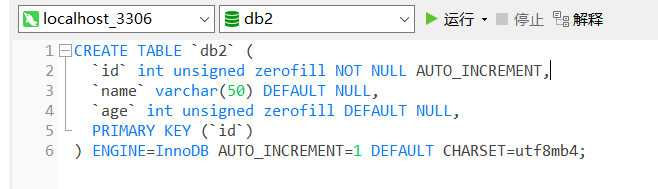
CREATE TABLE `db2` (
  `id` int unsigned zerofill NOT NULL AUTO_INCREMENT,
  `name` varchar(50) DEFAULT NULL,
  `age` int unsigned zerofill DEFAULT NULL,
  PRIMARY KEY (`id`)
) ENGINE=InnoDB AUTO_INCREMENT=1 DEFAULT CHARSET=utf8mb4;
<dependency>
            <groupId>org.springframework.boot</groupId>
            <artifactId>spring-boot-starter-web</artifactId>
        </dependency>
        <dependency>
            <groupId>org.mybatis.spring.boot</groupId>
            <artifactId>mybatis-spring-boot-starter</artifactId>
            <version>2.1.4</version>
        </dependency>

        <dependency>
            <groupId>mysql</groupId>
            <artifactId>mysql-connector-java</artifactId>
            <scope>runtime</scope>
        </dependency>
        <dependency>
            <groupId>org.springframework.boot</groupId>
            <artifactId>spring-boot-starter-test</artifactId>
            <scope>test</scope>
            <exclusions>
                <exclusion>
                    <groupId>org.junit.vintage</groupId>
                    <artifactId>junit-vintage-engine</artifactId>
                </exclusion>
            </exclusions>
        </dependency>
        <dependency>
            <groupId>junit</groupId>
            <artifactId>junit</artifactId>
            <scope>test</scope>
        </dependency>
server:
  port: 8080 # 启动端口
spring:
  datasource:
    db1: # 数据源1
      jdbc-url: jdbc:mysql://localhost:3306/db1?serverTimezone=Asia/Shanghai&useUnicode=true&characterEncoding=utf8
      username: root
      password: root
      driver-class-name: com.mysql.cj.jdbc.Driver
    db2: # 数据源2
      jdbc-url: jdbc:mysql://localhost:3306/db2?serverTimezone=Asia/Shanghai&useUnicode=true&characterEncoding=utf8
      username: root
      password: root
      driver-class-name: com.mysql.cj.jdbc.Driver
server.port=8080

      spring.datasource.db1.url=jdbc:mysql://localhost:3306/db1?serverTimezone=Asia/Shanghai&useUnicode=true&characterEncoding=utf8
      spring.datasource.db1.username=root
      spring.datasource.db1.password=root
      spring.datasource.db1.driver-class-name=com.mysql.jdbc.Driver

      spring.datasource.db2.url=jdbc:mysql://localhost:3306/db2?serverTimezone=Asia/Shanghai&useUnicode=true&characterEncoding=utf8
      spring.datasource.db2.username=root
      spring.datasource.db2.password=root
      spring.datasource.db2.driver-class-name=com.mysql.jdbc.Driver
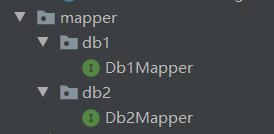
我个人是放在mapper包下,文件随便命名的
代码随便写的,测试而已
import org.apache.ibatis.annotations.Insert;
import org.apache.ibatis.annotations.Mapper;
/**
* @Author if
* @Description: What is it
* @Date 2021-05-20 下午 09:52
*/
@Mapper
public interface Db1Mapper {
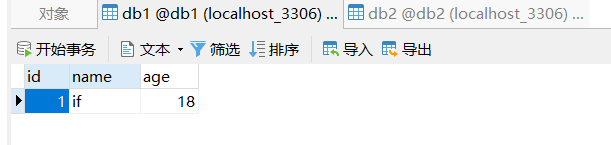
@Insert("insert into db1(name,age) values('if',18)")
int add();
}
import org.apache.ibatis.annotations.Insert;
import org.apache.ibatis.annotations.Mapper;
/**
* @Author if
* @Description: What is it
* @Date 2021-05-20 下午 09:52
*/
@Mapper
public interface Db2Mapper {
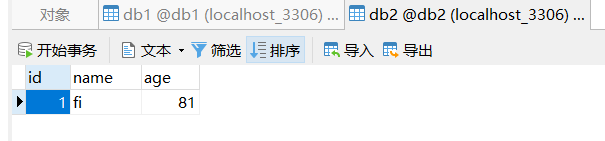
@Insert("insert into db2(name,age) values('fi',81)")
int add();
}
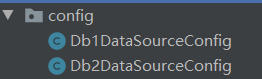
我个人是放在config包下,文件随便命名的
import org.apache.ibatis.session.SqlSessionFactory;
import org.mybatis.spring.SqlSessionFactoryBean;
import org.mybatis.spring.SqlSessionTemplate;
import org.mybatis.spring.annotation.MapperScan;
import org.springframework.beans.factory.annotation.Qualifier;
import org.springframework.boot.context.properties.ConfigurationProperties;
import org.springframework.boot.jdbc.DataSourceBuilder;
import org.springframework.context.annotation.Bean;
import org.springframework.context.annotation.Configuration;
import org.springframework.core.io.support.PathMatchingResourcePatternResolver;
import javax.sql.DataSource;

/**
 * @Author if
 * @Description: 注意以下有些文件路径需要更改
 * @Date 2021-05-20 下午 09:56
 */
@Configuration
@MapperScan(basePackages = "com.ifyyf.study.mapper.db1", sqlSessionFactoryRef = "db1SqlSessionFactory")
public class Db1DataSourceConfig {
    @Bean("db1DataSource")
    @ConfigurationProperties(prefix = "spring.datasource.db1") //读取application.yml中的配置参数映射成为一个对象
    public DataSource getDb1DataSource(){
        return DataSourceBuilder.create().build();
    }

    @Bean("db1SqlSessionFactory")
    public SqlSessionFactory db1SqlSessionFactory(@Qualifier("db1DataSource") DataSource dataSource) throws Exception {
        SqlSessionFactoryBean bean = new SqlSessionFactoryBean();
        bean.setDataSource(dataSource);
        // mapper的xml形式文件位置必须要配置,不然将报错:no statement (这种错误也可能是mapper的xml中,namespace与项目的路径不一致导致)
        bean.setMapperLocations(new PathMatchingResourcePatternResolver().getResources("classpath*:mapping/db1/*.xml"));
        return bean.getObject();
    }

    @Bean("db1SqlSessionTemplate")
    public SqlSessionTemplate db1SqlSessionTemplate(@Qualifier("db1SqlSessionFactory") SqlSessionFactory sqlSessionFactory){
        return new SqlSessionTemplate(sqlSessionFactory);
    }
}
import org.apache.ibatis.session.SqlSessionFactory;
import org.mybatis.spring.SqlSessionFactoryBean;
import org.mybatis.spring.SqlSessionTemplate;
import org.mybatis.spring.annotation.MapperScan;
import org.springframework.beans.factory.annotation.Qualifier;
import org.springframework.boot.context.properties.ConfigurationProperties;
import org.springframework.boot.jdbc.DataSourceBuilder;
import org.springframework.context.annotation.Bean;
import org.springframework.context.annotation.Configuration;
import org.springframework.core.io.support.PathMatchingResourcePatternResolver;
import javax.sql.DataSource;

/**
 * @Author if
 * @Description: 注意以下有些文件路径需要更改
 * @Date 2021-05-20 下午 09:56
 */
@Configuration
@MapperScan(basePackages = "com.ifyyf.study.mapper.db2", sqlSessionFactoryRef = "db2SqlSessionFactory")
public class Db2DataSourceConfig {
    @Bean("db2DataSource")
    @ConfigurationProperties(prefix = "spring.datasource.db2") //读取application.yml中的配置参数映射成为一个对象
    public DataSource getDb2DataSource(){
        return DataSourceBuilder.create().build();
    }

    @Bean("db2SqlSessionFactory")
    public SqlSessionFactory db2SqlSessionFactory(@Qualifier("db2DataSource") DataSource dataSource) throws Exception {
        SqlSessionFactoryBean bean = new SqlSessionFactoryBean();
        bean.setDataSource(dataSource);
        // mapper的xml形式文件位置必须要配置,不然将报错:no statement (这种错误也可能是mapper的xml中,namespace与项目的路径不一致导致)
        bean.setMapperLocations(new PathMatchingResourcePatternResolver().getResources("classpath*:mapping/db2/*.xml"));
        return bean.getObject();
    }

    @Bean("db2SqlSessionTemplate")
    public SqlSessionTemplate db2SqlSessionTemplate(@Qualifier("db2SqlSessionFactory") SqlSessionFactory sqlSessionFactory){
        return new SqlSessionTemplate(sqlSessionFactory);
    }
}
springboot项目中测试类进行测试
import com.ifyyf.study.mapper.db1.Db1Mapper;
import com.ifyyf.study.mapper.db2.Db2Mapper;
import org.junit.jupiter.api.Test;
import org.springframework.boot.test.context.SpringBootTest;
import javax.annotation.Resource;

@SpringBootTest
class StudyApplicationTests {
    @Resource
    private Db1Mapper db1Mapper;
    @Resource
    private Db2Mapper db2Mapper;
    @Test
    void contextLoads() {
        System.out.println(db1Mapper.add());
        System.out.println(db2Mapper.add());
    }
}