注意这个不是vue-cli创建的项目 是一个引用vue.js写的html文件 ,直接粘到一个html文件就能用了,我的音乐链接隔一段时间会失效,需要自己准备音乐
有拖动和点击切换播放进度的功能
demo图片

代码
<!DOCTYPE html>
<html lang="en">
<head>
<meta charset="UTF-8">
<meta http-equiv="X-UA-Compatible" content="IE=edge">
<meta name="viewport" content="width=device-width, initial-scale=1.0">
<title>Document</title>
</head>
<body>
<div id="app">
<audio ref="audioRef" autoplay @canplay='canplay' @timeupdate='update'></audio>
<button @click="play">播放</button>
<button @click="pause">暂停</button>
<div class="progress-wrapper">
<span class="time time-l">{{formatTime(currentTime)}}</span>
<div class="progress-bar-wrapper">
<cpn :progress=progress
@progress-changing="onProgressChanging"
@progress-changed='progressChanged'>
</cpn>
</div>
<span class="time time-l">{{formatTime(duration)}}</span>
</div>
</div>
<!-- 子组件 -->
<template id="myCpn">
<div class="progress-bar">
<!-- 后面黑色的一条 -->
<div class="bar-inner" @click="clickProgress">
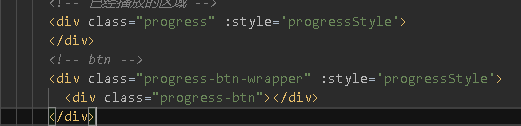
<!-- 已经播放的区域 -->
<div class="progress" :style='progressStyle' ref="progress">
</div>
<!-- btn -->
<div class="progress-btn-wrapper" :style='btnStyle' @touchstart.preventDefault='onTouchStart'
@touchmove.preventDefault='onTouchMove' @touchend.preventDefault='onTouchEnd' >
<div class="progress-btn"></div>
</div>
</div>
</div>
</template>
<script src="../../js/vue.js"></script>
<script>
audioEl = null
const progressBtnWidth = 16
// 子组件
const cpn = {
template: "#myCpn",
props: {
progress: {
type: Number,
default: 0
}
},
data() {
return {
offset: 0
}
},
mounted() {
},
created() {
this.touch = {}
},
computed: {
progressStyle() {
return `width: ${this.offset}px`
},
btnStyle() {
// console.log('fds');
return `transform: translate3d(${this.offset}px,0,0)`
},
},
watch: {
progress(newProgress) {
// 进度条宽度
const barWidth = this.$el.clientWidth - progressBtnWidth
this.offset = barWidth * newProgress
}
},
methods: {
onTouchStart(e) {
// console.log(e);
this.touch.x1 = e.changedTouches[0].clientX
// 黄色进度条初始宽度
this.touch.beginWidth = this.$refs.progress.clientWidth
console.log(this.touch);
},
onTouchMove(e) {
// console.log(e);
// x偏移量
const delta = e.changedTouches[0].clientX - this.touch.x1
// 之前的width+这次拖动增加的偏移量=应有的黄条长度
const tempWidth = this.touch.beginWidth + delta
// 再拿到barWidth
const barWidth = this.$el.clientWidth - progressBtnWidth
// 黄条长度/barwidth = progress 现在应该有的进度
const progress = tempWidth / barWidth
this.offset = barWidth * progress
this.$emit('progress-changing', progress)
// console.log("tempWidth", tempWidth);
// console.log("barWidth", barWidth);
// console.log("progress", progress);
},
onTouchEnd(e) {
// console.log(e);
const barWidth = this.$el.clientWidth - progressBtnWidth
const progress = this.$refs.progress.clientWidth / barWidth
this.$emit('progress-changed', progress)
},
// 点击进度条
clickProgress(e){
// console.log("fds");
console.log('getBoundingClientRect', this.$el.getBoundingClientRect());
const rect = this.$el.getBoundingClientRect()
// 黄条应有的宽度
const offsetWidth = e.pageX - rect.x
const barWidth = this.$el.clientWidth - progressBtnWidth
const progress = offsetWidth/barWidth
this.$emit('progress-changed', progress)
console.log(offsetWidth)
}
},
}
const app = new Vue({
el: "#app",
data: {
content: 'fdasdf',
src: 'https://music.163.com/song/media/outer/url?id=1463165983.mp3',
currentTime: 0,
duration: 0,
isplay: false,
progressChanging : false
},
components: {
cpn
},
mounted() {
this.$nextTick(() => {
audioEl = this.$refs.audioRef
audioEl.src = this.src
// 默认暂停
audioEl.pause()
})
},
computed: {
progress() {
return this.currentTime / this.duration
console.log("progress", this.currentTime / this.duration);
},
},
methods: {
play() {
audioEl.play()
this.isplay = true
},
pause() {
audioEl.pause()
this.isplay = false
// console.log();
},
canplay(e) {
// console.log(123456);
console.log(e);
this.duration = e.target.duration
},
update(e) {
if(!this.progressChanging){
this.currentTime = e.target.currentTime
}
},
onProgressChanging(e) {
// console.log("onProgressChanging", e);
this.progressChanging = true
// 实时修改currentTime值
this.currentTime = this.duration * e
},
progressChanged(e){
// console.log(e);
this.progressChanging = false
audioEl.currentTime = this.currentTime= this.duration * e
if(!this.isplay){
console.log("------");
audioEl.play()
}
},
formatTime(interval) {
// interval 向下取整
interval = interval | 0
// 不足两位的话就向前填充一个0
let minute = ((interval / 60 | 0) + '')
let second = ((interval % 60 | 0) + '')
let len = minute.length
for (; len < 2; len++) {
minute = '0' + minute
}
len = second.length
for (; len < 2; len++) {
second = '0' + second
}
return `${minute}:${second}`
},
},
})
</script>
</body>
<style>
#app {
width: 100%;
}
.progress-wrapper {
display: flex;
width: 80%;
padding: 10px 0;
align-items: center;
margin: 0 auto;
}
.time {
width: 40px;
flex: 0 0 40px;
font-size: 8px;
margin: 0 auto;
padding: 0 8px;
}
.time-l {
text-align: left;
}
.time-l {
text-align: right;
}
.progress-bar-wrapper {
flex: 1;
}
/* 子组件样式 */
.progress-bar {
height: 30px;
}
.bar-inner {
position: relative;
top: 11px;
height: 8px;
background-color: rgba(87, 82, 82, 0.062);
border-radius: 5px;
}
.progress {
position: absolute;
height: 100%;
background-color: rgb(238, 238, 136);
}
.progress-btn-wrapper {
position: absolute;
left: -8px;
top: -11px;
width: 30px;
height: 30px;
}
.progress-btn {
position: relative;
top: 7px;
left: 7px;
box-sizing: border-box;
width: 16px;
height: 16px;
border: 3px solid rgb(189, 189, 218);
border-radius: 50%;
background: rgb(123, 192, 212);
}
</style>
</html>
解说
https://developer.mozilla.org/zh-CN/docs/Web/API/TouchEvent
中间的进度条是一个进度条组件,一个黑色的背景是进度的总长度,左侧黄色的条是当前播放的进度,中间的滑块是可以左右拖动的,可以手动改变进度条,在播放的过程中,进度条是会变长的,并且滑块是向右偏移的,可以左右拖动滑块,拖动也是改变了播放进度,并且左侧的时间是会发生变化的
来实现播放过程中,进度条也会随之播放 组件的状态靠什么决定呢 可以靠进度来决定,组件的任何状态都可以根据进度来决定,父组件传入一个数字类型的progress
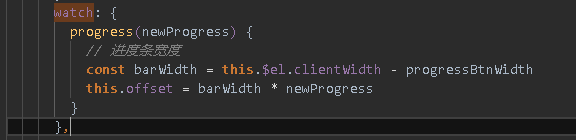
btn的位置,以及progress黄条的宽度都是根据progress计算而来的,宽度可以用一个数据offset来表示(定义个data),之后要监听progess,
https://cn.vuejs.org/v2/api/#vm-el
知识 获取根 DOM 元素
      watch: {
        progress(newProgress) {
          // 进度条宽度
          const barWidth = this.$el.clientWidth - progressBtnWidth
          // 偏移量
          this.offset = barWidth * newProgress
        }
      }
知识 当然可以用computed,但是要注意用computed获取el的宽度一开始肯定是获取不到的,computed一开始上来就计算一次,在模板被渲染的时候就会访问offset,然后就会计算一次el宽度,这时候组件还没有mounted,是获取不到的;watch的话,progress变化的时候其实已经渲染了,所以clientWidth就可以拿到,另外,因为之后还要处理一些逻辑,更偏向逻辑的编写,所以应该用watch去实现
有了offset之后要去映射dom,给黄色进度条和btn设置一个动态的style,
他们两个的style都是根据offset计算而来的,
      computed: {
        progressStyle(){
          return  `width: ${this.offset}px`
        },
        btnStyle() {
          return `transform: translate3d(${this.offset}px,0,0)`
        }
      },
现在来根据offset来计算出它的样式是怎么样的 我们接受progress这个属性,当外部的progress变了之后,就根据progress计算出它的offset,有了偏移量,样式就能发生变化,
疑问 flex 0 0 40px 与width 两者效果是类似的,但是在某些场合下,flex布局会出现挤压或塌陷的现象,导致宽度被挤压,所以设定width可以保证我们的宽度不变化
这里是监听canplay事件
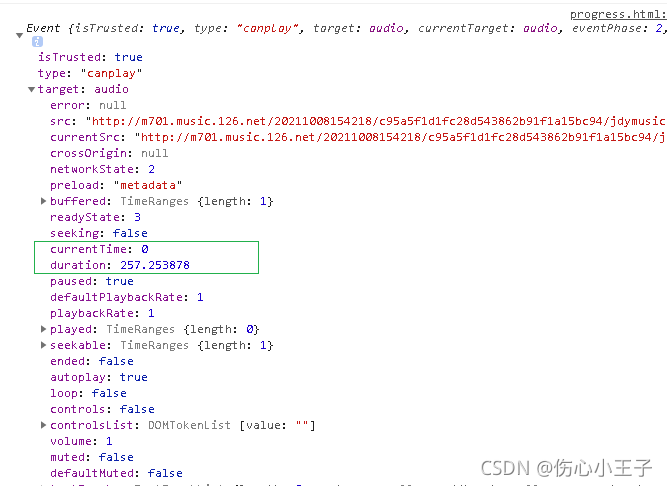
父组件计算属性 播放进度:已播放时间/总时间 总时间已经拿到了,播放时间可以用一个事件:timeupdate来监听

现在的效果
可以看出来这是秒数,需要格式化时间,定义一个工具函数
插播 函数柯里化 https://www.jianshu.com/p/2975c25e4d71 IIFE:自我执行函数 柯里化
还有位运算一些东西 https://www.jianshu.com/p/a3202bc3f7a4
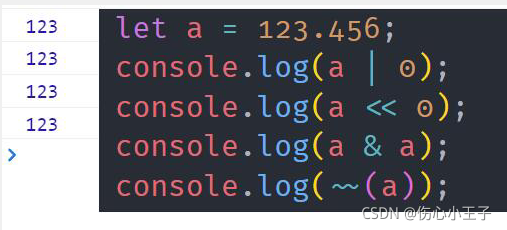
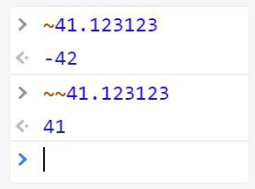
一个疑问 xxx.yyy|0 为什么等于xxx 为什么这里或运算符能有取整的作用呢
知识padstart方法
formatTime函数
formatTime(interval) {
  // interval 向下取整
  interval = interval | 0
  // 不足两位的话就向前填充一个0
  const minute = ((interval / 60 | 0) + '').padstart(2, '0')
  const second = ((interval % 60 | 0) + '').padstart(2, '0')
  return `${minute}:${second}`
}
但是并不能用 它识别不了这个padstart方法
所以只能自己写了
        formatTime(interval) {
          // interval 向下取整
          interval = interval | 0
          // 不足两位的话就向前填充一个0
          let minute = ((interval / 60 | 0) + '')
          let second = ((interval % 60 | 0) + '')
          let len = minute.length
          for( ;len<2;len++){
            minute='0'+minute
          }
          len = second.length
          for( ;len<2;len++){
            second='0'+second
          }
          return `${minute}:${second}`
        }
接下来写进度条的交互逻辑
支持拖动和点击
在移动端常见的就是ontouchstart ontouchmove ontouchend
https://developer.mozilla.org/zh-CN/docs/Web/API/TouchEvent
知识 prevent修饰符
给滑块添加三个事件
      methods: {
        onTouchStart(e) {
          console.log(e);
        },
        onTouchMove(e) {
          console.log(e);
        },
        onTouchEnd(e) {
          console.log(e);
        }
      },
需要获取两个信息,一个是要知道它点击的位置,也就是说要知道他的横坐标是什么。以及左侧进度条的宽度(offset)
[screenX clientX pageX概念
因为横坐标的位置在touchmove的时候也需要获取,所以可以把数据绑定到一个可以被共享的对象上,可以在created钩子函数中定义一个对象,
      created() {
        this.touch = {}
      },
给黄条一个ref 之后
        onTouchStart(e) {
          // console.log(e);
          this.touch.x1=e.changedTouches[0].clientX
          // 黄色进度条初始宽度
          this.touch.beginWidth = this.$refs.progress.clientWidth
          console.log(this.touch);
        },
        onTouchStart(e) {
          // console.log(e);
          this.touch.x1=e.changedTouches[0].clientX
          // 黄色进度条初始宽度
          this.touch.beginWidth = this.$refs.progress.clientWidth
          console.log(this.touch);
        },
        onTouchMove(e) {
          // console.log(e);
          // x偏移量
          const delta = e.changedTouches[0].clientX-this.touch.x1
          // 之前的width+这次拖动增加的偏移量=应有的黄条长度
          const tempWidth = this.touch.beginWidth + delta
          // 再拿到barWidth
          const barWidth = this.$el.clientWidth - progressBtnWidth
          // 黄条长度/barwidth = progress 现在应该有的进度
          const progress = tempWidth/barWidth
          this.offset = barWidth * progress
          // console.log("tempWidth", tempWidth);
          // console.log("barWidth", barWidth);
          // console.log("progress", progress);

        },
来整理一下,最终目的是要拿到offset,offset是由progress和barWidth共同决定的,这里progress怎么算呢需要拿到当前黄条应该的宽度除总宽度,黄条应该的宽度就是一开始的宽度+这次滑动的x距离,然后barWidth的获取是简单的,之后就可以算出来了
会不会觉得多此一举呢 直接原来的黄条宽度+这次滑动的长度不就可以了吗 为什么还要算progress呢,因为要让外部知道,歌曲的进度发生了改变,要让他们对应上才可以,最终是要修改audio的,这个是用父组件做的,现在只是实现了拖动,所以需要派发事件,这里派发两个自定义事件,一个progress-changing事件,表示手指还在拖动的过程中,还没有离开,当手指离开的时候还要派发一个progress-change 把新的progress传出去
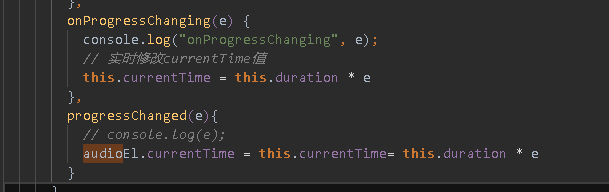
实时修改currentTime的值

这是拖动的时候修改currentTIme,修改音乐的时间是在手松开的时候,
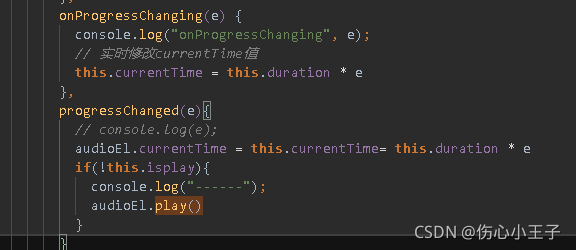
但是我们暂停的时候发现是可以拖动的,但是播放的时候拖动发现是有问题的,
优化:在change的时候,如果是暂停的效果就让他播放,这时候就要定义一个isplay在点击播放暂停的时候翻转
现在来改bug,在播放的时候,拖动进度会出问题,为什么呢,监听progressChanging,我们修改了currentTime,这个currentTime一旦发生了改变,progress会根据currentTime做一个新的计算,然后传给子组件,子组件他就会进入到这个逻辑
offset就会重新做一次计算,
最后这里会覆盖
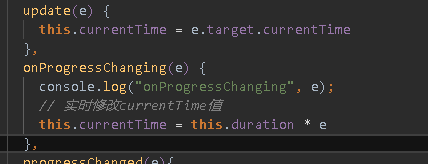
应该在update的时候需要做一些控制,在changing的过程加一个标志位,
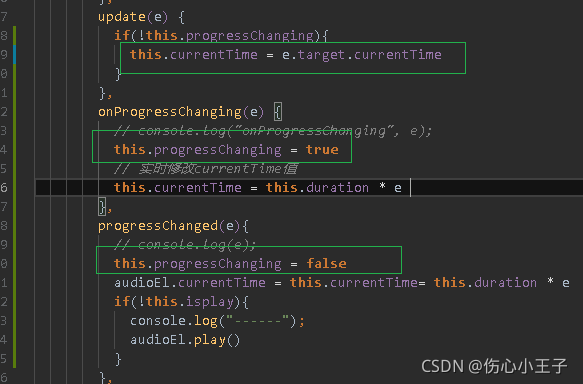
就是说在update函数中,如果changing在拖动的过程中,不要去修改currentTime,在changing的过程中,就认为是进度条改变,他修改进度条的优先级高,自身播放导致的currentTime改变优先级比较低,
这样就ok了
除了拖动,我们还希望点击它跳转到对应位置,
知识webapi --getBoundingClientRect 方法返回元素的大小及其相对于视口的位置(获取短的那一条)。

用pagex获取长的那一条
        clickProgress(e){
          // console.log("fds");
          console.log('getBoundingClientRect', this.$el.getBoundingClientRect());
          const rect = this.$el.getBoundingClientRect()
          // 黄条应有的宽度
          const offsetWidth = e.pageX - rect.x
          const barWidth = this.$el.clientWidth - progressBtnWidth
          const progress = offsetWidth/barWidth
          this.$emit('progress-changed', progress)
          console.log(offsetWidth)
        }

