项目当中使用vue的时候一定会用到路由,并且二级路由甚至三集路由的需求都是刚需,当然,多级路由的配置方法和二级的是一样的,简单讲讲二级路由的配置吧。
首先把一级路由的结构准备好:
 <router-link to="https://img.qb5200.com/download-x/discover">
  <div @click="clickFind('发现')">
   <span class="icon-find"></span>
   <p>发现</p>
  </div>
  </router-link>
  <router-link to="/todayStudy">
  <div @click="clickStudy('今日学习')">
   <span class="icon-todayStudy"></span>
   <p>今日学习</p>
  </div>
  </router-link>
  <router-link to="/listenAnyWhere">
  <div @click="clickListen('随时听')">
   <span class="icon-listenAny"></span>
   <p>随时听</p>
  </div>
  </router-link>
  <router-link to="/bought">
  <div @click="clickBought('已购')">
   <span class="icon-areadyBy"></span>
   <p>已购</p>
  </div>
  </router-link>
  <router-link to="/mine">
  <div @click="clickMe">
   <span class="icon-me"></span>
   <p>我</p>
  </div>
  </router-link>
 </div>
 <router-view></router-view>
在main.js里引入模块,并配置路由:
import discover from './componentshttps://img.qb5200.com/download-x/discoverhttps://img.qb5200.com/download-x/discover.vue';
import todayStudy from './components/todayStudy/study.vue';
import listen from './components/listenAnyWhere/listen.vue';
import bought from './components/bought/bought.vue';
import mine from './components/mine/mine.vue';
const routes = [
 {
 path: '/',
 redirect: 'https://img.qb5200.com/download-x/discover'
 },
 {
 path: 'https://img.qb5200.com/download-x/discover',
 component: discover
 },
 {
 path: '/todayStudy',
 component: todayStudy
 },
 {
 path: '/listenAnyWhere',
 component: listen
 },
 {
 path: '/bought',
 component: bought
 },
 {
 path: '/mine',
 component: mine
 }
];
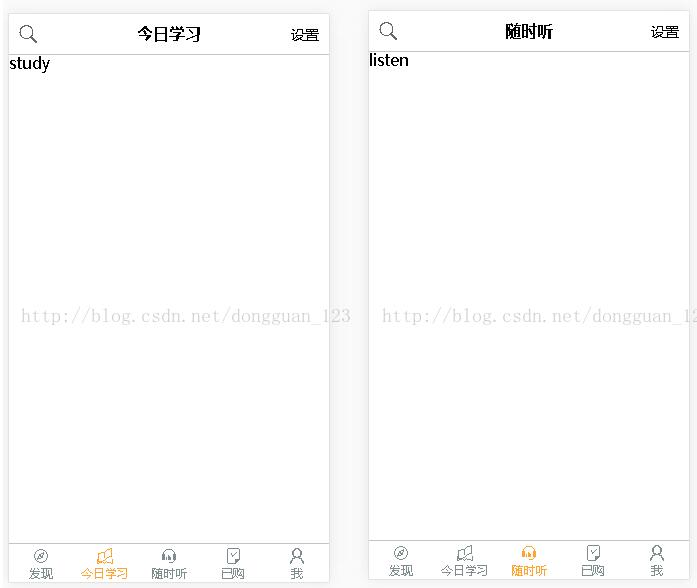
先看效果

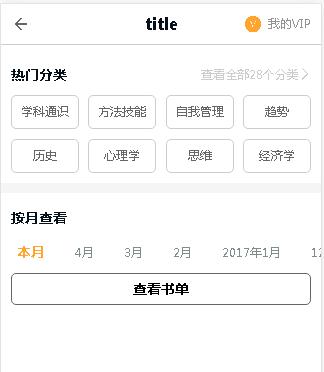
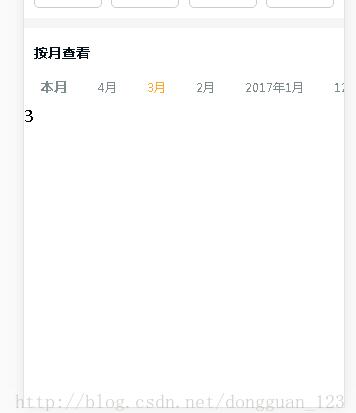
点击每天听本书后进入下一级
在main.js里设置二级路由
import thisMouth from './componentshttps://img.qb5200.com/download-x/discoverhttps://img.qb5200.com/download-x/detailEveryDay/thisMouth/thisMouth.vue';
import four from './componentshttps://img.qb5200.com/download-x/discoverhttps://img.qb5200.com/download-x/detailEveryDay/fourth/fourth.vue';
import three from './componentshttps://img.qb5200.com/download-x/discoverhttps://img.qb5200.com/download-x/detailEveryDay/three/third.vue';
import two from './componentshttps://img.qb5200.com/download-x/discoverhttps://img.qb5200.com/download-x/detailEveryDay/two/second.vue';
import one from './componentshttps://img.qb5200.com/download-x/discoverhttps://img.qb5200.com/download-x/detailEveryDay/one/first.vue';
import twel from './componentshttps://img.qb5200.com/download-x/discoverhttps://img.qb5200.com/download-x/detailEveryDay/twe/twel.vue';
import elev from './componentshttps://img.qb5200.com/download-x/discoverhttps://img.qb5200.com/download-x/detailEveryDay/elven/elev.vue';
const routes = [
 {
 path: '/',
 redirect: 'https://img.qb5200.com/download-x/discover'
 },
 {
 path: 'https://img.qb5200.com/download-x/discover',
 component: discover,
 <span style="color:#ff0000;">children: [
  {
  path: '/',
  component: thisMouth
  },
  {
  path: '/thisMouth',
  component: thisMouth
  },
  {
  path: '/forthMouth',
  component: four
  },
  {
  path: '/thirdMouth',
  component: three
  },
  {
  path: '/secondMouth',
  component: two
  },
  {
  path: '/firstMouth',
  component: one
  },
  {
  path: '/elMouth',
  component: twel
  },
  {
  path: '/twMouth',
  component: elev
  }
 ]</span>
 },
在相应的路径下建立各个路由所需模块即可
以上这篇vue二级路由设置方法就是小编分享给大家的全部内容了,希望能给大家一个参考,也希望大家多多支持。

