背景
当我们基于vue开发单个项目时,我们会init一个vue-cli,但当我们想在其他项目里共用这套模板时,就需要重新init一个,或者clone过来,这非常不方便,而且当多人开发时,我们希望所有的开发代码都在一个git目录下,这时就有了对webpack进行配置的需求,当有些页面需要多入口时,我们又产生了对多入口配置的需求,这里提供一种配置方案,希望能帮助到有需要的人,废话不多说,我们开始吧!
先初始化一个项目
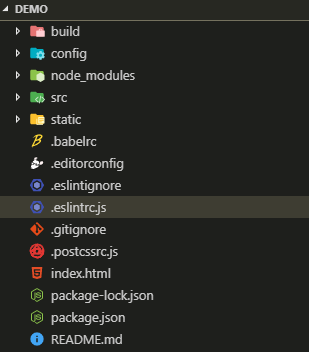
我们通过vue init webpack demo 生成的文件目录是这样的
修改项目入口
要改多入口,首先改造一下 webpack.base.conf.js 中的 context 和 entry 。
context:基础目录,绝对路径,用于从配置中解析入口起点(entry point)和 loader。
entry:起点或是应用程序的起点入口。从这个起点开始,应用程序启动执行。
module.exports = {
 context: path.resolve(__dirname, '../'),
 entry: {
  app: './src/main.js'
 },
};
如果项目只有一个入口,那么直接在这里改entry就可以了,但一般我们都是多个项目在放一个目录里,所以要提取出来context和entry。
const paths = require('./paths')
const rootPath = paths.rootPath
module.exports = {
 context: rootPath
 entry: {
  app: utils.getEntry(),
 },
};
在config里新建 _config.js 和 paths.js
_config.js ,用于设置当前启动项目,并将这个文件添加到.gitignore中,因为以后多人开发都是在本地修改项目地址。
'use strict'
 module.exports = {
 appName: 'mobile',
 projectName: 'demo'
}
这里设计2个目录,appName是src下的一级目录,projectName是appName下的二级目录,目的在于方便拓展,比如公司的项目分为pc项目和mobile项目,开发时便于区分,如果你的项目比较少,那可以把appName写成一个固定字符串如:pages,每次切换项目只更改projectName就可以了。我们将所有项目放在src下,类似目录如下
├─mobile
│ ├─demo
│ └─demo2
└─pc
  ├─demo
  └─demo2
paths.js ,用于配置一些全局需要用到的路径
'use strict'
const path = require('path')
const fs = require('fs')
const _config = require('./_config')

const rootPath = fs.realpathSync(process.cwd()) // 项目根目录 fs.realpathSync表示获取真实路径
const resolve = relativePath => path.resolve(rootPath, relativePath) // 自定义一个resolve函数,拼接出需要的路径地址
module.exports = {
 rootPath, // 项目根目录
 commonPath: resolve('common'), // 公共目录
 projectPath: resolve(`src/${_config.appName}/${_config.projectName}`), // 子项目根目录
 config: resolve('config'), // 项目配置
 static: resolve('static') // 公共静态资源目录
}
新建common文件夹
我们在src同级新建一个common文件夹,用于存放静态资源及公共组件
-components
 ├─assets
 ├─components
 └─xhr
assets里可以存放公共样式css,公共字体font,公共图片img,公共方法js等;components里存放提取出来的公共组件,xhr我放的是axio的封装,整个文件夹可以自定义修改,这里就不展开了,如果项目比较简单不需要,在paths.js里删去对应的部分即可。
再来看我们修改的entry,我们在config文件夹中的utils.js 新增了getEntry方法,并在entry处引用。
'use strict'
// 省略...
const paths = require('./paths')
const fs = require('fs')
// 省略...
exports.getEntry = () => {
 const entryPath = path.resolve(paths.projectPath, 'entry')
 const entryNames = fs
   .readdirSync(entryPath)
   .filter(n => /\.js$/g.test(n))
   .map(n => n.replace(/\.js$/g, ''))
 const entryMap = {}

 entryNames.forEach(
   name =>
   (entryMap[name] = [
     ...['babel-polyfill', path.resolve(entryPath, `${name}.js`)]
   ])
 )
 return entryMap
}
实际上就是对当前项目entry文件中的js文件进行遍历,如果是单个就是单入口,多个就是多入口。
创建2个项目

demo1是一个单入口项目,demo2是一个多入口项目,如果是多入口项目,需要在entry增加对应的js文件,如上图中的more.html和more.js,上面的getEntry其实找的就是index.js和more.js。
我们再看一下demo2中entry中的index.js和more.js
// index.js
import Vue from 'vue'
import App from '../App'

new Vue({
 el: '#app',
 router,
 components: { App },
 template: '<App/>'
})
// more.js
import Vue from 'vue'
import App from '../More'

new Vue({
 el: '#more',
 components: { App },
 template: '<App/>'
})
引入对应的组件就好,再看下config.js
const host = 'http://xxx.com/api' // 测试地址

module.exports = {
 dev: {
  // proxy代理配置
  proxyTable: {
   '/api': {
    target: host, // 源地址
    changeOrigin: true, // 改变源
    logLevel: 'debug',
    ws: true,
    pathRewrite: {
     '^/api': '' // 路径重写
    }
   }
  },
  build: {
   // build输出路径
   // assetsRoot: path.resolve(process.cwd(), '')
  }
  // 是否启用postcss-pxtorem插件 https://github.com/cuth/postcss-pxtorem
  // pxtorem: true
 }
}
这里就是根据需要自行配置了,如果不需要完全可以不要这个文件,重要的还是entry的入口文件。
打包出口配置
入口改好了,我们再看出口,找到如下内容
// webpack.dev.conf.js
plugins: [
  new webpack.DefinePlugin({
   'process.env': require('../confighttps://img.qb5200.com/download-x/dev.env')
  }),
  new webpack.HotModuleReplacementPlugin(),
  new webpack.NamedModulesPlugin(), // HMR shows correct file names in console on update.
  new webpack.NoEmitOnErrorsPlugin(),
  // https://github.com/ampedandwired/html-webpack-plugin
  new HtmlWebpackPlugin({
   filename: 'index.html',
   template: 'index.html',
   inject: true
  }),
  // copy custom static assets
  new CopyWebpackPlugin([
   {
    from: path.resolve(__dirname, '../static'),
    to: config.dev.assetsSubDirectory,
    ignore: ['.*']
   }
  ])
 ]
// webpack.prod.conf.js
new HtmlWebpackPlugin({
   filename: config.build.index,
   template: 'index.html',
   inject: true,
   minify: {
    removeComments: true,
    collapseWhitespace: true,
    removeAttributeQuotes: true
    // more options:
    // https://github.com/kangax/html-minifier#options-quick-reference
   },
   // necessary to consistently work with multiple chunks via CommonsChunkPlugin
   chunksSortMode: 'dependency'
  }),
// 省略
// copy custom static assets
  new CopyWebpackPlugin([
   {
    from: path.resolve(__dirname, '../static'),
    to: config.build.assetsSubDirectory,
    ignore: ['.*']
   }
  ])
HtmlWebpackPlugin的作用是生成一个 HTML5 文件,CopyWebpackPlugin的作用是将单个文件或整个目录复制到构建目录。我们在utils.js中新建2个方法getHtmlWebpackPlugin和getCopyWebpackPlugin,对这两个方法进行替换,让他们支持多入口。改动后如下
// webpack.dev.conf.js
 plugins: [
  new webpack.DefinePlugin({
   'process.env': require('.https://img.qb5200.com/download-x/dev.env')
  }),
  new webpack.HotModuleReplacementPlugin(),
  new webpack.NamedModulesPlugin(), // HMR shows correct file names in console on update.
  new webpack.NoEmitOnErrorsPlugin(),
  // https://github.com/ampedandwired/html-webpack-plugin
  // 改动
  ...utils.getHtmlWebpackPlugin(baseWebpackConfig),
  // copy custom static assets
  // 改动
  ...utils.getCopyWebpackPlugin()
 ]
// webpack.prod.conf.js
  // 改动
   ...utils.getHtmlWebpackPlugin(baseWebpackConfig),
  // 省略
  // 改动
   ...utils.getCopyWebpackPlugin()
// utils.js
exports.getHtmlWebpackPlugin = baseWebpackConfig => {
 const HtmlWebpackPluginList = []
 const entryNames = Object.keys(baseWebpackConfig.entry)
 entryNames.forEach(name => {
   HtmlWebpackPluginList.push(
     new HtmlWebpackPlugin(
       Object.assign({
           filename: config.build.filename && process.env.NODE_ENV == 'production' ? config.build.filename : `${name}.html`,
           template: config.build.template && process.env.NODE_ENV == 'production' ? path.resolve(
             paths.projectPath, config.build.template) : path.resolve(
             paths.projectPath,
             `${name}.html`
           ),
           inject: true,
           excludeChunks: entryNames.filter(n => n !== name)
         },
         process.env.NODE_ENV === 'production' ? {
           minify: {
             removeComments: true,
             collapseWhitespace: true
               // removeAttributeQuotes: true
           },
           chunksSortMode: 'dependency'
         } : {}
       )
     )
   )
 })
 return HtmlWebpackPluginList
}

exports.getCopyWebpackPlugin = () => {
 const projectStaticPath = path.resolve(paths.projectPath, 'static')
 const assetsSubDirectory =
   process.env.NODE_ENV === 'production' ?
   config.build.assetsSubDirectory :
   config.dev.assetsSubDirectory
 const rootConfig = {
   from: paths.static,
   to: assetsSubDirectory,
   ignore: ['.*']
 }
 const projectConfig = {
   from: projectStaticPath,
   to: assetsSubDirectory,
   ignore: ['.*']
 }
 return [
   new CopyWebpackPlugin(
     fs.existsSync(projectStaticPath) ? [rootConfig, projectConfig] : [rootConfig]
   )
 ]
}
修改index.js
我们找到config里index.js,对其做一些修改,让我们可以在项目里的config.js中配置代理,打包目录,让模板更灵活。
// config/index.js 改造前
 dev: {
  // Paths
  assetsSubDirectory: 'static',
  assetsPublicPath: '/',
  proxyTable: {},
  // Various Dev Server settings
  host: 'localhost', // can be overwritten by process.env.HOST
 },
 build: {
  // Template for index.html
  index: path.resolve(__dirname, '..https://img.qb5200.com/download-x/dist/index.html'),

  // Paths
  assetsRoot: path.resolve(__dirname, '..https://img.qb5200.com/download-x/dist'),
  assetsSubDirectory: 'static',
  assetsPublicPath: '/',
  // 省略
 }
//config/index.js 改造后
const paths = require('./paths')
const resolve = relativePath => path.resolve(paths.projectPath, relativePath)
const _config = require(resolve('config.js')) // 子项目webpack配置
 dev: {
  // Paths
  assetsSubDirectory: 'static',
  assetsPublicPath: '/',
  proxyTable: _config.dev.proxyTable,
  // Various Dev Server settings
  host: '0.0.0.0', // can be overwritten by process.env.HOST
 },
 build: {
  // Template for index.html
  index: path.resolve(__dirname, '..https://img.qb5200.com/download-x/dist/index.html'),

  // Paths
  assetsRoot: _config.build.assetsRoot || path.resolve(__dirname, '..https://img.qb5200.com/download-x/dist'),
  assetsSubDirectory: 'static',
  assetsPublicPath: _config.build.publichPath || './',
  // 省略
 }
到这里,我们的多入口配置就基本完成了,注意修改过的配置文件里一些引用需要加上,检查下路径是否正确。
既然我们的目的就是打造多入口模板,那么以demo2为例,运行npm run dev 在如果服务是http://localhost:8080,多页面入口在浏览器访问时url就是http://localhost:8080/more.html。注意要带.html哦。
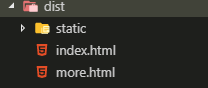
运行npm run build 我们会发现dist文件夹里有2个html,说明多入口打包成功
到此我们的项目模板就配置完成了。以后多人开发、多入口活动都可以在这个项目下进行开发了,此篇不涉及webpack优化,只提供一种配置思路。如果感觉文章写的不够清楚,或者想直接使用这个模板,我的git上有完整的脚手架
传送门 ,如果遇到问题或者好的建议,欢迎提出。

