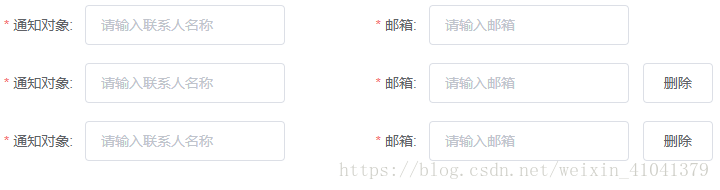
首先有一个这样的需求,表单中默认有一个联系人信息,用户可以再添加新的联系人信息

点击添加更多联系人之后
官方文档中有写用v-for来实现新增表单,但是那是单表单的新增,现在多表单的新增,可以考虑的实现方法是先写死一个必须的表单,需要新增的两个表单放在一个div里,在div中使用v-for生成,达到同时新增的效果
代码如下
//必填一个联系人的表单
<el-form-item class="rules" label="通知对象:" prop="notifyobject">
      <el-input v-model="ruleForm.notifyobject" placeholder="请输入联系人名称" :disabled="isReadonly" class="el-select_box"></el-input>
     </el-form-item>
     <el-form-item class="rules" label="邮箱:" prop="email">
      <el-input v-model="ruleForm.email" placeholder="请输入邮箱" :disabled="isReadonly" class="el-select_box"></el-input>
     </el-form-item>
//动态生成的联系人表单
     <div class="moreRules">
      <div class="moreRulesIn" v-for="(item, index) in ruleForm.moreNotifyObject" :key="item.key">
       <el-form-item class="rules" label="通知对象:" :prop="'moreNotifyObject.' + index +'.notifyobject'" :rules="moreNotifyOjbectRules.moreNotifyOjbectName">
        <el-input v-model="item.notifyobject" placeholder="请输入联系人名称" :disabled="isReadonly" class="el-select_box"></el-input>
       </el-form-item>
       <el-form-item class="rules" label="邮箱:" :prop="'moreNotifyObject.'+ index +'.email'" :rules="moreNotifyOjbectRules.moreNotifyOjbectEmail">
        <el-input v-model="item.email" placeholder="请输入邮箱" :disabled="isReadonly" class="el-select_box"></el-input>
       </el-form-item>
       <el-button @click="deleteRules(item, index)" :disabled="isReadonly">删除</el-button>
      </div>
     </div>
     <el-form-item v-show="!isRead">
      <el-button type="text" class="addUser" @click="addUser" :disabled="isReadonly"><i class="iconfont icon-tianjialianxiren"></i>添加更多联系人</el-button>
     </el-form-item>
和普通表单验证不同的是,动态表单要新增自己的验证规则,和添加普通表单的方式一样
ruleForm:{
  //普通表单的验证规则
},
//新增表单的验证规则
   moreNotifyOjbectRules: {
    moreNotifyOjbectName: [{ required: true, message: '请输入联系人名称', trigger: 'blur' },
     {
      validator: (rule, value, callback) => {
       if (value.length > 15 || value.length < 2) {
        callback(new Error('长度必须为2~8个字符'))
       } else {
        var reg = new RegExp("[`~!@#$^&*()=|{}':',\\[\\].<>《》/?~!@#¥……&*()——|{}【】‘;:”“'。,、?]")
        if (reg.test(value)) {
         callback(new Error('不能含有特殊字符'))
        } else {
         callback()
        }
       }
      },
      trigger: 'change'
     }
    ],
    moreNotifyOjbectEmail: [{ required: true, message: '请输入邮箱地址', trigger: 'blur' },
     { type: 'email', message: '请输入正确的邮箱地址', trigger: 'blur' }
    ]
   }
这里需要注意的是:rules是每个表单都要都要添加的,有多个的话就要给每个表单绑定一个规则
<el-form-item class="rules" label="通知对象:" :prop="'moreNotifyObject.' + index +'.notifyobject'" :rules="moreNotifyOjbectRules.moreNotifyOjbectName">
<el-form-item class="rules" label="邮箱:" :prop="'moreNotifyObject.'+ index +'.email'" :rules="moreNotifyOjbectRules.moreNotifyOjbectEmail">
另外要注意的是:prop,正常表单验证单项是依靠prop,但是动态生成话要用:prop。
书写的语法是:prop="'moreNotifyObject.' + index +'.notifyobject'",moreNotifyObject是v-for绑定的数组,index是索引,notifyobject是表单绑定的v-model的名称,然后用.把他们链接起来。
所以总结起来的语法就是:prop="'v-for绑定的数组.' + index + '.v-model绑定的变量'"
还有一个需要注意就是v-for的写法,要将表单的model名写进去
<div class="moreRulesIn" v-for="(item, index) in ruleForm.moreNotifyObject" :key="item.key">
还有要注意的就是v-for绑定的数组也要在表单的对象里,写在表单对象外是验证不了的,在data里添加
ruleform:{
  moreNotifyObject: [{
     notifyobject: '',
     email: ''
    }]
}
然后新增联系人的函数应该这样写
 addUser() {
   this.ruleForm.moreNotifyObject.push({
    notifyobject: '',
    email: ''
   })
  }
同理删除联系人也是
deleteRules(item, index) {
   this.index = this.ruleForm.moreNotifyObject.indexOf(item)
   if (index !== -1) {
    this.ruleForm.moreNotifyObject.splice(index, 1)
   }
  }
如果一开始只想让默认必填的表单显示,而新增的不显示,如文章最开头的表现一样,则可以在methods中初始化v-for绑定的数组
methods:{
  //初始化数据
  initData(){
    this.ruleFrom.moreNotifyObject = []
  }}
总结
以上所述是小编给大家介绍的Vue+Element实现动态生成新表单并添加验证功能,希望对大家有所帮助,如果大家有任何疑问请给我留言,小编会及时回复大家的。在此也非常感谢大家对网站的支持!

