本文着重讲解了OpenCV+python实现实时目标检测功能,文中会用代码示例为大家做详细介绍,希望能够帮助到您,欢迎大家阅读和收藏
环境安装
conda create -n py3.6 python=3.6 //创建
	conda activate py3.6 //激活

3.安装依赖numpy和imutils
//用镜像安装
pip install -i http://pypi.tuna.tsinghua.edu.cn/simple numpy
pip install -i http://pypi.tuna.tsinghua.edu.cn/simple imutils
4.安装opencv
(1)首先下载opencv(网址:opencv),在这里我选择的是opencv_python‑4.1.2+contrib‑cp36‑cp36m‑win_amd64.whl 。
(2)下载好后,把它放到任意盘中(这里我放的是D盘),切换到安装目录,执行安装命令:pip install opencv_python‑4.1.2+contrib‑cp36‑cp36m‑win_amd64.whl
代码
首先打开一个空文件命名为real_time_object_detection.py,加入以下代码,导入你所需要的包。
# import the necessary packages
from imutils.video import VideoStream
from imutils.video import FPS
import numpy as np
import argparse
import imutils
import time
import cv2
2.我们不需要图像参数,因为在这里我们处理的是视频流和视频——除了以下参数保持不变:
–prototxt:Caffe prototxt 文件路径。
–model:预训练模型的路径。
–confidence:过滤弱检测的最小概率阈值,默认值为 20%。
# construct the argument parse and parse the arguments
ap = argparse.ArgumentParser()
ap.add_argument("-p", "--prototxt", required=True,
	help="path to Caffe 'deploy' prototxt file")
ap.add_argument("-m", "--model", required=True,
	help="path to Caffe pre-trained model")
ap.add_argument("-c", "--confidence", type=float, default=0.2,
	help="minimum probability to filter weak detections")
args = vars(ap.parse_args())
3.初始化类列表和颜色集,我们初始化 CLASS 标签,和相应的随机 COLORS。
# initialize the list of class labels MobileNet SSD was trained to
# detect, then generate a set of bounding box colors for each class
CLASSES = ["background", "aeroplane", "bicycle", "bird", "boat",
	"bottle", "bus", "car", "cat", "chair", "cow", "diningtable",
	"dog", "horse", "motorbike", "person", "pottedplant", "sheep",
	"sofa", "train", "tvmonitor"]
COLORS = np.random.uniform(0, 255, size=(len(CLASSES), 3))
4.加载自己的模型,并设置自己的视频流。
# load our serialized model from disk
print("[INFO] loading model...")
net = cv2.dnn.readNetFromCaffe(args["prototxt"], args["model"])

# initialize the video stream, allow the cammera sensor to warmup,
# and initialize the FPS counter
print("[INFO] starting video stream...")
vs = VideoStream(src=0).start()
time.sleep(2.0)
fps = FPS().start()
首先我们加载自己的序列化模型,并且提供对自己的 prototxt文件 和模型文件的引用
net = cv2.dnn.readNetFromCaffe(args["prototxt"], args["model"])。
下一步,我们初始化视频流(来源可以是视频文件或摄像头)。首先,我们启动 VideoStreamvs = VideoStream(src=0).start(),随后等待相机启动time.sleep(2.0),最后开始每秒帧数计算fps = FPS().start()。VideoStream 和 FPS 类是 imutils 包的一部分。
5.遍历每一帧
# loop over the frames from the video stream
while True:
	# grab the frame from the threaded video stream and resize it
	# to have a maximum width of 400 pixels
	frame = vs.read()
	frame = imutils.resize(frame, width=400)

	# grab the frame from the threaded video file stream
	(h, w) = frame.shape[:2]
	blob = cv2.dnn.blobFromImage(cv2.resize(frame, (300, 300)),
		0.007843, (300, 300), 127.5)

	# pass the blob through the network and obtain the detections and
	# predictions
	net.setInput(blob)
	detections = net.forward()
首先,从视频流中读取一帧frame = vs.read(),随后调整它的大小imutils.resize(frame, width=400)。由于我们随后会需要宽度和高度,接着进行抓取(h, w) = frame.shape[:2]。最后将 frame 转换为一个有 dnn 模块的 blob,cv2.dnn.blobFromImage(cv2.resize(frame, (300, 300)),0.007843, (300, 300), 127.5)。
现在,我们设置 blob 为神经网络的输入net.setInput(blob),通过 net 传递输入detections = net.forward()。
6.这时,我们已经在输入帧中检测到了目标,现在看看置信度的值,来判断我们能否在目标周围绘制边界框和标签。
# loop over the detections
	for i in np.arange(0, detections.shape[2]):
		# extract the confidence (i.e., probability) associated with
		# the prediction
		confidence = detections[0, 0, i, 2]

		# filter out weak detections by ensuring the `confidence` is
		# greater than the minimum confidence
		if confidence > args["confidence"]:
			# extract the index of the class label from the
			# `detections`, then compute the (x, y)-coordinates of
			# the bounding box for the object
			idx = int(detections[0, 0, i, 1])
			box = detections[0, 0, i, 3:7] * np.array([w, h, w, h])
			(startX, startY, endX, endY) = box.astype("int")

			# draw the prediction on the frame
			label = "{}: {:.2f}%".format(CLASSES[idx],
				confidence * 100)
			cv2.rectangle(frame, (startX, startY), (endX, endY),
				COLORS[idx], 2)
			y = startY - 15 if startY - 15 > 15 else startY + 15
			cv2.putText(frame, label, (startX, y),
				cv2.FONT_HERSHEY_SIMPLEX, 0.5, COLORS[idx], 2)
在 detections 内循环,一个图像中可以检测到多个目标。因此我们需要检查置信度。如果置信度足够高(高于阈值),那么将在终端展示预测,并以文本和彩色边界框的形式对图像作出预测。
在 detections 内循环,首先我们提取 confidence 值,confidence = detections[0, 0, i, 2]。如果 confidence 高于最低阈值(if confidence > args["confidence"]:),那么提取类标签索引(idx = int(detections[0, 0, i, 1])),并计算检测到的目标的坐标(box = detections[0, 0, i, 3:7] * np.array([w, h, w, h]))。然后,我们提取边界框的 (x, y) 坐标((startX, startY, endX, endY) = box.astype("int")),将用于绘制矩形和文本。接着构建一个文本 label,包含 CLASS 名称和 confidence(label = "{}: {:.2f}%".format(CLASSES[idx],confidence * 100))。还要使用类颜色和之前提取的 (x, y) 坐标在物体周围绘制彩色矩形(cv2.rectangle(frame, (startX, startY), (endX, endY),COLORS[idx], 2))。如果我们希望标签出现在矩形上方,但是如果没有空间,我们将在矩形顶部稍下的位置展示标签(y = startY - 15 if startY - 15 > 15 else startY + 15)。最后,我们使用刚才计算出的 y 值将彩色文本置于帧上(cv2.putText(frame, label, (startX, y),cv2.FONT_HERSHEY_SIMPLEX, 0.5, COLORS[idx], 2))。
7.帧捕捉循环剩余的步骤还包括:展示帧;检查 quit 键;更新 fps 计数器。
	# show the output frame
	cv2.imshow("Frame", frame)
	key = cv2.waitKey(1) & 0xFF

	# if the `q` key was pressed, break from the loop
	if key == ord("q"):
		break

	# update the FPS counter
	fps.update()
上述代码块简单明了,首先我们展示帧(cv2.imshow("Frame", frame)),然后找到特定按键(key = cv2.waitKey(1) & 0xFF),同时检查「q」键(代表「quit」)是否按下。如果已经按下,则我们退出帧捕捉循环(if key == ord("q"):break),最后更新 fps 计数器(fps.update())。
8.退出了循环(「q」键或视频流结束),我们还要处理以下。
# stop the timer and display FPS information
fps.stop()
print("[INFO] elapsed time: {:.2f}".format(fps.elapsed()))
print("[INFO] approx. FPS: {:.2f}".format(fps.fps()))

# do a bit of cleanup
cv2.destroyAllWindows()
vs.stop()
运行文件目录有以下文件:
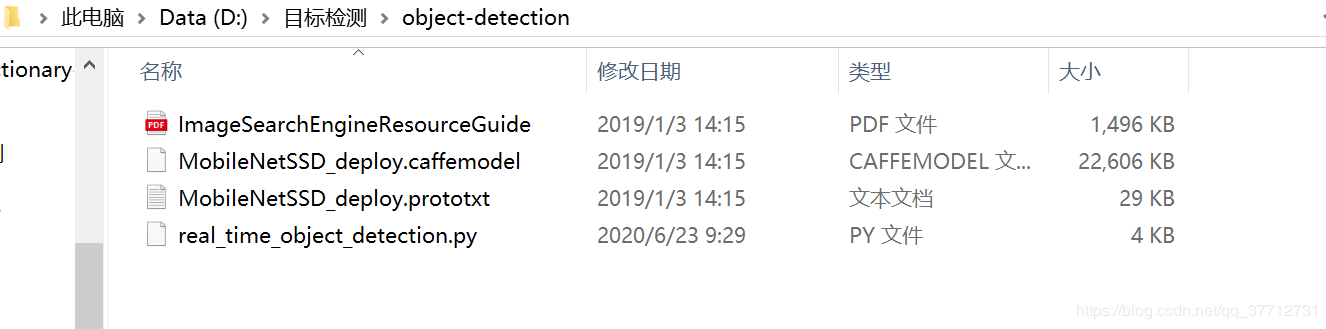
到文件相应的目录下:cd D:\目标检测\object-detection执行命令:python real_time_object_detection.py --prototxt MobileNetSSD_deploy.prototxt.txt --model MobileNetSSD_deploy.caffemodel
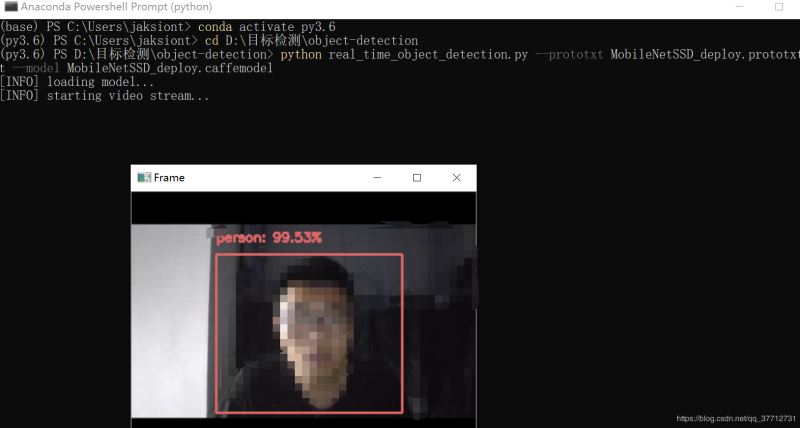
演示
这里我把演示视频上传到了B站,地址链接目标检测
补充
项目github地址object_detection链接。
本项目要用到MobileNetSSD_deploy.prototxt.txt和MobileNetSSD_deploy.caffemodel,可以去github上下载项目运行。

