本文着重讲解了idea配置springboot热部署终极解决办法(解决热部署失效问题),文中会用代码示例为大家做详细介绍,希望能够帮助到您,需要的朋友参考下吧
idea配置springboot热部署终极解决办法,解决热部署失效问题
1. 添加maven依赖
 <dependency>
   <groupId>org.springframework.boot</groupId>
   <artifactId>spring-boot-devtools</artifactId>
   <version>2.2.5.RELEASE</version>
   <optional>true</optional>
  </dependency>
2. 添加插件
 <plugin>
    <groupId>org.springframework.boot</groupId>
    <artifactId>spring-boot-maven-plugin</artifactId>
    <version>2.2.5.RELEASE</version>
    <configuration>
     <fork>true</fork>
     <addResources>true</addResources>
    </configuration>
   </plugin>
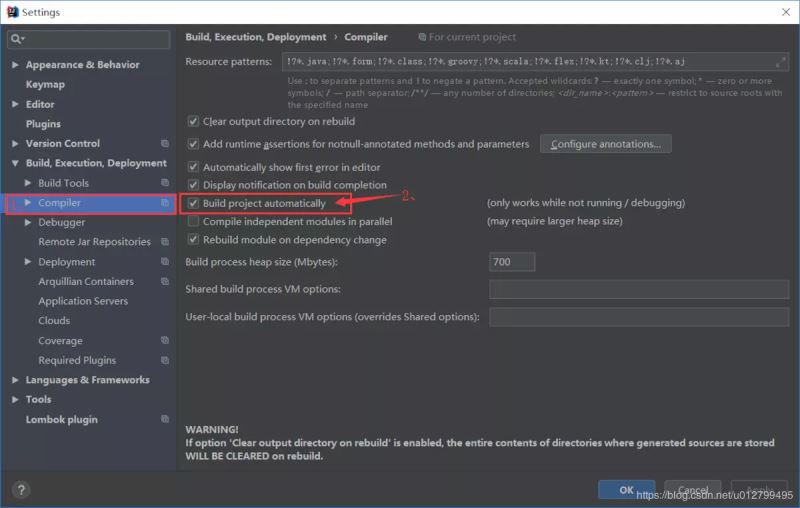
3.开启自动编译
File-Settings-Compiler-Build Project automatically
4.Ctrl+Shift+Alt+/ 选择Registry
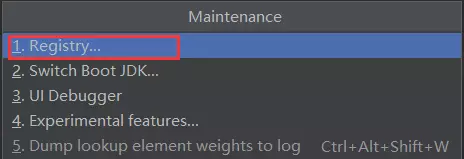
找到选项Compiler autoMake allow when app running打勾

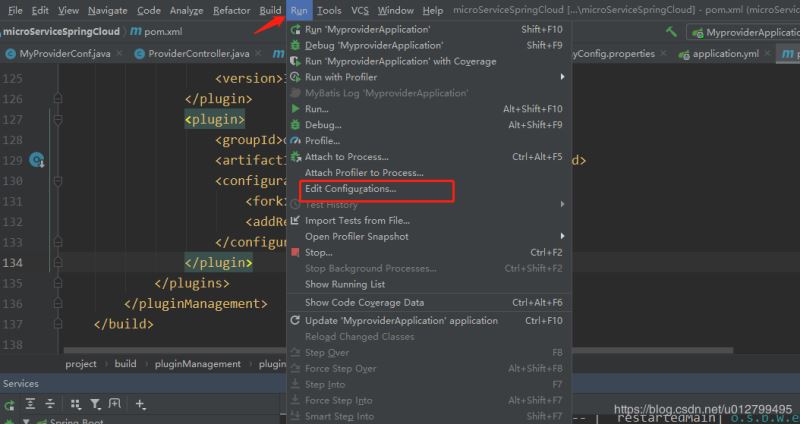
5.设置项目启动加载方式菜单栏选择 Run->Edit Configurations…
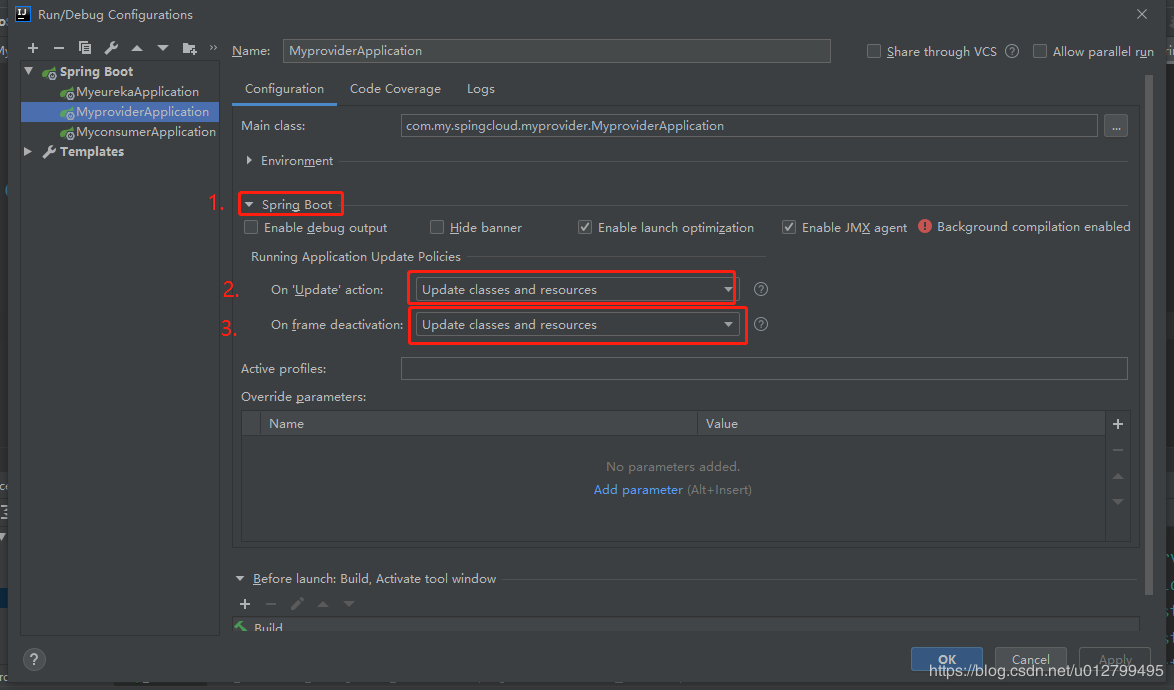
找到spring boot下的 On ‘Update' action 和 On frame deactivation ,选择 Update classes and resources
(注意:这步非常重要)
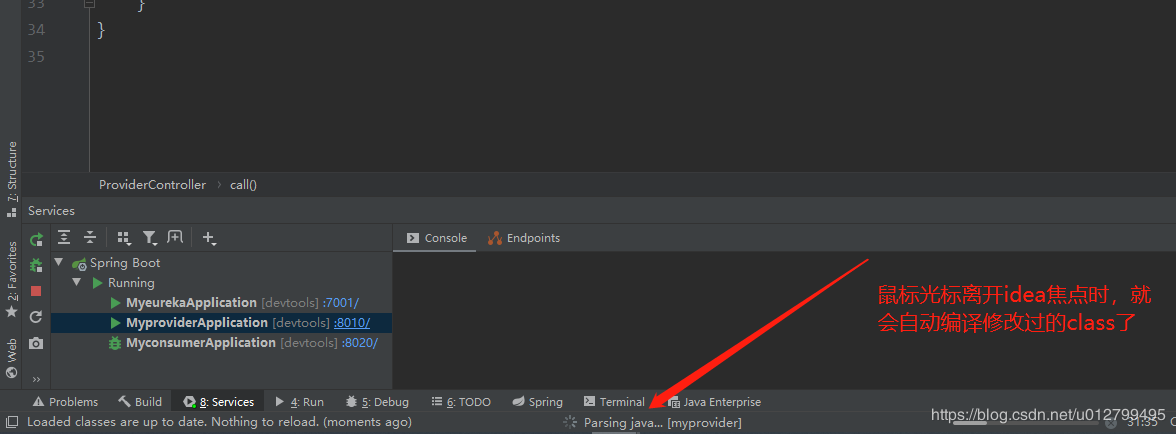
最后测试热部署,随便修改一个类中的代码,查看idea最下方的提示条,出现 build 后 紧接着 出现 parsing java… 表示正在重新编译,等待项目自动重新启动后就可以看见修改的类生效了
PS:下面看下SpringBoot在idea中配置热部署
导入热部署jar包
 <dependency>
  <groupId>org.springframework.boot</groupId>
  <artifactId>spring-boot-devtools</artifactId>
 </dependency>
IDEA使用:

