1.1 起步依赖原理分析
1.1.1 分析spring-boot-starter-parent
按住Ctrl点击pom.xml中的spring-boot-starter-parent,跳转到了spring-boot-starter-parent的pom.xml,xml配置如下(只摘抄了部分重点配置):
<parent>
  <groupId>org.springframework.boot</groupId>
  <artifactId>spring-boot-dependencies</artifactId>
  <version>2.0.1.RELEASE</version>
  <relativePath>../../spring-boot-dependencies</relativePath>
</parent>
按住Ctrl点击pom.xml中的spring-boot-starter-dependencies,跳转到了spring-boot-starter-dependencies的pom.xml,xml配置如下(只摘抄了部分重点配置):
<properties>
    <activemq.version>5.15.3</activemq.version>
    <antlr2.version>2.7.7</antlr2.version>
    <appengine-sdk.version>1.9.63</appengine-sdk.version>
    <artemis.version>2.4.0</artemis.version>
    <aspectj.version>1.8.13</aspectj.version>
    <assertj.version>3.9.1</assertj.version>
    <atomikos.version>4.0.6</atomikos.version>
    <bitronix.version>2.1.4</bitronix.version>
    <build-helper-maven-plugin.version>3.0.0</build-helper-maven-plugin.version>
    <byte-buddy.version>1.7.11</byte-buddy.version>
    ... ... ...
</properties>
<dependencyManagement>
    <dependencies>
        <dependency>
            <groupId>org.springframework.boot</groupId>
            <artifactId>spring-boot</artifactId>
            <version>2.0.1.RELEASE</version>
        <https://img.qb5200.com/download-x/dependency>
        <dependency>
            <groupId>org.springframework.boot</groupId>
            <artifactId>spring-boot-test</artifactId>
            <version>2.0.1.RELEASE</version>
        <https://img.qb5200.com/download-x/dependency>
        ... ... ...
    <https://img.qb5200.com/download-x/dependencies>
<https://img.qb5200.com/download-x/dependencyManagement>
<build>
    <pluginManagement>
        <plugins>
            <plugin>
                <groupId>org.jetbrains.kotlin</groupId>
                <artifactId>kotlin-maven-plugin</artifactId>
                <version>${kotlin.version}</version>
            </plugin>
            <plugin>
                <groupId>org.jooq</groupId>
                <artifactId>jooq-codegen-maven</artifactId>
                <version>${jooq.version}</version>
            </plugin>
            <plugin>
                <groupId>org.springframework.boot</groupId>
                <artifactId>spring-boot-maven-plugin</artifactId>
                <version>2.0.1.RELEASE</version>
            </plugin>
            ... ... ...
        </plugins>
    </pluginManagement>
</build>
从上面的spring-boot-starter-dependencies的pom.xml中我们可以发现,一部分坐标的版本、依赖管理、插件管理已经定义好,所以我们的SpringBoot工程继承spring-boot-starter-parent后已经具备版本锁定等配置了。所以起步依赖的作用就是进行依赖的传递。
1.1.2 分析spring-boot-starter-web
按住Ctrl点击pom.xml中的spring-boot-starter-web,跳转到了spring-boot-starter-web的pom.xml,xml配置如下(只摘抄了部分重点配置):
<?xml version="1.0" encoding="UTF-8"?>
<project xsi:schemaLocation="http://maven.apache.org/POM/4.0.0 http://maven.apache.org/xsd/maven-4.0.0.xsd" xmlns="http://maven.apache.org/POM/4.0.0"
    xmlns:xsi="http://www.w3.org/2001/XMLSchema-instance">
    <modelVersion>4.0.0</modelVersion>
    <parent>
        <groupId>org.springframework.boot</groupId>
        <artifactId>spring-boot-starters</artifactId>
        <version>2.0.1.RELEASE</version>
    </parent>
    <groupId>org.springframework.boot</groupId>
    <artifactId>spring-boot-starter-web</artifactId>
    <version>2.0.1.RELEASE</version>
    <name>Spring Boot Web Starter</name>

    <dependencies>
        <dependency>
            <groupId>org.springframework.boot</groupId>
            <artifactId>spring-boot-starter</artifactId>
            <version>2.0.1.RELEASE</version>
            <scope>compile</scope>
        <https://img.qb5200.com/download-x/dependency>
        <dependency>
            <groupId>org.springframework.boot</groupId>
            <artifactId>spring-boot-starter-json</artifactId>
            <version>2.0.1.RELEASE</version>
            <scope>compile</scope>
        <https://img.qb5200.com/download-x/dependency>
        <dependency>
            <groupId>org.springframework.boot</groupId>
            <artifactId>spring-boot-starter-tomcat</artifactId>
            <version>2.0.1.RELEASE</version>
            <scope>compile</scope>
        <https://img.qb5200.com/download-x/dependency>
        <dependency>
            <groupId>org.hibernate.validator</groupId>
            <artifactId>hibernate-validator</artifactId>
            <version>6.0.9.Final</version>
            <scope>compile</scope>
        <https://img.qb5200.com/download-x/dependency>
        <dependency>
            <groupId>org.springframework</groupId>
            <artifactId>spring-web</artifactId>
            <version>5.0.5.RELEASE</version>
            <scope>compile</scope>
        <https://img.qb5200.com/download-x/dependency>
        <dependency>
            <groupId>org.springframework</groupId>
            <artifactId>spring-webmvc</artifactId>
            <version>5.0.5.RELEASE</version>
            <scope>compile</scope>
        <https://img.qb5200.com/download-x/dependency>
    <https://img.qb5200.com/download-x/dependencies>
</project>
从上面的spring-boot-starter-web的pom.xml中我们可以发现,spring-boot-starter-web就是将web开发要使用的spring-web、spring-webmvc等坐标进行了“打包”,这样我们的工程只要引入spring-boot-starter-web起步依赖的坐标就可以进行web开发了,同样体现了依赖传递的作用。
1.2 自动配置原理解析
按住Ctrl点击查看启动类MySpringBootApplication上的注解@SpringBootApplication
@SpringBootApplication
public class MySpringBootApplication {
    public static void main(String[] args) {
        SpringApplication.run(MySpringBootApplication.class);
    }
}
注解@SpringBootApplication的源码
@Target(ElementType.TYPE)
@Retention(RetentionPolicy.RUNTIME)
@Documented
@Inherited
@SpringBootConfiguration
@EnableAutoConfiguration
@ComponentScan(excludeFilters = {
        @Filter(type = FilterType.CUSTOM, classes = TypeExcludeFilter.class),
        @Filter(type = FilterType.CUSTOM, classes = AutoConfigurationExcludeFilter.class) })
public @interface SpringBootApplication {

    /**
     * Exclude specific auto-configuration classes such that they will never be applied.
     * @return the classes to exclude
     */
    @AliasFor(annotation = EnableAutoConfiguration.class)
    Class<?>[] exclude() default {};

    ... ... ...

}
其中,
@SpringBootConfiguration:等同与@Configuration,既标注该类是Spring的一个配置类
@EnableAutoConfiguration:SpringBoot自动配置功能开启
按住Ctrl点击查看注解@EnableAutoConfiguration
@Target(ElementType.TYPE)
@Retention(RetentionPolicy.RUNTIME)
@Documented
@Inherited
@AutoConfigurationPackage
@Import(AutoConfigurationImportSelector.class)
public @interface EnableAutoConfiguration {
    ... ... ...
}
其中,@Import(AutoConfigurationImportSelector.class) 导入了AutoConfigurationImportSelector类
按住Ctrl点击查看AutoConfigurationImportSelector源码
public String[] selectImports(AnnotationMetadata annotationMetadata) {
        ... ... ...
        List<String> configurations = getCandidateConfigurations(annotationMetadata,
                                                                   attributes);
        configurations = removeDuplicates(configurations);
        Set<String> exclusions = getExclusions(annotationMetadata, attributes);
        checkExcludedClasses(configurations, exclusions);
        configurations.removeAll(exclusions);
        configurations = filter(configurations, autoConfigurationMetadata);
        fireAutoConfigurationImportEvents(configurations, exclusions);
        return StringUtils.toStringArray(configurations);
}


protected List<String> getCandidateConfigurations(AnnotationMetadata metadata,
            AnnotationAttributes attributes) {
        List<String> configurations = SpringFactoriesLoader.loadFactoryNames(
                getSpringFactoriesLoaderFactoryClass(), getBeanClassLoader());

        return configurations;
}
其中,SpringFactoriesLoader.loadFactoryNames 方法的作用就是从META-INF/spring.factories文件中读取指定类对应的类名称列表

spring.factories 文件中有关自动配置的配置信息如下:
... ... ...

org.springframework.boot.autoconfigure.web.reactive.function.client.WebClientAutoConfiguration,\
org.springframework.boot.autoconfigure.web.servlet.DispatcherServletAutoConfiguration,\
org.springframework.boot.autoconfigure.web.servlet.ServletWebServerFactoryAutoConfiguration,\
org.springframework.boot.autoconfigure.web.servlet.error.ErrorMvcAutoConfiguration,\
org.springframework.boot.autoconfigure.web.servlet.HttpEncodingAutoConfiguration,\
org.springframework.boot.autoconfigure.web.servlet.MultipartAutoConfiguration,\

... ... ...
上面配置文件存在大量的以Configuration为结尾的类名称,这些类就是存有自动配置信息的类,而SpringApplication在获取这些类名后再加载
我们以ServletWebServerFactoryAutoConfiguration为例来分析源码:
@Configuration
@AutoConfigureOrder(Ordered.HIGHEST_PRECEDENCE)
@ConditionalOnClass(ServletRequest.class)
@ConditionalOnWebApplication(type = Type.SERVLET)
@EnableConfigurationProperties(ServerProperties.class)
@Import({ ServletWebServerFactoryAutoConfiguration.BeanPostProcessorsRegistrar.class,
        ServletWebServerFactoryConfiguration.EmbeddedTomcat.class,
        ServletWebServerFactoryConfiguration.EmbeddedJetty.class,
        ServletWebServerFactoryConfiguration.EmbeddedUndertow.class })
public class ServletWebServerFactoryAutoConfiguration {
    ... ... ...
}
其中,
@EnableConfigurationProperties(ServerProperties.class) 代表加载ServerProperties服务器配置属性类
进入ServerProperties.class源码如下:
@ConfigurationProperties(prefix = "server", ignoreUnknownFields = true)
public class ServerProperties {

    /**
     * Server HTTP port.
     */
    private Integer port;

    /**
     * Network address to which the server should bind.
     */
    private InetAddress address;

    ... ... ...

}
其中,
prefix = "server" 表示SpringBoot配置文件中的前缀,SpringBoot会将配置文件中以server开始的属性映射到该类的字段中。映射关系如下:

二、SpringBoot的配置文件
2.1 SpringBoot配置文件类型
2.1.1 SpringBoot配置文件类型和作用
SpringBoot是基于约定的,所以很多配置都有默认值,但如果想使用自己的配置替换默认配置的话,就可以使用application.properties或者application.yml(application.yaml)进行配置。
SpringBoot默认会从Resources目录下加载application.properties或application.yml(application.yaml)文件
其中,application.properties文件是键值对类型的文件,之前一直在使用,所以此处不在对properties文件的格式进行阐述。除了properties文件外,SpringBoot还可以使用yml文件进行配置,下面对yml文件进行讲解。
2.1.2 application.yml配置文件
2.1.2.1 yml配置文件简介
YML文件格式是YAML (YAML Aint Markup Language)编写的文件格式,YAML是一种直观的能够被电脑识别的的数据数据序列化格式,并且容易被人类阅读,容易和脚本语言交互的,可以被支持YAML库的不同的编程语言程序导入,比如: C/C++, Ruby, Python, Java, Perl, C#, PHP等。YML文件是以数据为核心的,比传统的xml方式更加简洁。
YML文件的扩展名可以使用.yml或者.yaml。
2.1.2.2 yml配置文件的语法
2.1.2.2.1 配置普通数据
语法: key: value
示例代码:
name: haohao注意:value之前有一个空格
2.1.2.2.2 配置对象数据
语法:
key:
key1: value1
key2: value2
或者:
key: {key1: value1,key2: value2}
示例代码:
person:
  name: haohao
  age: 31
  addr: beijing

#或者

person: {name: haohao,age: 31,addr: beijing}
注意:key1前面的空格个数不限定,在yml语法中,相同缩进代表同一个级别
2.1.2.2.2 配置Map数据
同上面的对象写法
2.1.2.2.3 配置数组(List、Set)数据
语法:
key:
- value1
- value2
或者:
key: [value1,value2]
示例代码:
city:
  - beijing
  - tianjin
  - shanghai
  - chongqing

#或者

city: [beijing,tianjin,shanghai,chongqing]

#集合中的元素是对象形式
student:
  - name: zhangsan
    age: 18
    score: 100
  - name: lisi
    age: 28
    score: 88
  - name: wangwu
    age: 38
    score: 90
注意:value1与之间的 - 之间存在一个空格
2.1.3 SpringBoot配置信息的查询
上面提及过,SpringBoot的配置文件,主要的目的就是对配置信息进行修改的,但在配置时的key从哪里去查询呢?我们可以查阅SpringBoot的官方文档
文档URL:https:/https://img.qb5200.com/download-x/docs.spring.io/spring-boothttps://img.qb5200.com/download-x/docs/2.0.1.RELEASE/reference/htmlsingle/#common-application-properties
常用的配置摘抄如下:
# QUARTZ SCHEDULER (QuartzProperties)
spring.quartz.jdbc.initialize-schema=embedded # Database schema initialization mode.
spring.quartz.jdbc.schema=classpath:org/quartz/impl/jdbcjobstore/tables_@@platform@@.sql # Path to the SQL file to use to initialize the database schema.
spring.quartz.job-store-type=memory # Quartz job store type.
spring.quartz.properties.*= # Additional Quartz Scheduler properties.

# ----------------------------------------
# WEB PROPERTIES
# ----------------------------------------

# EMBEDDED SERVER CONFIGURATION (ServerProperties)
server.port=8080 # Server HTTP port.
server.servlet.context-path= # Context path of the application.
server.servlet.path=/ # Path of the main dispatcher servlet.

# HTTP encoding (HttpEncodingProperties)
spring.http.encoding.charset=UTF-8 # Charset of HTTP requests and responses. Added to the "Content-Type" header if not set explicitly.

# JACKSON (JacksonProperties)
spring.jackson.date-format= # Date format string or a fully-qualified date format class name. For instance, `yyyy-MM-dd HH:mm:ss`.

# SPRING MVC (WebMvcProperties)
spring.mvc.servlet.load-on-startup=-1 # Load on startup priority of the dispatcher servlet.
spring.mvc.static-path-pattern=/** # Path pattern used for static resources.
spring.mvc.view.prefix= # Spring MVC view prefix.
spring.mvc.view.suffix= # Spring MVC view suffix.

# DATASOURCE (DataSourceAutoConfiguration & DataSourceProperties)
spring.datasource.driver-class-name= # Fully qualified name of the JDBC driver. Auto-detected based on the URL by default.
spring.datasource.password= # Login password of the database.
spring.datasource.url= # JDBC URL of the database.
spring.datasource.username= # Login username of the database.

# JEST (Elasticsearch HTTP client) (JestProperties)
spring.elasticsearch.jest.password= # Login password.
spring.elasticsearch.jest.proxy.host= # Proxy host the HTTP client should use.
spring.elasticsearch.jest.proxy.port= # Proxy port the HTTP client should use.
spring.elasticsearch.jest.read-timeout=3s # Read timeout.
spring.elasticsearch.jest.username= # Login username.
我们可以通过配置application.poperties 或者 application.yml 来修改SpringBoot的默认配置
例如:
application.properties文件
server.port=8888
server.servlet.context-path=demo
application.yml文件
server:
  port: 8888
  servlet:
    context-path: https://img.qb5200.com/download-x/demo
2.2 配置文件与配置类的属性映射方式
2.2.1 使用注解@Value映射
我们可以通过@Value注解将配置文件中的值映射到一个Spring管理的Bean的字段上
例如:
application.properties配置如下:
person:
  name: zhangsan
  age: 18
或者,application.yml配置如下:
person:
  name: zhangsan
  age: 18
实体Bean代码如下:
@Controller
public class QuickStartController {
@Value("${person.name}")
private String name;
@Value("${person.age}")
private Integer age;
@RequestMapping("/quick")
@ResponseBody
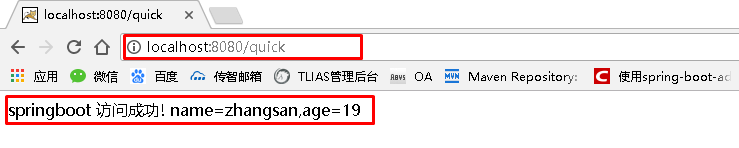
public String quick(){
return "springboot 访问成功! name="+name+",age="+age;
}
}浏览器访问地址:http://localhost:8080/quick 结果如下:
2.2.2 使用注解@ConfigurationProperties映射
通过注解@ConfigurationProperties(prefix="配置文件中的key的前缀")可以将配置文件中的配置自动与实体进行映射
application.properties配置如下:
person:
  name: zhangsan
  age: 18
或者,application.yml配置如下:
person:
  name: zhangsan
  age: 18
实体Bean代码如下:
@Controller
@ConfigurationProperties(prefix = "person")
public class QuickStartController {

    private String name;
    private Integer age;

    @RequestMapping("/quick")
    @ResponseBody
    public String quick(){
        return "springboot 访问成功! name="+name+",age="+age;
    }

    public void setName(String name) {
        this.name = name;
    }

    public void setAge(Integer age) {
        this.age = age;
    }
}
浏览器访问地址:http://localhost:8080/quick
注意:使用@ConfigurationProperties方式可以进行配置文件与实体字段的自动映射,但需要字段必须提供set方法才可以,而使用@Value注解修饰的字段不需要提供set方法

