本文实例讲述了gearman+mysql方式实现持久化操作。分享给大家供大家参考,具体如下:
1、为什么要持久化?
gearman的job server中的工作队列存储在内存中,一旦服务器有未处理的任务时重启或者宕机,那么这些任务就会丢失。
持久化存储队列可以允许添加后台任务,并将其存储在外部的持久型队列里(比如MySQL数据库)。
2、关于gearman的持久化的文章,建议可以看官方文档
http://gearman.org/manual/job_server/#persistent_queues
3、创建用于持久化的数据库和表
CREATE DATABASE gearman;

CREATE TABLE `gearman_queue` (
`unique_key` varchar(64) NOT NULL,
`function_name` varchar(255) NOT NULL,
`priority` int(11) NOT NULL,
`data` longblob NOT NULL,
`when_to_run` int(11),
PRIMARY KEY (`unique_key`)
) ENGINE=InnoDB DEFAULT CHARSET=utf8;
4、创建gearman用户
> create user 'gearman'@'%' IDENTIFIED BY '123456';
> grant all on gearman.* TO 'gearman'@'%';
> flush privileges;
5、启动gearmand时指定持久化参数
> gearmand -q libdrizzle \
--libdrizzle-host=192.168.1.100 \
--libdrizzle-port=3306 \
--libdrizzle-user=gearman \
--libdrizzle-password=123456 \
--libdrizzle-db=gearman \
--libdrizzle-table=gearman_queue \
--libdrizzle-mysql
或者使用如下
> gearmand -q mysql \
--mysql-host=192.168.1.100 \
--mysql-port=3306 \
--mysql-user=gearman \
--mysql-password=123456 \
--mysql-db=gearman \
--mysql-table=gearman_queue
如果出现如下问题,说明你在编译安装gearman时没有把libdrizzle装上
gearmand: unrecognised option '--libdrizzle-host=192.168.1.100'
在如下网址,下载libdrizzle
https://launchpad.net/libdrizzle/+download
如:libdrizzle-5.1.4.tar.gz
安装libdrizzle
> tar xf libdrizzle-5.1.4.tar.gz
> cd libdrizzle-5.1.4
这里最好不要指定--prefix,因为你指定了其它目录,下面gearman编译时可能会找不到相关头文件和链接库,需要你手动添加软链接
> ./configure
> make && make install
然后我们重新编译安装gearman
> tar xf gearmand-1.1.12.tar.gz
> cd gearmand-1.1.12
如果configure的有哪些参数不清楚,可以用下面命令查看
> ./configure --help
这里需要安装mysql-devel,以便gearman支持mysql的持久化
> yum install mysql-server mysql-devel
因为我早先装过gearman,没有指定--prefix,所以这里也没有指定,有需要的可以自行指定
> ./configure
> make && make install
configure完成最后显示的一段信息
* LIBS:
* LDFLAGS Flags:
* Assertions enabled: no
* Debug enabled: no
* Warnings as failure: no
* Building with libsqlite3 no
* Building with libdrizzle yes
* Building with libmemcached not found
* Building with libpq no
* Building with tokyocabinet no
* Building with libmysql yes
* SSL enabled: no
* cyassl found: no
* openssl found: yes
* make -j: 2
* VCS checkout: no
* sphinx-build: :
最后可以看到libdrizzle和libmysql那地方显示yes
查看是否安装上
> gearmand --help
如果出现如下错误
gearmand: error while loading shared libraries: libdrizzle.so.9: cannot open shared object file: No such file or directory
请打开修改/etc/ld.so.conf
> vi /etc/ld.so.conf
加入如下一句话
/usr/local/lib
运行ldconfig
> ldconfig
再次运行上面的gearmand --help,如果出现如下信息,则安装成功
builtin:

libdrizzle:
--libdrizzle-host arg (=localhost) Host of server.
--libdrizzle-port arg (=3306) Port of server. (by default Drizzle)
--libdrizzle-uds arg Unix domain socket for server.
--libdrizzle-user arg (=root) User name for authentication.
--libdrizzle-password arg Password for authentication.
--libdrizzle-db arg (=gearman) Database to use.
--libdrizzle-table arg (=queue) Table to use.
--libdrizzle-mysql Use MySQL protocol.

MySQL:
--mysql-host arg (=localhost) MySQL host.
--mysql-port arg (=3306) Port of server. (by default 3306)
--mysql-user arg MySQL user.
--mysql-password arg MySQL user password.
--mysql-db arg MySQL database.
--mysql-table arg (=gearman_queue) MySQL table name.
通过libdrizzle启动gearmand如果出现如下问题
gearmand: Error while initializing the queue : libdrizzle
并且日志里面的记录是这样的
ERROR 2017-02-22 07:51:02.536574 [ main ] Failed to initialize libdrizzle:
initialize(QUEUE_ERROR) -> libgearman-server/queue.cc:246
不知道是不是mysql版本太高的原因,还是其他的原因,如果大家试了实在不行还是换另一个方式,另一方式我测试是成功的。
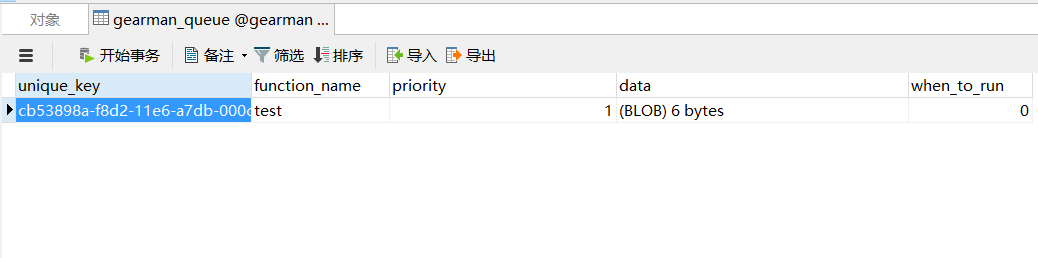
创建一个后台job
> gearman -f test -b 123456
查看数据库如下:
希望本文所述对大家MySQL数据库计有所帮助。

