最近由于工作要求:前端采用vue开发,后端采用springboot开发,前后端分离开发,最后前端页面又整合到后端来。经历多次采坑,总结以下方案:
vue打包后,会生成dist目录
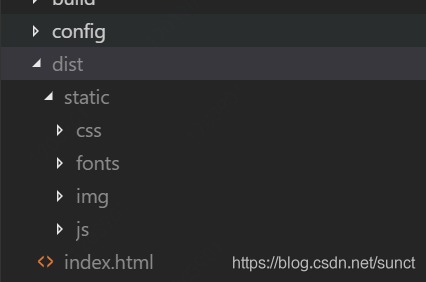
springboot静态资源目录如下:

SpringBoot处理静态资源和页面,设置如下:
@Override
public void addResourceHandlers(ResourceHandlerRegistry registry) {
 	registry.addResourceHandler("/static/**").addResourceLocations("classpath:/static/");
	super.addResourceHandlers(registry);
}
页面模板设置,如下:
#页面模板设置
spring.thymeleaf.option=classpath:/templates/
spring.thymeleaf.suffix=.html
spring.thymeleaf.mode=HTML5
spring.thymeleaf.encoding=UTF-8
spring.thymeleaf.content-type=text/html
spring.thymeleaf.cache=false
部署方案:
dist的index.html 直接放在templates目录下
dist的css、fonts、img、js 直接放在static目录下
vue使用vue-cli打包后,vendor就将vue.js其他引用的包一起压缩打包进去,导致vendor文件超过1M,影响页面加载速度
本项目使用了vue、vue-router、iview、axios、echarts等
(1)使用vue、vue-router、iview、axios、echarts等cnd引用
在index.html文件中,增加:
<script src="https://unpkg.com/vue@2.5.2/dist/vue.min.js"></script>
<script src="https://unpkg.com/vue-router@3.0.1/dist/vue-router.min.js"></script>
<script src="https://unpkg.com/iview@3.4.0/dist/iview.min.js"></script>
<script src="https://unpkg.com/axios@0.18.0/dist/axios.min.js"></script>
<script src="https://unpkg.com/echarts@4.2.1/dist/echarts.min.js"></script>
(2)打包时,排除vue、vue-router、iview、axios、echarts等打包
在webpack.base.conf.js文件中,module.exports={…} 方法中添加
module.exports = {
	...
	externals:{
	  'vue':'Vue',
	  'axios':'axios',
	  'vue-router':'VueRouter',
	  'iview':'iview',
	  'echarts':'echarts',
  },
  ...
}
这里有注意的是:命名问题
比如:vue-router的在https://unpkg.com/vue-router@3.0.1/dist/vue-router.min.js中默认采用VueRouter,所以在import vue-router一定要使用VueRouter,而不能使用其他别名。
vue默认别名是Vue
axios默认别名是axios
vue-router默认别名是VueRouter
iview默认别名是iview
echarts默认别名是echarts
例子:
import Vue from 'vue'
import VueRouter from 'vue-router'
import iview from 'iview'
import echarts from 'echarts'

Vue.use(VueRouter)

export default new VueRouter({
 mode: 'history',
 ...
})
(3)vue-router的路由页面设置为按需加载
export default new VueRouter({
 mode: 'history',
 routes: [
  //页面1
  {
   path: '/Page1',
   name: 'page1',
   component: () => import('@/views/Page1.vue')
  },
  //页面2
  {
   path: '/Page2',
   name: 'page2',
   component: () => import('@/views/Page2.vue')
  }
 ]
 });
(4)重新打包后vendor.js文件就小了,可以小到1k哦
百度上有很多处理方案,比如:使用errorPage方式处理,nginx配置等,这些问题比较繁琐,而且在部署过程中,一堆问题。
经过多次尝试,发现有一个最简单方法,Controller直接url路径配置到index.html即可,而且轻松解决history模式带来的后端问题,如下:
@ApiOperation(value = "", hidden = true)
@RequestMapping(path = "/Page1")
public String page1() {
  return "index";
}

@ApiOperation(value = "", hidden = true)
@RequestMapping(path = "/Page2")
public String page2() {
  return "index";
}
这种方案非常有利于后端开发人员做更多的进一步操作,比如:给每个页面增加页面权限等。
注意:该方案目前适用于前端页面整合到后端的项目工程。

