私服是架设在局域网的一种特殊的远程仓库。可以代理远程仓库以及部署第三方构件。
有了私服之后,当maven下载构件时,直接请求私服,私服上存在则下载到本地仓库。否则会请求外部的远程仓库,将构建下载到私服,再提供给本地仓库下载。

构建私服的软件,我们这边采用Sonatype Nexus


解压缩:

在bin下执行:
./nexus.exe /run
访问:8081端口,可以修改端口。
账号:admin
密码:admin123
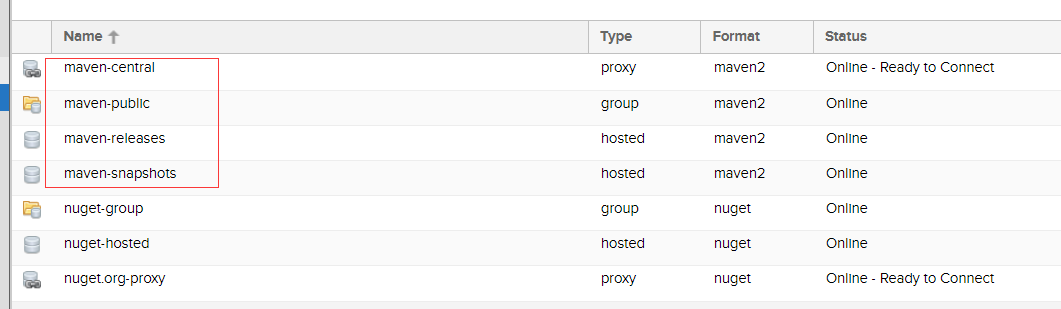
maven-central:maven中央库,默认从https://repo1.maven.org/maven2/拉取jar
maven-releases:私库发行版jar
maven-snapshots:私库快照(调试版本)jar
maven-public:仓库分组,把上面三个仓库组合在一起对外提供服务,在本地maven基础配置settings.xml中使用。
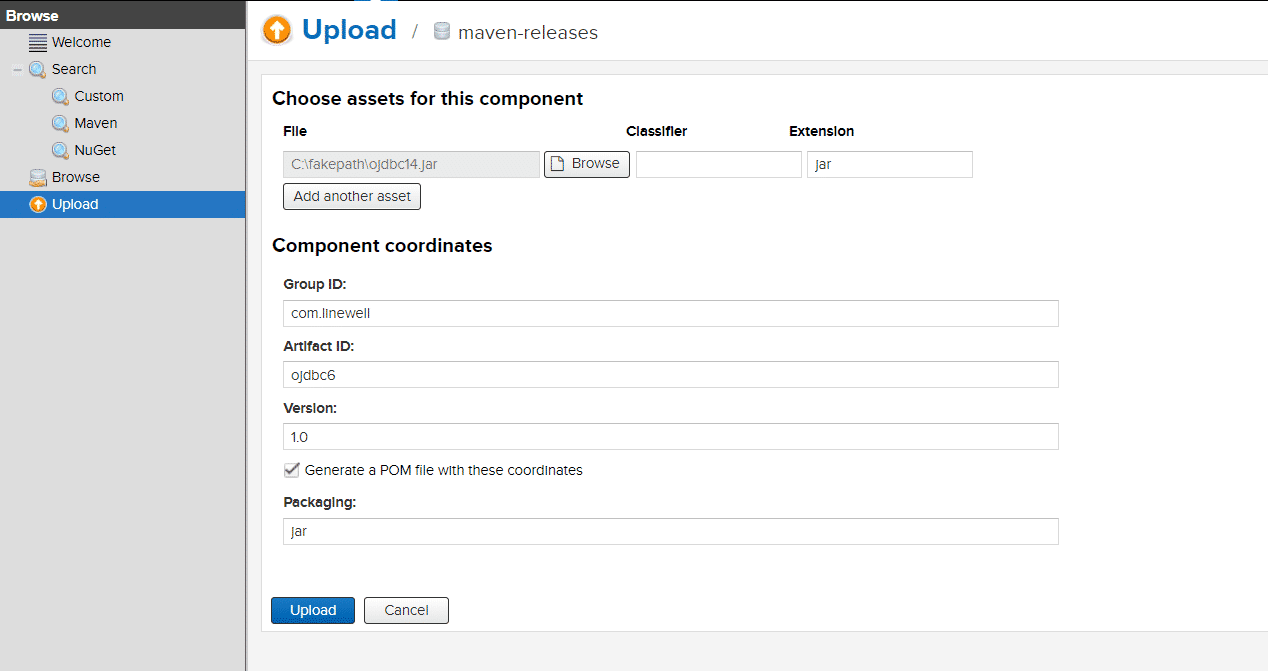
有些jar在中心仓库是没有的,如oracle的驱动。
测试第三方jar包,手动导入到私服中
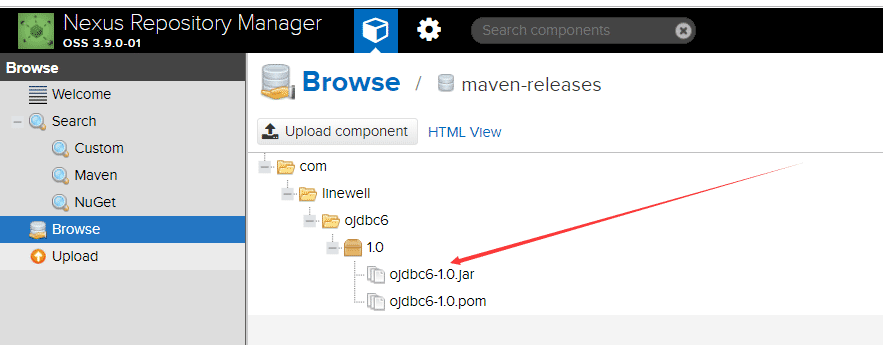
可以看到已经加载进来了。
maven关联私服
配置maven的setting文件:
1)配置账号密码
|-->
 <servers>
  <!-- server
   | Specifies the authentication information to use when connecting to a particular server, identified by
   | a unique name within the system (referred to by the 'id' attribute below).
   |
   | NOTE: You should either specify username/password OR privateKey/passphrase, since these pairings are
   |    used together.
   |
  <server>
   <id>deploymentRepo</id>
   <username>repouser</username>
   <password>repopwd</password>
  </server>
  -->

  <!-- Another sample, using keys to authenticate.
  <server>
   <id>siteServer</id>
   <privateKey>/path/to/private/key</privateKey>
   <passphrase>optional; leave empty if not used.</passphrase>
  </server>
  -->
  <server>
    <id>nexus-public</id>
    <username>admin</username>
    <password>admin123</password>
  </server>
 </servers>
2)配置profile, 在<profiles></profiles>中添加, 这边配置repository的id需要跟上面的server配置的id一样,这样才可以认证通过。
<profile>
   <id>nexus</id>
   <repositories>
    <repository>
     <id>nexus-public</id>
     <name>private reposity</name>
     <url>http://localhost:8081/repository/maven-public/</url>
     <layout>default</layout>
     <snapshotPolicy>always</snapshotPolicy>
    </repository>
   </repositories>
  </profile>
3)使profile生效
 <activeProfiles>
  <activeProfile>nexus</activeProfile>
 </activeProfiles>
创建一个项目,添加依赖,可以看到把我们刚才手动加的jar给依赖过来了。

把maven项目部署到私服
这边repository中配置的id需要跟maven setting中配置的server的id需要一样。需要在本项目的pom.xml添加如下配置。
<distributionManagement>
  <repository>
    <id>nexus-public</id>
    <name>core release repository</name>
    <url>http://localhost:8081/repository/maven-releases/</url>
  </repository>
  <snapshotRepository>
    <id>nexus-public</id>
    <name>core snapshots repository</name>
    <url>http://localhost:8081/repository/maven-snapshots/</url>
  </snapshotRepository>
</distributionManagement>
执行命令:
mvn deploy
需要等待执行完毕。

这边就可以看见,跑到私服里面来了。

