> Docker已经上市很多年,不是什么新鲜事物了,很多企业或者开发同学以前也不多不少有所接触,但是有实操经验的人不多,本系列教程主要偏重实战,尽量讲干货,会根据本人理解去做阐述,具体官方概念可以查阅官方教程,因为本系列教程对前一章节有一定依赖,建议先学习前面章节内容。
本系列教程导航:
[Docker深入浅出系列 | 容器初体验](https://www.cnblogs.com/evan-liang/p/12237400.html)
[Docker深入浅出系列 | Image实战演练](https://www.cnblogs.com/evan-liang/p/12244304.html)
[Docker深入浅出系列 | 单节点多容器网络通信](https://www.cnblogs.com/evan-liang/p/12271468.html)
[Docker深入浅出系列 | 容器数据持久化](https://www.cnblogs.com/evan-liang/p/12372371.html)
[Docker深入浅出系列 | 单机Nginx+Springboot实战](https:////www.cnblogs.com/evan-liang/p/12390315.html)
[Docker深入浅出系列 | Docker Compose多容器实战](https:////www.cnblogs.com/evan-liang/p/12390315.html)
教程目的:
- 了解harbor是什么&为什么要用
- 了解harbor的搭建流程
- 了解harbor的基本操作
***
# Harbor基本概念
## Harbor是什么
**官方概念:** Harbor是一个开放源代码容器映像镜像表,可通过基于角色的访问控制来保护镜像,扫描镜像中的漏洞并将镜像签名为受信任。 作为CNCF孵化项目,Harbor提供合规性,性能和互操作性,以帮助您跨Kubernetes和Docker等云原生计算平台持续,安全地管理镜像。
简单来说,Harbor就是一个开源的镜像管理仓库,类似Github一样,可以让我们存放一些镜像文件
更多详细内容,可以查看[Harbor 官方文档](https://goharbor.iohttps://img.qb5200.com/download-x/docs/1.10/working-with-projects/working-with-images/pulling-pushing-images/)
## 为什么要用
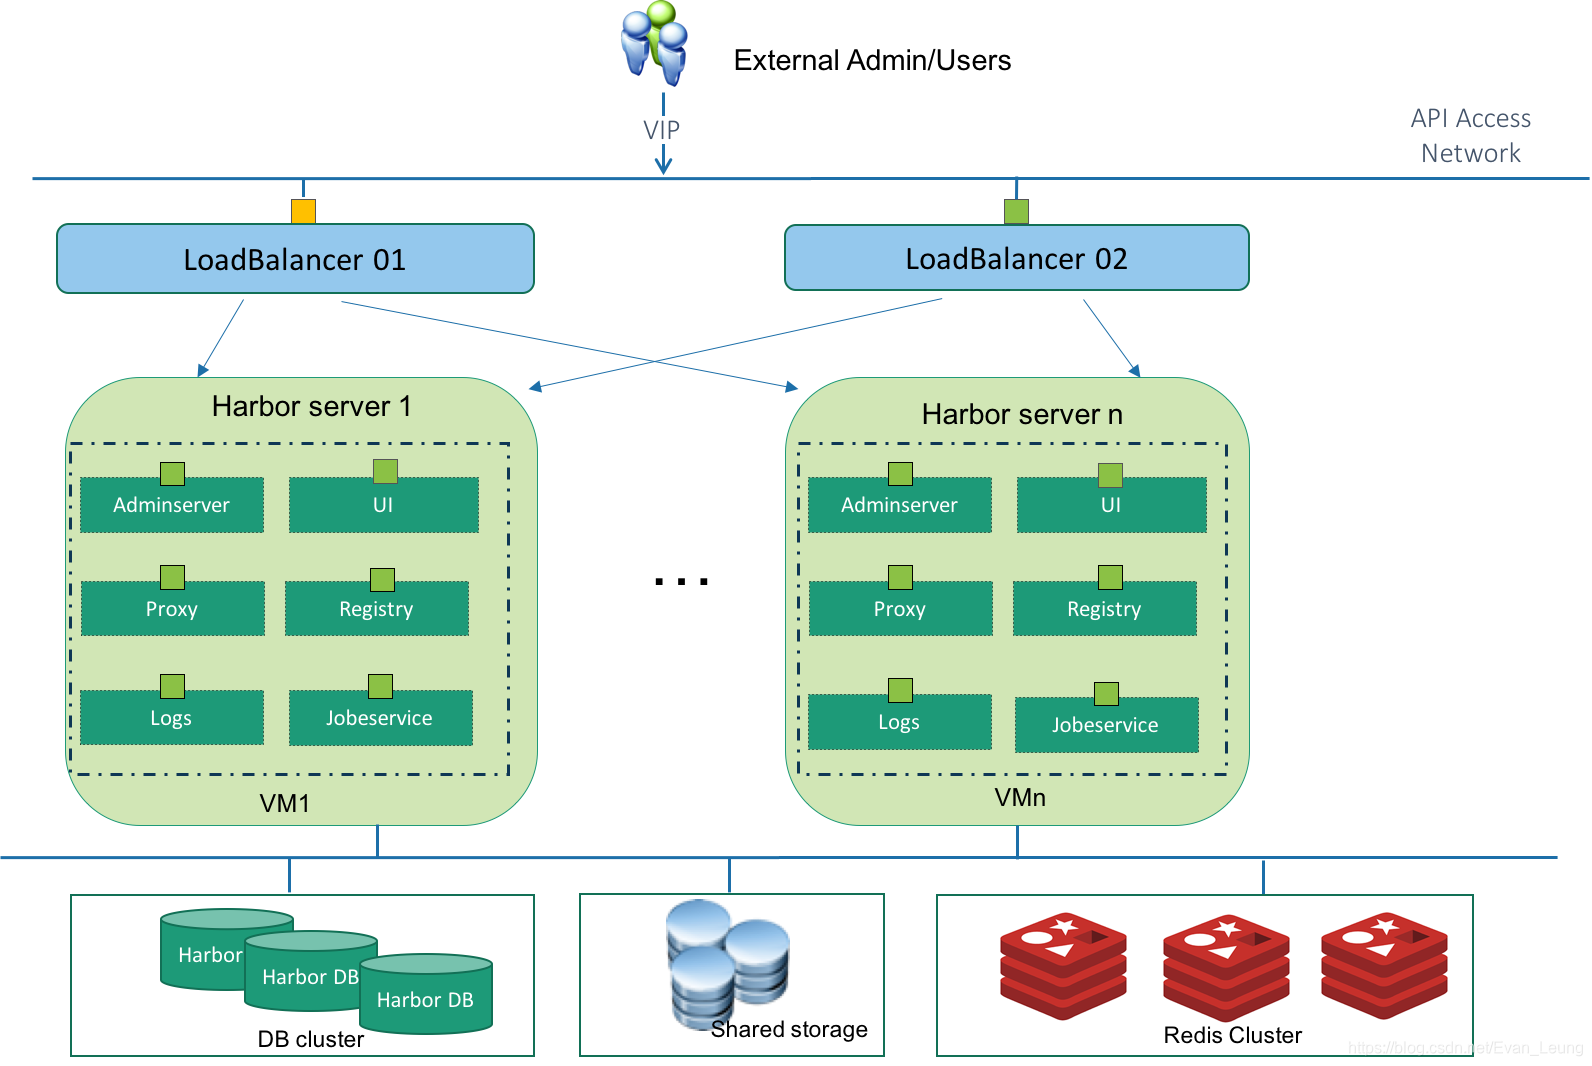
有动手跟着我前面教程练习的同学应该都有感受,之前的Springboot项目每次都需要在服务器创建镜像,当我有多台服务器需要用到这个镜像,我还得重复在每台服务器上创建一次,那有没有一个中间存储服务帮我们管理这些镜像,让所有的服务器可以共享这个镜像文件呢?Harbor的作用就是帮我们管理镜像,采用分布式架构,让我们可以在任意服务器拉去我们构建好的镜像文件。然后又会有人问我们不是已经有```docker hub```或者 ```docker hub```这些远程仓库了吗?确实,但是当我们需要搭建一些私有镜像仓库,不想把公司项目对外公开的时候,Harbor就很有用了,就像很多公司也会在自己公司搭建私有的nexus服务器来管理公司内部的应用package。
***
# 搭建Harbor镜像仓库
## 下载
到github选择一个```harbor```release版本下载
```https://github.com/goharbor/harbor/releases```
## 上传到服务器
上传到你的linux服务器,我这里沿用上一章创建的manager节点
```bash
[root@manager-node harbor]# ls
common.sh harbor.yml LICENSE
harbor.v1.10.1.tar.gz install.sh prepare
```
上面是harbor应用解压后的文件
## 修改harbor配置
修改harbor配置文件
harbor.yml
```yml
#设置域名
hostname: 192.168.101.11
#设置http参数
# http related config
http:
# port for http, default is 80. If https enabled, this port will redirect to https port
port: 8090
#设置管理员密码
harbor_admin_password: evan123
#屏蔽https
#https:
# https port for harbor, default is 443
# port: 443
```
上面修改了hostname为我虚拟机的ip,端口把默认```80```端口替换成```8090```,并且修改了管理员密码为```evan123```。需要注意,我这里屏蔽了```https```,如果大家需要开启```https```,需要配置证书和key到指定位置
## 开启Docker Http访问权限
Docker默认是不支持http访问注册表,否则后面使用docker去访问harbor服务,入报如下错误:
```bash
http: server gave HTTP response to HTTPS client
```
这里需要先修改下```/etchttps://img.qb5200.com/download-x/dockerhttps://img.qb5200.com/download-x/daemon.json```配置,加入以下配置
```bash
{
"insecure-registries" : ["192.168.101.11:8090"]
}
```
重启docker服务
```bash
systemctl restart docker
```
## 启动Harbor应用
假如没有```Docker```环境,```harbor```会启动报错
```bash
[root@manager-node harbor]# sh install.sh
[Step 0]: checking if docker is installed ...
Note: docker version: 19.03.7
[Step 1]: checking docker-compose is installed ...
Note: docker-compose version: 1.25.0
[Step 2]: loading Harbor images ...
Cannot connect to the Docker daemon at unix:///var/runhttps://img.qb5200.com/download-x/docker.sock. Is the docker daemon running?
```
需要先安装```Docker```和```docker-compose```组件,这里就不多说了,大家可以参考前面章节的安装教程
当启动Docker后,执行```install.sh```会自动完成安装
```bash
[root@manager-node harbor]# sh install.sh
...
Creating network "harbor_harbor" with the default driver
Creating harbor-log ... done
Creating harbor-portal ... done
Creating registry ... done
Creating redis ... done
Creating harbor-db ... done
Creating registryctl ... done
Creating harbor-core ... done
Creating nginx ... done
Creating harbor-jobservice ... done
✔ ----Harbor has been installed and started successfully.----
```
上面显示已经安装成功了
## 访问Harbor应用
在浏览器输入上面我们配置的ip和端口```192.168.101.11:8090```,就会看到```harbor```登陆页面
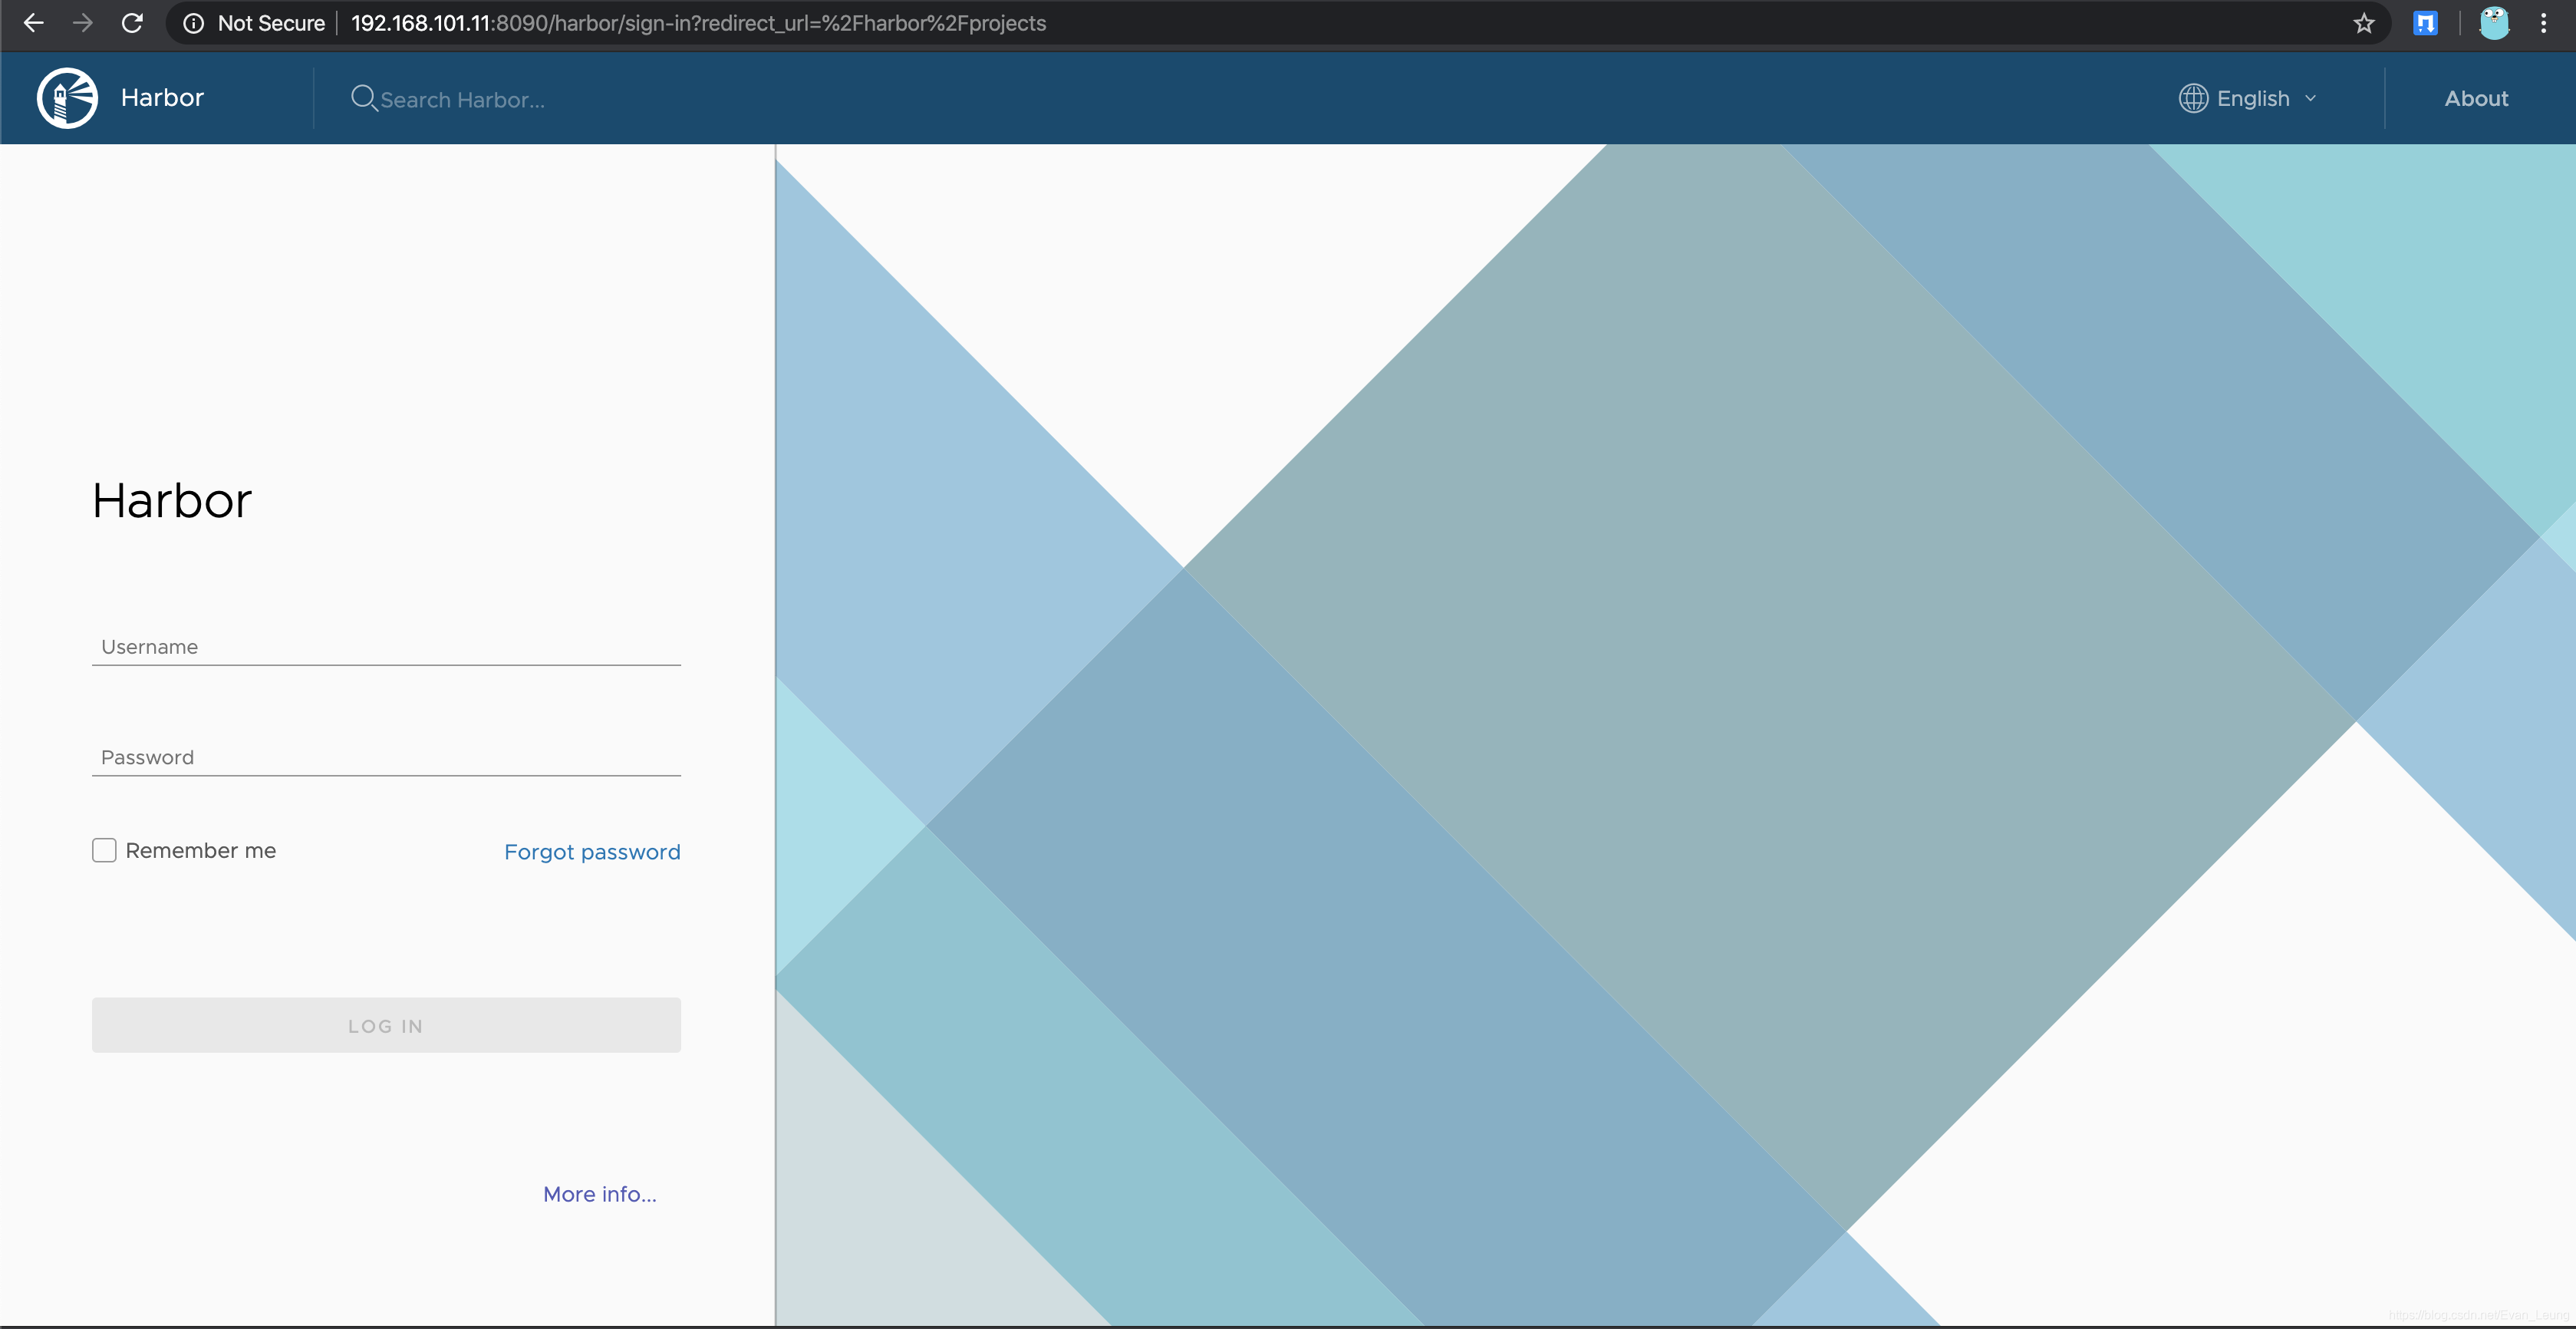
## 登陆Harbor
这里使用我们上面的定义的密码登陆
- 账号 - ```admin```
- 密码 - ```evan123```
***
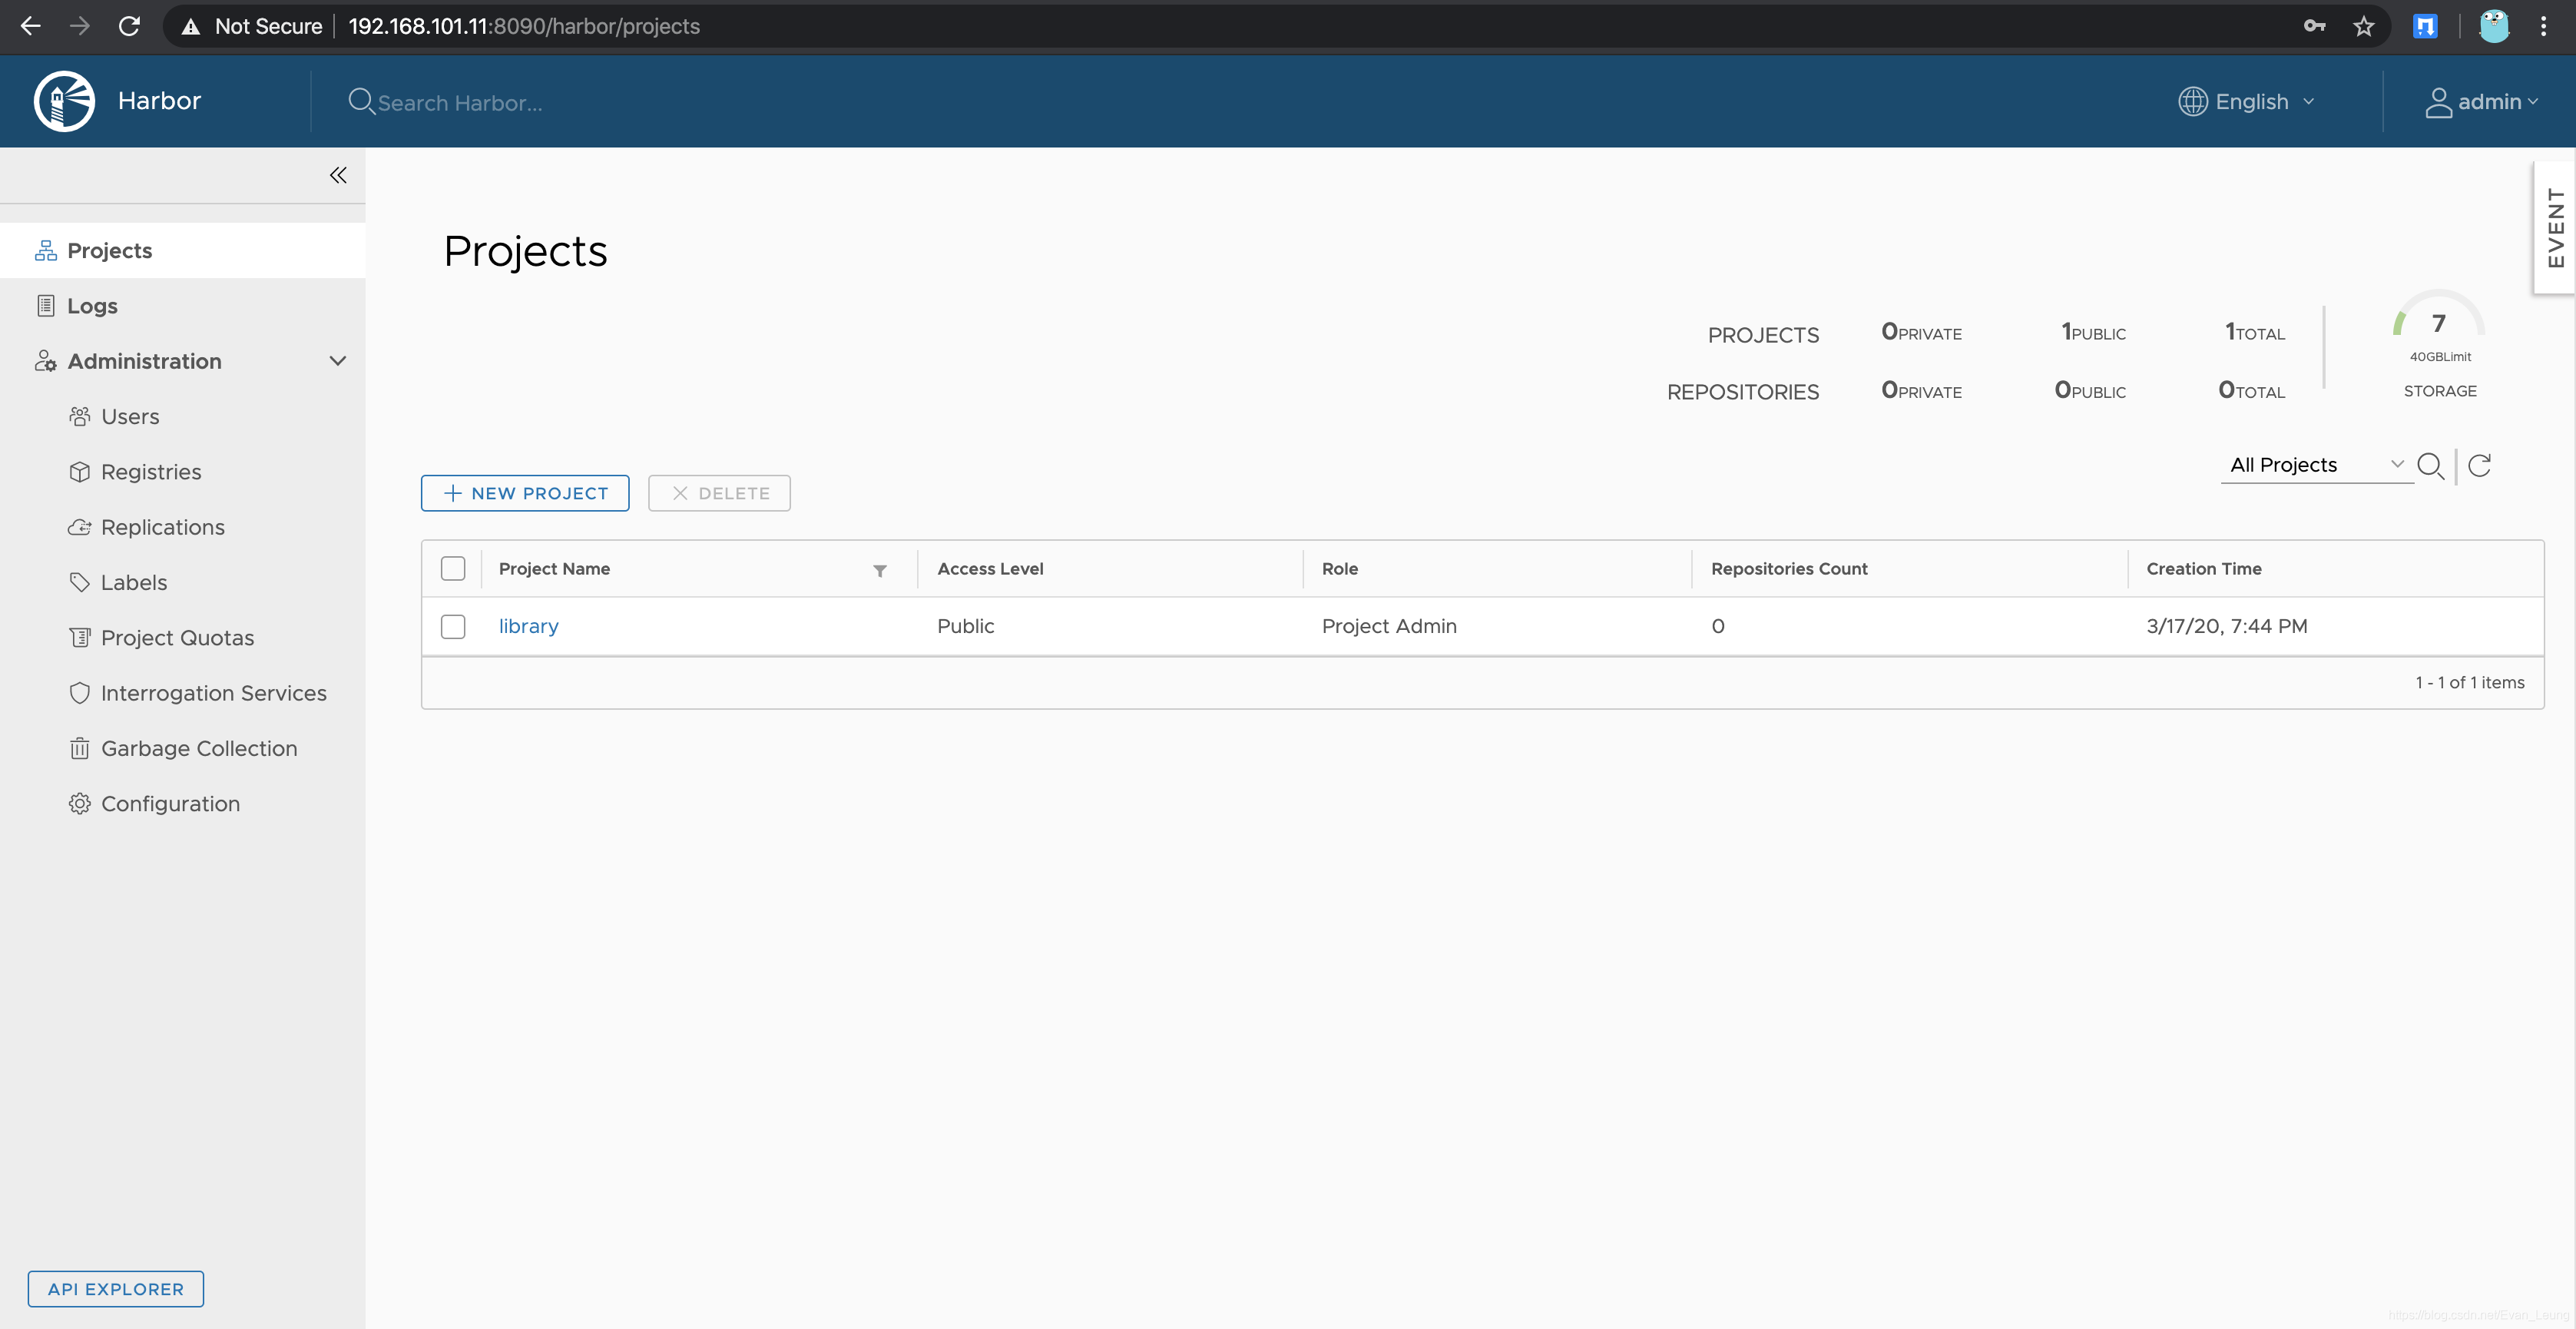
# 创建你第一个Harbor项目
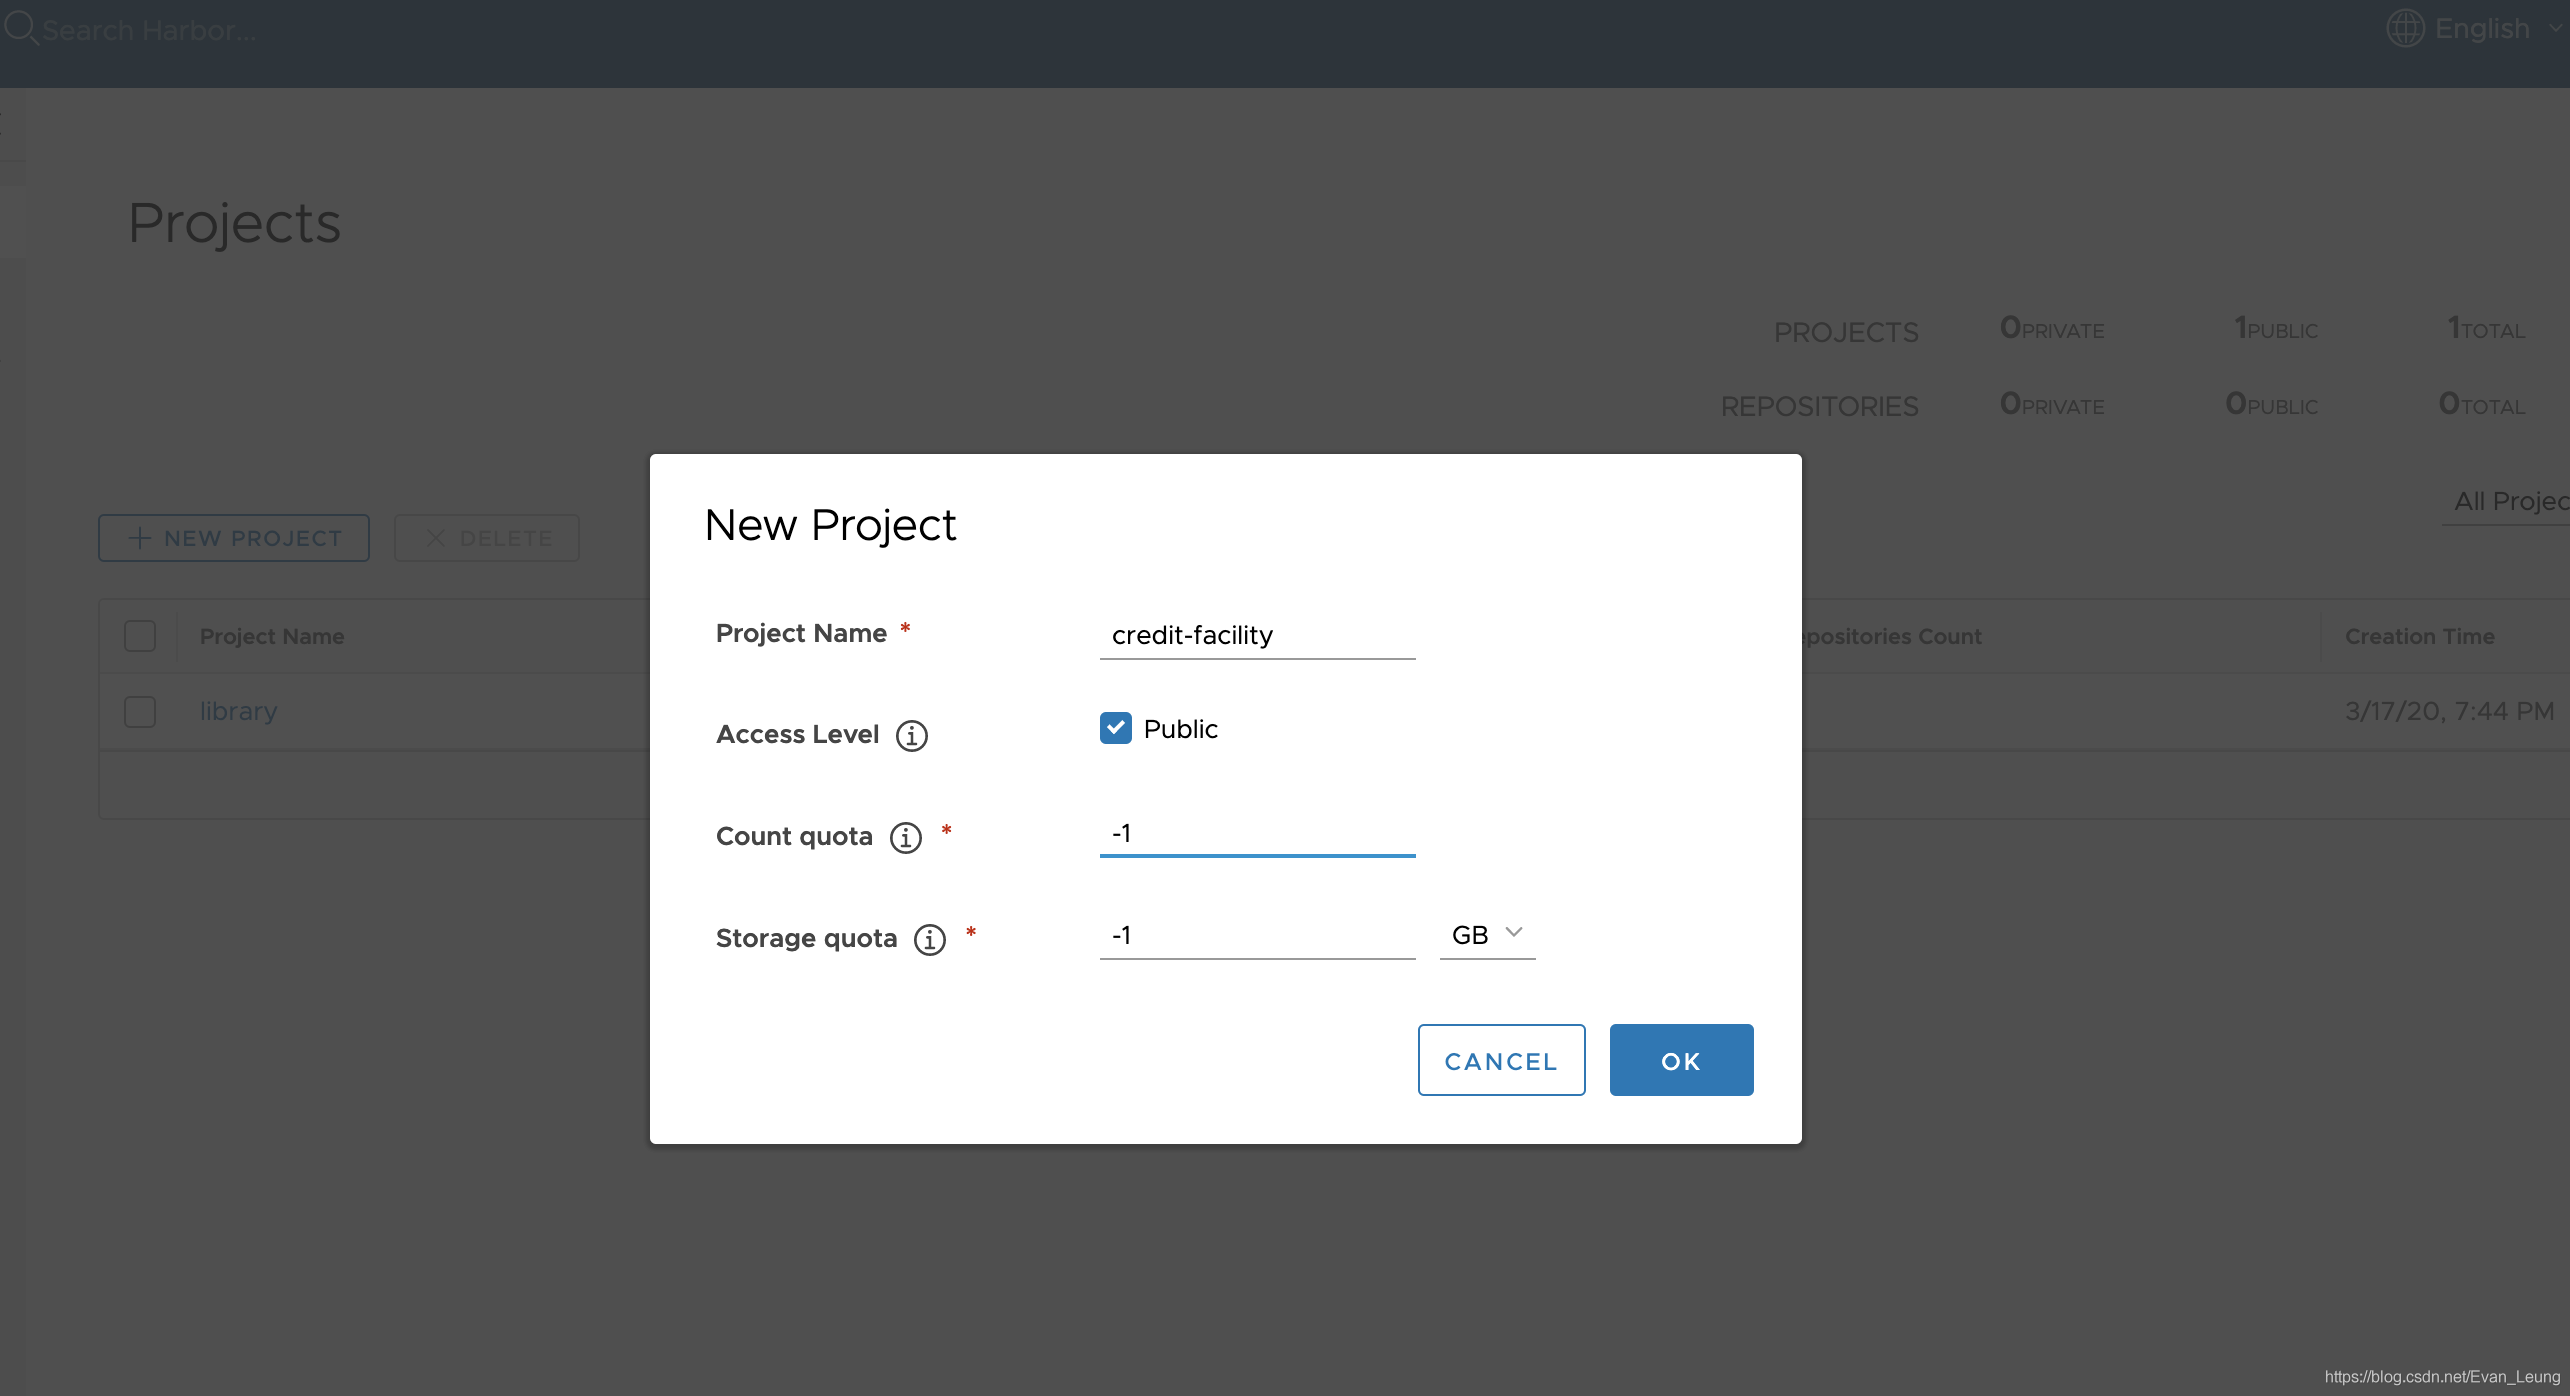
## 创建项目
点击```New```会进入项目创建对话框,这里填入项目名称即可,这里的访问级别我选择```public```
## 在使用Docker登陆Harbor
在使用Harbor之前,要在docker环境登陆Harbor服务
```bash
[root@manager-node harbor]# docker login 192.168.101.11:8090
Username: admin
Password:
WARNING! Your password will be stored unencrypted in /root/.docker/config.json.
Configure a credential helper to remove this warning. See
https:/https://img.qb5200.com/download-x/docs.docker.com/engine/reference/commandline/login/#credentials-store
Login Succeeded
```
## 对现有的Image打Tag
1. 查看现有的Image,这里我在前面教程已经创建了一些image
```bash
[root@manager-node credit-facility]# docker images
REPOSITORY TAG IMAGE ID CREATED SIZE
credit-facility-image latest 28948b936fac 2 days ago 130MB
```
2. 这里我选择```credit-facility-image```打个标签,新标签为```credit-facility:1.0```
```bash
docker tag credit-facility-image:latest credit-facility:1.0
```
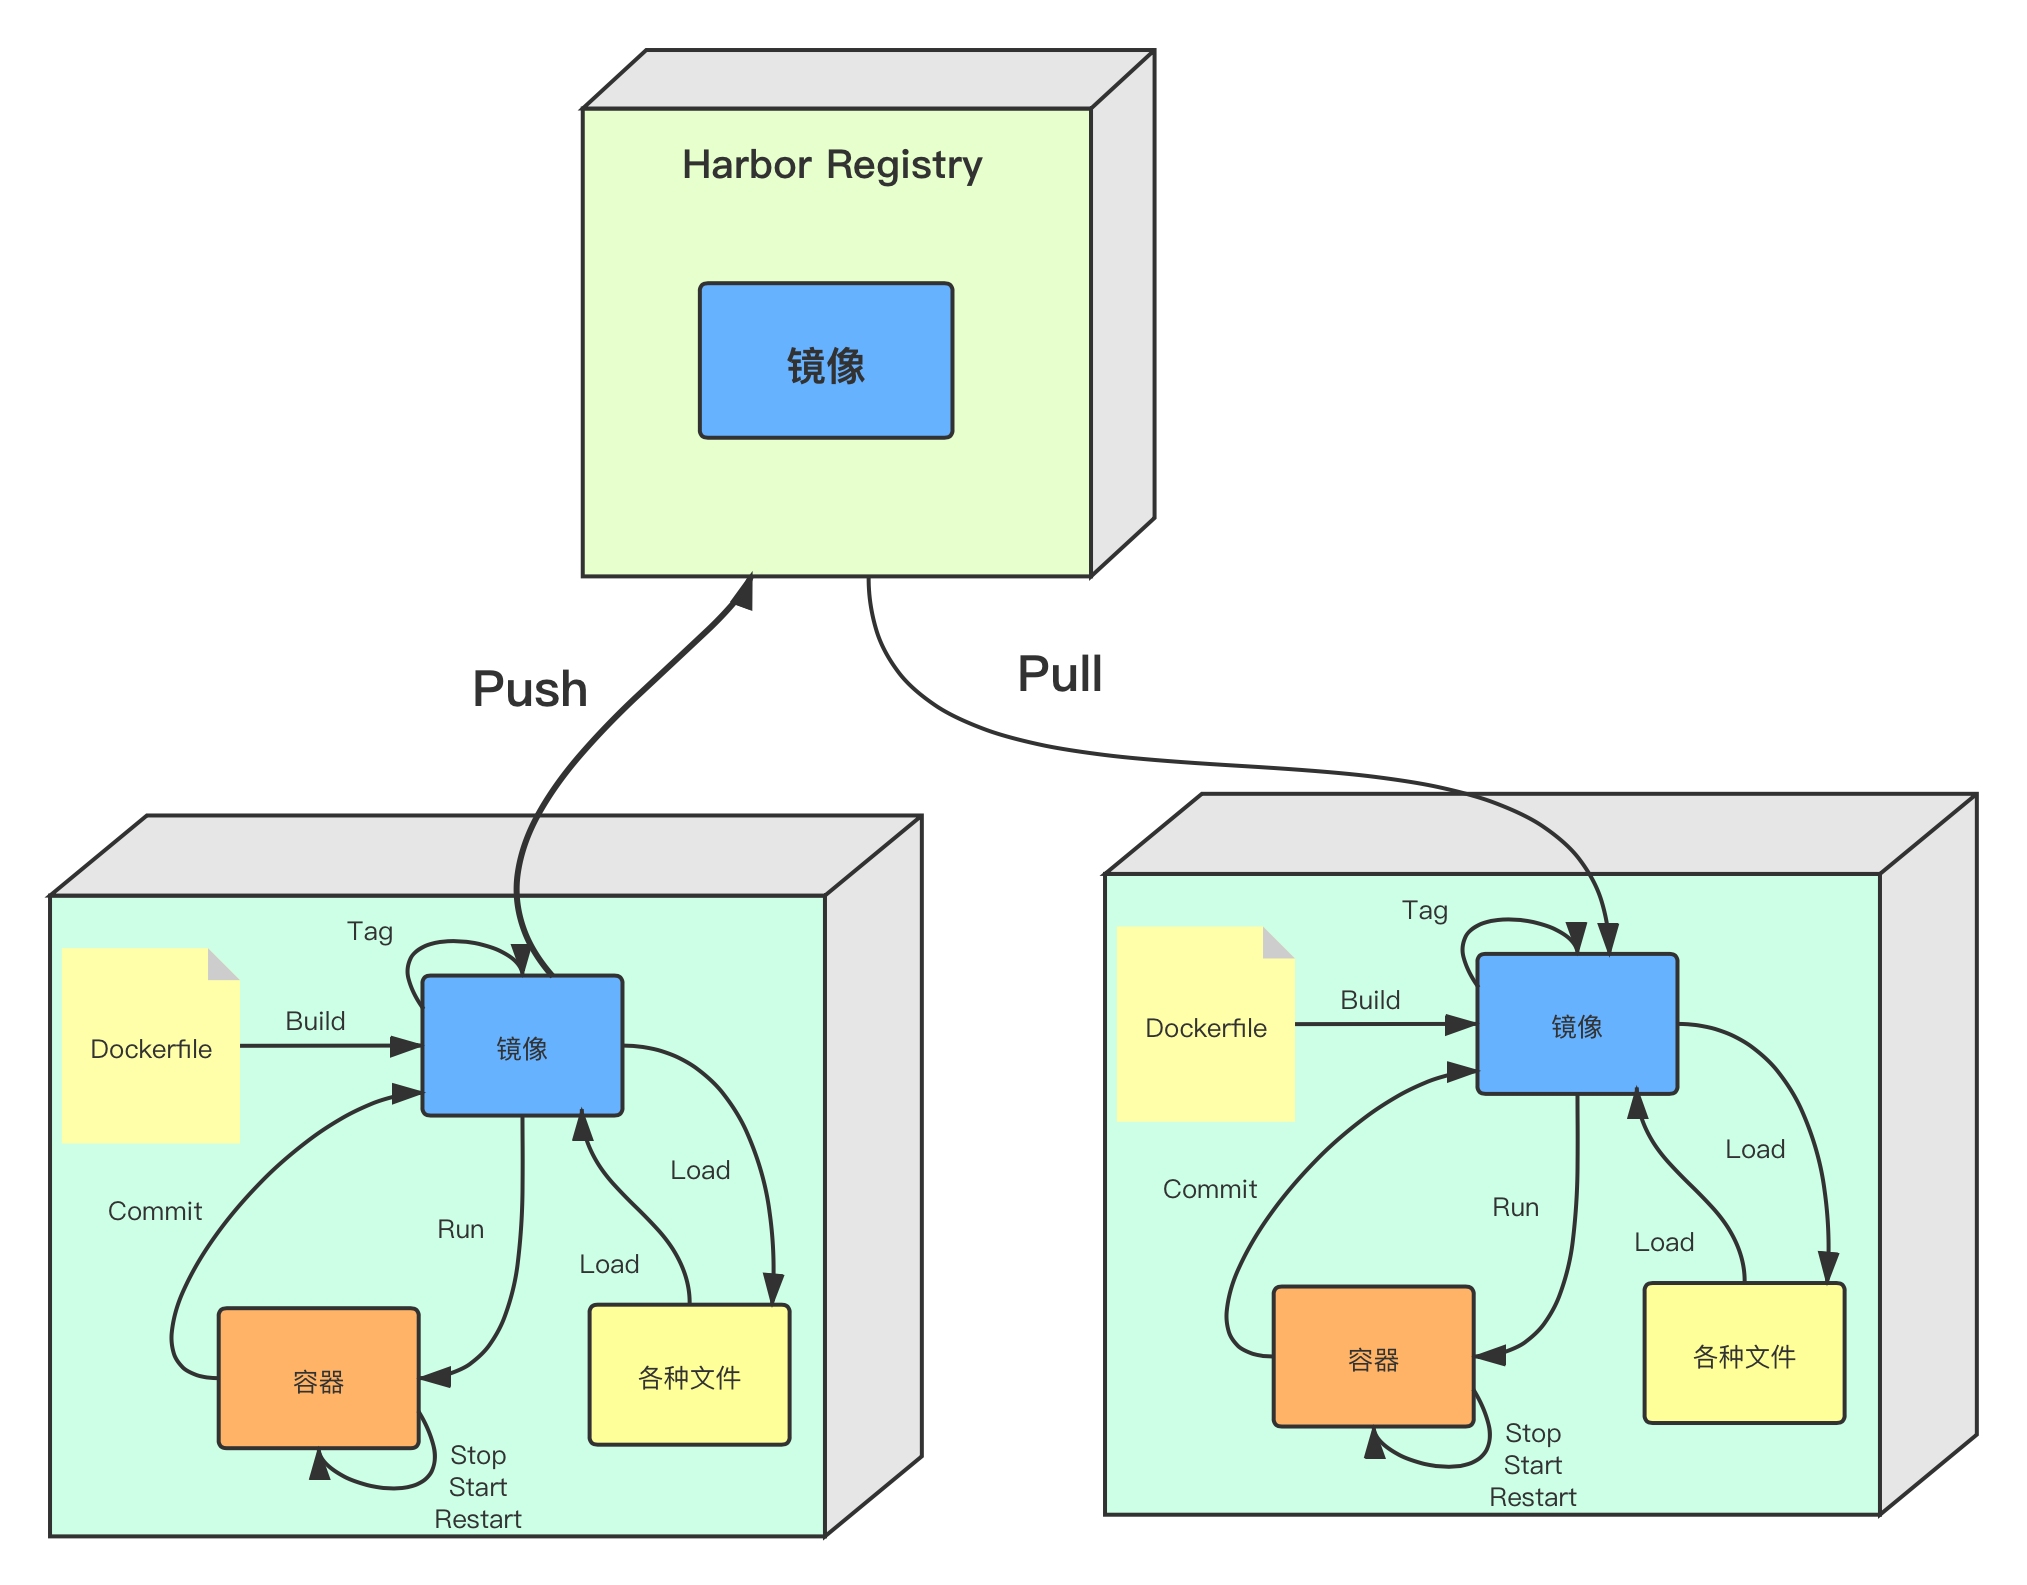
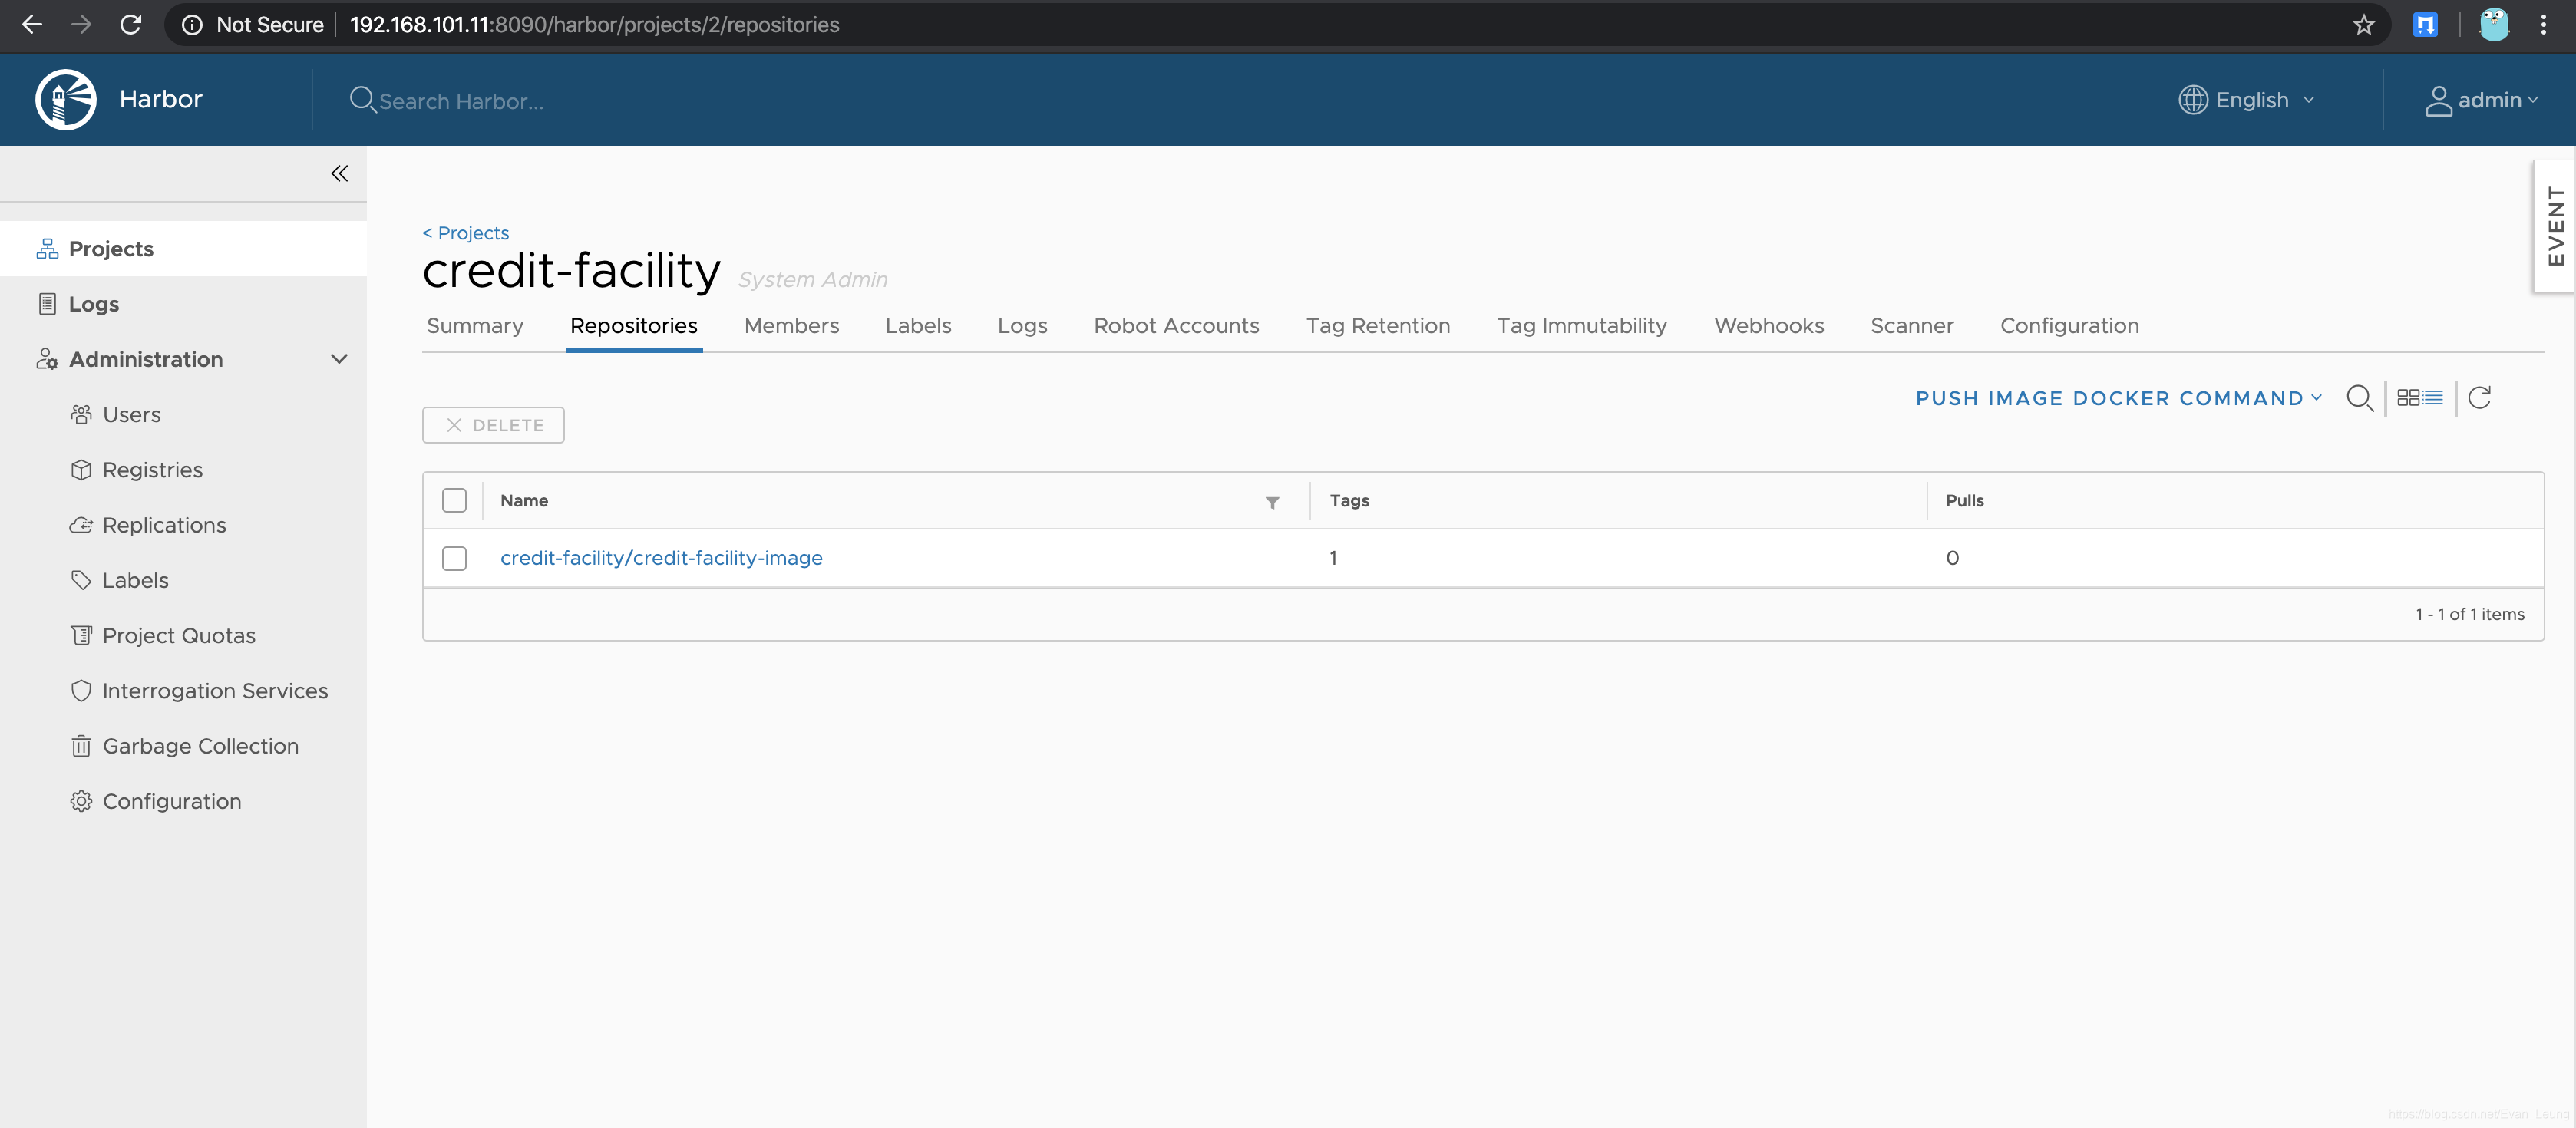
## 发布Image到Harbor
1. 使用Harbor的ip地址和前面创建好的项目名称```credit-facility```进行发布
```bash
[root@manager-node harbor]# docker push 192.168.101.11:8090/credit-facility/credit-facility-image
The push refers to repository [192.168.101.11:8090/credit-facility/credit-facility-image]
21f243c9904f: Pushed
edd61588d126: Pushed
9b9b7f3d56a0: Pushed
f1b5933fe4b5: Pushed
latest: digest: sha256:86a6289143d0a8a4cc94880b79af36416d07688585f8bb1b09fd4d50cd166f46 size: 1159
```
从上面显示结果可以看到,我们已经成功上传镜像到Harbor仓库了
## 拉取Image到服务器
1. 我们先把之前在本地创建的镜像删除,以免后面操作产生混淆
```bash
[root@manager-node harbor]# docker image rm 192.168.101.11:8090/credit-facility/credit-facility-image:latest
Untagged: 192.168.101.11:8090/credit-facility/credit-facility-image:latest
Untagged: 192.168.101.11:8090/credit-facility/credit-facility-image@sha256:86a6289143d0a8a4cc94880b79af36416d07688585f8bb1b09fd4d50cd166f46
```
2. 查看本地镜像列表
```bash
[root@manager-node harbor]# docker images
REPOSITORY TAG IMAGE ID CREATED SIZE
```
现在本地已经没有任何镜像
3.从Harbor仓库拉去镜像
```bash
[root@manager-node harbor]# docker pull 192.168.101.11:8090/credit-facility/credit-facility-image:latest
latest: Pulling from credit-facility/credit-facility-image
Digest: sha256:86a6289143d0a8a4cc94880b79af36416d07688585f8bb1b09fd4d50cd166f46
Status: Downloaded newer image for 192.168.101.11:8090/credit-facility/credit-facility-image:latest
192.168.101.11:8090/credit-facility/credit-facility-image:latest
```
镜像已经拉取成功
4.在查看本地镜像列表验证下
```bash
[root@manager-node harbor]# docker images
REPOSITORY TAG IMAGE ID CREATED SIZE
192.168.101.11:8090/credit-facility/credit-facility-image latest 28948b936fac 2 days ag
```
我们的镜像已经成功安装到本地了,这样即便我们以后换了一台服务器,也可以随时从Harbor仓库拉取镜像,不需要依赖本地服务器

