官网:https://github.com/Netflix/ribbon/wiki/Getting-Started
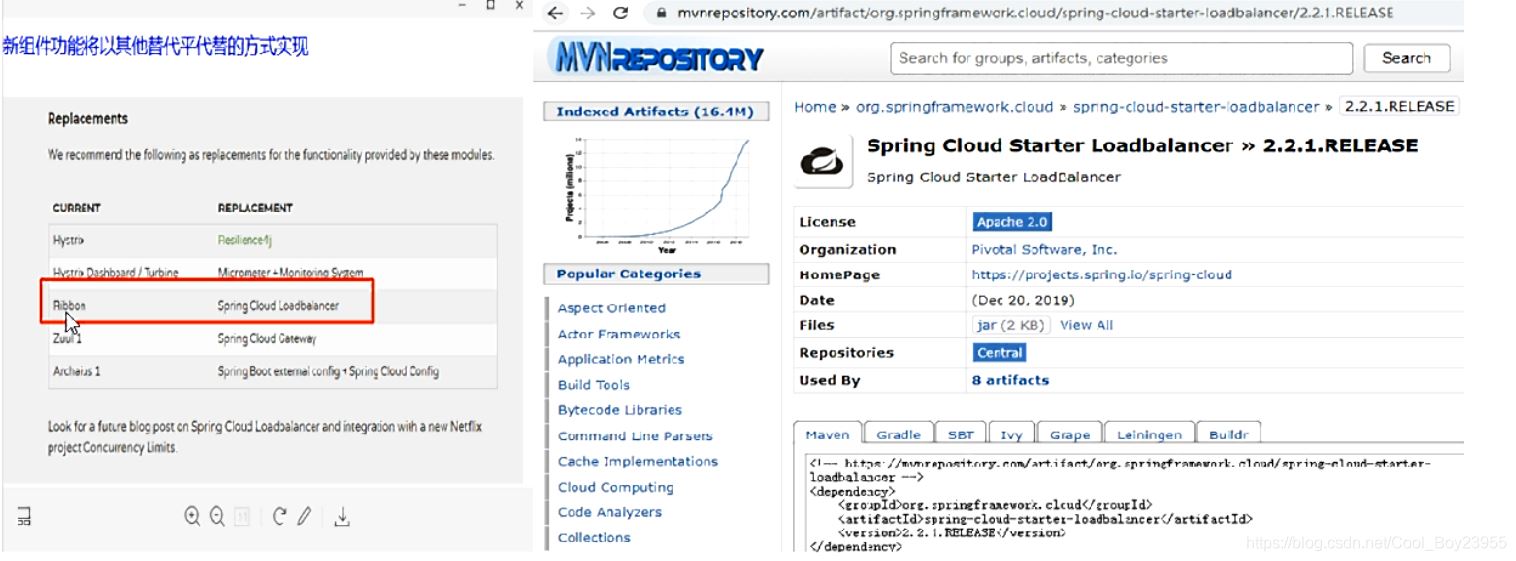
Ribbon目前也进入维护模式,未来替换方案:
LB(负载均衡)
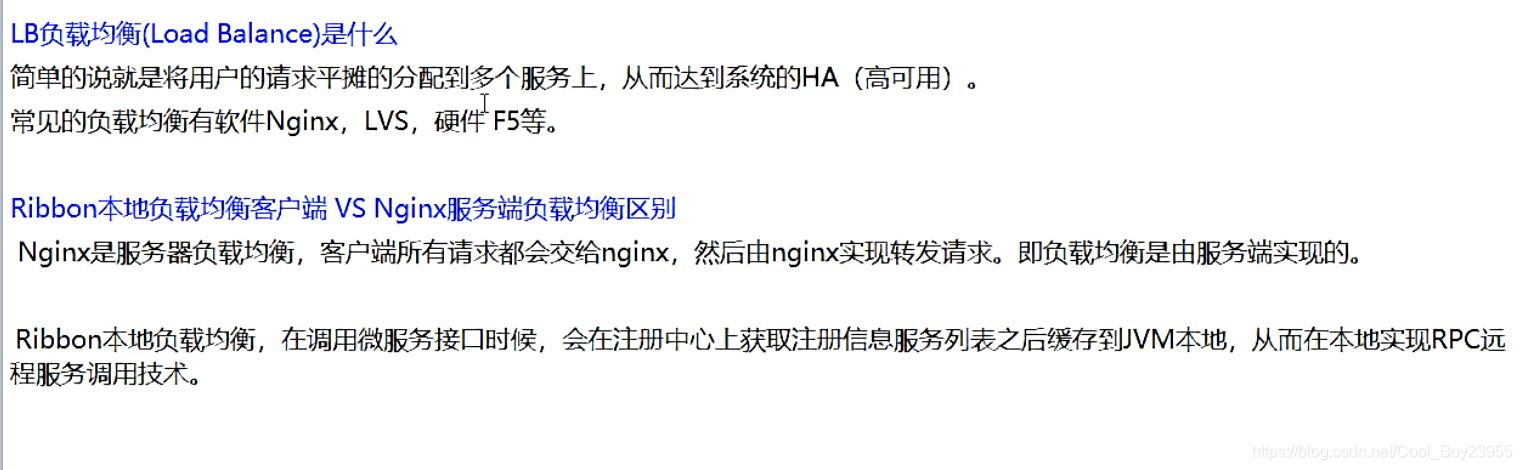
集中式LB

进程内LB
Ribbon就是负载均衡+RestTemplate调用
1、架构说明
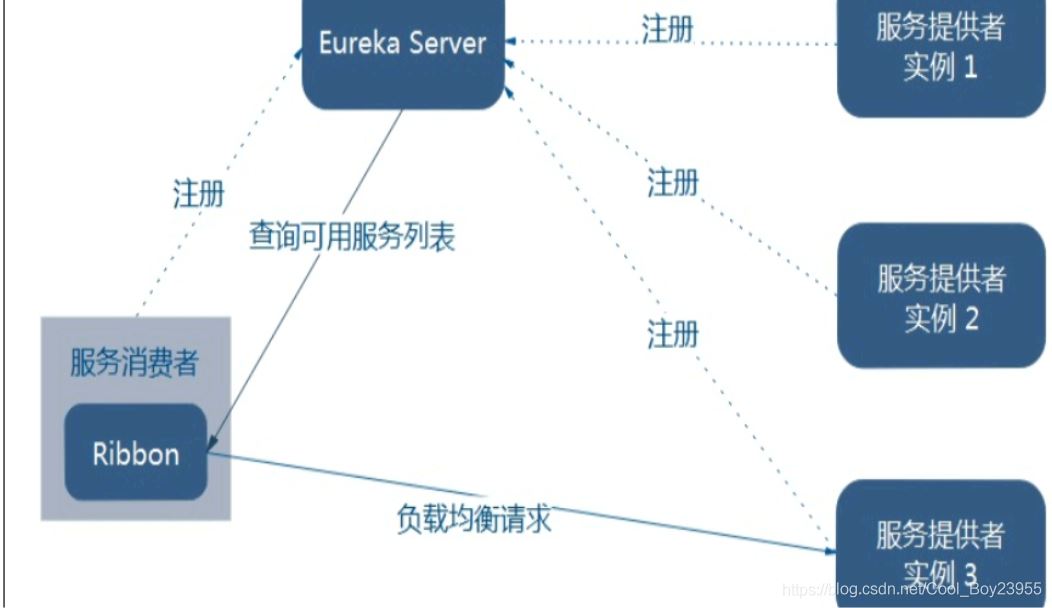
总结:Ribbon其实就是一个软负载均衡的客户端组件,他可以和其他所需请求的客户端结合使用,和eureka结合只是其中的一个实例。
2、
3、二说RestTemplate的使用
官网
修改cloud-consumer-order80
getForObject方法/getForEntity方法
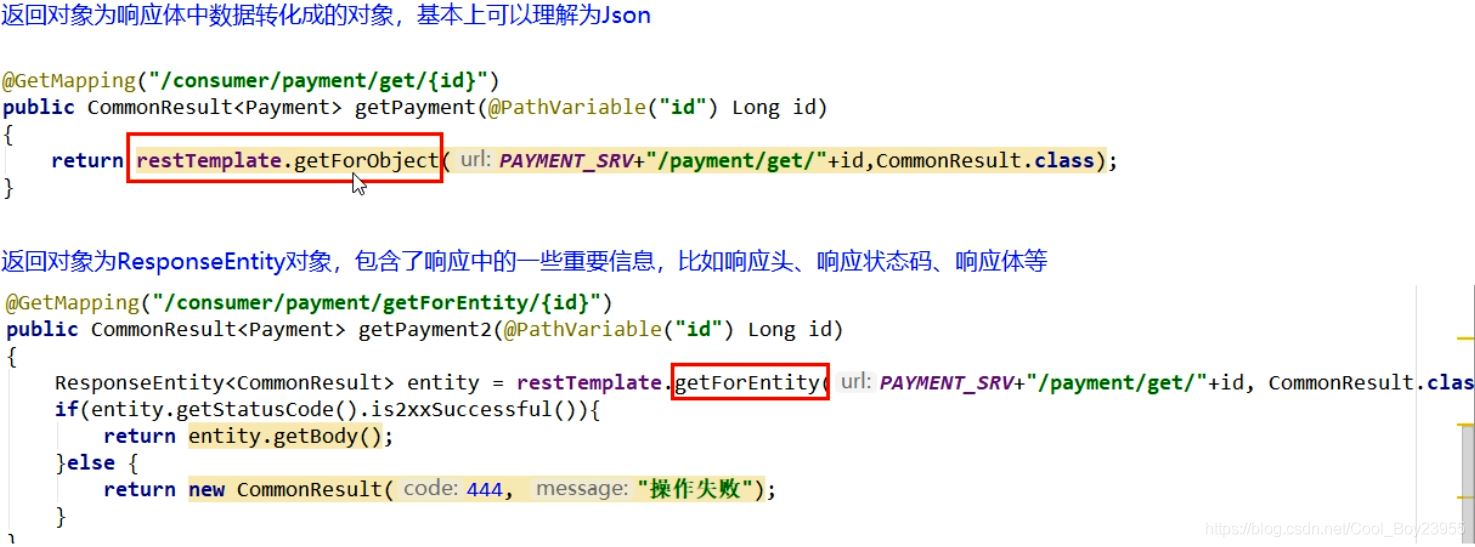
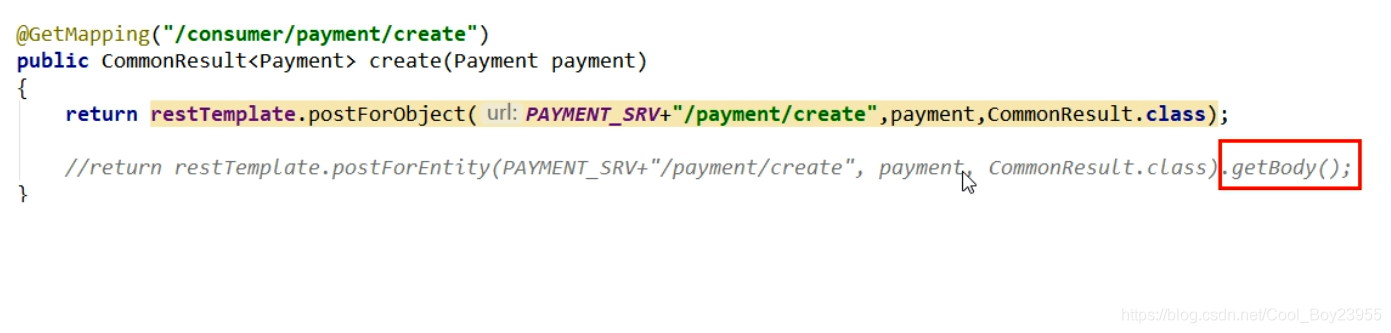
postForObject/postForEntity
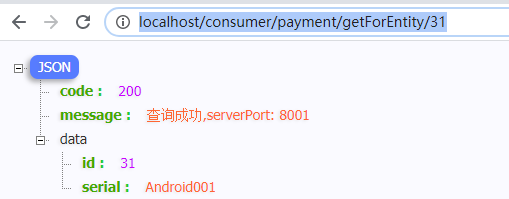
4、依次2启动7001,7002,8001,8002,80。访问:http://localhost/consumer/payment/getForEntity/31
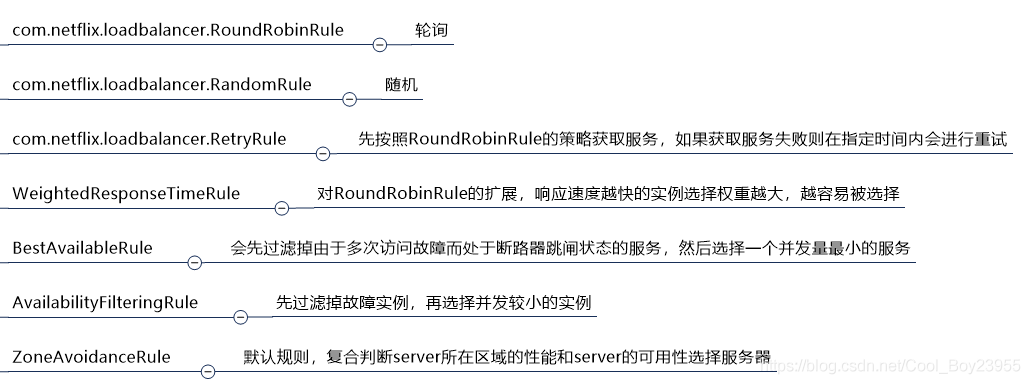
IRule:根据特定算法从服务列表中选取一个要访问的服务
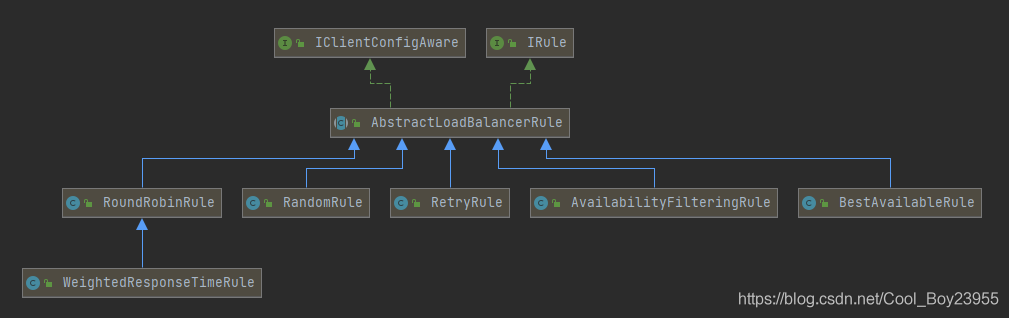
Ribbon自带负载均衡算法:
如何替换负载均衡算法:修改cloud-consumer-order80
1、注意配置细节

2、新建package
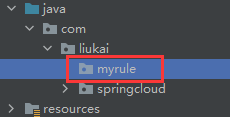
3、在myrule下面新建配置类MySelfRule
package com.liukai.myrule;

import com.netflix.loadbalancer.IRule;
import com.netflix.loadbalancer.RandomRule;
import org.springframework.context.annotation.Bean;
import org.springframework.context.annotation.Configuration;

/**
 * @author liukai
 * @version 1.0.0
 * @ClassName MySelfRule.java
 * @Description TODO
 * @createTime 2021年03月21日 11:50:00
 */
@Configuration
public class MySelfRule {

 @Bean(name = "myRandomRule")
 public IRule myRule(){
  return new RandomRule();//定义为随机
 }
}
4、主启动类添加@RibbonClient
package com.liukai.springcloud;

import com.liukai.myrule.MySelfRule;
import org.springframework.boot.SpringApplication;
import org.springframework.boot.autoconfigure.SpringBootApplication;
import org.springframework.cloud.netflix.eureka.EnableEurekaClient;
import org.springframework.cloud.netflix.ribbon.RibbonClient;

/**
 * @author liukai
 * @version 1.0.0
 * @ClassName OrderMain80.java
 * @Description TODO
 * @createTime 2021年03月19日 18:27:00
 */
@SpringBootApplication
@EnableEurekaClient
@RibbonClient(name = "CLOUD-PAYMENT-SERVICE",configuration = MySelfRule.class)
public class OrderMain80 {

 public static void main(String[] args) {
   SpringApplication.run(OrderMain80.class);
 }

}
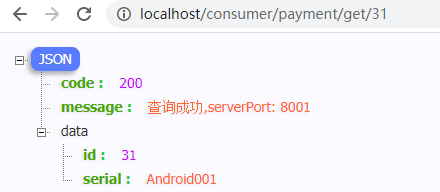
5、测试:依次启动7001,7002,8001,8002,cloud-consumer-order80
访问:http://localhost/consumer/payment/get/31
多方问几次,可以发现查询的端口号是随机的,而不是交替出现了
1、注释掉cloud-consumer-order80主启动类的@RibbonClient
2、原理
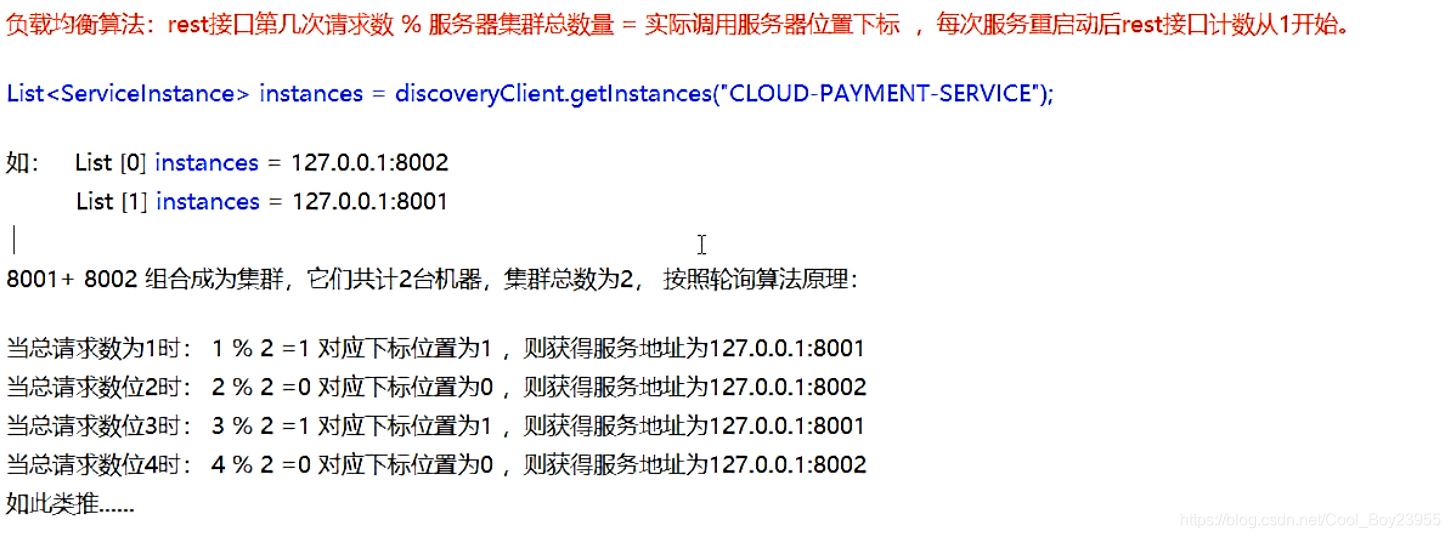
3、源码:
 public Server choose(ILoadBalancer lb, Object key) {
  if (lb == null) {
   log.warn("no load balancer");
   return null;
  }

  Server server = null;
  int count = 0;
  while (server == null && count++ < 10) {
   List<Server> reachableServers = lb.getReachableServers();
   List<Server> allServers = lb.getAllServers();
   int upCount = reachableServers.size();
   int serverCount = allServers.size();

   if ((upCount == 0) || (serverCount == 0)) {
    log.warn("No up servers available from load balancer: " + lb);
    return null;
   }

   int nextServerIndex = incrementAndGetModulo(serverCount);
   server = allServers.get(nextServerIndex);

   if (server == null) {
    /* Transient. */
    Thread.yield();
    continue;
   }

   if (server.isAlive() && (server.isReadyToServe())) {
    return (server);
   }

   // Next.
   server = null;
  }

  if (count >= 10) {
   log.warn("No available alive servers after 10 tries from load balancer: "
     + lb);
  }
  return server;
 }

 /**
  * Inspired by the implementation of {@link AtomicInteger#incrementAndGet()}.
  *
  * @param modulo The modulo to bound the value of the counter.
  * @return The next value.
  */
 private int incrementAndGetModulo(int modulo) {
  for (;;) {
   int current = nextServerCyclicCounter.get();
   int next = (current + 1) % modulo;
   if (nextServerCyclicCounter.compareAndSet(current, next))
    return next;
  }
 }
1、修改8001,8002的controller
// 手写负载均衡需要用到
 @GetMapping(value = "/payment/lb")
 public String getPaymentLB(){
  return serverPort;
 }
2、cloud-consumer-order80的ApplicationContextBean去掉@LoadBalanced
3、新建接口LoadBalancer
package com.liukai.springcloud.lb;

import org.springframework.cloud.client.ServiceInstance;

import java.util.List;

/**
 * @author liukai
 * @version 1.0.0
 * @ClassName LoadBalancer.java
 * @Description TODO
 * @createTime 2021年03月21日 12:24:00
 */
public interface LoadBalancer {
 //收集服务器总共有多少台能够提供服务的机器,并放到list里面
 ServiceInstance instances(List<ServiceInstance> serviceInstances);
}
4、新建实现类MyLB
package com.liukai.springcloud.lb;
import org.springframework.cloud.client.ServiceInstance;
import org.springframework.stereotype.Component;
import java.util.List;
import java.util.concurrent.atomic.AtomicInteger;
/**
* @author liukai
* @version 1.0.0
* @ClassName MyLB.java
* @Description TODO
* @createTime 2021年03月21日 12:27:00
*/
@Component
public class MyLB implements LoadBalancer {
private AtomicInteger atomicInteger = new AtomicInteger(0);
//坐标
private final int getAndIncrement() {
int current;
int next;
do {
current = this.atomicInteger.get();
next = current >= 2147483647 ? 0 : current + 1;
} while (!this.atomicInteger.compareAndSet(current, next)); //第一个参数是期望值,第二个参数是修改值是
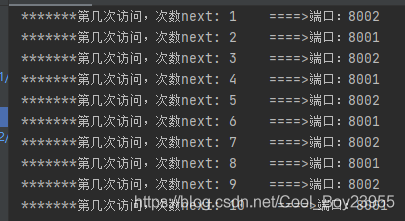
System.out.print("*******第几次访问,次数next: " + next);
return next;
}
@Override
public ServiceInstance instances(List<ServiceInstance> serviceInstances) { //得到机器的列表
int index = getAndIncrement() % serviceInstances.size(); //得到服务器的下标位置
System.out.println(" ====>端口:" + serviceInstances.get(index).getPort());
return serviceInstances.get(index);
}
}
5、修改OrderController
@Resource
 private LoadBalancer loadBalancer;

 @Resource
 private DiscoveryClient discoveryClient;

 @GetMapping(value = "/consumer/payment/lb")
 public String getPaymentLB(){
  List<ServiceInstance> instances = discoveryClient.getInstances("CLOUD-PAYMENT-SERVICE");
  if (instances == null || instances.size() <= 0){
   return null;
  }
//  instances.forEach(System.out::println);
  // 使用手写的负载均衡算法获取服务
  ServiceInstance serviceInstance = loadBalancer.instances(instances);
  // 获取服务的地址
  URI uri = serviceInstance.getUri();
  // 拼接地址访问
  return restTemplate.getForObject(uri+"/payment/lb",String.class);
 }
6、测试:访问 http://localhost/consumer/payment/lb
发现访问的端口号开始轮询出现,手写负载均衡轮询算法成功