一、整合目标
1.由IoC容器管理Hibernate的SessionFactory
2.让Hibernate使用Spring的声明式事务
二、整合步骤
先加入Hibernat,再加入Spring,再进行整合。
第一步:
配置Hibernate
1.加入Hibernate相关的包
Hibernate的必需包
c3p0包和数据库驱动包
AspectJWeaver.jar
数据库驱动包
2.添加Hibernate的配置文件hibernate.cfg.xml
a.Hibernate的数据源配置可以拿到Spring中去配置,所以无需在hibernate.cfg.xml中配置。
b.关联的.hbm.xml文件也可以在Spring配置文件中配置SessionFactory时进行配置。
c.在hibernate.cfg.xml中可以配置sql方言,sql显示,自动生成表,二级缓存等内容
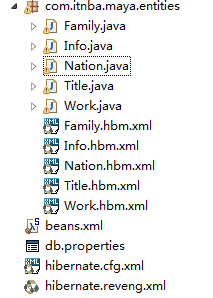
3.编写实体类和对应的hbm.xml映射文件。
<?xml version="1.0" encoding="UTF-8"?>
<!DOCTYPE hibernate-configuration PUBLIC
    "-//Hibernate/Hibernate Configuration DTD 3.0//EN"
    "http://www.hibernate.org/dtd/hibernate-configuration-3.0.dtd">
<hibernate-configuration>
  <session-factory>
    <!-- 数据库连接用Spring配置
    <property name="hibernate.connection.driver_class">com.mysql.jdbc.Driver</property>
    <property name="hibernate.connection.url">jdbc:mysql://127.0.0.1:3306/mydb</property>
    <property name="hibernate.connection.username">root</property>
    -->
    <property name="hibernate.dialect">org.hibernate.dialect.MySQLDialect</property>
    <property name="show_sql">true</property>
   <!--  类映射也可用Spring来配置
    <mapping resource="com/itnba/maya/entities/Family.hbm.xml"/>
    <mapping resource="com/itnba/maya/entities/Info.hbm.xml"/>
    <mapping resource="com/itnba/maya/entities/Nation.hbm.xml"/>
    <mapping resource="com/itnba/maya/entities/Title.hbm.xml"/>
    <mapping resource="com/itnba/maya/entities/Work.hbm.xml"/>
    -->
  </session-factory>

</hibernate-configuration>
第二步:加入Spring
1.加入Spring包。
Spring的jar包
aspectjweaver.jar
2.加入Spring的配置文件。
配置数据源
1)建立db.properties的资源文件,配置数据源的连接信息。
driverClass=com.mysql.jdbc.Driver
jdbcUrl=jdbc:mysql://localhost:3306/mydb
user=root
password=
minPoolSize=5
maxPoolSize=20
initialPoolSize=5
在Spring配置文件中导入db.properties <context:property-placehoder/>
配置实体化c3p0的数据源ComboPooledDataSource
(测试数据源配置成功)
  <!--加载资源对象 -->
    <context:property-placeholder location="classpath:db.properties"/>
    <!-- 实例化c3p0数据源 -->
    <bean class="com.mchange.v2.c3p0.ComboPooledDataSource" id="dataSource">
      <property name="driverClass" value="${driverClass}"></property>
      <property name="jdbcUrl" value="${jdbcUrl}"></property>
      <property name="user" value="${user}"></property>
      <property name="password" value="${password}"></property>
      <property name="minPoolSize" value="${minPoolSize}"></property>
      <property name="maxPoolSize" value="${maxPoolSize}"></property>
      <property name="initialPoolSize" value="${initialPoolSize}"></property>
    </bean>
2)配置Hibernate的SessionFactory——通过Spring提供的LocalSessionFactoryBean来配置
<!-- 配置Hibernate的SessionFactory -->
<bean class="org.springframework.orm.hibernate5.LocalSessionFactoryBean" id="factory">

<!--配置数据源属性-->
<property name="dataSource" ref="dataSource"></property>

<!--配置Hibernate配置文件的位置-->
<property name="configLocation" value="classpath:hibernate.cfg.xml"></property>

<!--配置Hibernate映射文件的位置,可以使用通配符-->
<property name="mappingLocations" value="com/itnba/maya/entities/*.hbm.xml"></property>
</bean>
3)配置Spring的声明式事务
配置事务管理器 -- HibernateTransactionManager
<!-- 配置spring的事务管理器 -->
    <bean class="org.springframework.orm.hibernate5.HibernateTransactionManager" id="transactionManager"><!-- 要根据hibernate的版本配置 -->
      <property name="sessionFactory" ref="factory"></property>
    </bean>
配置事务属性 -- 导入tx命名空间
  <!-- 配置事务属性 -->
    <tx:advice id="txAdvice" transaction-manager="transactionManager">
      <tx:attributes>
        <tx:method name="*"/>
      </tx:attributes>
    </tx:advice>
配置事务切点,并把切点和事务属性关联起来。--导入aop命名空间
  <!-- 配置事务切入点 -->
    <aop:config>
      <aop:pointcut expression="execution(* com.itnba.maya.entities.*.*(..))" id="pointCut"/>
      <aop:advisor advice-ref="txAdvice" pointcut-ref="pointCut"/>
    </aop:config>
第三步:编写代码
1.在Spring配置文件中配置自动扫描的包
    <!-- 自动扫描 -->
    <context:component-scan base-package="com.itnba.maya.entities"></context:component-scan>
package com.itnba.maya.entities;

import org.hibernate.Session;
import org.hibernate.SessionFactory;
import org.springframework.beans.factory.annotation.Autowired;
import org.springframework.stereotype.Repository;
@Repository//自动扫描
public class InfoDao {
  @Autowired//自动扫描
  private SessionFactory factory;
  public Session getSession(){
    return factory.getCurrentSession();
  }

  public void select() {
    Info data = getSession().get(Info.class, "p005");
    System.out.println(data.getName());

  }

}
用 main函数执行
package com.itnba.maya.entities;

import java.sql.Connection;
import java.sql.SQLException;

import javax.sql.DataSource;
import org.hibernate.Session;
import org.hibernate.SessionFactory;
import org.hibernate.cfg.Configuration;
import org.springframework.context.ApplicationContext;
import org.springframework.context.support.ClassPathXmlApplicationContext;

public class Test {

  public static void main(String[] args) throws SQLException {
    ApplicationContext context = new ClassPathXmlApplicationContext("beans.xml");
    InfoDao data=(InfoDao) context.getBean(InfoDao.class);
    data.select();


  }
}
结果:

完整的Spring配置文件
<?xml version="1.0" encoding="UTF-8"?>
<beans xmlns="http://www.springframework.org/schema/beans"
  xmlns:xsi="http://www.w3.org/2001/XMLSchema-instance"
  xmlns:aop="http://www.springframework.org/schema/aop"
  xmlns:context="http://www.springframework.org/schema/context"
  xmlns:tx="http://www.springframework.org/schema/tx"
  xsi:schemaLocation="http://www.springframework.org/schema/beans http://www.springframework.org/schema/beans/spring-beans.xsd
    http://www.springframework.org/schema/aop http://www.springframework.org/schema/aop/spring-aop-4.3.xsd
    http://www.springframework.org/schema/context http://www.springframework.org/schema/context/spring-context-4.3.xsd
    http://www.springframework.org/schema/tx http://www.springframework.org/schema/tx/spring-tx-4.3.xsd"
    >
    <!-- 自动扫描 -->
    <context:component-scan base-package="com.itnba.maya.entities"></context:component-scan>
    <!--加载资源对象 -->
    <context:property-placeholder location="classpath:db.properties"/>
    <!-- 实例化c3p0对象 -->
    <bean class="com.mchange.v2.c3p0.ComboPooledDataSource" id="dataSource">
      <property name="driverClass" value="${driverClass}"></property>
      <property name="jdbcUrl" value="${jdbcUrl}"></property>
      <property name="user" value="${user}"></property>
      <property name="password" value="${password}"></property>
      <property name="minPoolSize" value="${minPoolSize}"></property>
      <property name="maxPoolSize" value="${maxPoolSize}"></property>
      <property name="initialPoolSize" value="${initialPoolSize}"></property>
    </bean>
    <!-- 配置Hibernate的SessionFactory -->
    <bean class="org.springframework.orm.hibernate5.LocalSessionFactoryBean" id="factory">
      <property name="dataSource" ref="dataSource"></property>
      <property name="configLocation" value="classpath:hibernate.cfg.xml"></property>
      <property name="mappingLocations" value="com/itnba/maya/entities/*.hbm.xml"></property>
    </bean>
    <!-- 配置spring的声明性事务 -->
    <bean class="org.springframework.orm.hibernate5.HibernateTransactionManager" id="transactionManager"><!-- 要根据hibernate的版本配置 -->
      <property name="sessionFactory" ref="factory"></property>
    </bean>
    <!-- 配置事务属性 -->
    <tx:advice id="txAdvice" transaction-manager="transactionManager">
      <tx:attributes>
        <tx:method name="*"/>
      </tx:attributes>
    </tx:advice>
    <!-- 配置事务切入点 -->
    <aop:config>
      <aop:pointcut expression="execution(* com.itnba.maya.entities.*.*(..))" id="pointCut"/>
      <aop:advisor advice-ref="txAdvice" pointcut-ref="pointCut"/>

    </aop:config>

</beans>
另外:
Spring整合Hibernate,也可以不使用 Hibernate的配置文件,把Hibernate配置文件中的内容放在Spring的配置文件中。(一般不这么用)
<property name="hibernateProperties">
<props>
<prop key="hibernate.show_sql">true</prop>
<prop key="hibernate.dialect">org.hibernate.dialect.MySQLDialect</prop>
....
</props>
</property>

