当前开发项目涉及到富文本框,了解了不少富文本编辑器之后,最终决定使用度娘的UEditor。原因:功能强大,并且自带适配java后端的图片和视频上传。
项目地址
不多说,上一下该项目的地址: http://ueditor.baidu.com/website/
简书不支持markdown其他站点的外链很遗憾
整合过程
后端改造
因为项目使用的springboot框架,而UEditor对于java后端的支持仅仅是给了一个jsp文件。因此,需要对该文件进行一下处理,修改为面向springboot的统一controller。
@Controller
@Transactional
@RequestMapping("/static/common/ueditor/jsp")
public class JSPController {
  @RequestMapping("/controller")
  @ResponseBody
  public void getConfigInfo(HttpServletRequest request,HttpServletResponse response){
    response.setContentType("application/json");
    String rootPath = request.getSession().getServletContext()
        .getRealPath("/");
    try {
      String exec = new ActionEnter(request, rootPath).exec();
      PrintWriter writer = response.getWriter();
      writer.write(exec);
      writer.flush();
      writer.close();
    } catch (IOException | JSONException e) {
      e.printStackTrace();
    }
  }
如上所述,该项目即支持来自/static/common/ueditor/jsp/controller的上传请求了。
前端请求
在前端添加UEditor支持。即:将整个uediotr包进行项目引入,并且在使用该控件的地方进行js的导入。
项目引入,我的对应代码结构如下:
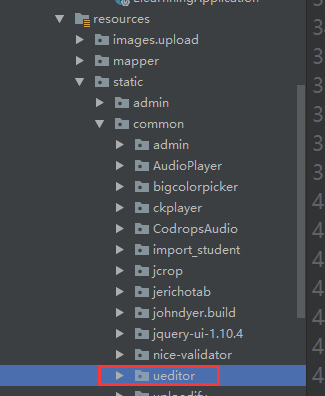
页面引入,引入对应代码如下:
<script type="text/javascript" charset="utf-8" th:src="@{/static/common/ueditor/ueditor.config.js}"></script>
  <script type="text/javascript" charset="utf-8" th:src="@{/static/common/ueditor/ueditor.all.js}"></script>
实例化UEditor编辑器即可,下面是我的初始化参数,仅做参考。
//实例化编辑器
  var ue = UE.getEditor(''+id,{
    toolbars: [
      [
        'fontfamily', //字体
        'fontsize', //字号
        'undo', //撤销
        'redo', //重做
        '|',
        'emotion', //表情
        'forecolor', //字体颜色
        'backcolor', //背景色
        'bold', //加粗
        'underline', //下划线
        'strikethrough', //删除线
        '|',
        'justifyleft', //居左对齐
        'justifyright', //居右对齐
        'justifycenter', //居中对齐
        '|',
        'link', //超链接
        'unlink', //取消链接
        'simpleupload', //单图上传
        'insertimage', //多图上传
        //'music', //音乐
        //'insertvideo', //视频
        'removeformat', //清除格式
        'formatmatch', //格式刷
        'source', //源代码
      ]
    ],
    enableAutoSave:false,
    autoHeightEnabled: true,
    autoFloatEnabled: true,
    initialFrameWidth:width,
    initialFrameHeight:height,
    scaleEnabled:true//滚动条
  });
此时,访问我们的页面就会看到富文本框了。
不过,此时会提示我们后台配置文件出错,无法实现上传功能
实现上传功能
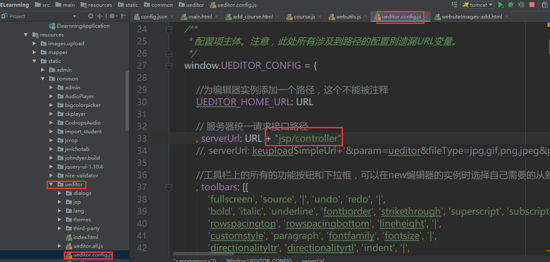
修改config.js文件,对应的全局请求路径。该请求是为了获取config.json对应的配置数据。可以在Controller里面直接返回配置信息或者在controller里面进行json文件的读取。我这里使用的是读取配置文件的方式,使用UEditor自带的方法,文章开头已经实现,这里贴一下需要修改的请求:
完成以上配置之后,再次加载UEditor的页面,其中上传图片的按钮即可完成图片的上传了。
注意:如果开始调试模式,加入断点,测试加载json串的时候。会出现超时错误。暂时没从配置文件里面找到配置字段。所有,这里需要注意,假如一切配置均无问题,但是依然返回后台配置错误的话,可以把断点全部取消掉试一试。
注意:上传需要加入上传组件,此处使用fileuoload
<dependency>
      <groupId>commons-fileupload</groupId>
      <artifactId>commons-fileupload</artifactId>
      <version>1.3</version>
    </dependency>
使用servlet实现上传
/**
 * 尝试使用servlet来实现UEditor
 *
 * @author OnyWang
 * @create 2018-02-05 2:40
 **/
@WebServlet(name = "UEditorServlet", urlPatterns = "/static/common/ueditor/UEditor")
public class UEditorControllerServlet extends HttpServlet {
  @Override
  protected void doPost(HttpServletRequest request, HttpServletResponse response) throws ServletException, IOException {
    request.setCharacterEncoding( "utf-8" );
    response.setHeader("Content-Type" , "text/html");
    PrintWriter out = response.getWriter();
    ServletContext application=this.getServletContext();
    String rootPath = application.getRealPath( "/" );

    String action = request.getParameter("action");
    String result = new ActionEnter( request, rootPath+"WEB-INF/classes" ).exec();
    if( action!=null &&
        (action.equals("listfile") || action.equals("listimage") ) ){
      rootPath = rootPath.replace("\\", "/");
      result = result.replaceAll(rootPath, "/");
    }
    out.write( result );
  }

  @Override
  protected void doGet(HttpServletRequest req, HttpServletResponse resp) throws ServletException, IOException {
    doPost(req, resp);
  }
采用servlet的方式,新建一个注解式的servlet即可。
需要在main方法里面加入@ServletComponentScan注解。
修改ueditor默认访问路径。
注意:springboot下面,所有的资源文件都是放在classes下面的,所有,对于路径的处理一定要加倍小心。放在增加路径web-inf/classes

