使用opencv将图片转为灰度图主要有两种方法,第一种是将彩色图转为灰度图,第二种是在使用OpenCV读取图片的时候直接读取为灰度图。
将彩色图转为灰度图
import cv2
import numpy as np
if __name__ == "__main__":
img_path = "timg.jpg"
img = cv2.imread(img_path)
#获取图片的宽和高
width,height = img.shape[:2][::-1]
#将图片缩小便于显示观看
img_resize = cv2.resize(img,
(int(width*0.5),int(height*0.5)),interpolation=cv2.INTER_CUBIC)
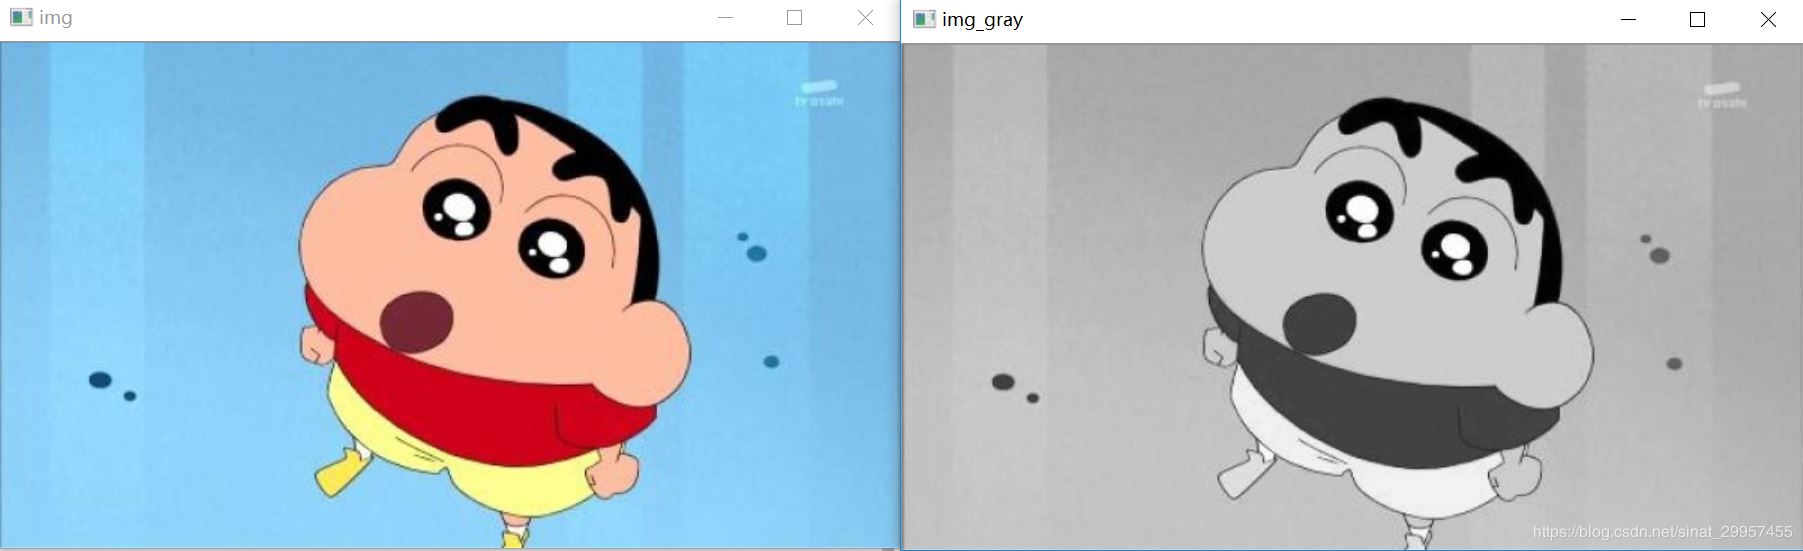
cv2.imshow("img",img_resize)
print("img_reisze shape:{}".format(np.shape(img_resize)))
#将图片转为灰度图
img_gray = cv2.cvtColor(img_resize,cv2.COLOR_RGB2GRAY)
cv2.imshow("img_gray",img_gray)
print("img_gray shape:{}".format(np.shape(img_gray)))
cv2.waitKey()
img_reisze shape:(337, 600, 3)
img_gray shape:(337, 600)
使用opencv读取图片的时候,默认使用的是BGR来读取图片的,可以看到原始读取的图片是3通道的,经过转换之后变成了单通道。
直接将图片采用灰度图的方式进行读取
import cv2
import numpy as np

if __name__ == "__main__":
  img_path = "timg.jpg"
  img = cv2.imread(img_path)
  #获取图片的宽和高
  width,height = img.shape[:2][::-1]
  #将图片缩小便于显示观看
  img_resize = cv2.resize(img,
  (int(width*0.5),int(height*0.5)),interpolation=cv2.INTER_CUBIC)
  cv2.imshow("img",img_resize)
  print("img_reisze shape:{}".format(np.shape(img_resize)))

  #读取灰度图
  img_gray = cv2.imread(img_path,cv2.IMREAD_GRAYSCALE)
  #将图片缩小便于显示观看
  img_gray = cv2.resize(img_gray,
  (int(width*0.5),int(height*0.5)),interpolation=cv2.INTER_CUBIC)
  cv2.imshow("img_gray",img_gray)
  print("img_gray shape:{}".format(np.shape(img_gray)))
  cv2.waitKey()
img_reisze shape:(337, 600, 3)
img_gray shape:(337, 600)

以上就是本文的全部内容,希望对大家的学习有所帮助,也希望大家多多支持。

