安装及配置
1.首先安装OpenCV,地址
这里我下载的是Windows版的3.4.5

然后安装即可……
2.Eclipse配置OpenCV
Window->Preferences->Java->User Libraries

New输入你的Libraries名
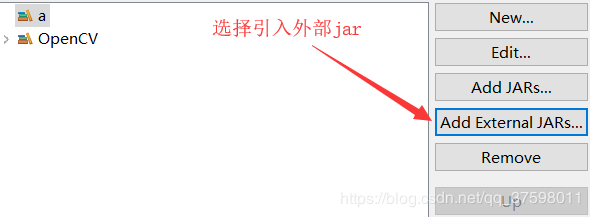
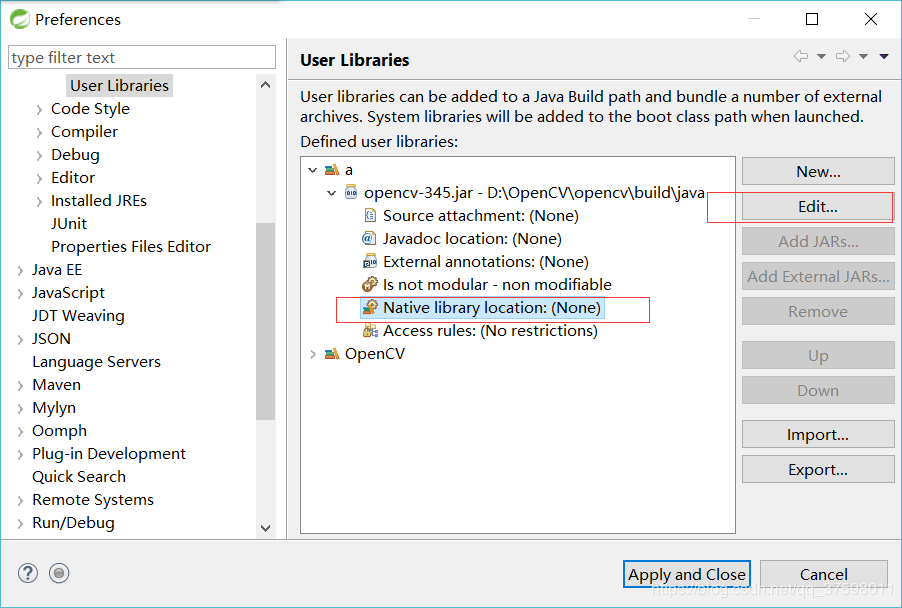
这里我的安装目录是D:\OpenCV,所以是:

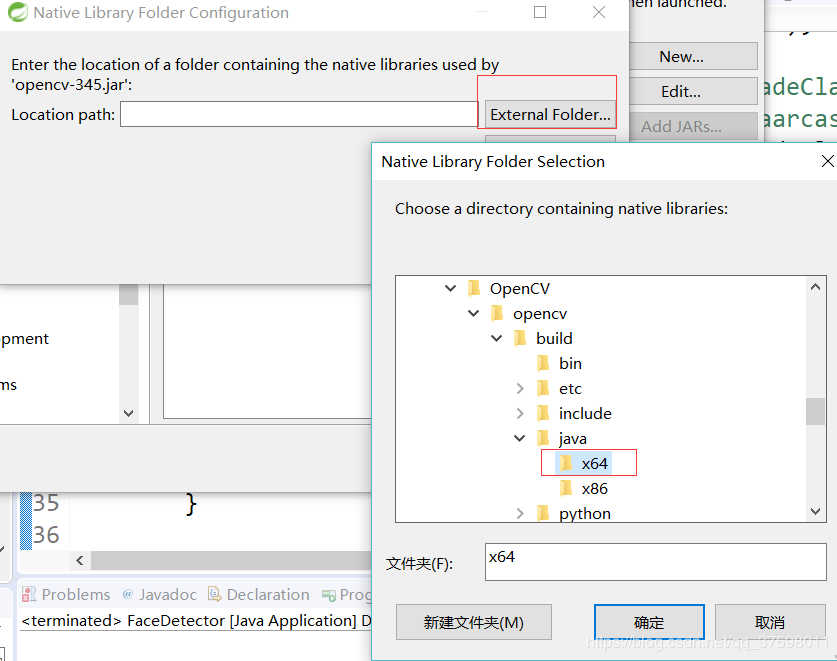
然后引入dll,我是64位机子,所以是:
Ok,下面创建Java项目做Java与OpenCV的人脸识别。
人脸识别
创建项目后首先右击选择Properties
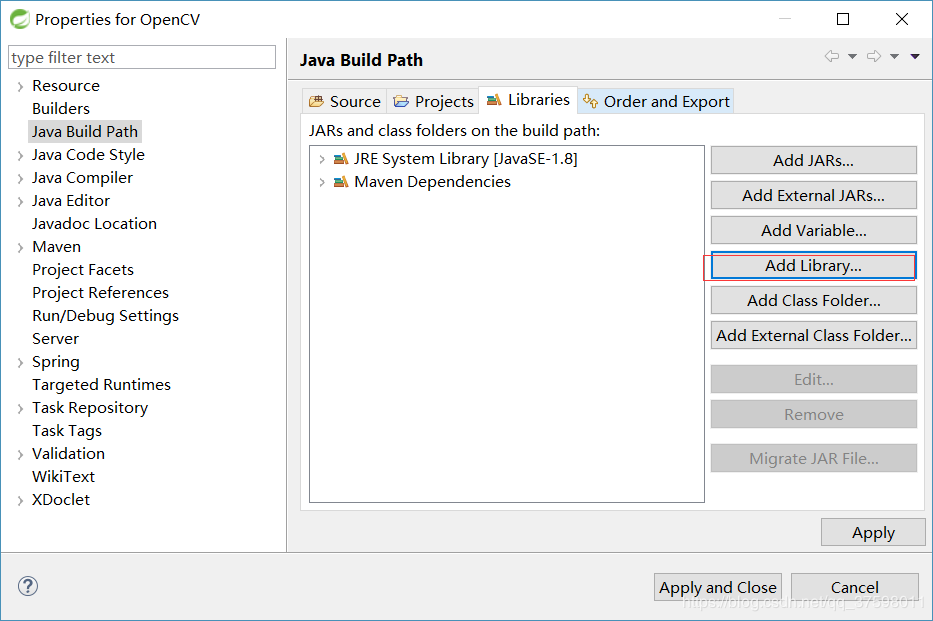

然后引入即可。
引入haarcascade_frontalface_alt.xml这个xml文件:

我的pom文件如下:
 <dependencies>
 <dependency>
 <groupId>org.springframework.boot</groupId>
 <artifactId>spring-boot-starter-web</artifactId>
 </dependency>


 <dependency>
 <groupId>org.bytedeco.javacpp-presets</groupId>
 <artifactId>ffmpeg</artifactId>
 <version>3.1.2-1.2</version>
 </dependency>
 <dependency>
 <groupId>org.bytedeco</groupId>
 <artifactId>javacv</artifactId>
 <version>1.4.1</version>
 </dependency>
 <!-- https://mvnrepository.com/artifact/org.bytedeco.javacpp-presets/ffmpeg-platform -->
 <dependency>
 <groupId>org.bytedeco.javacpp-presets</groupId>
 <artifactId>ffmpeg-platform</artifactId>
 <version>3.4.2-1.4.1</version>
 </dependency>
 <dependency>
 <groupId>commons-io</groupId>
 <artifactId>commons-io</artifactId>
 <version>2.4</version>
 </dependency>


 <!-- 视频摄像头 -->
 <!-- https://mvnrepository.com/artifact/org.bytedeco/javacv-platform -->
 <dependency>
 <groupId>org.bytedeco</groupId>
 <artifactId>javacv-platform</artifactId>
 <version>1.4.1</version>
 </dependency>
 <!-- https://mvnrepository.com/artifact/org.bytedeco.javacpp-presets/opencv-platform -->
 <dependency>
 <groupId>org.bytedeco.javacpp-presets</groupId>
 <artifactId>opencv-platform</artifactId>
 <version>3.4.1-1.4.1</version>
 </dependency>

 <dependency>
 <groupId>junit</groupId>
 <artifactId>junit</artifactId>
 <version>4.12</version>
 <scope>test</scope>
 </dependency>

 <dependency>
 <groupId>org.springframework.boot</groupId>
 <artifactId>spring-boot-starter-test</artifactId>
 <scope>test</scope>
 </dependency>
 </dependencies>
修改我的端口号:
server.port=8889
最后代码如下:
import java.io.BufferedInputStream;
import java.io.ByteArrayOutputStream;
import java.io.File;
import java.io.FileInputStream;
import java.io.FileNotFoundException;
import java.io.IOException;
import javax.servlet.http.HttpServletResponse;
import org.apache.commons.io.FileUtils;
import org.opencv.core.Core;
import org.opencv.core.Mat;
import org.opencv.core.MatOfRect;
import org.opencv.core.Point;
import org.opencv.core.Rect;
import org.opencv.core.Scalar;
import org.opencv.core.Size;
import org.opencv.imgcodecs.Imgcodecs;
import org.opencv.imgproc.Imgproc;
import org.opencv.objdetect.CascadeClassifier;
import org.springframework.beans.factory.annotation.Value;
import org.springframework.core.io.Resource;
import org.springframework.web.bind.annotation.PostMapping;
import org.springframework.web.bind.annotation.RestController;
import org.springframework.web.multipart.MultipartFile;
/*
* @author zzf
* @date 2019年1月17日 下午12:04:45
*/
@RestController
public class OpenCVController {
@Value("classpath:haarcascade_frontalface_alt.xml")
private Resource xml;
@PostMapping("/face")
public void FaceDetector(HttpServletResponse response, MultipartFile file) throws IOException {
// D:\workspace-sts-3.9.2.RELEASE\OpenCV\src\main\resources
// String opencvpath = System.getProperty("user.dir") +
// "\\src\\main\\resources\\";
// String opencvDllName = opencvpath + Core.NATIVE_LIBRARY_NAME + ".dll";
// System.load(opencvDllName);
System.loadLibrary(Core.NATIVE_LIBRARY_NAME);
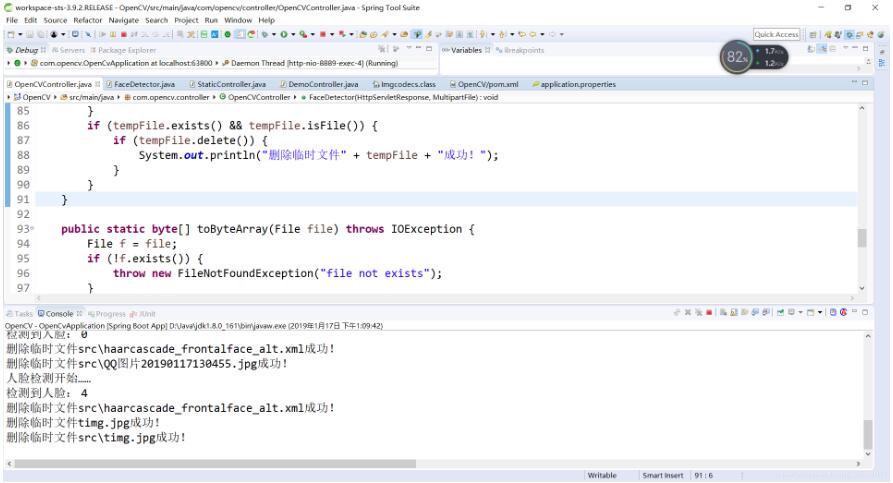
System.out.println("人脸检测开始……");
// 创建临时文件,因为boot打包后无法读取文件内的内容
File targetXmlFile = new File("src/" + xml.getFilename() + "");
FileUtils.copyInputStreamToFile(xml.getInputStream(), targetXmlFile);
CascadeClassifier faceDetector = new CascadeClassifier(targetXmlFile.toString());
if (faceDetector.empty()) {
System.out.println("请引入文件……");
return;
}
// 创建图片tempFile
File tempFile = new File("src/" + file.getOriginalFilename() + "");
FileUtils.copyInputStreamToFile(file.getInputStream(), tempFile);
// 读取创建的图片tempFile
Mat image = Imgcodecs.imread(tempFile.toString());
MatOfRect faceDetections = new MatOfRect();
// 进行人脸检测
faceDetector.detectMultiScale(image, faceDetections);
System.out.println(String.format("检测到人脸: %s", faceDetections.toArray().length));
Integer i = 1;
// 制图将图填充到image中
for (Rect rect : faceDetections.toArray()) {
Imgproc.rectangle(image, new Point(rect.x, rect.y), new Point(rect.x + rect.width, rect.y + rect.height),
new Scalar(0, 255, 0), 3);
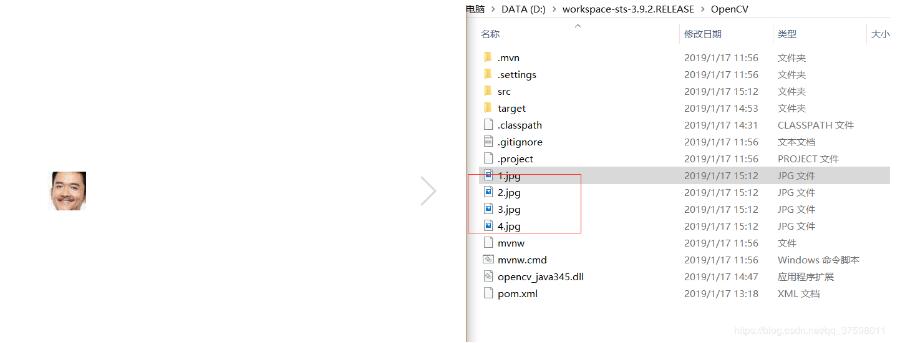
imageCut(tempFile.toString(), i+".jpg", rect.x, rect.y, rect.width, rect.height);// 进行图片裁剪
i++;
}
// 下面部分是返回给页面
String filename = file.getOriginalFilename();
Imgcodecs.imwrite(filename, image);
File imgFile = new File(filename);
if (imgFile.exists()) {
response.getOutputStream().write(toByteArray(imgFile));
response.getOutputStream().close();
}
// 删除临时文件
if (targetXmlFile.exists() && targetXmlFile.isFile()) {
if (targetXmlFile.delete()) {
System.out.println("删除临时文件" + targetXmlFile + "成功!");
}
}
if (imgFile.exists() && imgFile.isFile()) {
if (imgFile.delete()) {
System.out.println("删除临时文件" + imgFile + "成功!");
}
}
if (tempFile.exists() && tempFile.isFile()) {
if (tempFile.delete()) {
System.out.println("删除临时文件" + tempFile + "成功!");
}
}
}
public static void imageCut(String imagePath, String outFile, int posX, int posY, int width, int height) {
// 原始图像
Mat image = Imgcodecs.imread(imagePath);
// 截取的区域:参数,坐标X,坐标Y,截图宽度,截图长度
Rect rect = new Rect(posX, posY, width, height);
// 两句效果一样
Mat sub = image.submat(rect); // Mat sub = new Mat(image,rect);
Mat mat = new Mat();
Size size = new Size(width, height);
Imgproc.resize(sub, mat, size);// 将人脸进行截图并保存
Imgcodecs.imwrite(outFile, mat);
System.out.println(String.format("图片裁切成功,裁切后图片文件为: %s", outFile));
}
public static byte[] toByteArray(File file) throws IOException {
File f = file;
if (!f.exists()) {
throw new FileNotFoundException("file not exists");
}
ByteArrayOutputStream bos = new ByteArrayOutputStream((int) f.length());
BufferedInputStream in = null;
try {
in = new BufferedInputStream(new FileInputStream(f));
int buf_size = 1024;
byte[] buffer = new byte[buf_size];
int len = 0;
while (-1 != (len = in.read(buffer, 0, buf_size))) {
bos.write(buffer, 0, len);
}
return bos.toByteArray();
} catch (IOException e) {
e.printStackTrace();
throw e;
} finally {
try {
in.close();
} catch (IOException e) {
e.printStackTrace();
}
bos.close();
}
}
}
下面来一张我男神们的合照


以上就是本文的全部内容,希望对大家的学习有所帮助,也希望大家多多支持。

