
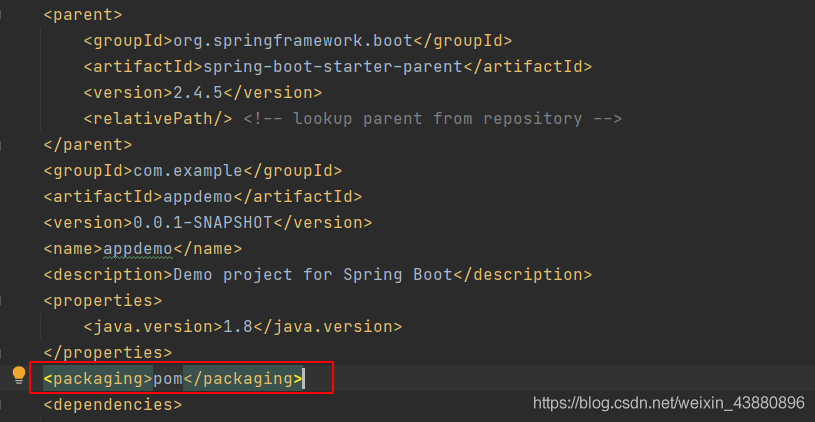
<packaging>pom</packaging>
<modules>
        <module>web</module>
    </modules>
<packaging>jar</packaging>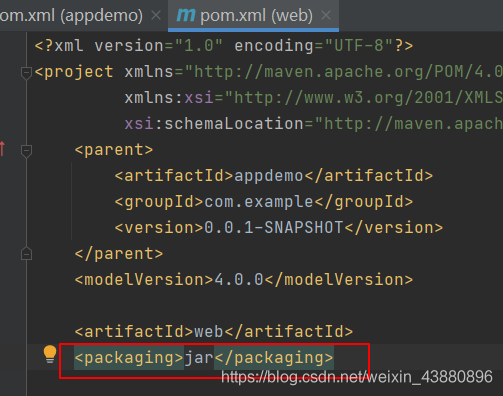
多模块项目中,项目启动由web模块进行管理,所以需要将启动文件以及包结构,移动到web模块下
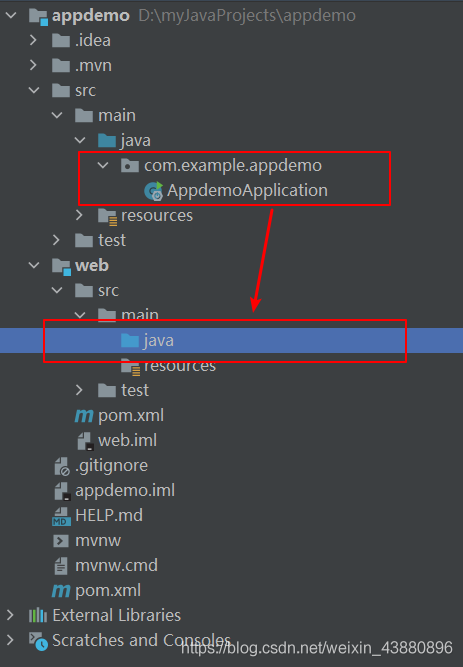
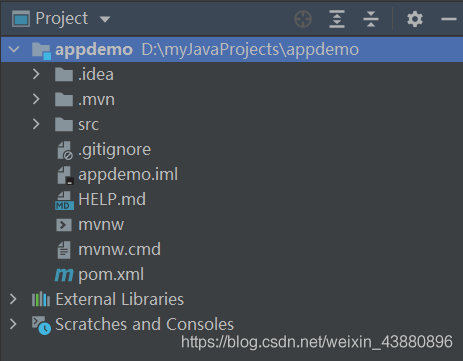
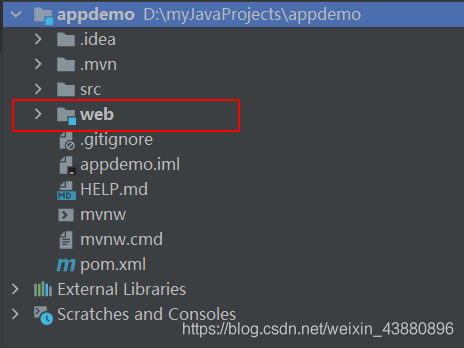
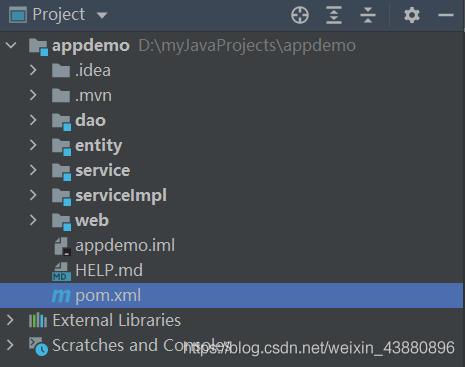
移动完毕,项目架构如下
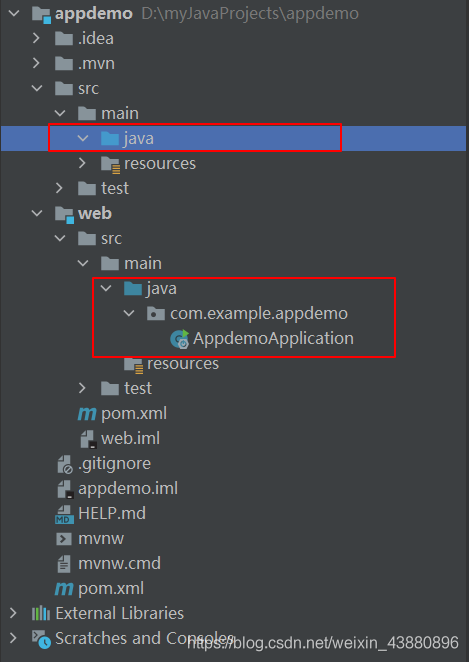
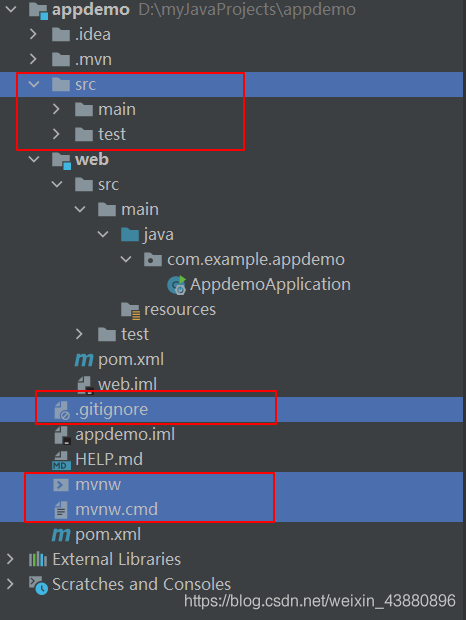
在多模块工程中,开发各种代码,分别在模块中进行,不在父工程中开发,所以父工程appdemo中的src文件夹,就没用了
<packaging>jar</packaging>
<modules>
        <module>web</module>
        <module>entity</module>
        <module>service</module>
        <module>serviceImpl</module>
        <module>dao</module>
    </modules>
修改父项目依赖
<dependencies>
        <dependency>
            <groupId>mysql</groupId>
            <artifactId>mysql-connector-java</artifactId>
            <scope>runtime</scope>
        </dependency>
        <dependency>
            <groupId>org.springframework.boot</groupId>
            <artifactId>spring-boot-starter-data-jpa</artifactId>
        </dependency>
        <dependency>
            <groupId>org.springframework.boot</groupId>
            <artifactId>spring-boot-starter-jdbc</artifactId>
        </dependency>
        <dependency>
            <groupId>org.springframework.boot</groupId>
            <artifactId>spring-boot-starter-web</artifactId>
        </dependency>

        <dependency>
            <groupId>org.springframework.boot</groupId>
            <artifactId>spring-boot-devtools</artifactId>
            <scope>runtime</scope>
            <optional>true</optional>
        </dependency>
        <dependency>
            <groupId>org.projectlombok</groupId>
            <artifactId>lombok</artifactId>
            <optional>true</optional>
        </dependency>
        <dependency>
            <groupId>org.springframework.boot</groupId>
            <artifactId>spring-boot-starter-test</artifactId>
            <scope>test</scope>
        </dependency>
    </dependencies>
<dependencyManagement>
        <dependencies>
            <dependency>
                <groupId>com.example</groupId>
                <artifactId>entity</artifactId>
                <version>0.0.1-SNAPSHOT</version>
            </dependency>
            <dependency>
                <groupId>com.example</groupId>
                <artifactId>service</artifactId>
                <version>0.0.1-SNAPSHOT</version>
            </dependency>
            <dependency>
                <groupId>com.example</groupId>
                <artifactId>serviceImpl</artifactId>
                <version>0.0.1-SNAPSHOT</version>
            </dependency>
            <dependency>
                <groupId>com.example</groupId>
                <artifactId>dao</artifactId>
                <version>0.0.1-SNAPSHOT</version>
            </dependency>
        </dependencies>
    </dependencyManagement>
使用dependencyManagement对依赖进行管理,可以使子模块在引用管理中的依赖时,不用再设置版本号。
修改web模块pom文件,增加如下依赖
<dependencies>
        <dependency>
            <groupId>com.example</groupId>
            <artifactId>entity</artifactId>
        </dependency>
        <dependency>
            <groupId>com.example</groupId>
            <artifactId>service</artifactId>
        </dependency>
        <dependency>
            <groupId>com.example</groupId>
            <artifactId>serviceImpl</artifactId>
        </dependency>
    </dependencies>
修改service模块pom文件,增加如下依赖
<dependencies>
        <dependency>
            <groupId>com.example</groupId>
            <artifactId>entity</artifactId>
        </dependency>
    </dependencies>
修改serviceImpl模块pom文件,增加如下依赖
<dependencies>
        <dependency>
            <groupId>com.example</groupId>
            <artifactId>entity</artifactId>
        </dependency>
        <dependency>
            <groupId>com.example</groupId>
            <artifactId>dao</artifactId>
        </dependency>
        <dependency>
            <groupId>com.example</groupId>
            <artifactId>service</artifactId>
        </dependency>
    </dependencies>
修改entity模块pom文件,增加如下依赖
<dependencies>
        <dependency>
            <groupId>mysql</groupId>
            <artifactId>mysql-connector-java</artifactId>
            <scope>runtime</scope>
        </dependency>
        <dependency>
            <groupId>org.springframework.boot</groupId>
            <artifactId>spring-boot-starter-data-jpa</artifactId>
        </dependency>
        <dependency>
            <groupId>org.springframework.boot</groupId>
            <artifactId>spring-boot-starter-jdbc</artifactId>
        </dependency>
    </dependencies>
修改dao模块pom文件,增加如下依赖
<dependencies>
        <dependency>
            <groupId>mysql</groupId>
            <artifactId>mysql-connector-java</artifactId>
            <scope>runtime</scope>
        </dependency>
        <dependency>
            <groupId>org.springframework.boot</groupId>
            <artifactId>spring-boot-starter-data-jpa</artifactId>
        </dependency>
        <dependency>
            <groupId>org.springframework.boot</groupId>
            <artifactId>spring-boot-starter-jdbc</artifactId>
        </dependency>
    </dependencies>
修改父项目appdemo的pom文件,删除数据库相关的依赖
<!--<dependency>
            <groupId>mysql</groupId>
            <artifactId>mysql-connector-java</artifactId>
            <scope>runtime</scope>
        </dependency>
        <dependency>
            <groupId>org.springframework.boot</groupId>
            <artifactId>spring-boot-starter-data-jpa</artifactId>
        </dependency>
        <dependency>
            <groupId>org.springframework.boot</groupId>
            <artifactId>spring-boot-starter-jdbc</artifactId>
        </dependency>-->
因为在父项目中设置的依赖,子模块中会自动继承,无需重复引用,但是并不是每个子模块都会需要连接、操作数据的这些依赖,所以在父项目的pom文件中,将这些依赖删除,在涉及到连接数据库,操作数据库的dao模块,以及涉及到使用实体类创建表的entity模块,单独引入这些必要的依赖即可。
因为启动类AppdemoApplication已经移动到web模块,并且要求项目是从web模块启动,所以需要删除父项目中的启动配置,并在web的pom文件中增加启动配置
<!--<build>
        <plugins>
            <plugin>
                <groupId>org.springframework.boot</groupId>
                <artifactId>spring-boot-maven-plugin</artifactId>
                <configuration>
                    <excludes>
                        <exclude>
                            <groupId>org.projectlombok</groupId>
                            <artifactId>lombok</artifactId>
                        </exclude>
                    </excludes>
                </configuration>
            </plugin>
        </plugins>
    </build>-->
	<build>
        <plugins>
            <plugin>
                <groupId>org.springframework.boot</groupId>
                <artifactId>spring-boot-maven-plugin</artifactId>
                <configuration>
                    <excludes>
                        <exclude>
                            <groupId>org.projectlombok</groupId>
                            <artifactId>lombok</artifactId>
                        </exclude>
                    </excludes>
                </configuration>
            </plugin>
        </plugins>
    </build>
比较简单的方法就是把父项目中的这个build配置项,复制到web模块的pom中。
如果不做启动项的修改,在运行启动类时,会提示找不到main方法,导致项目无法启动。
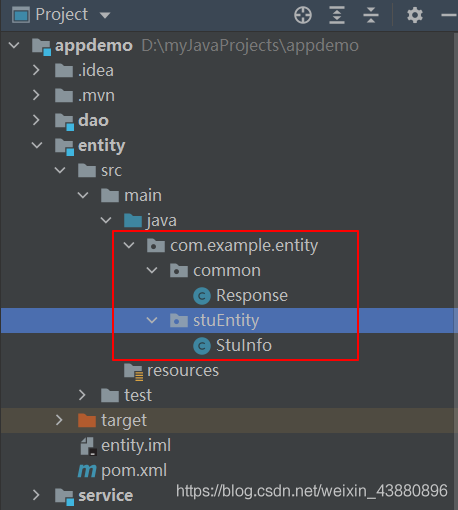
在entity模块中增加实体类文件Response和StuInfo
package com.example.entity.common;
import lombok.Data;

@Data
public class Response<T> {
    private int code;
    private String message;
    private T data;

    public Response(int code, String message, T data) {
        this.code = code;
        this.message = message;
        this.data = data;
    }
}
package com.example.entity.stuEntity;
import lombok.Data;
import javax.persistence.*;
import java.sql.Timestamp;

@Data
@Entity
@Table(name = "stuinfo")
public class StuInfo{
    @Id
    @GeneratedValue(strategy = GenerationType.IDENTITY)
    private Long id;//id,键值,自增
    private int stuid;//学生id
    private String name;//姓名
    private int gender;//性别
    private int age;//年龄
    private int grade_num;//年级
    private int class_num;//班级
    private int status;//状态,1-数据有效,2-数据删除
    private Timestamp createtime;//创建时间
    private Timestamp updatetime;//更新时间
}
@Table(name = “stuinfo”)会报红线,如果不想显示红线,需要在项目中配置数据库信息,然后做下关联就行,不做处理也无影响
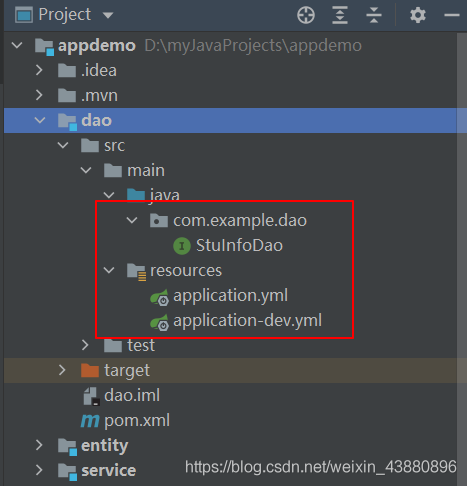
在dao模块中,增加数据库操作接口
package com.example.dao;

import com.example.entity.stuEntity.StuInfo;
import org.springframework.data.jpa.repository.JpaRepository;
import org.springframework.stereotype.Repository;

@Repository
public interface StuInfoDao extends JpaRepository<StuInfo, Long> {

}
因为存在开发环境,测试环境,预发环境,线上环境等多种环境,为了方便切换不同环境的,所以可以设置多个配置文件,配置文件名称格式为:application-XXX.yml,如开发环境的,可以写成:application-dev.yml
如果引用dev的这个配置文件,只需要在配置文件application.yml中,激活该配置文件即可,格式如下
spring:
  profiles:
    active: dev
application-dev.yml中配置了数据库连接和jpa等信息,内容如下(该部分需要根据自己的数据库信息,还有数据库的版本进行调整)
spring:
  datasource:
    url: jdbc:mysql://localhost:3306/demo_db?useUnicode=true&zeroDateTimeBehavior=convertToNull&autoReconnect=true&serverTimezone=UTC
#    url: jdbc:mysql://localhost:3306/demo_db?serverTimezone=UTC&useSSL=true&allowPublicKeyRetrieval=true&useUnicode=true
    username: root
    password: root
    driver-class-name: com.mysql.cj.jdbc.Driver
  jpa:
    database: mysql
    show-sql: true
    hibernate:
      ddl-auto: create
      naming:
        implicit-strategy: org.springframework.boot.orm.jpa.hibernate.SpringImplicitNamingStrategy
以上配置文件中,
url:连接mysql数据库的url,网上很多介绍,不做赘述
username、password:在选择的时候,不要写成data-username、data-password,否则启动项目的时候,会报连接数据库账号无效或无权限的情况,我是经常会写错,导致连接数据库的经常出现问题。
driver-class-name:这个驱动配置,不同版本的要求不同,不过现在高版本的驱动应该都是这个
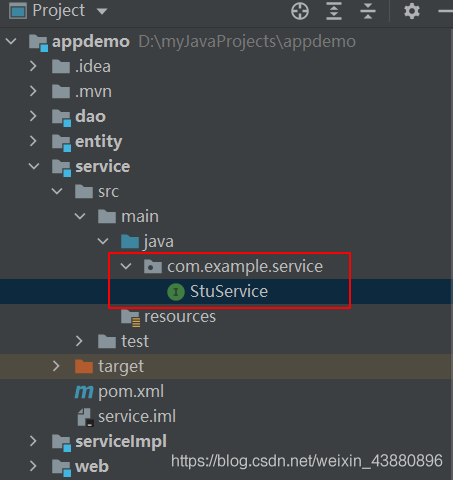
在service模块中定义接口StuService
接口代码如下
package com.example.service;

import com.example.entity.stuEntity.StuInfo;

public interface StuService {

    Boolean save(StuInfo stuInfo);
}
在serviceImpl模块中编写接口实现类
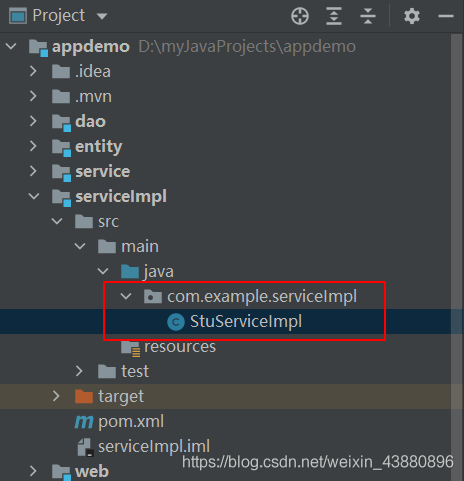
代码如下
package com.example.serviceImpl;

import com.example.dao.StuInfoDao;
import com.example.entity.stuEntity.StuInfo;
import com.example.service.StuService;
import lombok.extern.log4j.Log4j2;
import org.springframework.beans.factory.annotation.Autowired;
import org.springframework.stereotype.Service;
import java.sql.Timestamp;

@Service
@Log4j2
public class StuServiceImpl implements StuService {
    @Autowired
    private StuInfoDao stuInfoDao;

    @Override
    public Boolean save(StuInfo stuInfo) {
        stuInfo.setStatus(1);
        stuInfo.setCreatetime(new Timestamp(System.currentTimeMillis()));
        stuInfo.setUpdatetime(new Timestamp(System.currentTimeMillis()));
        log.error("测试日志");
        return Boolean.TRUE;
    }
}
@Service,标注该类为接口实现类,可供spring扫描注入
@Log4j2,日志工具
@Autowired,将StuInfoDao进行注入
在web模块中编写controllor类,供前端请求调用
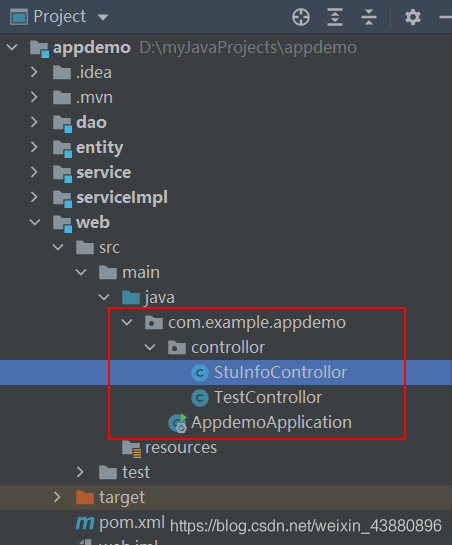
代码如下
package com.example.appdemo.controllor;
import com.example.entity.common.Response;
import com.example.entity.stuEntity.StuInfo;
import com.example.service.StuService;
import org.springframework.beans.factory.annotation.Autowired;
import org.springframework.web.bind.annotation.PostMapping;
import org.springframework.web.bind.annotation.RequestBody;
import org.springframework.web.bind.annotation.RequestMapping;
import org.springframework.web.bind.annotation.RestController;
@RestController
@RequestMapping("/stu")
public class StuInfoControllor {
@Autowired
private StuService stuService;
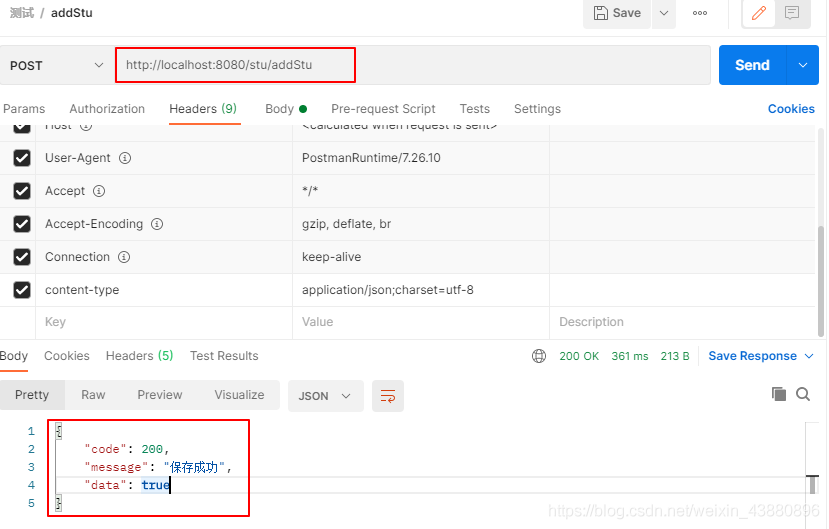
@PostMapping("/addStu")
public Response<Boolean> addStu(@RequestBody StuInfo stuInfo) {
if (stuService.save(stuInfo)) {
return new Response<>(200, "保存成功", Boolean.TRUE);
} else {
return new Response<>(400, "保存失败", Boolean.FALSE);
}
}
}
修改启动类AppdemoApplication,增加扫描注解
工程在启动过程中,spring会对工程内的类进行扫描,自动生成对象供程序调用,但是有时候工程自动扫描时会忽略某些类,这就需要明确指定需要扫描的包,启动类代码如下
package com.example.appdemo;

import org.springframework.boot.SpringApplication;
import org.springframework.boot.autoconfigure.SpringBootApplication;
import org.springframework.boot.autoconfigure.domain.EntityScan;
import org.springframework.context.annotation.ComponentScan;
import org.springframework.data.jpa.repository.config.EnableJpaRepositories;

@SpringBootApplication(scanBasePackages = "com.example")
@ComponentScan({"com.example"})
@EnableJpaRepositories("com.example")
@EntityScan("com.example.entity")
public class AppdemoApplication {
    public static void main(String[] args) {
        SpringApplication.run(AppdemoApplication.class, args);
    }
}
Error:java:JDK isn't specified for module错误,这个只要把工程父项目的【.idea】文件夹删除,重新刷新生成即可解决
