工具已经封装好,小伙伴们可以直接下载使用:https://gitee.com/lm970585581/spring-boot2-license
下载后打开cloud-license-serve项目直接启动即可。
然后调用项目的获取信息接口:http://localhost:9081/license/getServerInfos?osName=windows
会得到类似如下结果,分别代表ip地址、mac地址、cpu序号、主板序号。
{
    "ipAddress": [
        "192.168.80.1",
        "192.168.220.1"
    ],
    "macAddress": [
        "01-51-56-C0-00-01",
        "00-52-56-C0-00-08",
        "BC-54-2D-DF-69-FC"
    ],
    "cpuSerial": "BFECFBFF000806EC",
    "mainBoardSerial": "L1HF16301D5"
}
使用JDK自带的 keytool 工具生成公私钥证书库:
假如我们设置公钥库密码为:public_password1234,私钥库密码为:private_password1234,则生成命令如下:
#生成命令
keytool -genkeypair -keysize 1024 -validity 3650 -alias "privateKey" -keystore "privateKeys.keystore" -storepass "public_password1234" -keypass "private_password1234" -dname "CN=localhost, OU=localhost, O=localhost, L=SH, ST=SH, C=CN"

#导出命令
keytool -exportcert -alias "privateKey" -keystore "privateKeys.keystore" -storepass "public_password1234" -file "certfile.cer"

#导入命令
keytool -import -alias "publicCert" -file "certfile.cer" -keystore "publicCerts.keystore" -storepass "public_password1234"
上述命令执行完成之后,会在当前路径下生成三个文件,分别是:privateKeys.keystore、publicCerts.keystore、certfile.cer。其中文件certfile.cer不再需要可以删除,文件privateKeys.keystore用于当前的 ServerDemo 项目给客户生成license文件,而文件publicCerts.keystore则随应用代码部署到客户服务器,用户解密license文件并校验其许可信息。
最后我们再生成license,调用接口地址为:http://localhost:9081/license/generateLicense
调用的参数是一个json参数,格式如下:
{
    "subject": "license_demo",
    "privateAlias": "privateKey",
    "keyPass": "private_password1234",
    "storePass": "public_password1234",
    "licensePath": "C:/Users/zifangsky/Desktop/license_demo/license.lic",
    "privateKeysStorePath": "C:/Users/zifangsky/Desktop/license_demo/privateKeys.keystore",
    "issuedTime": "2018-07-10 00:00:01",
    "expiryTime": "2019-12-31 23:59:59",
    "consumerType": "User",
    "consumerAmount": 1,
    "description": "这是证书描述信息",
    "licenseCheckModel": {
        "ipAddress": ["192.168.245.1", "10.0.5.22"],
        "macAddress": ["00-50-56-C0-00-01", "50-7B-9D-F9-18-41"],
        "cpuSerial": "BFEBFBFF000406E3",
        "mainBoardSerial": "L1HF65E00X9"
    }
}
如果请求成功,那么最后会在 licensePath 参数设置的路径生成一个 license.lic 的文件,这个文件就是给客户部署代码的服务器许可文件。
如果小伙伴们按照上文的步骤一步一步的跟着实现,我们已经获得了license.lic,接下来就是把license使用到我们自己的项目中了。
cloud-license-client就是引入项目的一个例子,打开可以直接使用。
引入自己的项目只需将以下文件导入
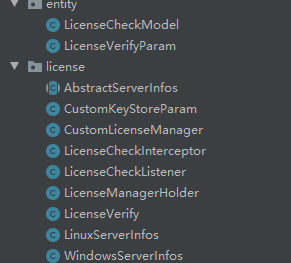
并配置好拦截器LicenseCheckInterceptor就可以使用了。配置方法在InterceptorConfig类中,可以参考。
这里需要注意的是使用license需要两个文件:license.lic,publicCerts.keystore
演示项目配置的路径是绝对路径,一般我们会配置相对路径,把两个文件放到项目下,配置位置在LicenseCheckListener类中
修改如下部分改为相对路径读取就可以了
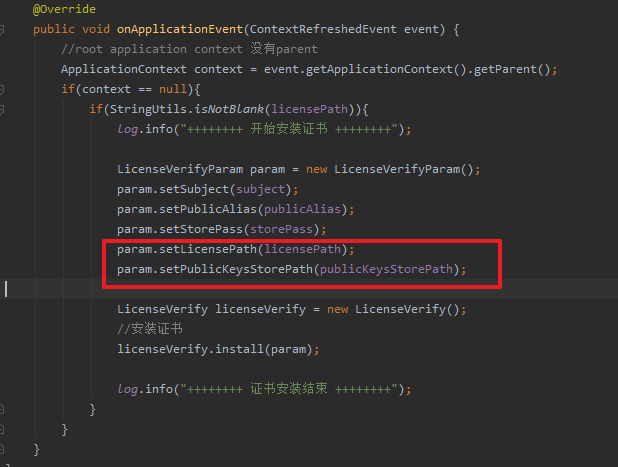
这里就不演示如何修改了,因为修改起来很容易。
还需要注意一点:
对于LicenseCheckModel,LicenseCreatorParam两个类,引入到自己的客户端后一定要保证包名与生成license时的包名一致,不然会导致序列化失败的问题。
<dependency>
  <groupId>org.smartboot.license</groupId>
  <artifactId>license-client</artifactId>
  <version>1.0.3</version>
</dependency>
public class LicenseTest {
  public static void main(String[] args) throws Exception {
      File file=new File("license.txt");
      License license = new License();
      LicenseEntity licenseEntity=license.loadLicense(file);
      System.out.println(new String(licenseEntity.getData()));
  }
}
简单方便,几行代码放在启动方法里校验,也可以加注在拦截器里。
一个简单方便的授权方式,只需以上几步就可集成到boot项目中去啦!
生成机器码
我们首先要做的就是对软件部署的环境的唯一性进行限制,这里使用的是macadderss,当然你也可以换成cpu序列编号,并无太大影响,先上代码
private static String getMac() {
        try {
            Enumeration<NetworkInterface> el = NetworkInterface
                    .getNetworkInterfaces();
            while (el.hasMoreElements()) {
                byte[] mac = el.nextElement().getHardwareAddress();
                if (mac == null)
                    continue;
                String hexstr = bytesToHexString(mac);
                return getSplitString(hexstr, "-", 2).toUpperCase();
            }
        } catch (Exception exception) {
            exception.printStackTrace();
        }
        return null;
    }

public static String getMachineCode() throws Exception{
        Set<String> result = new HashSet<>();
        String mac = getMac();
        result.add(mac);
        Properties props = System.getProperties();
        String javaVersion = props.getProperty("java.version");
        result.add(javaVersion);
        String javaVMVersion = props.getProperty("java.vm.version");
        result.add(javaVMVersion);
        String osVersion = props.getProperty("os.version");
        result.add(osVersion);
        String code = Encrpt.GetMD5Code(result.toString());
        return getSplitString(code, "-", 4);

    }
这里进行的操作是取出机器码,与java版本,jvm,操作系统参数进行混合,并进行MD5操作
进行lic文件的生成
授权证书主要包含三个要素,机器码,是否永久有效标识,证书时效,我们会将这些数据写入文本中并进行加密处理,看下生成证书的代码
public static void getLicense(String isNoTimeLimit, String licenseLimit, String machineCode, String licensePath, String priavateKeyPath) throws Exception{
        String[] liccontent = {
                "LICENSEID=yanpeng19940119@gmail.com",
                "LICENSENAME=YBLOG使用证书",
                MessageFormat.format("LICENSETYPE={0}",isNoTimeLimit),
                MessageFormat.format("EXPIREDAY={0}",licenseLimit), //日期采用yyyy-MM-dd日期格式
                MessageFormat.format("MACHINECODE={0}",machineCode),
                ""
        };

        //将lic内容进行混合签名并写入内容
        StringBuilder sign = new StringBuilder();
        for(String item:liccontent){
            sign.append(item+"yblog");
        }
        liccontent[5] = MessageFormat.format("LICENSESIGN={0}",Encrpt.GetMD5Code(sign.toString()));
        FileUtil.createFileAndWriteLines(licensePath,liccontent);
        //将写入的内容整体加密替换
        String filecontent =FileUtil.readFileToString(licensePath);
        String encrptfilecontent = Encrpt.EncriptWRSA_Pri(filecontent,priavateKeyPath);
        File file = new File(licensePath);
        file.delete();
        FileUtil.createFile(licensePath,encrptfilecontent);
最后在验证lic,我们会在系统中注册一个拦截器,未通过系统授权认证会自动跳转到lic文件上传界面,springboot接收文件与常规java有一些不同,使用的MultipartFile对象,会获取到上传文件的数组,进行操作。
我们就可以通过系统内置的公钥对lic文件的机器码,授权时间进行验证,确定是否能正常访问系统。
好了,到这里本文的分享就结束了,本文分享的其实是License的使用说明,并没有带大家阅读源码去看原理,感兴趣的小伙伴可以自行阅读一下项目源码,也很容易看懂哦。

