这篇博客将介绍人脸检测,然后使用Python,OpenCV模糊它们来“匿名化”每张图像,以确保隐私得到保护,保证没有人脸可以被识别如何使用。
并介绍俩种模糊的方法:简单高斯模糊、像素模糊。
人脸模糊和匿名化的实际应用包括:
原始图 VS 简单高斯模糊效果图如下:

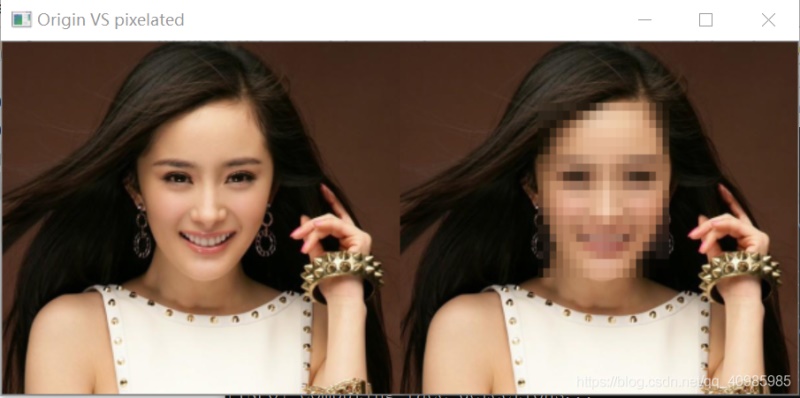
原始图 VS 像素模糊效果图如下:
在晚间新闻上看到的面部模糊正是像素模糊,主要是因为它比高斯模糊更“美观”;
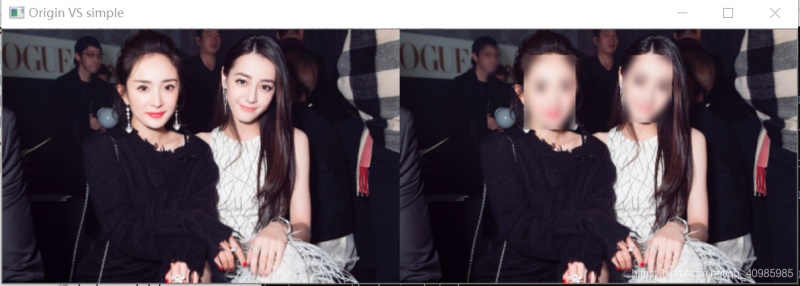
多人的也可以哦:原始图 VS 简单高斯模糊效果图:
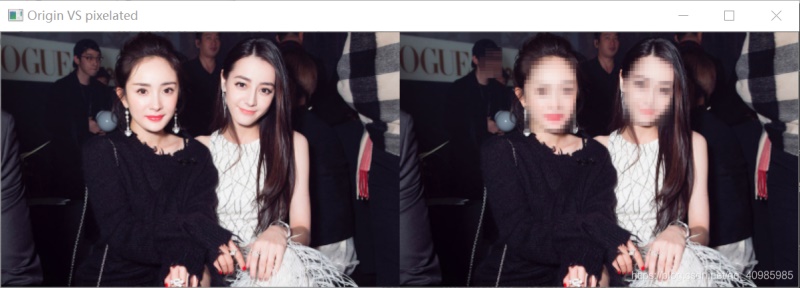
多人的也可以哦:原始图 VS 像素模糊效果图:
人脸模糊是一种计算机视觉方法,用于对图像和视频中的人脸进行匿名化。
如上图中人的身份是不可辨认的,通常使用面部模糊来帮助保护图像中的人的身份。
人脸检测方法有很多,任选一种,进行图像中的人脸检测或者实时视频流中人脸的检测。人脸成功检测后可使用以下俩种方式进行模糊。
应用OpenCV和计算机视觉进行人脸模糊包括四部分:
# USAGE
# python blur_face.py --image examples/we.jpg --face face_detector
# python blur_face.py --image examples/we.jpg --face face_detector --method pixelated

# 使用OpenCV实现图像中的人脸模糊
# 导入必要的包
import argparse
import os

import cv2
import imutils
import numpy as np
from pyimagesearch.face_blurring import anonymize_face_pixelate
from pyimagesearch.face_blurring import anonymize_face_simple

# 构建命令行参数及解析
# --image 输入人脸图像
# --face 人脸检测模型的目录
# --method 使用简单高斯模糊、像素模糊
# --blocks 面部分块数,默认20
# --confidence 面部检测置信度,过滤弱检测的值,默认50%
ap = argparse.ArgumentParser()
ap.add_argument("-i", "--image", required=True,
                help="path to input image")
ap.add_argument("-f", "--face", required=True,
                help="path to face detector model directory")
ap.add_argument("-m", "--method", type=str, default="simple",
                choices=["simple", "pixelated"],
                help="face blurring/anonymizing method")
ap.add_argument("-b", "--blocks", type=int, default=20,
                help="# of blocks for the pixelated blurring method")
ap.add_argument("-c", "--confidence", type=float, default=0.5,
                help="minimum probability to filter weak detections")
args = vars(ap.parse_args())

# 加载基于Caffe的人脸检测模型
# 从磁盘加载序列化的面部检测模型及标签文件
print("[INFO] loading face detector model...")
prototxtPath = os.path.sep.join([args["face"], "deploy.prototxt"])
weightsPath = os.path.sep.join([args["face"],
                                "res10_300x300_ssd_iter_140000.caffemodel"])
net = cv2.dnn.readNet(prototxtPath, weightsPath)

# 从此盘加载输入图像,获取图像维度
image = cv2.imread(args["image"])
image = imutils.resize(image, width=600)
orig = image.copy()
(h, w) = image.shape[:2]

# 预处理图像,构建图像blob
blob = cv2.dnn.blobFromImage(image, 1.0, (300, 300),
                             (104.0, 177.0, 123.0))

# 传递blob到网络,并获取面部检测结果
print("[INFO] computing face detections...")
net.setInput(blob)
detections = net.forward()

# 遍历人脸检测结果
for i in range(0, detections.shape[2]):
    # 提取检测的置信度,即可能性
    confidence = detections[0, 0, i, 2]

    # 过滤弱检测结果,确保均高于最小置信度
    if confidence > args["confidence"]:
        # 计算人脸的边界框(x,y)
        box = detections[0, 0, i, 3:7] * np.array([w, h, w, h])
        (startX, startY, endX, endY) = box.astype("int")

        # 提取面部ROI
        face = image[startY:endY, startX:endX]

        # 检查是使用简单高斯模糊 还是 像素模糊方法
        if args["method"] == "simple":
            face = anonymize_face_simple(face, factor=3.0)
        # 否则应用像素匿名模糊方法
        else:
            face = anonymize_face_pixelate(face,
                                           blocks=args["blocks"])

        # 用模糊的匿名面部覆盖图像中的原始人脸ROI
        image[startY:endY, startX:endX] = face

# 原始图像和匿名图像并排显示
output = np.hstack([orig, image])
cv2.imshow("Origin VS " + str(args['method']), output)
cv2.waitKey(0)
# USAGE
# python blur_face_video.py --face face_detector
# python blur_face_video.py --face face_detector --method pixelated

# 导入必要的包
import argparse
import os
import time

import cv2
import imutils
import numpy as np
from imutils.video import VideoStream
from pyimagesearch.face_blurring import anonymize_face_pixelate
from pyimagesearch.face_blurring import anonymize_face_simple

# 构建命令行参数及解析
# --face 人脸检测模型的目录
# --method 使用简单高斯模糊、像素模糊
# --blocks 面部分块数,默认20
# --confidence 面部检测置信度,过滤弱检测的值,默认50%
ap = argparse.ArgumentParser()
ap.add_argument("-f", "--face", required=True,
                help="path to face detector model directory")
ap.add_argument("-m", "--method", type=str, default="simple",
                choices=["simple", "pixelated"],
                help="face blurring/anonymizing method")
ap.add_argument("-b", "--blocks", type=int, default=20,
                help="# of blocks for the pixelated blurring method")
ap.add_argument("-c", "--confidence", type=float, default=0.5,
                help="minimum probability to filter weak detections")
args = vars(ap.parse_args())

# 从磁盘加载训练好的人脸检测器Caffe模型
print("[INFO] loading face detector model...")
prototxtPath = os.path.sep.join([args["face"], "deploy.prototxt"])
weightsPath = os.path.sep.join([args["face"],
                                "res10_300x300_ssd_iter_140000.caffemodel"])
net = cv2.dnn.readNet(prototxtPath, weightsPath)

# 初始化视频流,预热传感器2s
print("[INFO] starting video stream...")
vs = VideoStream(src=0).start()
time.sleep(2.0)

# 遍历视频流的每一帧
while True:
    # 从线程化的视频流获取一帧,保持宽高比的缩放宽度为400px
    frame = vs.read()
    frame = imutils.resize(frame, width=400)

    # 获取帧的维度,预处理帧(构建blob)
    (h, w) = frame.shape[:2]
    blob = cv2.dnn.blobFromImage(frame, 1.0, (300, 300),
                                 (104.0, 177.0, 123.0))

    # 传递blob到网络并获取面部检测结果
    net.setInput(blob)
    detections = net.forward()

    # 遍历人脸检测结果
    for i in range(0, detections.shape[2]):
        # 提取检测的置信度,即可能性
        confidence = detections[0, 0, i, 2]

        # 过滤弱检测结果,确保均高于最小置信度
        if confidence > args["confidence"]:
            # 计算人脸的边界框(x,y)
            box = detections[0, 0, i, 3:7] * np.array([w, h, w, h])
            (startX, startY, endX, endY) = box.astype("int")

            # 提取面部ROI
            face = frame[startY:endY, startX:endX]

            # 检查是使用简单高斯模糊 还是 像素模糊方法
            if args["method"] == "simple":
                face = anonymize_face_simple(face, factor=3.0)
            # 否则应用像素匿名模糊方法
            else:
                face = anonymize_face_pixelate(face,
                                               blocks=args["blocks"])

            # 用模糊的匿名面部ROI覆盖图像中的原始人脸ROI
            frame[startY:endY, startX:endX] = face

    # 展示输出帧
    cv2.imshow("Frame", frame)
    key = cv2.waitKey(1) & 0xFF

    # 按下‘q'键,退出循环
    if key == ord("q"):
        break

# 做一些清理工作
# 关闭所有窗口,释放视频流指针
cv2.destroyAllWindows()
vs.stop()
https://www.pyimagesearch.com/2020/04/06/blur-and-anonymize-faces-with-opencv-and-python/

