多标签页 (Tabs) 的设计对于多窗口多任务管理有着无与伦比的高效率与方便性
在上面的文章中已经实现了后台管理的基本权限功能,包括用户、角色、菜单管理及权限分配。
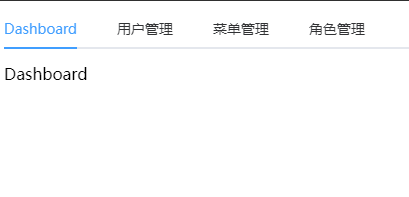
用户通过单击侧边栏的菜单,就可以调出对应的功能页面进行使用。但在使用的过程中,我们发现程序只能在同一时间打开一个页面。我们更希望打开多个功能页面时,这些页面以标签的形式集成在同一个窗口显示,要想切换到某个页面或是关闭某个页面,我们只需要操作相应的标签即可,非常方便快捷。

1.使用element tabs组件搭建基础的多标签页,示例如下:
<template>
  <div class="tabbar-container">
    <el-tabs v-model="pageCurrent" type="card" closable @tab-click="tabChange" @tab-remove="removeTab">
      <el-tab-pane
        v-for="(item) in pageList"
        :key="item.name"
        :name="item.name"
        class="tabbar-item"
      >
        <span slot="label">
          <span><i :class="item.icon" />{{ }} {{ item.label }}</span>
        </span>
      </el-tab-pane>
    </el-tabs>

  </div>
</template>
2. 监控路由变化情况,将路由信息与tabs panel列表进行关联
  watch: {
    $route: {
      handler(to, form = null) {
        // 当路由改变时,检测该路由是否已经在打开的页面之中,如果不在,就添加进去
        if (to.meta) {
          this.pageCurrent = to.path
          var index = this.pageList.findIndex(value => {
            return value.name === to.path
          })
          if (index < 0) {
            this.pageList.push({ name: to.path, label: to.meta.title, icon: to.meta.icon })
          }
        }
      },
      immediate: true
    }
  },
增加移除tab页与切换tab页事件
  methods: {
    // 移除tab页
    removeTab(targetName) {
      if (targetName === '/dashboard') return
      const tabs = this.pageList
      let activeName = this.pageCurrent
      if (activeName === targetName) {
        tabs.forEach((tab, index) => {
          if (tab.name === targetName) {
            const nextTab = tabs[index + 1] || tabs[index - 1]
            if (nextTab) {
              activeName = nextTab.name
            }
          }
        })
      }
      this.pageCurrent = activeName
      this.pageList = tabs.filter(tab => tab.name !== targetName)
      this.$router.push({ path: activeName })
    },
    // 切换标签页
    tabChange(tab, event) {
      this.$router.push({ path: tab.name })
    }
  }
在布局主界面中加入多标签组件
<template>
  <div :class="classObj" class="app-wrapper">
    <div v-if="device==='mobile'&&sidebar.opened" class="drawer-bg" @click="handleClickOutside" />
    <sidebar class="sidebar-container" />
    <div class="main-container">
      <div :class="{'fixed-header':fixedHeader}">
        <navbar />
        <!-- 加入多标签组件 -->
        <tabbar />
      </div>
      <app-main />
    </div>
  </div>
</template>

<script>
import { Navbar, Sidebar, AppMain, Tabbar } from './components'
...
</script>

前端
https://gitee.com/zhuhuix/startup-frontend
https://github.com/zhuhuix/startup-frontend
后端
https://gitee.com/zhuhuix/startup-backend
https://github.com/zhuhuix/startup-backend

