依赖属性就是一种自己可以没有值,并且可以通过绑定从其他数据源获取值。依赖属性可支持WPF中的样式设置、数据绑定、继承、动画及默认值。
将所有的属性都设置为依赖属性并不总是正确的解决方案,具体取决于其应用场景。有时,使用私有字段实现属性的典型方法便能满足要求。MSDN中给出了下面几种应用依赖属性的场景:
无论什么时候,只要依赖属性的值发生改变,wpf就会自动根据属性的元数据触发一系列的动作,这些动作可以重新呈现UI元素,也可以更新当前的布局,刷新数据绑定等等,这种变更的通知最有趣的特点之一就是属性触发器,它可以在属性值改变的时候,执行一系列自定义的动作,而不需要更改任何其他的代码来实现。通过下面的示例来演示属性变更通知
示例:当鼠标移动到Button按钮上面时,文字的前景色变为红色,离开时变为默认颜色黑色,采用传统方式和依赖属性两种方式实现:
<Window x:Class="WpfDemo.MainWindow"
        xmlns="http://schemas.microsoft.com/winfx/2006/xaml/presentation"
        xmlns:x="http://schemas.microsoft.com/winfx/2006/xaml"
        Title="Grid面板" Height="237" Width="525" WindowStartupLocation="CenterScreen">
    <Grid >
        <Button Height="30" Width="200" MouseEnter="Button_MouseEnter" MouseLeave="Button_MouseLeave" >鼠标移动到上面,前景色变为红色</Button>
    </Grid>
</Window>
C#后台代码实现:
using System;
using System.Collections.Generic;
using System.Linq;
using System.Text;
using System.Threading.Tasks;
using System.Windows;
using System.Windows.Controls;
using System.Windows.Data;
using System.Windows.Documents;
using System.Windows.Input;
using System.Windows.Media;
using System.Windows.Media.Imaging;
using System.Windows.Navigation;
using System.Windows.Shapes;

namespace WpfDemo
{
    /// <summary>
    /// MainWindow.xaml 的交互逻辑
    /// </summary>
    public partial class MainWindow : Window
    {
        public MainWindow()
        {
            InitializeComponent();
        }

        /// <summary>
        /// 鼠标移动到按钮上面
        /// </summary>
        /// <param name="sender"></param>
        /// <param name="e"></param>
        private void Button_MouseEnter(object sender, MouseEventArgs e)
        {
            Button btn = sender as Button;
            if (btn != null)
            {
                btn.Foreground = Brushes.Red;
            }
        }

        /// <summary>
        /// 鼠标离开按钮
        /// </summary>
        /// <param name="sender"></param>
        /// <param name="e"></param>
        private void Button_MouseLeave(object sender, MouseEventArgs e)
        {
            Button btn = sender as Button;
            if (btn != null)
            {
                btn.Foreground = Brushes.Black;
            }
        }
    }
}<Window x:Class="WpfDemo.MainWindow"
xmlns="http://schemas.microsoft.com/winfx/2006/xaml/presentation"
xmlns:x="http://schemas.microsoft.com/winfx/2006/xaml"
Title="Grid面板" Height="237" Width="525" WindowStartupLocation="CenterScreen">
<Grid >
<Button Height="30" Width="200">鼠标移动到上面,前景色变为红色
<Button.Style>
<Style TargetType="Button">
<Style.Triggers>
<Trigger Property="IsMouseOver" Value="true">
<Setter Property="Foreground" Value="Red"></Setter>
</Trigger>
</Style.Triggers>
</Style>
</Button.Style>
</Button>
</Grid>
</Window>使用上面的两种方式都可以实现Button按钮的前景色改变,效果如下:

在判断属性IsMouseOver的值为false的时候,自动将Foreground的值改为之前的值,因此就不需要写IsMouseOver的值为false的时候,将Foreground的值改为Black。
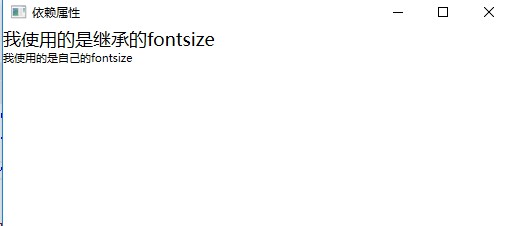
是指属性值自顶向下沿着元素树进行传递。
<Window x:Class="WpfDemo.MainWindow"
        xmlns="http://schemas.microsoft.com/winfx/2006/xaml/presentation"
        xmlns:x="http://schemas.microsoft.com/winfx/2006/xaml"
        Title="依赖属性" Height="237" Width="525" FontSize="18" WindowStartupLocation="CenterScreen">
    <Grid >
        <StackPanel>
            <TextBlock>我使用的是继承的fontsize</TextBlock>
            <TextBlock FontSize="11">我使用的是自己的fontsize</TextBlock>
        </StackPanel>
    </Grid>
</Window>
界面运行效果:
依赖属性和CLR属性在内存的使用上是截然不同的,每个CLR属性都包含一个非static的字段,因此当我们实例化一个类型的时候,就会创建该类型所拥有的所有CLR属性,也就是说一个对象所占用的内存在调用new操作进行实例化的时候就已经决定了、而wpf允许对象在创建的时候并不包含用于存储数据的空间,只保留在需要用到数据的时候能够获得该默认值,即用其他对象数据或者实时分配空间的能力。
在类上实现属性时,只要该类派生自 DependencyObject,便可以选择使用 DependencyProperty 标识符来标示属性,从而将其设置为依赖属性。其语法如下:
public static DependencyProperty TextProperty;
TextProperty =
DependencyProperty.Register("Text", //属性名称
typeof(string), //属性类型
typeof(TestDependencyPropertyWindow), //该属性所有者,即将该属性注册到那个类上
new PropertyMetadata("")); //属性默认值
public string Text
{
get { return (string)GetValue(TextProperty); }
set { SetValue(TextProperty, value); }
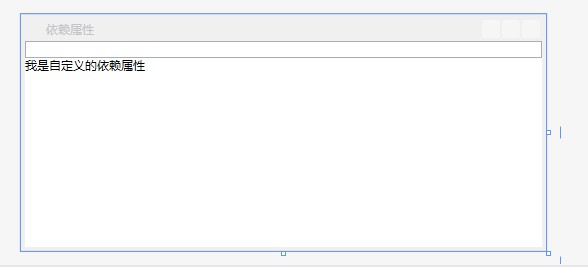
}示例:自定义一个依赖属性,界面包括一个TextBox和TextBlock,TextBlock上面字体的前景色随TextBox里面输入的颜色而改变,如果TextBox里面输入的值可以转换成颜色,TextBlock字体的前景色会显示输入的颜色值,如果不能转换,显示默认的前景色。
using System;
using System.Collections.Generic;
using System.Linq;
using System.Text;
using System.Threading.Tasks;
using System.Windows;
using System.Windows.Controls;
using System.Windows.Data;
using System.Windows.Documents;
using System.Windows.Input;
using System.Windows.Media;
using System.Windows.Media.Imaging;
using System.Windows.Navigation;
using System.Windows.Shapes;

namespace WpfDemo
{
    /// <summary>
    /// MyDependencyProperty.xaml 的交互逻辑
    /// </summary>
    public partial class MyDependencyProperty : UserControl
    {
        public MyDependencyProperty()
        {
            InitializeComponent();
        }

        //1、声明依赖属性变量
        public static readonly DependencyProperty MyColorProperty;

        //2、在属性系统中进行注册
        static MyDependencyProperty()
        {
            MyColorProperty = DependencyProperty.Register("MyColor", typeof(string), typeof(MyDependencyProperty),
                new PropertyMetadata("Red", (s, e) =>
                {
                    var mdp = s as MyDependencyProperty;
                    if (mdp != null)
                    {
                        try
                        {
                            var color = (Color)ColorConverter.ConvertFromString(e.NewValue.ToString());
                            mdp.Foreground = new SolidColorBrush(color);
                        }
                        catch
                        {
                            mdp.Foreground = new SolidColorBrush(Colors.Black);
                        }
                    }

                }));
        }

        //3、使用.NET属性包装依赖属性:属性名称与注册时候的名称必须一致,
        //即属性名MyColor对应注册时的MyColor
        public string MyColor
        {
            get
            {
                return (string)GetValue(MyColorProperty);
            }
            set
            {
                SetValue(MyColorProperty, value);
            }
        }
    }
}
快速定义依赖属性的快捷方式:
输入propdp,连续按两下Tab健,自动生成定义依赖属性的语法。和输入cw连续按两下Tab健,自动生成Console.Write()一样。
public int MyProperty
        {
            get { return (int)GetValue(MyPropertyProperty); }
            set { SetValue(MyPropertyProperty, value); }
        }

        // Using a DependencyProperty as the backing store for MyProperty.  This enables animation, styling, binding, etc...
        public static readonly DependencyProperty MyPropertyProperty =
DependencyProperty.Register("MyProperty", typeof(int), typeof(ownerclass), new PropertyMetadata(0));<UserControl x:Class="WpfDemo.MyDependencyProperty"
xmlns="http://schemas.microsoft.com/winfx/2006/xaml/presentation"
xmlns:x="http://schemas.microsoft.com/winfx/2006/xaml"
xmlns:mc="http://schemas.openxmlformats.org/markup-compatibility/2006"
xmlns:d="http://schemas.microsoft.com/expression/blend/2008"
mc:Ignorable="d"
d:DesignHeight="300" d:DesignWidth="300">
<Grid>
<TextBlock>我是自定义的依赖属性</TextBlock>
</Grid>
</UserControl><Window x:Class="WpfDemo.MainWindow"
xmlns="http://schemas.microsoft.com/winfx/2006/xaml/presentation"
xmlns:x="http://schemas.microsoft.com/winfx/2006/xaml"
xmlns:p="clr-namespace:WpfDemo"
Title="依赖属性" Height="237" Width="525" WindowStartupLocation="CenterScreen">
<Grid >
<StackPanel>
<TextBox Name="tbColor"></TextBox>
<p:MyDependencyProperty MyColor="{Binding Path=Text,ElementName=tbColor}" ></p:MyDependencyProperty>
</StackPanel>
</Grid>
</Window>在设计界面显示的效果:
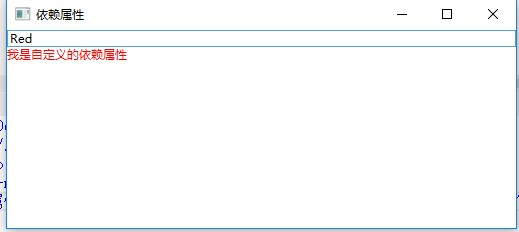
在TextBox里面输入正确的颜色值,前景色会显示为当前输入的颜色:
在TextBox里面输入错误的颜色值,前景色会显示为默认颜色:

到此这篇关于WPF依赖属性用法的文章就介绍到这了。希望对大家的学习有所帮助,也希望大家多多支持。

