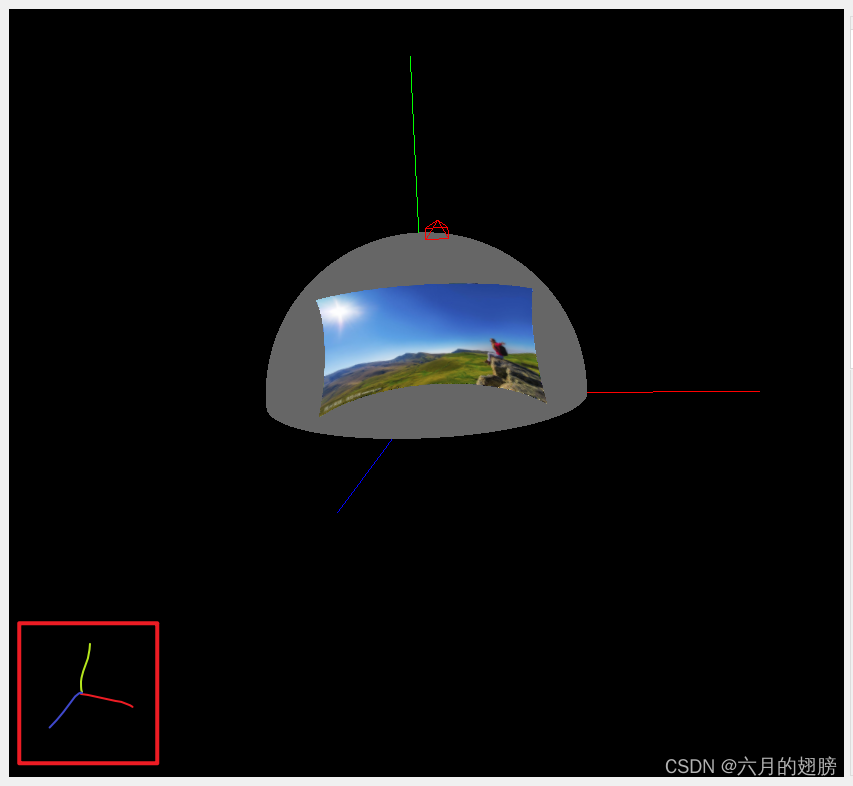
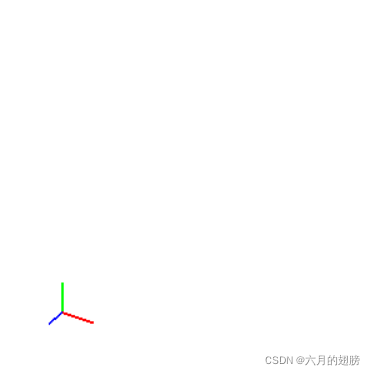
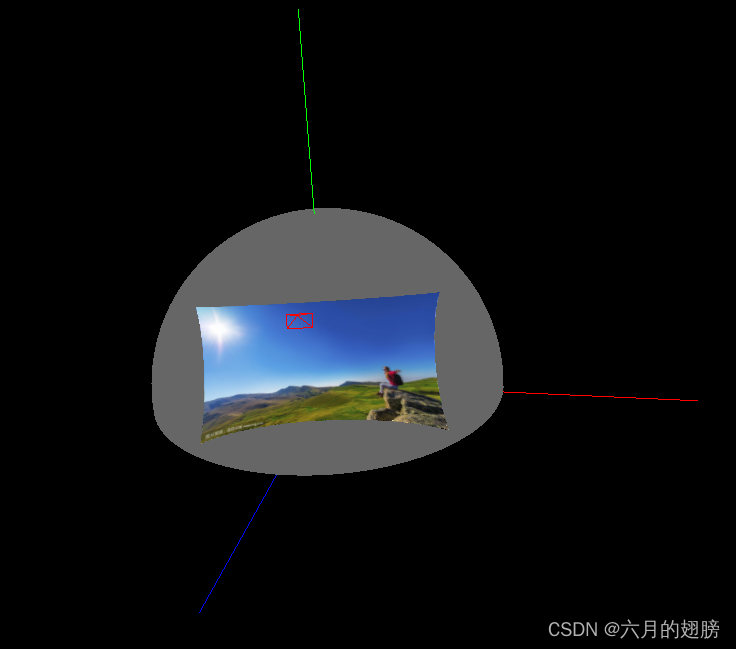
最开始是想在左下角位置画个坐标轴

后来在网上找了一个,也是别人搬运的,没有出处。学习了一下,感觉不太方便
#include <iostream>
using namespace std;

#include<gl/glut.h>

//这个N是用来计数的,为了验证两个回调函数display和reshape谁先执行
//结果是reshape先执行
int N = 0;

GLfloat transx, transy;
GLfloat scale;

int primw = 300;
int primh = 300;
GLfloat rotatex = 0, rotatey = 0;
GLint mousepx, mousepy;

void rend(void)
{
    glClear(GL_COLOR_BUFFER_BIT);
    glPointSize(8);
    glLineWidth(2);

    glPushMatrix();
    glTranslatef(transx, transy, 0);
    //glTranslatef(0, 0, 0);
    glRotatef(rotatex, 1, 0, 0);
    glRotatef(rotatey, 0, 1, 0);
    glBegin(GL_LINES);
    glColor3f(0, 1, 0);
    glVertex3f(0, 0, 0);
    glVertex3f(0, 2, 0);
    glColor3f(1, 0, 0);
    glVertex3f(0, 0, 0);
    glVertex3f(2, 0, 0);
    glColor3f(0, 0, 1);
    glVertex3f(0, 0, 0);
    glVertex3f(0, 0, 2);
    glEnd();
    glPopMatrix();
    glFlush();
    if (N < 3)
        cout << "rend" << endl;
    N++;
}

void reshape(int w, int h)
{
    glViewport(0, 0, w, h);
    glMatrixMode(GL_PROJECTION);
    glLoadIdentity();
    if (w <= h)
        gluOrtho2D(-10, 10, -10.0 / w * h, 10.0 / w * h);
    else
        gluOrtho2D(-10.0 / h * w, 10.0 / h * w, -10, 10);
    glMatrixMode(GL_MODELVIEW);
    glLoadIdentity();
    if (w <= h)
    {   /*  scale=(GLfloat)primw/w;*/
        transx = (50 - w / 2.0) * 20.0 / w;
        transy = (50 - h / 2.0) * 20.0 / w;
    }
    else
    {
        /*      scale=(GLfloat)primh/h;*/
        transx = (50 - w / 2.0) * 20.0 / h;
        transy = (50 - h / 2.0) * 20.0 / h;
    }
    if (N < 3)
        cout << "reshape" << endl;
    N++;
}

void motion(int x, int y)//鼠标按下移动
{
    int w, h;
    w = glutGet(GLUT_WINDOW_WIDTH);
    h = glutGet(GLUT_WINDOW_HEIGHT);
    if (0 <= x && x <= w && 0 <= y && y <= h)
    {
        rotatex = -(mousepy - y) / (GLfloat)h * 360;
        rotatey = -(mousepx - x) / (GLfloat)w * 360;
        /*      cout<<"rotatex:rotatey"<<rotatex<<" "<<rotatey<<endl;*/
        glutPostRedisplay();
    }
}

void mousedown(int mouse, int state, int x, int y)
{
    if (state == GLUT_DOWN)
    {
        mousepx = x;
        mousepy = y;
    }
    //  cout<<"mousepx:mousepy"<<endl;
    //  cout<<mousepx<<"  "<<mousepy<<endl;
}

int main(int argc, char** argv)
{
    glutInit(&argc, argv);
    glutInitDisplayMode(GLUT_RGB);
    glutInitWindowSize(primw, primh);
    glutCreateWindow("coordination");

    glClearColor(1, 1, 1, 0);
    glutDisplayFunc(rend);
    glutMotionFunc(motion);
    glutMouseFunc(mousedown);
    glutReshapeFunc(reshape);//最先调用,比display先
    glutMainLoop();
    return 0;
}
是这样的效果,效果还行,只是这种方式不太方便嵌到代码中

最终还是决定不在左下角画了,直接在模型上画出来坐标轴,用颜色区分xyz

顶点着色器如下,就是将三条线的顶点和颜色数组输入到顶点着色器中,并与模型使用相同的MVP
#version 330 core
layout (location = 0) in vec3 aPos;
layout (location = 1) in vec3 aColor;

uniform mat4 modelview;
uniform mat4 view;
uniform mat4 projection;
out vec3 color;

void main()
{
        gl_Position = projection * view * modelview * vec4(aPos, 1.0);
        color = aColor;
}第一,图中圆环所在的指定区域与坐标轴所在的区域是两个相互独立的空间,通过使用glViewport函数限定。
glViewport(0,0,500,500);//指定圆环绘制空间,从(0,0)位置开始,长宽分别为500

glViewport(0,300,200,200);//指定坐标轴的绘制空间,从(0,300)位置开始,长宽分别为200
第二,设定投影效果、观察坐标及旋转缩放等
//设置投影效果//
glMatrixMode(GL_PROJECTION);
glLoadIdentity();
glOrtho(-500, 500, -500, 500, -500, 500); //指定了一个正方体区域,在这个区域内的图形才能正常显示

//设置模型视图矩阵,开始画图//
glMatrixMode(GL_MODELVIEW);
glLoadIdentity();
gluLookAt(0, 2, 0, 0, 0, 0, 0, 0, 1); //从(0,2,0)位置看向原点,z轴向上
第二,考虑到实际应用中我们需要对圆环进行旋转,那坐标系也应该进行旋转,这样才能一一对应上。
glRotatef(_xAngle, 1, 0, 0);
glRotatef(_yAngle, 0, 1, 0);
//传入的角度根据具体需求具体设定
第三,绘制坐标轴。可以将坐标轴画成一个上下底面同宽,长度较长的一个圆柱体;而坐标箭头可以看成头部很宽,底部宽度为0的圆柱体。
const int AXES_LEN = 300;
const int ARROW_LEN = 100;
const int ARROW_RADIUS = 30;

GLUquadricObj *objCylinder = gluNewQuadric();
//确定坐标系原点
glPushMatrix();
glColor3f(1.0f, 1.0f, 1.0f);
glutSolidSphere(15, 20, 20);
glPopMatrix();

glPushMatrix();
glColor3f(1.0f, 0.0f, 0.0f);
glutSolidSphere(0.25, 6, 6);
gluCylinder(objCylinder, 10, 10, AXES_LEN, 10, 5); //z
glTranslatef(0, 0, AXES_LEN);
gluCylinder(objCylinder, ARROW_RADIUS, 0, ARROW_LEN, 10, 5); //z arrow
glPopMatrix();

glPushMatrix();
glColor3f(0.0f, 1.0f, 0.0f);
glRotatef(90, 1.0, 0.0, 0.0);
gluCylinder(objCylinder, 10, 10, AXES_LEN, 10, 5); //Y
glTranslatef(0, 0, AXES_LEN);
gluCylinder(objCylinder, ARROW_RADIUS, 0, ARROW_LEN, 10, 5); //Y arrow
glPopMatrix();

glPushMatrix();
glColor3f(0.0f, 0.0f, 1.0f);
glRotatef(90, 0.0, 1.0, 0.0);
gluCylinder(objCylinder, 10, 10, AXES_LEN, 10, 5); //X
glTranslatef(0, 0, AXES_LEN);
gluCylinder(objCylinder, ARROW_RADIUS, 0, ARROW_LEN, 10, 5); //X arrow
glPopMatrix();
上述代码中需要注意到的是x轴和y轴的是根据z轴旋转得到的。
第四步,添加“xyz”字符,这是我目前遇到的问题。我尝试使用如下代码:
glRasterPos3f(300, 0, 0);
glutBitmapCharacter(GLUT_BITMAP_HELVETICA_18, 'y');