今天分享一下springboot将jar包打包到指定目录下。
由于之前上线都是一个打包到一个jar,由于服务多了,1个包100多M,哪怕是小版本上线都需要重新上传jar包。
将不常用的比如spring,druid等不常用打包到lib目录,这样每次上线不需要上传这些。第三方或者常改动的还打包到本身的jar包内,每次上线都会新打包。
这样原来的100多M的jar包,可以变成2、3M。
如图所示:
原来的打包方式
改后的方式:


简单解释一下,includes标签内就是打入jar包第三方jar。将上面的2M的包解压缩后,就是includes的包。
如图所示。

excludeGroupIds和excludeArtifactIds 是配置不在lib目录里的包,由于java启动加载的机制是优先加载jar包,再加载外部目录,如果jar包都存在两个地方,这样配置就没有意义了,每次还是得重新发布lib目录,所以将includes中的包,再在excludeGroupIds 和 excludeArtifactIds 配置上。
<build>
    <plugins>
        <plugin>
            <groupId>org.springframework.boot</groupId>
            <artifactId>spring-boot-maven-plugin</artifactId>
            <version>2.0.5.RELEASE</version>
            <executions>
                <execution>
                    <goals>
                        <goal>repackage</goal>
                        <goal>build-info</goal>
                    </goals>
                </execution>
            </executions>
            <configuration>
                <layout>ZIP</layout>
                <includes>
                    <include>
                        <groupId>nothing</groupId>
                        <artifactId>nothing</artifactId>
                    </include>
                    <include>
                        <groupId>com.etc</groupId>
                        <artifactId>etc-manage-api</artifactId>
                    </include>
                    <include>
                        <groupId>com.etc</groupId>
                        <artifactId>etc-manage-core</artifactId>
                    </include>
                    <include>
                        <groupId>com.etc</groupId>
                        <artifactId>etc-manage-rpc-api</artifactId>
                    </include>
                    <include>
                        <groupId>com.sinoiov.etc.apollo</groupId>
                        <artifactId>apollo-spring-boot-starter</artifactId>
                    </include>
                </includes>
            </configuration>
        </plugin>
        <plugin>
            <groupId>org.apache.maven.plugins</groupId>
            <artifactId>maven-dependency-plugin</artifactId>
            <executions>
                <execution>
                    <id>copy</id>
                    <phase>package</phase>
                    <goals>
                        <goal>copy-dependencies</goal>
                    </goals>
                    <configuration>
                        <excludeGroupIds>
                            com.sinoiov.etc.apollo
                        </excludeGroupIds>
                        <excludeArtifactIds>
                            etc-manage-api,etc-manage-core,etc-manage-rpc-api
                        </excludeArtifactIds>
                        <outputDirectory>${project.build.directory}/lib</outputDirectory>
                    </configuration>
                </execution>
            </executions>
        </plugin>
    </plugins>
</build>
原脚本
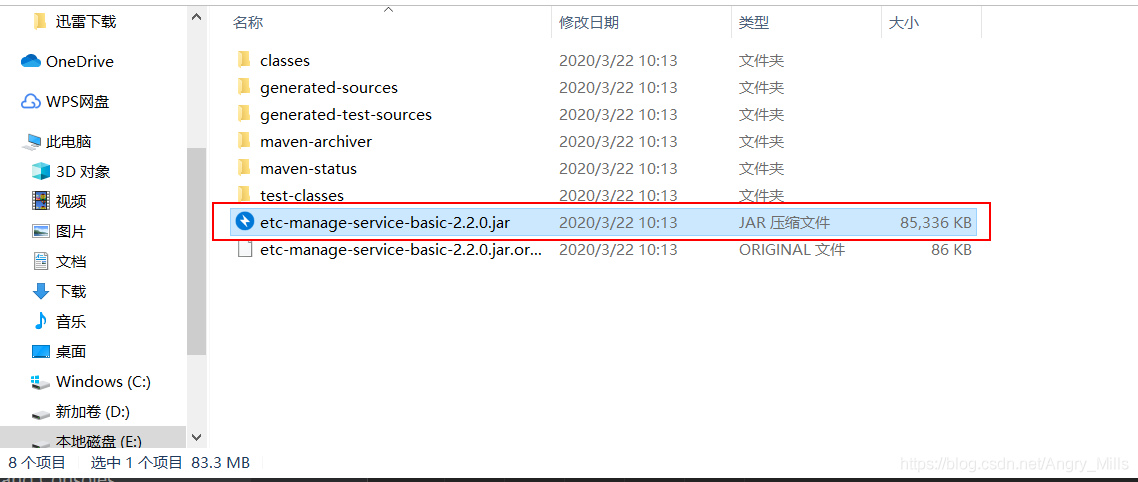
java -jar etc-manage-service-basic-2.2.0.jar
现脚本 (如果相对目录不好用,就用绝对目录试试)
java Dloader.path=../lib -jar etc-manage-service-basic-2.2.0.jar
修改maven的pom.xml文件
不拷贝资源文件
<resources>
    <resource>
        <directory>src/main/resources</directory>
        <excludes>
            <exclude>*</exclude>
        </excludes>
        <filtering>true</filtering>
    </resource>
</resources>
修改打包方式
<plugin>
    <groupId>org.springframework.boot</groupId>
    <artifactId>spring-boot-maven-plugin</artifactId>
    <configuration>
        <layout>ZIP</layout>
    </configuration>
</plugin>
假设application.properties和application-{profile}.properties都在/tmp/temp/config,jar文件在/tmp/temp
java -Dloader.path=file:///tmp/temp/config,demo-1.0.jar -jar demo-1.0.jar
对比jar包中MANIFEST.MF文件在`ZIP配置前后的区别
配置前:
Main-Class: org.springframework.boot.loader.JarLauncher
Start-Class: com.chinaunicom.gateway.GatewayApplication
配置后:
Main-Class: org.springframework.boot.loader.PropertiesLauncher
Start-Class: com.chinaunicom.gateway.GatewayApplication
发现是类加载器变了,查看org.springframework.boot.loader包下所有加载器实现:
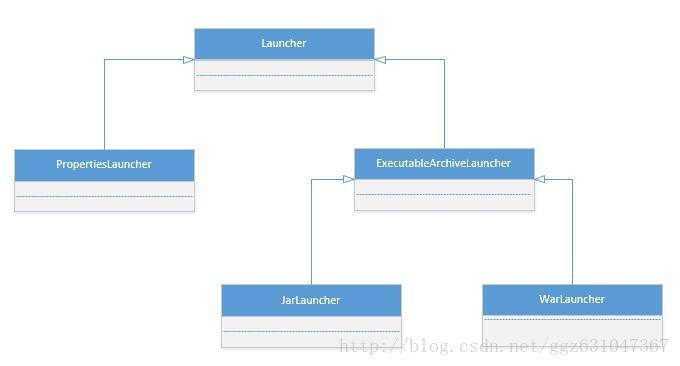
查看五个类描述:官方文档
JarLauncher
Launcher for JAR based archives. This launcher assumes that dependency jars are included inside a /BOOT-INF/lib directory and that application classes are included inside a /BOOT-INF/classes directory.
WarLauncher
Launcher for WAR based archives. This launcher for standard WAR archives. Supports dependencies in WEB-INF/lib as well as WEB-INF/lib-provided, classes are loaded from WEB-INF/classes.
PropertiesLauncher
Launcher for archives with user-configured classpath and main class via a properties file. This model is often more flexible and more amenable to creating well-behaved OS-level services than a model based on executable jars.
Looks in various places for a properties file to extract loader settings, defaulting to application.properties either on the current classpath or in the current working directory. The name of the properties file can be changed by setting a System property loader.config.name (e.g. -Dloader.config.name=foo will look for foo.properties. If that file doesn't exist then tries loader.config.location (with allowed prefixes classpath: and file: or any valid URL). Once that file is located turns it into Properties and extracts optional values (which can also be provided overridden as System properties in case the file doesn't exist):
loader.path: a comma-separated list of directories (containing file resources and/or nested archives in .jar or .zip or archives) or archives to append to the classpath. BOOT-INF/classes,BOOT-INF/lib in the application archive are always used
loader.main: the main method to delegate execution to once the class loader is set up. No default, but will fall back to looking for a Start-Class in a MANIFEST.MF, if there is one in ${loader.home}/META-INF.
spring-boot-maven-plugin帮助
以上为个人经验,希望能给大家一个参考,也希望大家多多支持。

