此实验准备两台虚拟机便于调试,一台CentOs6,一台红帽6
[root@cento211 yum.repos.d]# yum -y install httpd mod_ssl
[root@cento211 ~]# systemctl enable httpd.service
Created symlink from /etc/systemd/system/multi-user.target.wants/httpd.service to /usr/lib/systemd/system/httpd.service.

[root@cento211 ~]# systemctl start httpd.service
[root@cento211 ~]# vim /var/www/html/index.html

Congratulation!
查看应用web页面的编辑内容
[root@cento211 ~]# cat /var/www/html/index.html
Congratulation!
[root@cento211 ~]# systemctl is-enabled firewalld
enabled
(1).首先看Firewalld的默认区域
[root@cento211 ~]# firewall-cmd --get-default
public (是默认的public区域)
(2).使用dmz区域
[root@cento211 ~]# firewall-cmd --set-default-zone=dmz
success
(3).查看此时的默认区域
[root@cento211 ~]# firewall-cmd --get-default
dmz

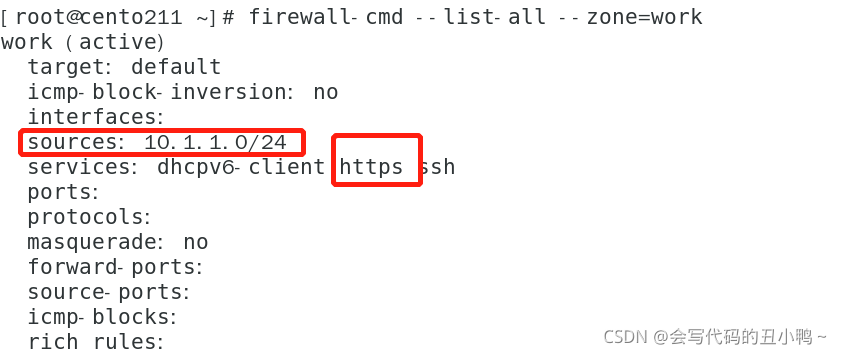
[root@cento211 ~]# firewall-cmd --permanent --add-source=10.1.1.0/24 --zone=work
success
[root@cento211 ~]# firewall-cmd --reload
success
[root@cento211 ~]# firewall-cmd --list-all --zone=work
work (active)
  target: default
  icmp-block-inversion: no
  interfaces:
  sources: 10.1.1.0/24 (这个就是我们配置的地址)
  services: dhcpv6-client ssh
  ports:
  protocols:
  masquerade: no
  forward-ports:
  source-ports:
  icmp-blocks:
  rich rules:
(1).首先打开Https服务
[root@cento211 ~]# firewall-cmd --permanent --add-service=https --zone work
success
(2).重置
[root@cento211 ~]# firewall-cmd --reload
success
(3).查看此服务被启用
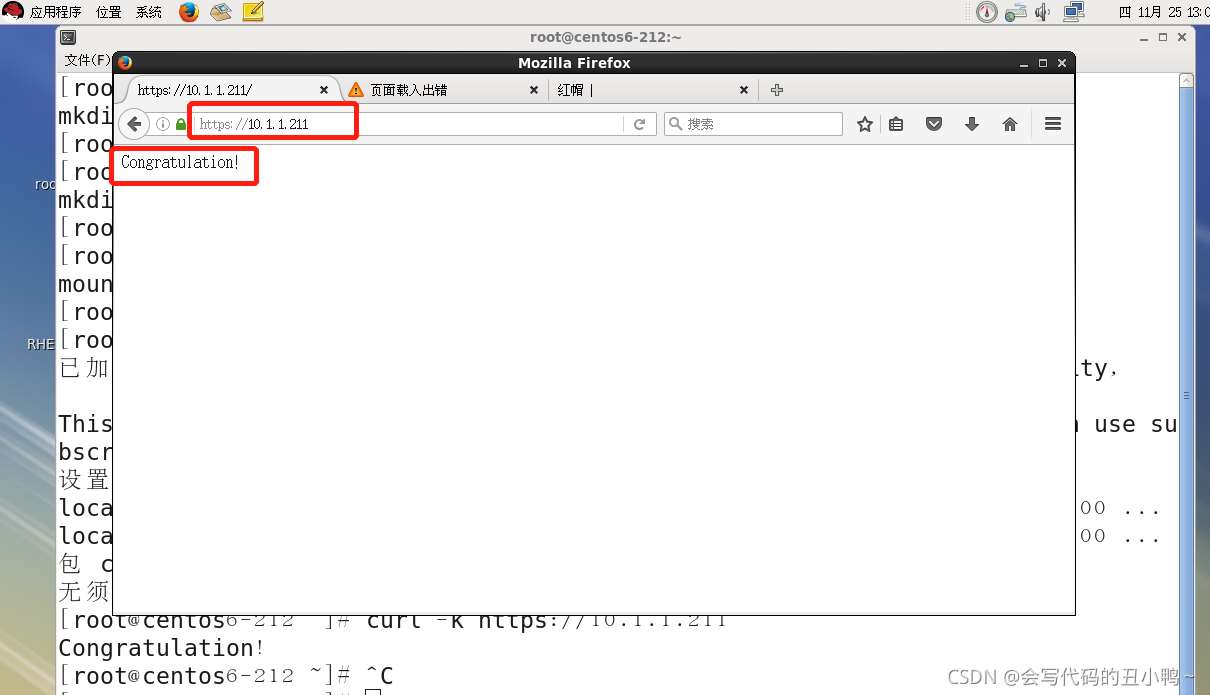
[root@centos6-212~]# curl -k https://10.1.1.211
Congratulation!