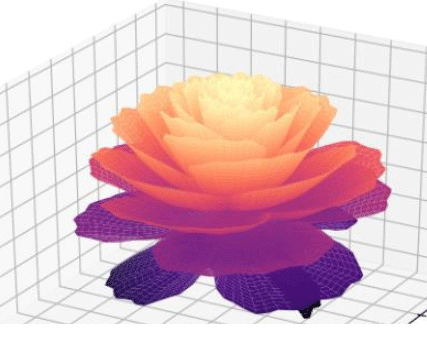
一、玫瑰花绘制—深红色
import numpy as np
import matplotlib.pyplot as plt
from mpl_toolkits.mplot3d import Axes3D
fig = plt.figure()
ax = fig.gca(projection='3d')
[x, t] = np.meshgrid(np.array(range(25)) / 24.0, np.arange(0, 575.5, 0.5) / 575 * 30 * np.pi - 4*np.pi)
p = (np.pi / 2) * np.exp(-t / (8 * np.pi))
change = np.sin(20*t)/50
u = 1 - (1 - np.mod(3.3 * t, 2 * np.pi) / np.pi) ** 4 / 2 + change
y = 2 * (x ** 2 - x) ** 2 * np.sin(p)
r = u * (x * np.sin(p) + y * np.cos(p)) * 1.5
h = u * (x * np.cos(p) - y * np.sin(p))
c= plt.get_cmap('magma')
surf = ax.plot_surface(r * np.cos(t), r * np.sin(t), h, rstride=1, cstride=1,
cmap= c, linewidth=0, antialiased=True)
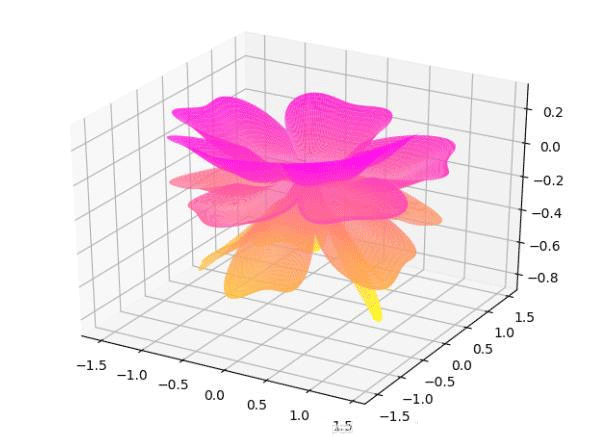
plt.show()二、玫瑰花绘制—五颜六色
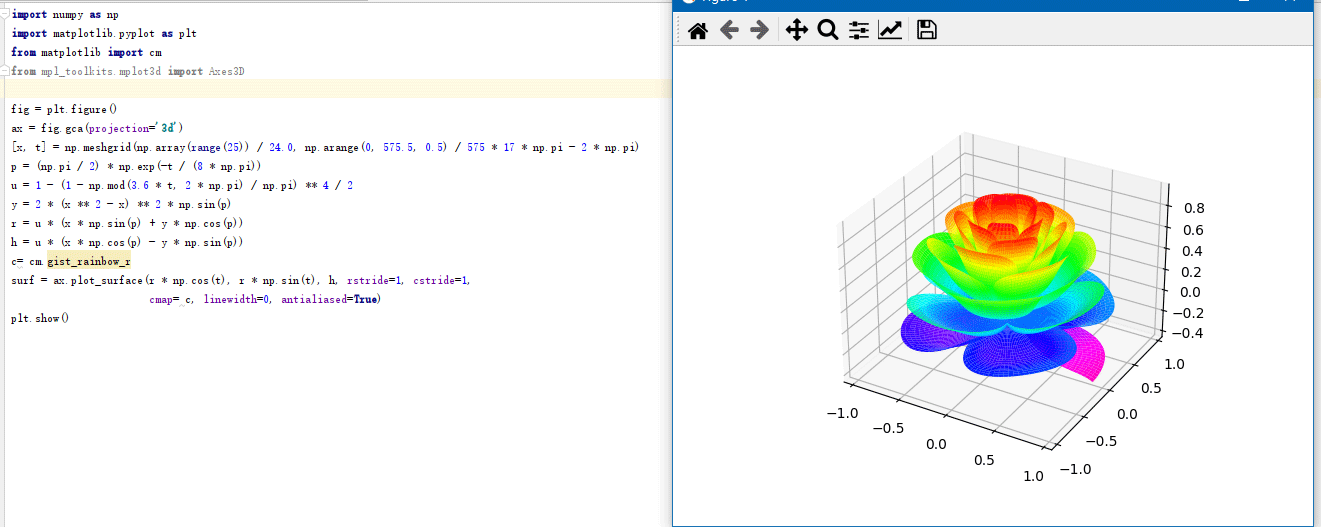
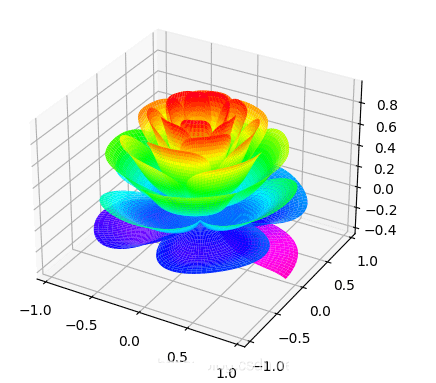
import numpy as np
import matplotlib.pyplot as plt
from matplotlib import cm
from mpl_toolkits.mplot3d import Axes3D

fig = plt.figure()
ax = fig.gca(projection='3d')
[x, t] = np.meshgrid(np.array(range(25)) / 24.0, np.arange(0, 575.5, 0.5) / 575 * 17 * np.pi - 2 * np.pi)
p = (np.pi / 2) * np.exp(-t / (8 * np.pi))
u = 1 - (1 - np.mod(3.6 * t, 2 * np.pi) / np.pi) ** 4 / 2
y = 2 * (x ** 2 - x) ** 2 * np.sin(p)
r = u * (x * np.sin(p) + y * np.cos(p))
h = u * (x * np.cos(p) - y * np.sin(p))
c= cm.gist_rainbow_r
surf = ax.plot_surface(r * np.cos(t), r * np.sin(t), h, rstride=1, cstride=1,
                       cmap= c, linewidth=0, antialiased=True)
plt.show()
三、玫瑰花绘制—粉红色
import numpy as np
import matplotlib.pyplot as plt
from matplotlib import cm
from mpl_toolkits.mplot3d import Axes3D

fig = plt.figure()
ax = fig.gca(projection='3d')
[x, t] = np.meshgrid(np.array(range(25)) / 24.0, np.arange(0, 575.5, 0.5) / 575 * 17 * np.pi - 2 * np.pi)
p = (np.pi / 2) * np.exp(-t / (8 * np.pi))
u = 1 - (1 - np.mod(3.6 * t, 2 * np.pi) / np.pi) ** 4 / 2
y = 2 * (x ** 2 - x) ** 2 * np.sin(p)
r = u * (x * np.sin(p) + y * np.cos(p))
h = u * (x * np.cos(p) - y * np.sin(p))
c= cm.get_cmap('spring_r')
surf = ax.plot_surface(r * np.cos(t), r * np.sin(t), h, rstride=1, cstride=1,
                       cmap= c, linewidth=0, antialiased=True)
plt.show()
四、玫瑰花绘制—红色
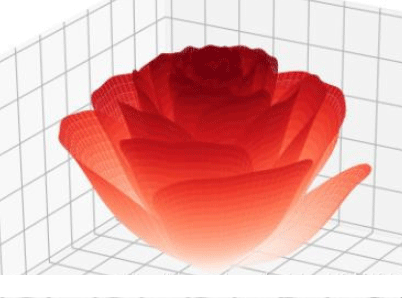
# 省略了头文件,可以在之前的博客里看到
import numpy as np
import matplotlib.pyplot as plt
from mpl_toolkits.mplot3d import Axes3D
fig = plt.figure()
ax = fig.gca(projection='3d')
# 将相位向后移动了6*pi
[x, t] = np.meshgrid(np.array(range(25)) / 24.0, np.arange(0, 575.5, 0.5) / 575 * 20 * np.pi + 4*np.pi)
p = (np.pi / 2) * np.exp(-t / (8 * np.pi))
# 添加边缘扰动
change = np.sin(15*t)/150
# 将t的参数减少,使花瓣的角度变大
u = 1 - (1 - np.mod(3.3 * t, 2 * np.pi) / np.pi) ** 4 / 2 + change
y = 2 * (x ** 2 - x) ** 2 * np.sin(p)
r = u * (x * np.sin(p) + y * np.cos(p))
h = u * (x * np.cos(p) - y * np.sin(p))
c= plt.get_cmap('Reds')
surf = ax.plot_surface(r * np.cos(t), r * np.sin(t), h, rstride=1, cstride=1,
                       cmap= c, linewidth=0, antialiased=True)
plt.show()
五、桃花绘制
import numpy as np
import matplotlib.pyplot as plt
from mpl_toolkits.mplot3d import Axes3D
fig = plt.figure()
ax = fig.gca(projection='3d')
[x, t] = np.meshgrid(np.array(range(25)) / 24.0, np.arange(0, 575.5, 0.5) / 575 * 6 * np.pi - 4*np.pi)
p = (np.pi / 2) * np.exp(-t / (8 * np.pi))
change = np.sin(10*t)/20
u = 1 - (1 - np.mod(5.2 * t, 2 * np.pi) / np.pi) ** 4 / 2 + change
y = 2 * (x ** 2 - x) ** 2 * np.sin(p)
r = u * (x * np.sin(p) + y * np.cos(p)) * 1.5
h = u * (x * np.cos(p) - y * np.sin(p))
c= plt.get_cmap('spring_r')
surf = ax.plot_surface(r * np.cos(t), r * np.sin(t), h, rstride=1, cstride=1,
                       cmap= c, linewidth=0, antialiased=True)
plt.show()

