1、基于amin-work-x项目作为原始项目,改造动态菜单为自定义菜单
2、分别在主应用项目(main)和子应用(childrenOne,childrenTwo)项目中安装microApp
npm i @micro-zoe/micro-app --save
1,修改子项目mian.ts,添加与基座的交互配置和路由冲突解决
import { createApp } from "vue";
import App from "./App.vue";
import { Router } from 'vue-router'
import router from "./router";
import "./utils/router";
import ElementPlus from "element-plus";
import "element-plus/dist/index.css";
import "dayjs/locale/zh-cn";
import zhCn from "element-plus/es/locale/lang/zh-cn";
import "@/icons/iconfont/iconfont.css";
import "@/icons/iconfont/iconfont.js";
import "@/styles/main.css";
import LayoutStore from "@/layouts";
import http from "@/api/http";
import { registerComponents } from "./components";
import * as Icons from "@element-plus/icons";
import pinia from "./store/pinia";
import "./setting";
declare global {
interface Window {
microApp: any
__MICRO_APP_NAME__: string
__MICRO_APP_ENVIRONMENT__: string
__MICRO_APP_BASE_ROUTE__: string
}
}
// 与基座进行数据交互
function handleMicroData(router: Router) {
// 是否是微前端环境
if (window.__MICRO_APP_ENVIRONMENT__) {
// 监听基座下发的数据变化
window.microApp.addDataListener((data: Record<string, unknown>) => {
console.log('child-vue3 addDataListener:', data)
// 当基座下发path时进行跳转
if (data.path && data.path !== router.currentRoute.value.path) {
router.push(data.path as string)
}
})
// 向基座发送数据
setTimeout(() => {
window.microApp.dispatch({ myname: 'tenant-app' })
}, 3000)
}
}
/**
* 用于解决主应用和子应用都是vue-router4时相互冲突,导致点击浏览器返回按钮,路由错误的问题。
* 相关issue:https://github.com/micro-zoe/micro-app/issues/155
* 当前vue-router版本:4.0.12
*/
function fixBugForVueRouter4(router: Router) {
// 判断主应用是main-vue3或main-vite,因为这这两个主应用是 vue-router4
if (window.__MICRO_APP_ENVIRONMENT__) {
//if (window.location.href.includes('/main-vue3') || window.location.href.includes('/main-vite')) {
/**
* 重要说明:
* 1、这里主应用下发的基础路由为:`/main-xxx/app-vue3`,其中 `/main-xxx` 是主应用的基础路由,需要去掉,我们只取`/app-vue3`,不同项目根据实际情况调整
*
* 2、realBaseRoute 的值为 `/app-vue3`
*/
const realBaseRoute = window.__MICRO_APP_BASE_ROUTE__;//.replace(/^\/app-tenant-[^/]+/g, '')
router.beforeEach(() => {
if (typeof window.history.state?.current === 'string') {
window.history.state.current = window.history.state.current.replace(new RegExp(realBaseRoute, 'g'), '')
}
})
router.afterEach(() => {
if (typeof window.history.state === 'object') {
window.history.state.current = realBaseRoute + (window.history.state.current || '')
}
})
}
}
const app = createApp(App);
Object.keys(Icons).forEach((it) => {
app.component(it, (Icons as any)[it]);
});
registerComponents(app);
app.use(LayoutStore, {
state: {
layoutMode: "ltr",
},
actions: {
onPersonalCenter() {
router.push({ path: "/personal", query: { uid: 1 } });
},
onLogout() {
router.replace({ path: "/login", query: { redirect: "/" } }).then(() => {
window.location.reload();
});
},
},
});
app.use(pinia).use(router);
app.use(ElementPlus, {
locale: zhCn,
});
app.use(http);
app.mount("#app");
handleMicroData(router)
fixBugForVueRouter4(router)
// 监听卸载操作
window.addEventListener('unmount', function () {
//console.log("r4开始卸载", window.location, window.history, app)
app?.unmount()
//console.log('微应用child-vue3卸载了')
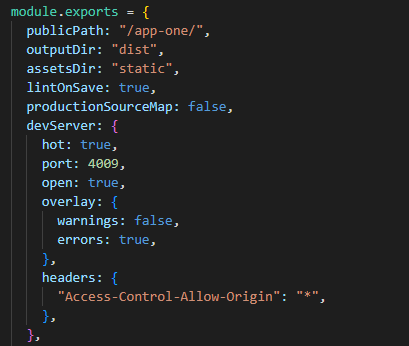
})2,修改vue.config.js文件,配置publicPath、端口号、允许跨域
3,为保证子应用的路由在主应用中能直接使用,可在每个路由前添加子应用的路由标志
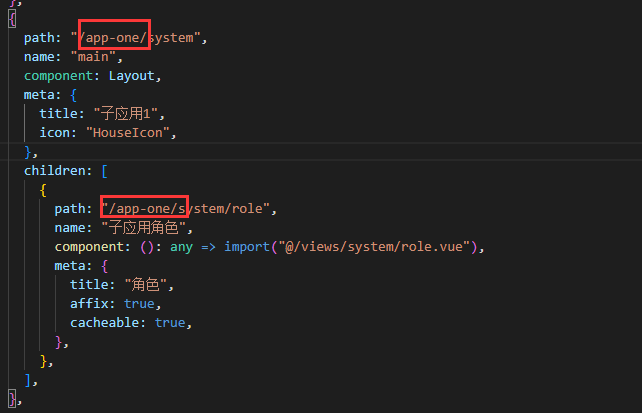
这一步可不操作,如果不添加,则需要在主应用添加菜单或者动态获取菜单时,根据其他标志,为路由手动加上当前子应用的标志,用于判断子应用来源
4、修改子应用路由问history模式
const router = createRouter({
  history: createWebHistory(window.__MICRO_APP_BASE_ROUTE__||process.env.BASE_URL),
  routes: mapTwoLevelRouter([...constantRoutes, ...asyncRoutes]),
});1,在layout中添加子应用入口文件(src\layouts\microapp\app-one.vue)
<template>
  <div style="height: 100%">
    <micro-app
      name="appname-one"
      :url="url"
      baseroute="/app-main"
      :data="microAppData"
      @created="handleCreate"
      @beforemount="handleBeforeMount"
      @mounted="handleMount"
      @unmount="handleUnmount"
      @error="handleError"
      @datachange="handleDataChange"
      style="height: 100%"
    ></micro-app>
  </div>
</template>

<script lang="ts">
export default {
  name: "name-app",
  data() {
    return {
      url:
        process.env.NODE_ENV === "development"
          ? "http://localhost:4009/app-one"
          : "通过配置获取线上地址",
      microAppData: { msg: "来自基座的数据" },
    };
  },
  methods: {
    handleCreate(): void {
      console.log("child-vue3 创建了");
    },

    handleBeforeMount(): void {
      console.log("child-vue3 即将被渲染");
    },

    handleMount(): void {
      console.log("child-vue3 已经渲染完成");

      setTimeout(() => {
        // eslint-disable-next-line @typescript-eslint/ban-ts-comment
        // @ts-ignore
        this.microAppData = { msg: "来自基座的新数据" };
      }, 2000);
    },

    handleUnmount(): void {
      console.log("child-vue3 卸载了");
    },

    handleError(): void {
      console.log("child-vue3 加载出错了");
    },

    handleDataChange(e: CustomEvent): void {
      console.log("来自子应用 child-vue3 的数据:", e.detail.data);
    },
  },
};
</script>

<style></style>
2,在主应用中注册子应用路由

子应用的路由第一次指向主应用的layout,第二层指向上面新建的入口文件
3,修改主应用publicPath
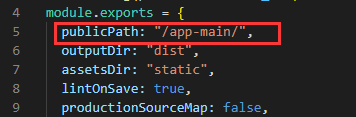
此处的publicPath需与app-one中的baseroute保持一致
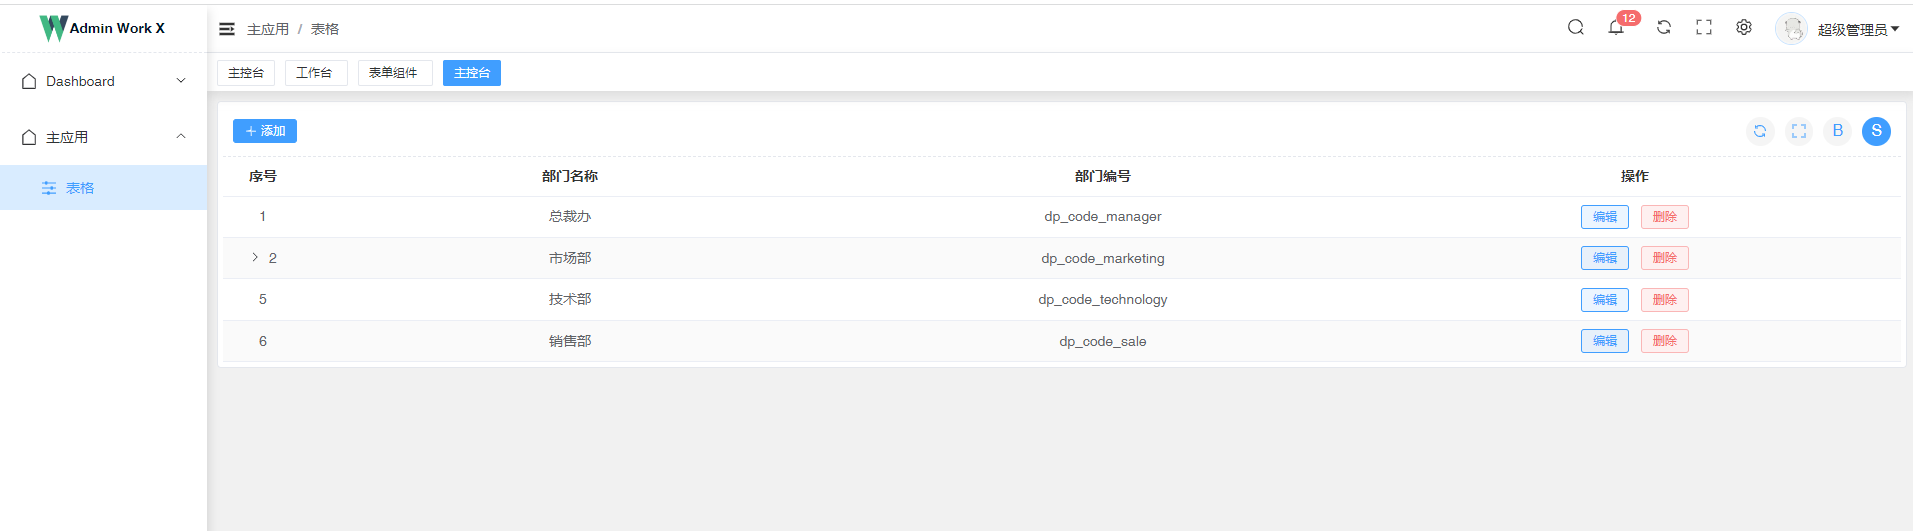
配置完成后,先后运行两个项目后,在主应用中手动添加一个子应用的的具体页面路由,就可以在主应用中打开子应用了,但是此时子应用的路由表覆盖了主应用。
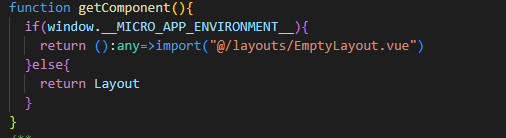
为解决这个问题,需要在子应用中添加一个非layout布局的空页面,当子应用单独运行时,指向layout布局页面,如果是在微服务中使用,则指向空页面
src\layouts\EmptyLayout.vue
<template>
<div class="empty-layout">
<router-view> </router-view>
</div>
</template>
<style lang="scss" scoped>
.empty-layout {
height: 100%;
}
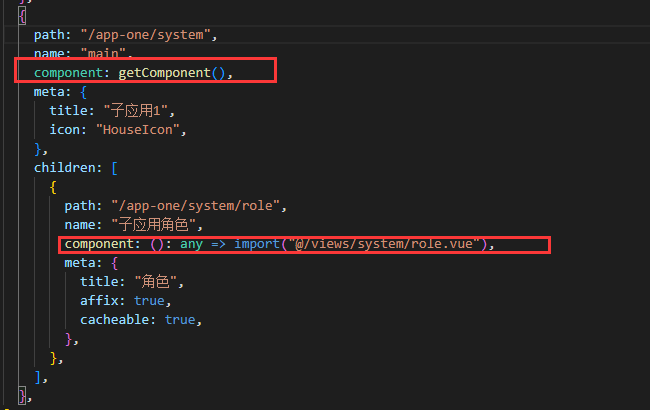
</style>src\router\index.ts