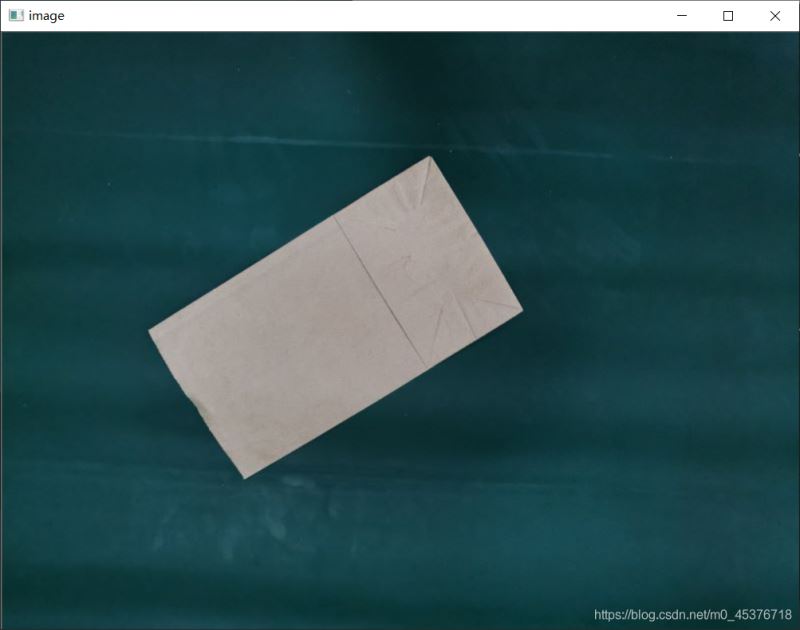
网上很多例子都说cv2.minAreaRect函数的输出的角度范围在[-90,0],但是实测输出范围在[0,90]。再进行调研,确定为opencv4.5版本升级改动引起。
cv2.minAreaRect输入:四边形的四个点(不要求顺序)。
输出:最小外接矩形的中心点坐标x,y,宽高w,h,角度anlge,输出形式为元组((x,y),(w,h),anlge),顺序格式不变。
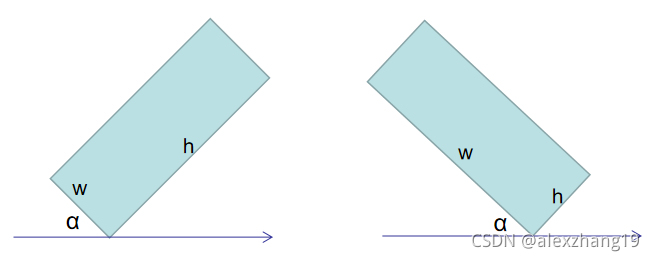
4.5版本定义为,x轴顺时针旋转最先重合的边为w,angle为x轴顺时针旋转的角度,angle取值为(0,90]。
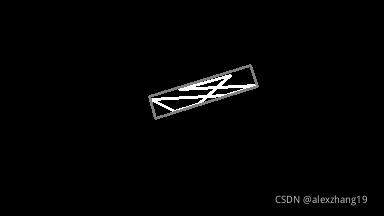
cnts, _ = cv2.findContours(mask, cv2.RETR_TREE, cv2.CHAIN_APPROX_SIMPLE)
rect = cv2.minAreaRect(cnts[0])
box = np.int0(cv2.boxPoints(rect))
print(rect)
输出结果:((201.25, 92.10), (20.93, 101.94), 67.47)
中心点坐标:(201, 92),宽高: (20, 101),角度: 67。
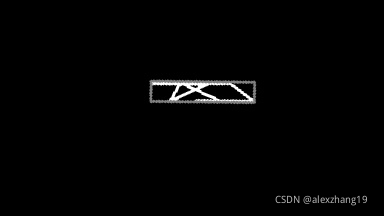
配合旋转函数,可实现框的拉平。旋转函数(逆时针旋转):
import cv2
import numpy as np

def rotate(img, angle, center=None, scale=1.0, fill=0, interpolation=cv2.INTER_LINEAR, expand=True):
    if center is not None and expand:
        raise ValueError('`auto_bound` conflicts with `center`')

    h, w = img.shape[:2]
    if center is None:
        center = ((w - 1) * 0.5, (h - 1) * 0.5)
    assert isinstance(center, tuple)

    matrix = cv2.getRotationMatrix2D(center, angle, scale)
    if expand:
        cos = np.abs(matrix[0, 0])
        sin = np.abs(matrix[0, 1])
        new_w = h * sin + w * cos
        new_h = h * cos + w * sin
        matrix[0, 2] += (new_w - w) * 0.5
        matrix[1, 2] += (new_h - h) * 0.5
        w = int(np.round(new_w))
        h = int(np.round(new_h))
    rotated = cv2.warpAffine(
        img,
        matrix, (w, h),
        flags=interpolation,
        borderValue=fill)
    return rotated
执行旋转:
rotate(img, -23, center=(201, 92), expand=False)
结果:
角度说明:
角度为x轴顺时针旋转,第一次接触到矩形边界时的值,范围:0~90°,第一次接触的边界为宽,区分方向可以使用宽、高的值来确定。
角度按逆时针旋转方式调整为:
if rect[1][0] > rect[1][1]: # w > h
    angle = int(rect[2])
else:
angle = -(90 - int(rect[2]))有网友测试4.1.*,4.2.*,4.3.*,4.4.*下minAreaRect函数的都一样,就是网上常见的角度输出为[-90~0]情况。但是实测python版本4系列的都为上述4.5版情况,可能是c++版本的不同吧。这里补充[-90~0]情况。
rect = cv2.minAreaRect(cnts[0])
rect[0]返回最小外接矩形的中心点,rect[1]为最小外接矩形的宽、高。rect[2]为旋转角度。
宽、高和角度定义如下:角度为x轴沿逆时针旋转遇到的第一个边时的旋转角度,因为是逆时针旋转所以角度为0~-90度。约定:遇到的第一个边为宽、另一个边为高。

函数为minAreaRect(InputArray points) ,InputArray points是所要求最小外接矩形的点集,这个点集不定个数。
这个矩形是可以有偏转角度的,可以与图像的边界不平行。
调用形式:RotatedRect minAreaRect(InputArray points)

顺时针为正,逆时针为负
参数详解:
Point2f center:表示旋转的中心点
double angle:表示旋转的角度 //这里的角度顺时针为负,逆时针为正
double scale:图像缩放因子
minAreaRect():以X轴正方向为起点,顺时针为正,逆时针为负
getRotationMatrix2D():以X轴正方向为起点,顺时针为负,逆时针为正
下面是一个例子:
#include <iostream>
#include <string>
#include <math.h>
#include <vector>
#include <io.h>
#include <fstream>
#include <opencv2/opencv.hpp>
#include <opencv2/core/core.hpp>
#include <opencv2/highgui/highgui.hpp>

using namespace cv;
using namespace std;

int main()
{
	Mat image = imread("a11.jpg");
	Mat gaussianimage,grayimage, cannyimage, thresholdimage;

//---------------------旋转-----------------
	//计算偏转角度
	GaussianBlur(image, gaussianimage, Size(5, 5), 3, 3);//尽可能多的去除杂质
	Canny(gaussianimage, cannyimage, 50, 150, 3);
	cvtColor(cannyimage, grayimage, CV_GRAY2BGR);
	vector<vector<Point>>vec_point;
	vector<Vec4i>hireachy;
	findContours(cannyimage, vec_point, hireachy, RETR_EXTERNAL, CHAIN_APPROX_SIMPLE);

	double degree = 0;
	for (size_t i = 0; i < vec_point.size(); i++)
	{
		RotatedRect minrect = minAreaRect(vec_point[i]);//minAreaRect():以X轴正方形为起点,顺时针为正,逆时针为负
		degree = minrect.angle;

        //此处目的是为了让目标图像旋转到水平位置
		if (degree > -90 && degree <= -45)
		{
			degree += 90;
		}
		else if (degree >-45 && degree < 0)
		{
			degree;
		}
		else
		{
			degree = 0;
		}
		cout <<"degree:" << degree << endl;
	}

	//旋转纠正
	Point center = Point(image.cols / 2, image.rows / 2);
	double angle = degree;
	double scale = 1;
	Mat rot(2, 3, CV_32FC1);
	rot = getRotationMatrix2D(center, angle, scale);//getRotationMatrix2D():以X轴正方形为起点,顺时针为负,逆时针为正
	Mat rotimage;
	warpAffine(image, rotimage, rot, image.size());
	namedWindow("rotation", 0);
	resizeWindow("rotation", 800, 600);
	imshow("rotation", rotimage);
}
效果图: