制作无边框窗口时,系统自带阴影会消失,这时就需要我自己给窗口添加阴影以防止窗口融入背景。添加阴影的方法很简单,直接用effect就可以了,但这里还是有个不容易注意到的细节需要处理,加阴影后窗口最大化可能会有问题。
(1)方法一
使用WindowStyle可以去除窗口边框,AllowsTransparency+Background制造透明窗口为阴影留出透明边距。
注:此方法较影响窗口渲染性能。
<Window WindowStyle="None" AllowsTransparency="True" Background="Transparent" >
(2)方法二
使用WindowChrome也可以实现无边框窗口,.net4.5之后可以使用此组件。WindowChrome通常不会影响渲染性能。
<Window  WindowStyle="None"  Background="Transparent"  ResizeMode="NoResize">
    <WindowChrome.WindowChrome>
        <WindowChrome GlassFrameThickness="-1"   CaptionHeight="0"   />
    </WindowChrome.WindowChrome
    <Grid>
    </Grid>
</Window>使用DropShadowEffect 加Margin属性即可。添加阴影特效后,需要设置margin给阴影留出边距,否则是看不到阴影的。通常到这一步就结束了,如果窗口需要最大化则继续往下。
<Window >
    <Grid Margin="10" Background="White">
        <Grid.Effect>
            <DropShadowEffect ShadowDepth="0" BlurRadius="10" Opacity="0.8" Color="#AAAAAA"/>
        </Grid.Effect>
    </Grid>
</Window>1、 为何添加触发器?
根据上述2个步骤添加完阴影后,如果将窗口最大化就会发现,Margin依然生效,全屏窗口有一个透明外边距,为了解决这问题所以需要添加触发器。

2、 具体实现
在style中使用触发器,绑定窗口状态,当最大化时边距设为0,其他情况设为阴影需要的边距。在这里需要注意的是此时Grid不可以设置Margin属性了只能在触发器中设置,因为赋值优先级的原因,在Grid中设置Margin后触发器的赋值会失效。
<Grid  Background="#1e1e1e">
    <Grid.Style>
        <Style TargetType="Grid">
            <!--给阴影留出边距-->
            <Style.Triggers>
                <DataTrigger Binding="{Binding WindowState, RelativeSource={RelativeSource Mode=FindAncestor, AncestorType=Window}}" Value="Normal">
                    <Setter Property="Margin" Value="10" />
                </DataTrigger>
                <DataTrigger Binding="{Binding WindowState, RelativeSource={RelativeSource Mode=FindAncestor, AncestorType=Window}}" Value="Minimized">
                    <Setter Property="Margin" Value="10" />
                </DataTrigger>
                <DataTrigger Binding="{Binding WindowState, RelativeSource={RelativeSource Mode=FindAncestor, AncestorType=Window}}" Value="Maximized">
                    <Setter Property="Margin" Value="0" />
                </DataTrigger>
            </Style.Triggers>
        </Style>
    </Grid.Style>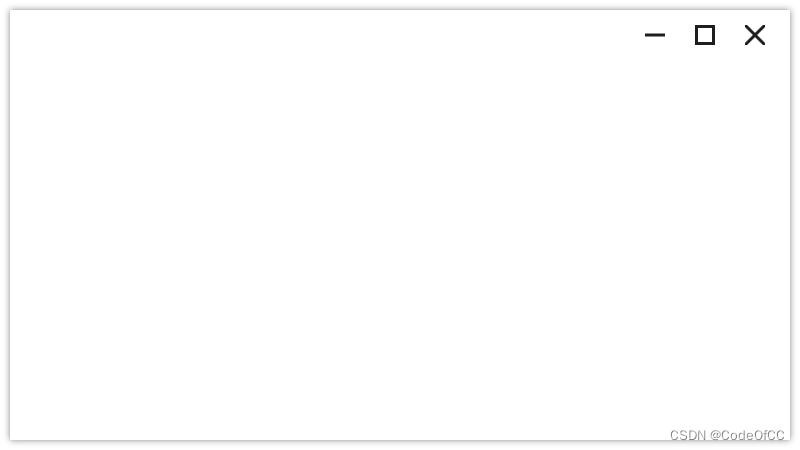
</Grid>MainWindow.xaml
<Window x:Class="WpfApp8.MainWindow"
        xmlns="http://schemas.microsoft.com/winfx/2006/xaml/presentation"
        xmlns:x="http://schemas.microsoft.com/winfx/2006/xaml"
        xmlns:d="http://schemas.microsoft.com/expression/blend/2008"
        xmlns:mc="http://schemas.openxmlformats.org/markup-compatibility/2006"
        xmlns:local="clr-namespace:WpfApp8"
        mc:Ignorable="d"
        Title="MainWindow" Height="450" Width="800"
        WindowStyle="None"
        Background="Transparent"
        ResizeMode="NoResize"
        >
    <WindowChrome.WindowChrome>
        <WindowChrome GlassFrameThickness="-1"   CaptionHeight="0"   />
    </WindowChrome.WindowChrome>
    <Grid  Background="white">
        <Grid.Effect>
            <DropShadowEffect ShadowDepth="0" BlurRadius="10" Opacity="0.8" Color="#AAAAAA"/>
        </Grid.Effect>
        <Grid.Style>
            <Style TargetType="Grid">
                <!--给阴影留出边距-->
                <Style.Triggers>
                    <DataTrigger Binding="{Binding WindowState, RelativeSource={RelativeSource Mode=FindAncestor, AncestorType=Window}}" Value="Normal">
                        <Setter Property="Margin" Value="10" />
                    </DataTrigger>
                    <DataTrigger Binding="{Binding WindowState, RelativeSource={RelativeSource Mode=FindAncestor, AncestorType=Window}}" Value="Minimized">
                        <Setter Property="Margin" Value="10" />
                    </DataTrigger>
                    <DataTrigger Binding="{Binding WindowState, RelativeSource={RelativeSource Mode=FindAncestor, AncestorType=Window}}" Value="Maximized">
                        <Setter Property="Margin" Value="0" />
                    </DataTrigger>
                </Style.Triggers>
            </Style>
        </Grid.Style>
        <!--标题栏-->
        <Grid  VerticalAlignment="Top"  >
            <StackPanel Margin="0,0,10,0" HorizontalAlignment="Right" Orientation="Horizontal">
                <!--最小化按钮-->
                <Button Width="50" Height="50" Focusable="False" VerticalAlignment="Center" Cursor="Hand"  Click="Button_Click_1" >
                    <Button.Template>
                        <ControlTemplate TargetType="Button">
                            <Grid x:Name="grd" Background="Transparent">
                                <Rectangle Width="20" Height="3" Fill="#1e1e1e" ></Rectangle>
                            </Grid>
                            <ControlTemplate.Triggers>
                                <Trigger Property="IsMouseOver" Value="True">
                                    <Setter TargetName="grd" Property="Background" Value="#666666"></Setter>
                                </Trigger>
                            </ControlTemplate.Triggers>
                        </ControlTemplate>
                    </Button.Template>
                </Button>
                <!--最大化按钮-->
                <Button Width="50" Height="50" Focusable="False" VerticalAlignment="Center" Cursor="Hand"  Visibility="{DynamicResource MaximizeButtonVisibility}" Click="Button_Click">
                    <Button.Template>
                        <ControlTemplate>
                            <Grid x:Name="grd" Background="Transparent">
                                <Rectangle Width="20" Height="20" Stroke="#1e1e1e"  StrokeThickness="3"></Rectangle>
                            </Grid>
                            <ControlTemplate.Triggers>
                                <Trigger Property="IsMouseOver" Value="True">
                                    <Setter TargetName="grd" Property="Background" Value="#666666"></Setter>
                                </Trigger>
                            </ControlTemplate.Triggers>
                        </ControlTemplate>
                    </Button.Template>
                </Button>
                <!--关闭按钮-->
                <Button Width="50" Height="50"  Focusable="False"  VerticalAlignment="Center" Cursor="Hand" Click="Button_Click_2">
                    <Button.Template>
                        <ControlTemplate>

                            <Grid x:Name="grd" Background="Transparent">
                                <Line Width="20" Height="20" X1="0" Y1="0" X2="20" Y2="20" StrokeThickness="3" Stroke="#1e1e1e" ></Line>
                                <Line Width="20" Height="20" X1="20" Y1="0" X2="0" Y2="20" StrokeThickness="3" Stroke="#1e1e1e" ></Line>
                            </Grid>
                            <ControlTemplate.Triggers>
                                <Trigger Property="IsMouseOver" Value="True">
                                    <Setter TargetName="grd" Property="Background" Value="#666666"></Setter>
                                </Trigger>
                            </ControlTemplate.Triggers>
                        </ControlTemplate>
                    </Button.Template>
                </Button>
            </StackPanel>
        </Grid>
    </Grid>
</Window>
MainWindow.xaml.cs
using System.Windows;
namespace WpfApp8
{
    /// <summary>
    /// Interaction logic for MainWindow.xaml
    /// </summary>
    public partial class MainWindow : Window
    {
        public MainWindow()
        {
            InitializeComponent();
        }
        private void Button_Click(object sender, RoutedEventArgs e)
        {
            WindowState = WindowState== WindowState.Maximized? WindowState .Normal: WindowState.Maximized;
        }
        private void Button_Click_1(object sender, RoutedEventArgs e)
        {
            WindowState = WindowState.Minimized;
        }
        private void Button_Click_2(object sender, RoutedEventArgs e)
        {
            Close();
        }
    }
}
以上就是今天要讲的内容,给窗口添加阴影的方法还是比较简单的,只是需要注意窗口最大化的情况。但实际上窗口阴影对性能影响还是比较大的,尤其是有渲染视频的情况下,消耗更多的cpu。所以阴影只适合对性能要求不高的场景。

