在前后端分离出现之前,传统的web页面都是服务端渲染的,如JSP、PHP、Python Django,还有各种模板技术Freemarker, velocity,thymeleaf、mustache等等。其实这套技术都挺成熟的,也用了很多年。
但前后端分离出现后,带来两个好处:
vue系的Nuxt.js 和 React系的Next.js谁更胜一筹?目前我还没有答案,貌似后者更成熟一些,但Nuxt也发展迅速。
{
  "name": "mall",
  "version": "1.0.0",
  "private": true,
  "scripts": {
    "dev": "nuxt",
    "build": "nuxt build",
    "serve": "nuxt dev",
    "preview": "nuxt preview",
    "start": "nuxt start",
    "generate": "nuxt generate"
  },
  "dependencies": {
    "@nuxt/content": "^1.0.0",
    "@nuxtjs/pwa": "^3.3.5",
    "core-js": "^3.25.3",
    "element-plus": "^2.2.27",
    "@element-plus/icons-vue": "^2.0.10",
    "vue": "3.2.45",
    "pinia": "^2.0.14",
    "@pinia/nuxt": "^0.4.5"
  },
  "devDependencies": {
    "nuxt": "^3.0.0",
    "nuxt-windicss": "^2.5.5",
    "vite": "^3.2.4",
    "@nuxt/types": "^2.15.8",
    "@nuxt/typescript-build": "^2.1.0",
    "@iconify/vue": "^3.2.1",
    "@vueuse/nuxt": "^8.4.2",
    "@windicss/plugin-animations": "^1.0.9",
    "sass": "^1.51.0"
  }
}
约定成俗的目录结构:

├── app.vue # Nuxt 3 应用程序中的主组件 入口组件
├── components # 组件目录,支持自动导入
├── layouts # 布局目录
├── composables # 公共函数,支持自动导入
├── assets # 静态资源目录 与vue项目的assets相同
├── middleware # 路由中间件
├── nuxt.config.ts # Nuxt 配置文件,可以理解成vue.config.js 文件名必须是nuxt.config 后缀名可以是.js,.ts或.mjs
├── package.json
├── pages # 基于文件的路由
├── plugins #插件
├── public # 不会参与打包,与vue项目的public类似直接挂在服务器的根目录
├── README.md
├── server
├── tsconfig.json
└── yarn.lock
注意:
入口点在app.vue中:
<script setup>
import { ID_INJECTION_KEY } from "element-plus";
provide(ID_INJECTION_KEY, {
  prefix: 100,
  current: 0,
});
</script>
<template>
  <div>
    <NuxtLayout>
      <NuxtLoadingIndicator :height="5" :duration="3000" :throttle="400" />
      <NuxtPage />
    </NuxtLayout>
  </div>
</template>
通过<NuxtPage>找到layout下某个layout,可以通过名称指定layout,缺省是layouts/default.vue:
<!--default.vue文件-->
<template>
  <main class="py-2 px-10 text-center">
    <slot />
    <Footer />
    <div class="mt-5 mx-auto text-center opacity-25 text-sm">

    </div>
  </main>
</template>
然后,default.vue中的slot会被route里指定的某个page替换,默认的page是pages/index.vue。
在page里就可以调用我们在components目录下存放的各个组件了。
<template>
  <div>
    <Header />
    <PageWrapper>
      hello world
    </PageWrapper>
  </div>
</template>
<script lang="ts" setup>
import { ref } from "vue";
const activeIndex = ref('1')
const activeIndex2 = ref('1')
const handleSelect = (key: string, keyPath: string[]) => {
  console.log(key, keyPath)
}
const value1 = ref();
</script>
<style></style>
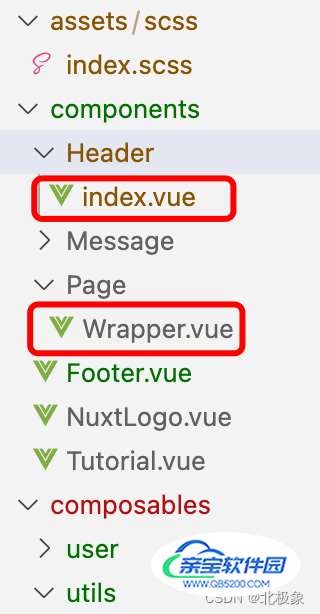
上面这个page用到了两个组件:Header和PageWrapper,分别对应components下的Header/index.vue和page/Wrapper.vue文件。
这就是从app.vue->layout->page->component的调用关系。
主要参数:
–config-file 或 -c: 指定 nuxt.config.js 的文件路径。
–spa 或 -s: 禁用服务器端渲染,使用 SPA 模式
–unix-socket 或 -n: 指定 UNIX Socket 的路径。
使用vue中动态组件的写法要使用resolveComponent语法:
<template>
  <div>
    <component :is="isHeader ? TheHeader : 'div'" />
  </div>
</template>
<script setup>
const isHeader = ref(1)
// 组件
const TheHeader = resolveComponent('TheHeader')
</script>
Nuxt3 再不需要axios这个模块了,直接采用内置的useFetch, useLazyFetch, useAsyncData and useLazyAsyncData几个方法。
await useFetch(() => "/my/post/url", {
        method: 'POST',
        mode: 'cors', // 允许跨域
        body: { some: true },
        initialCache: false,
        onResponse({ request, response, options }) {
    	    // Process the response data
    	},

    });
也可以这么写:
onMounted(async () => {
    const{ data, pending, error, refresh } = await useFetch(() => 'http://localhost:8888/cms/api/ebook/listall', {mode: 'cors'}, { immediate: true })
    const bookList = JSON.parse(data.value) // 注意data是一个vue的ref对象,需要.value获得其值
    bookList.forEach(book => {
      console.log(book.bookName)
    });
})
部署 Nuxt.js 服务端渲染的应用不能直接使用 nuxt 命令,而应该先进行编译构建,然后再启动 Nuxt 服务,可通过以下两个命令来完成:
nuxt build
nuxt start
nuxt build
会为我们生成 .nuxt文件
三种部署形式:

