基本配置、测试
<dependency>
  <groupId>org.springframework.boot</groupId>
  <artifactId>spring-boot-starter-freemarker</artifactId>
</dependency>
@Controller
@RequestMapping("/goodItem")
public class GoodItemController {
@Reference
private IGoodsService goodsService;
@Autowired
private Configuration configuration;
@RequestMapping("/createHtml")
@ResponseBody
public String createHtml(int gid, HttpServletRequest request){
//通过商品id获取商品详情信息
Goods goods = goodsService.queryById(gid);
String [] images=goods.getGimage().split("\\|");
//通过模板生成商品静态页面
try {
//获取商品详情的模板对象
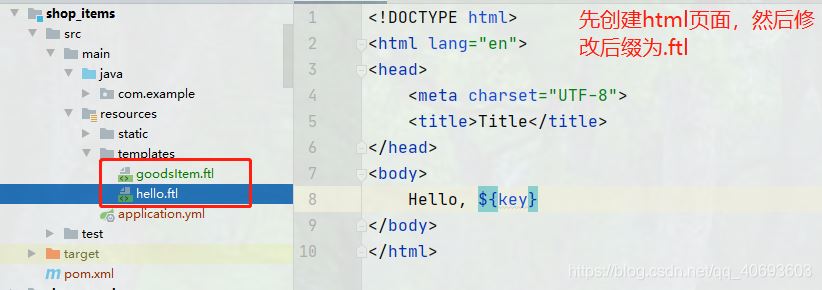
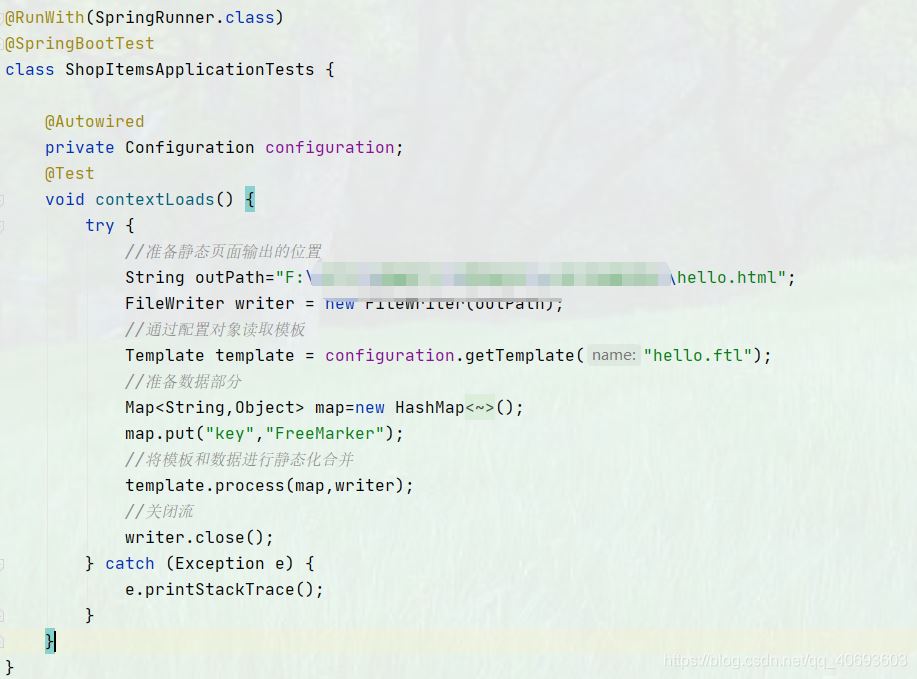
Template template = configuration.getTemplate("goodsItem.ftl");
//准备商品数据
Map<String,Object> map=new HashMap<>();
map.put("goods",goods);
map.put("context",request.getContextPath());
//freemarker页面没有分割功能,所以通过后台将图片分割后,将图片数组传到后台
map.put("images",images);
//生成静态页
//获得classpath路径
//静态页面的名称必须和商品有所关联,最简单的方式就是用商品的id作为页面的名字
String path = this.getClass().getResource("/static/page/").getPath()+goods.getId()+".html";;
template.process(map,new FileWriter(path));
} catch (Exception e) {
e.printStackTrace();
}
return "";
}
}
注意:
1、freemarker页面不能通过<base th:href="${#request.getContextPath()+'/'}" rel="external nofollow" >获得项目的根路径。
因此可从后台将根路径传到前端,然后通过<base href="${context}/" rel="external nofollow" />获取。
2、当page是一个空文件夹的时候,会报错。这是因为maven项目不会对空文件夹进行打包编译。
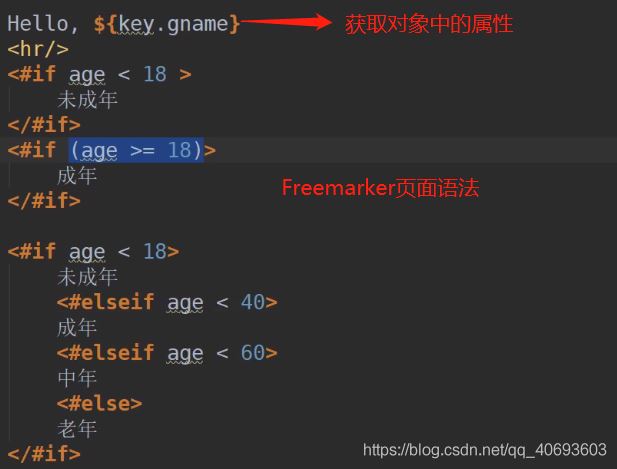
FreeMarker的基本语法