我们在项目中都会遇到项目打包,可以通过assembly对我们的项目进行打包。
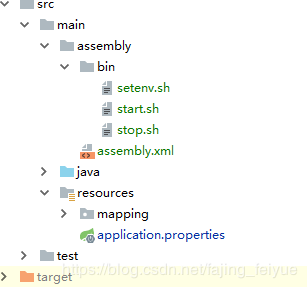
1、首先看一下在打包前的项目文件结构。
2、在pom.xml中配置assembly插件
 <build>
 <plugins>
 <plugin>
 <groupId>org.springframework.boot</groupId>
 <artifactId>spring-boot-maven-plugin</artifactId>
 </plugin>
 <plugin>
 <groupId>org.apache.maven.plugins</groupId>
 <artifactId>maven-compiler-plugin</artifactId>
 <configuration>
 <source>1.8</source>
 <target>1.8</target>
 </configuration>
 </plugin>
 <plugin>
 <groupId>org.apache.maven.plugins</groupId>
 <artifactId>maven-assembly-plugin</artifactId>
 <version>2.4</version>
 <configuration>
 <appendAssemblyId>false</appendAssemblyId>
 <descriptors>
 <descriptor>src/main/assembly/assembly.xml</descriptor>
 </descriptors>
 </configuration>
 <executions>
 <execution>
 <id>make-assembly</id>
 <!-- 绑定到package生命周期阶段上 -->
 <phase>package</phase>
 <goals>
 <goal>assembly</goal>
 </goals>
 </execution>
 </executions>
 </plugin>
 </plugins>
 </build>
3、在assembly这个目录下新增assembly.xml这个文件
<assembly>
 <id>assembly</id>
 <formats>
 <!--打包的文件类型-->
 <format>tar.gz</format>
 </formats>

 <includeBaseDirectory>false</includeBaseDirectory>

 <fileSets>
 <fileSet>
 <directory>src/main/assembly/bin</directory>
 <outputDirectory>/bin</outputDirectory>
 <includes>
 <include>*.sh</include>
 </includes>
 <!--打包文件权限-->
 <fileMode>0755</fileMode>
 </fileSet>

 <fileSet>
 <!--原文件目录-->
 <directory>src/main/resources</directory>
 <!--打包的目录-->
 <outputDirectory>/conf</outputDirectory>
 </fileSet>
 <!--将项目文件打包为jar文件-->
 <fileSet>
 <directory>${project.build.directory}</directory>
 <outputDirectory>/lib</outputDirectory>
 <includes>
 <include>*.jar</include>
 </includes>
 </fileSet>

 </fileSets>
 <!--添加 jar的打包-->
 <dependencySets>
 <dependencySet>
 <outputDirectory>lib</outputDirectory>
 </dependencySet>
 </dependencySets>

</assembly>
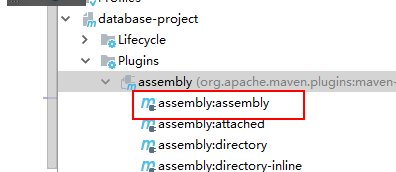
4、点击 assembly:assembly 就能进行打包。
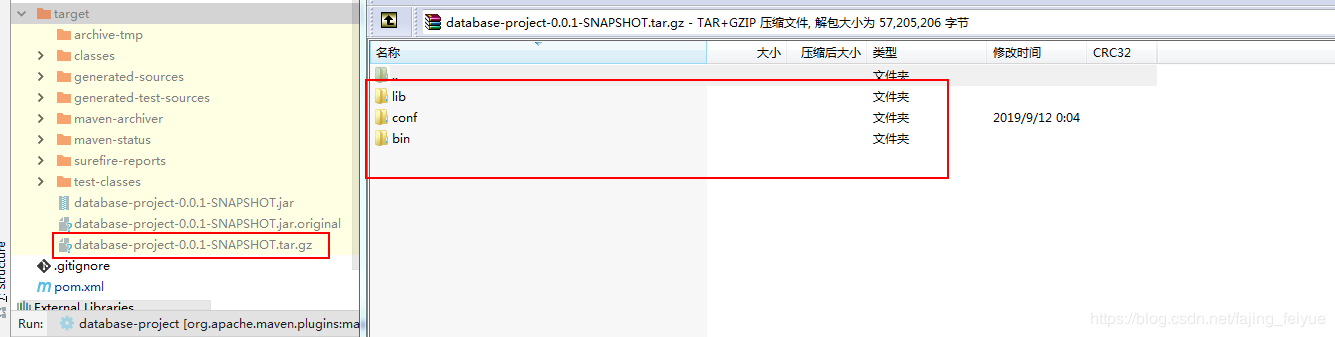
5、查看打好包的文件
5、附上start.sh,stop.sh文件
start.sh文件
#!/usr/bin/env bash

#source $(dirname $0)/../../env.sh
SERVERJAR="database-project-0.0.1-SNAPSHOT.jar"
base_dir=$(dirname $0)
cd ..


if [ "$JAVA_HOME" != "" ]; then
 JAVA="$JAVA_HOME/bin/java"
else
 JAVA=java
fi


JAVA_OPTS="-server -Xms32m -Xmx32m -Xmn24m -Xss256K \
-XX:SurvivorRatio=4 -XX:+UseConcMarkSweepGC -XX:+UseCMSCompactAtFullCollection \
-XX:CMSInitiatingOccupancyFraction=60 -XX:+PrintGCDateStamps \
-XX:+PrintGCDetails -Xloggc:$base_dir/gc.log"

echo -n "Starting server ..."
 PID=$(ps -ef | grep database-project-0.0.1-SNAPSHOT.jar | grep -v grep |awk '{print $2}')
if [ -z "$PID" ]; then
 echo Application is already stopped
else
 echo kill $PID
 kill -9 $PID
fi

echo `pwd`
echo $SERVERJAR
echo $JAVA
echo $JAVA_OPTS
echo $JAVA_DEBUG_OPT

nohup $JAVA $JAVA_OPTS $JAVA_DEBUG_OPT -jar lib/$SERVERJAR > $base_dir/nohup.out &

if [ $? -eq 0 ];then
 # echo -n $! > "$PIDFILE"
 if [ $? -eq 0 ]
 then
 sleep 1
 echo STARTED
 else
 echo FAILED TO WRITE PID
 exit 1
 fi
else
 echo SERVER DID NOT START
 exit 1
fi
stop.sh
#!/usr/bin/env bash


SERVERJAR="database-project-0.0.1-SNAPSHOT.jar"

base_dir=$(dirname $0)

echo -n "Stopping server ..."
 PID=$(ps -ef | grep database-project-0.0.1-SNAPSHOT.jar | grep -v grep |awk '{print $2}')
if [ -z "$PID" ]; then
 echo Application is already stopped
else
 echo kill $PID
 kill -9 $PID
fi
exit 0
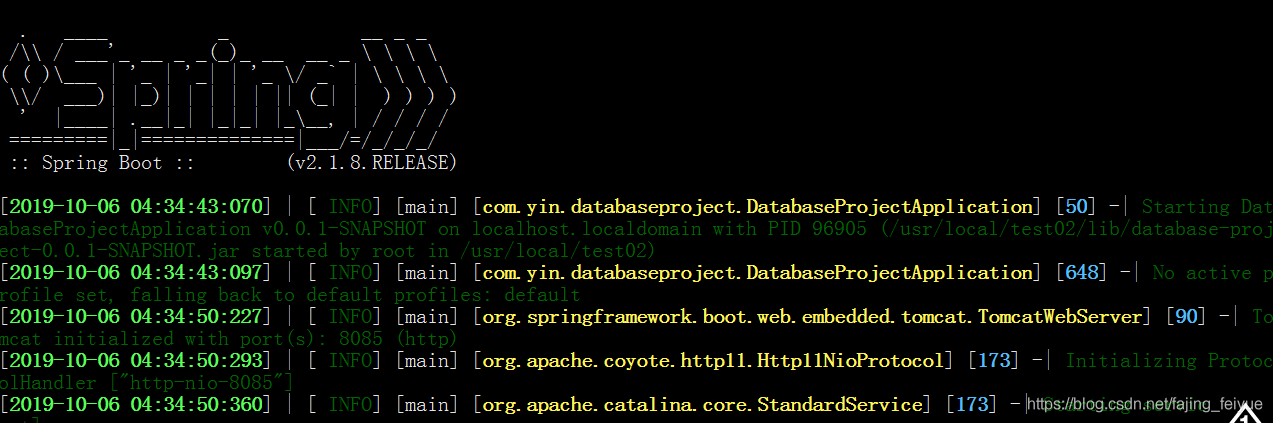
文件解压运行start.sh文件
脚本意思可以参考
日志可以参考
启动运行参数可以参考
在启动脚本的的时候可能会 ./start.sh 脚本的时候可能会报错
No such file or directory
这是由于在windows下编写的脚本文件,放到Linux中无法识别格式,编辑start.sh和stop.sh脚本文件,set ff=unix 设置为linux下环境
set ff=unix

查看脚本启动情况
tail -f -n 500 nohup.out
总结

