对于需要长期与终端打交道的工程师来说,拥有一款称手的终端管理器是很有必要的,对于 Windows 用户来说,最好的选择是 `Xshell`,这个大家都没有异议。但对于 MacOS 用户来说,仍然毋庸置疑,`iTerm2` 就是你要的利器,如果你觉得不是,那是你的问题,不是 `iTerm2` 的问题。今天我就来告诉你问题出在哪里,我将要向你展示的基本上都是你没见过的配方,擦亮眼睛吧!
本教程总共分为三个部分:第一部分关于 iTerm 自身的设置和优化;第二部分关于连接远程服务器的设置和优化;第三部分关于 zsh 的设置和优化。
今天来讲第一部分。
## 1. 悬浮窗口
首先我们来解决第一个问题:**如何在任何界面呼入呼出 iTerm2 的窗口,并且悬浮在界面的顶部?**
相信每个人都会有这样的使用场景:你正在全屏浏览器浏览网页,或者正在全屏编辑器写代码写文章之类的,突然想到了什么,或发现了什么,想快速打开终端,执行一两条命令(诸如打开文件、启动服务等),然后关闭。
对于这种情况,我们的愿景是可以通过快捷键迅速打开终端,然后用同样的快捷键迅速隐藏它,直到我需要时再次来到我面前。至于实现方式,虽繁琐但并不复杂,下面跟着我的步骤走:
### 创建新的 Profile
首先打开 `Preperence → Profiles`,新建一个 `Profiles`,取名 `HotKey Window`。

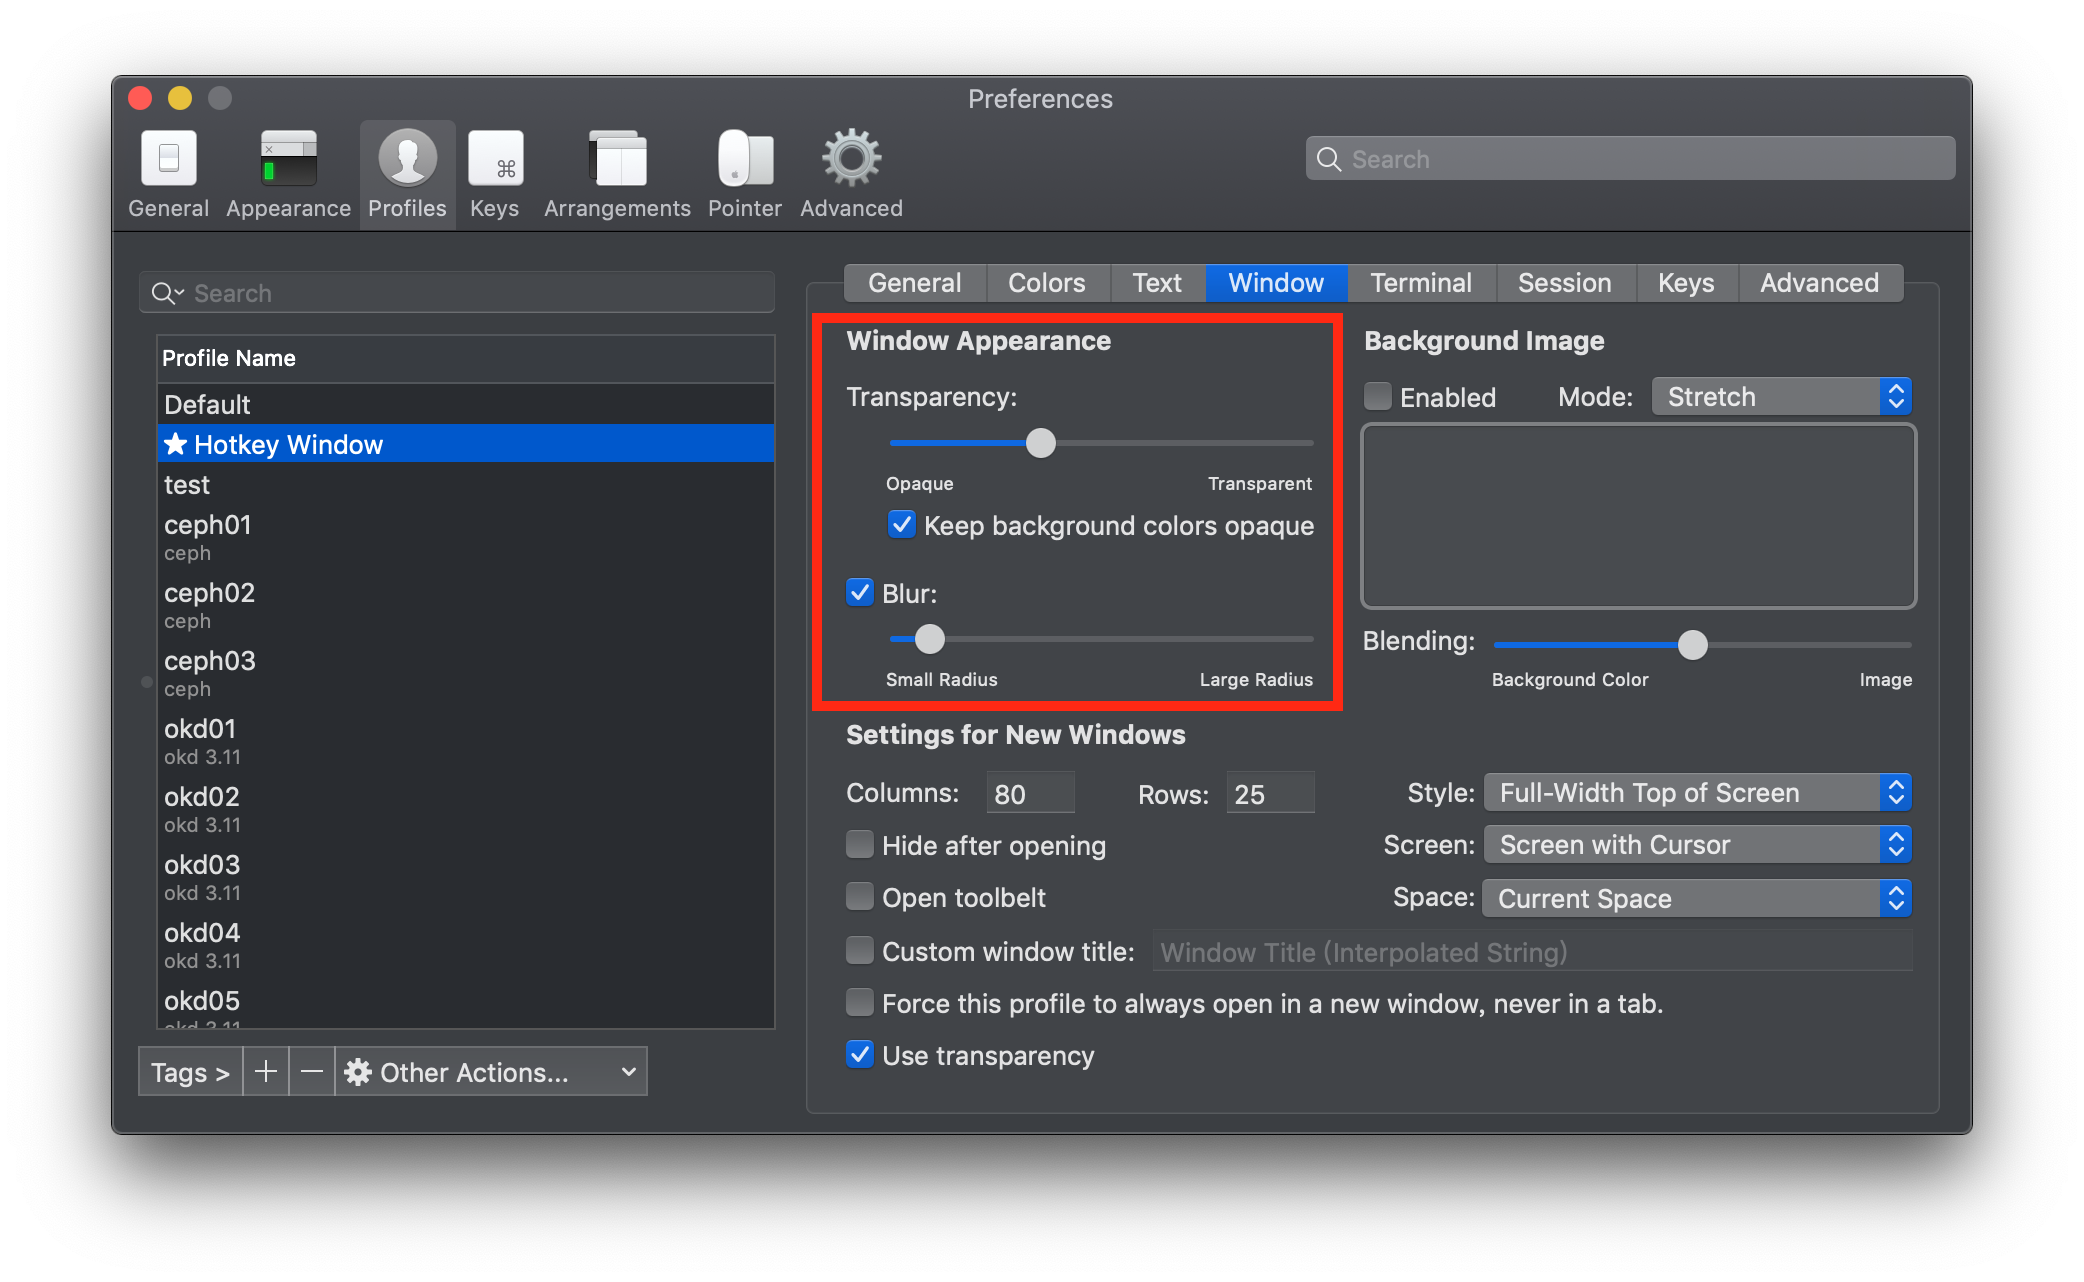
### 背景透明与模糊设置
在`Preperence → Profiles → Window → Window Appearance` 进行设置
### 窗口风格配置
在`Preperence → Profiles → Window → Settings for New Windows` 进行设置
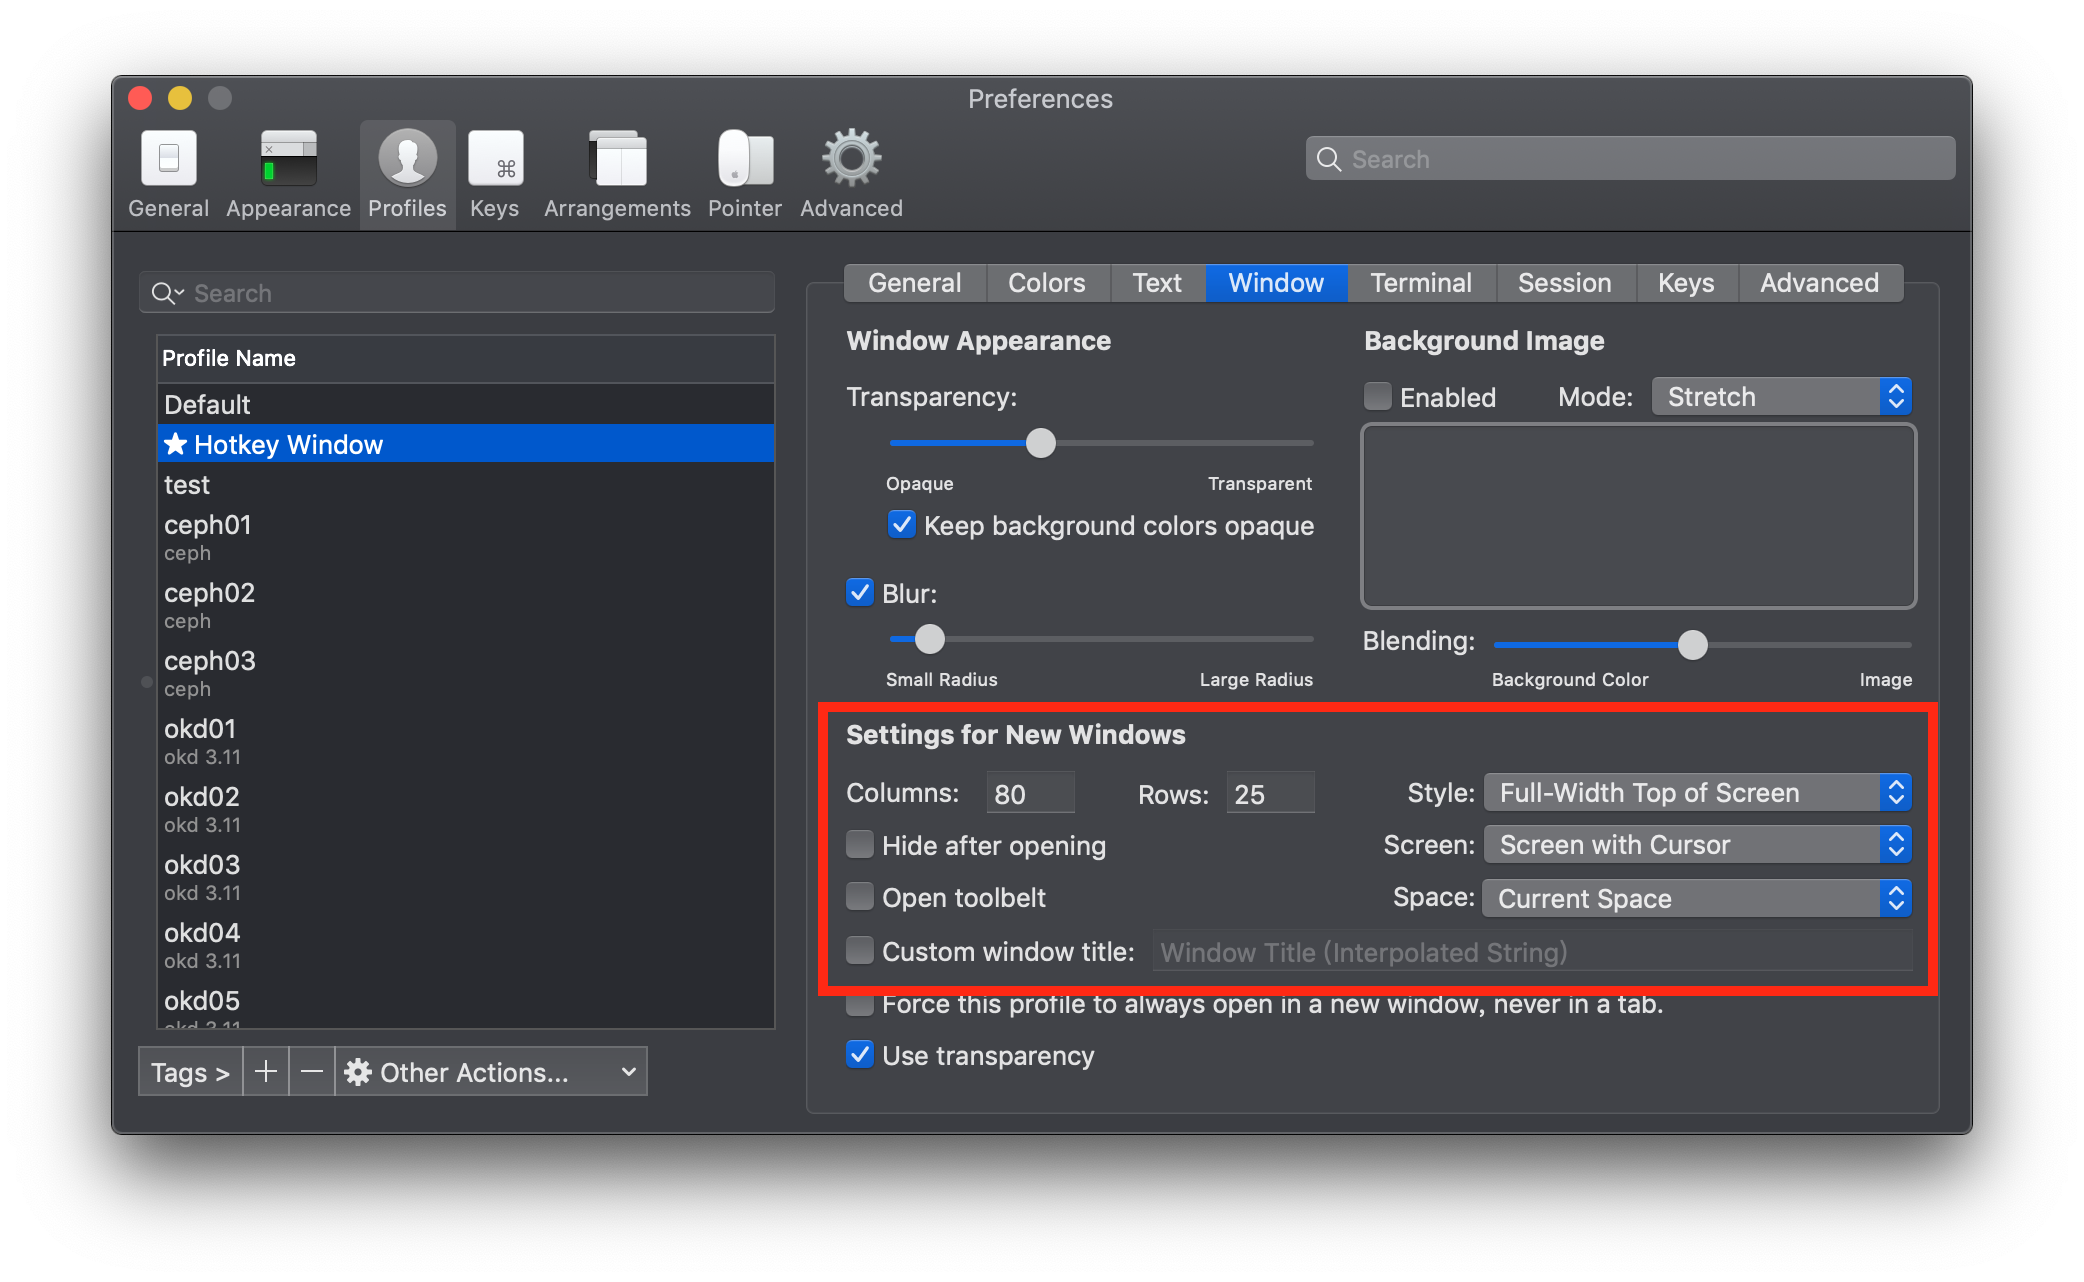
解释一下这几个参数:
+ **Full-Width Top of Screen** : 这个很好理解,让终端显示在屏幕顶部,并占满整个宽度。
+ **Current Spce** : 表示只显示在当前的工作空间,举个例子吧,假设你在当前屏幕打开了终端,你切换到下一个屏幕时它就不会跟到下一个屏幕。
+ **Screen width Cursor** : 这个和上面的参数搭配,用来判定哪个屏幕属于当前的工作空间,表示你的鼠标在哪,哪里就是当前的工作空间。
### 设置 HotKey
在 `Preperence → Profiles → Keys → HotKey Window` 进行设置
选中 `A hotkey opens a dedicated window with this profile`,表示此 profile 可以通过快捷键快速打开快速关闭。

然后点击 `Configure Hotkey Window`,设置快捷键。
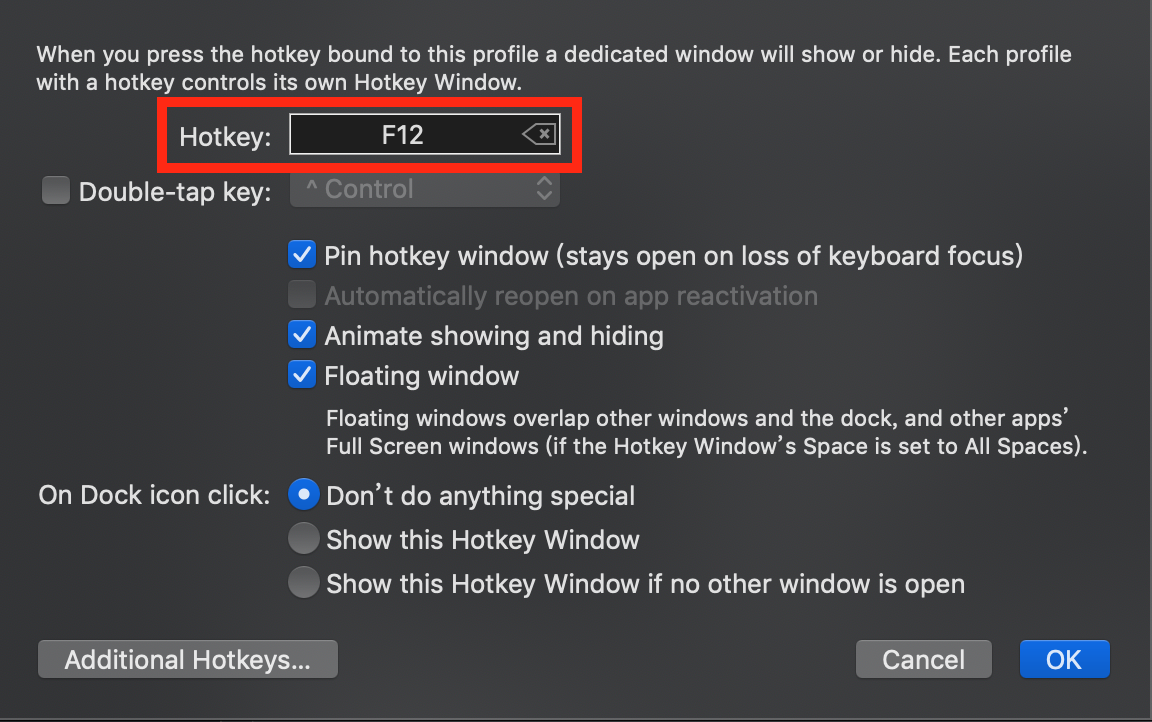
为了只使用一个键,可以使用功能键作为快捷键,我选择的是 `F12`。
这里需要说明一点,功能键只适用于没有 `Touch Bar` 的 MacBook,对于新款的带 `Touch Bar` 的 MacBook,只能使用其他的组合快捷键,比如 `Cmd+P` 什么的。至于原因嘛,那是因为新款 MacBook 的功能键只能显示在 `Touch Bar` 上,你只能分别针对应用打开功能键,也就是说,你只有打开这个应用时,才会在 Touch Bar 上显示功能键,可是我们要的是在任何地方通过快捷键呼出终端,我不能先打开终端,再使用功能键打开终端。。。这是个先有鸡还是先有蛋的问题,所以还是选其他快捷键吧。
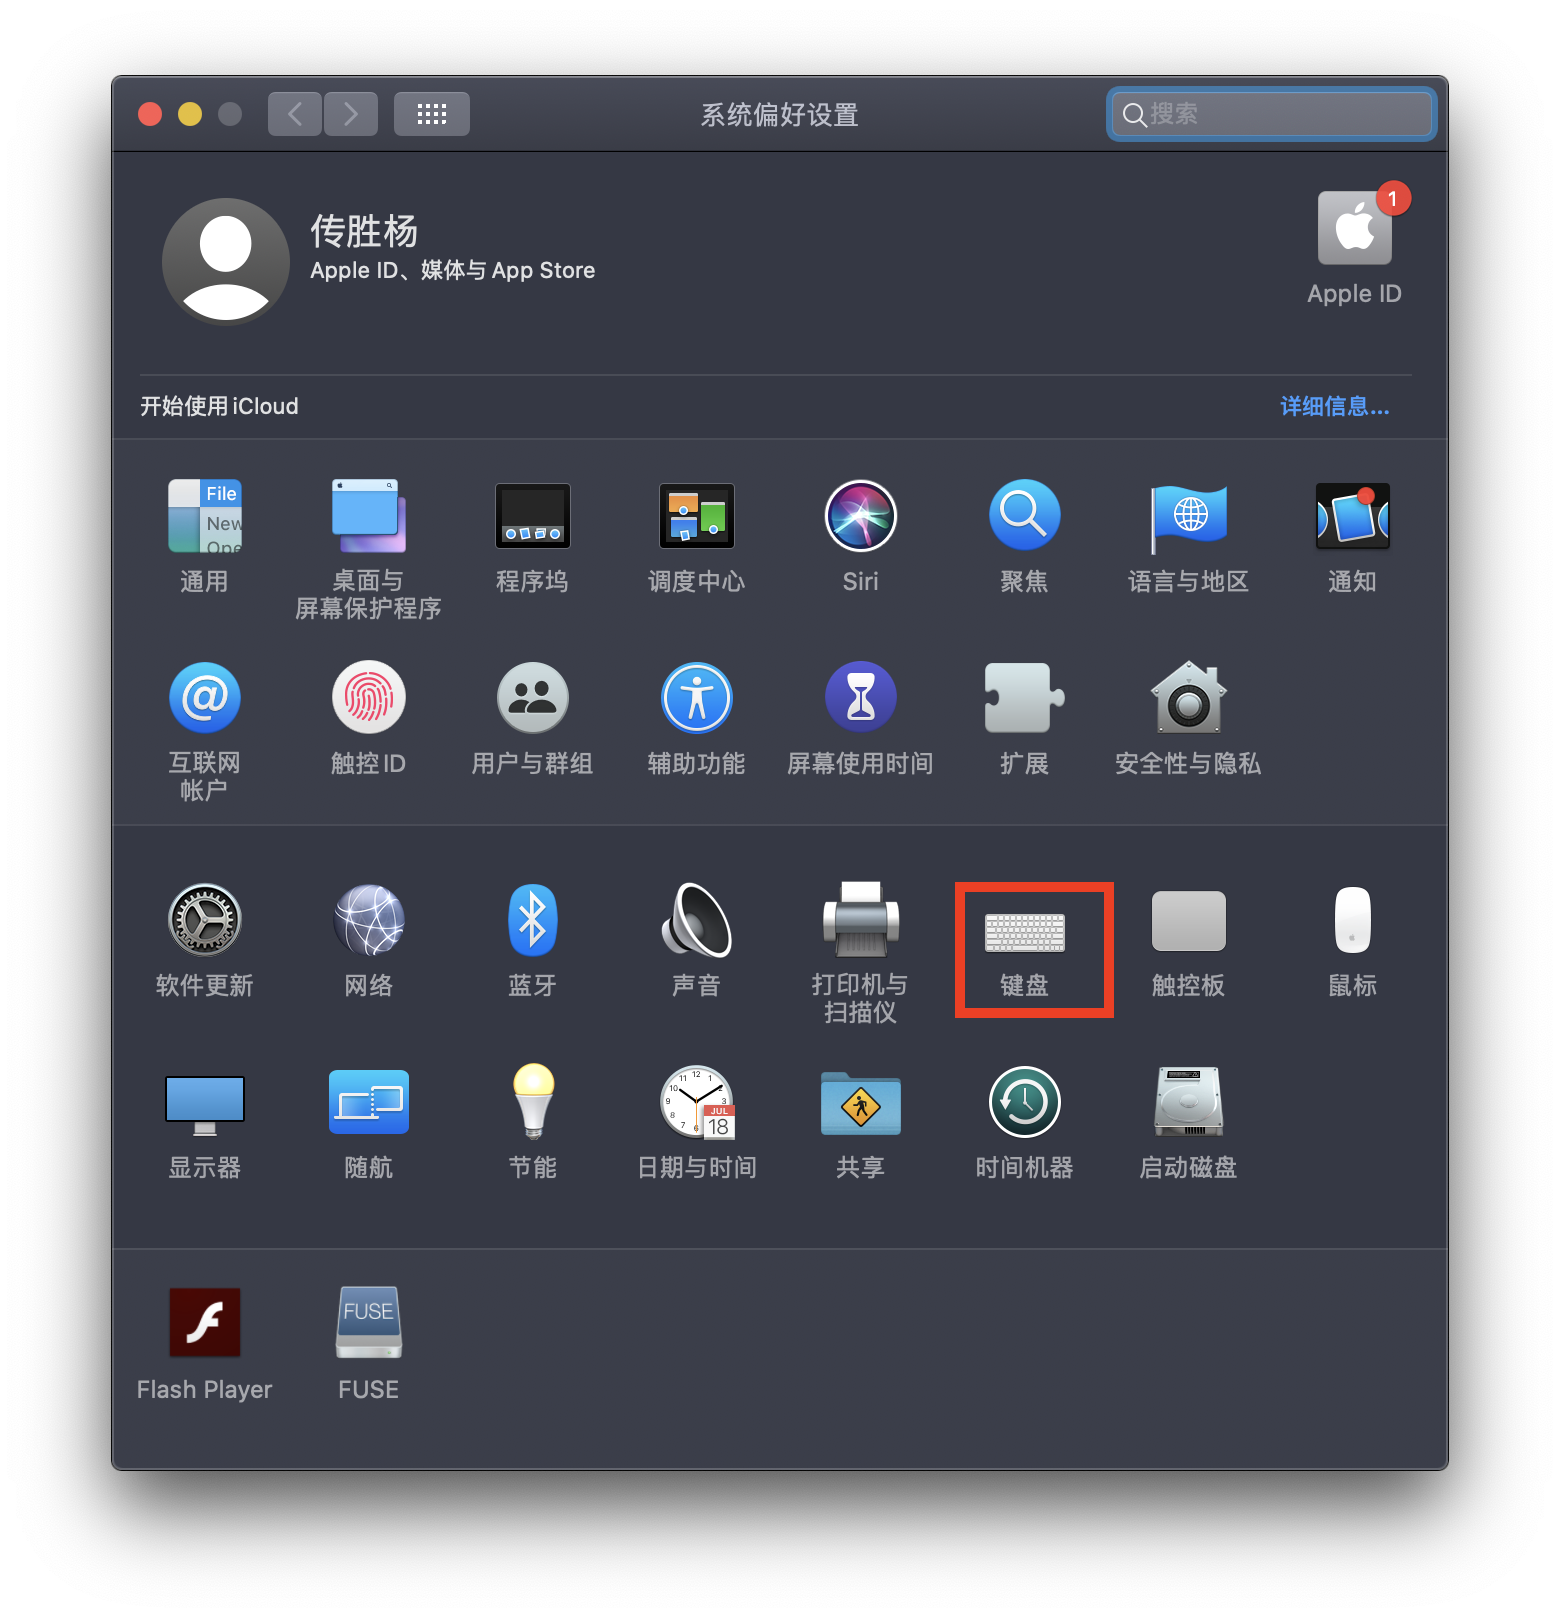
对于没有 `Touch Bar` 的 MacBook,我们可以这么设置,首先打开系统偏好设置,选择键盘设置。

选中 **将 F1、F2 等键用作标准功能键**。
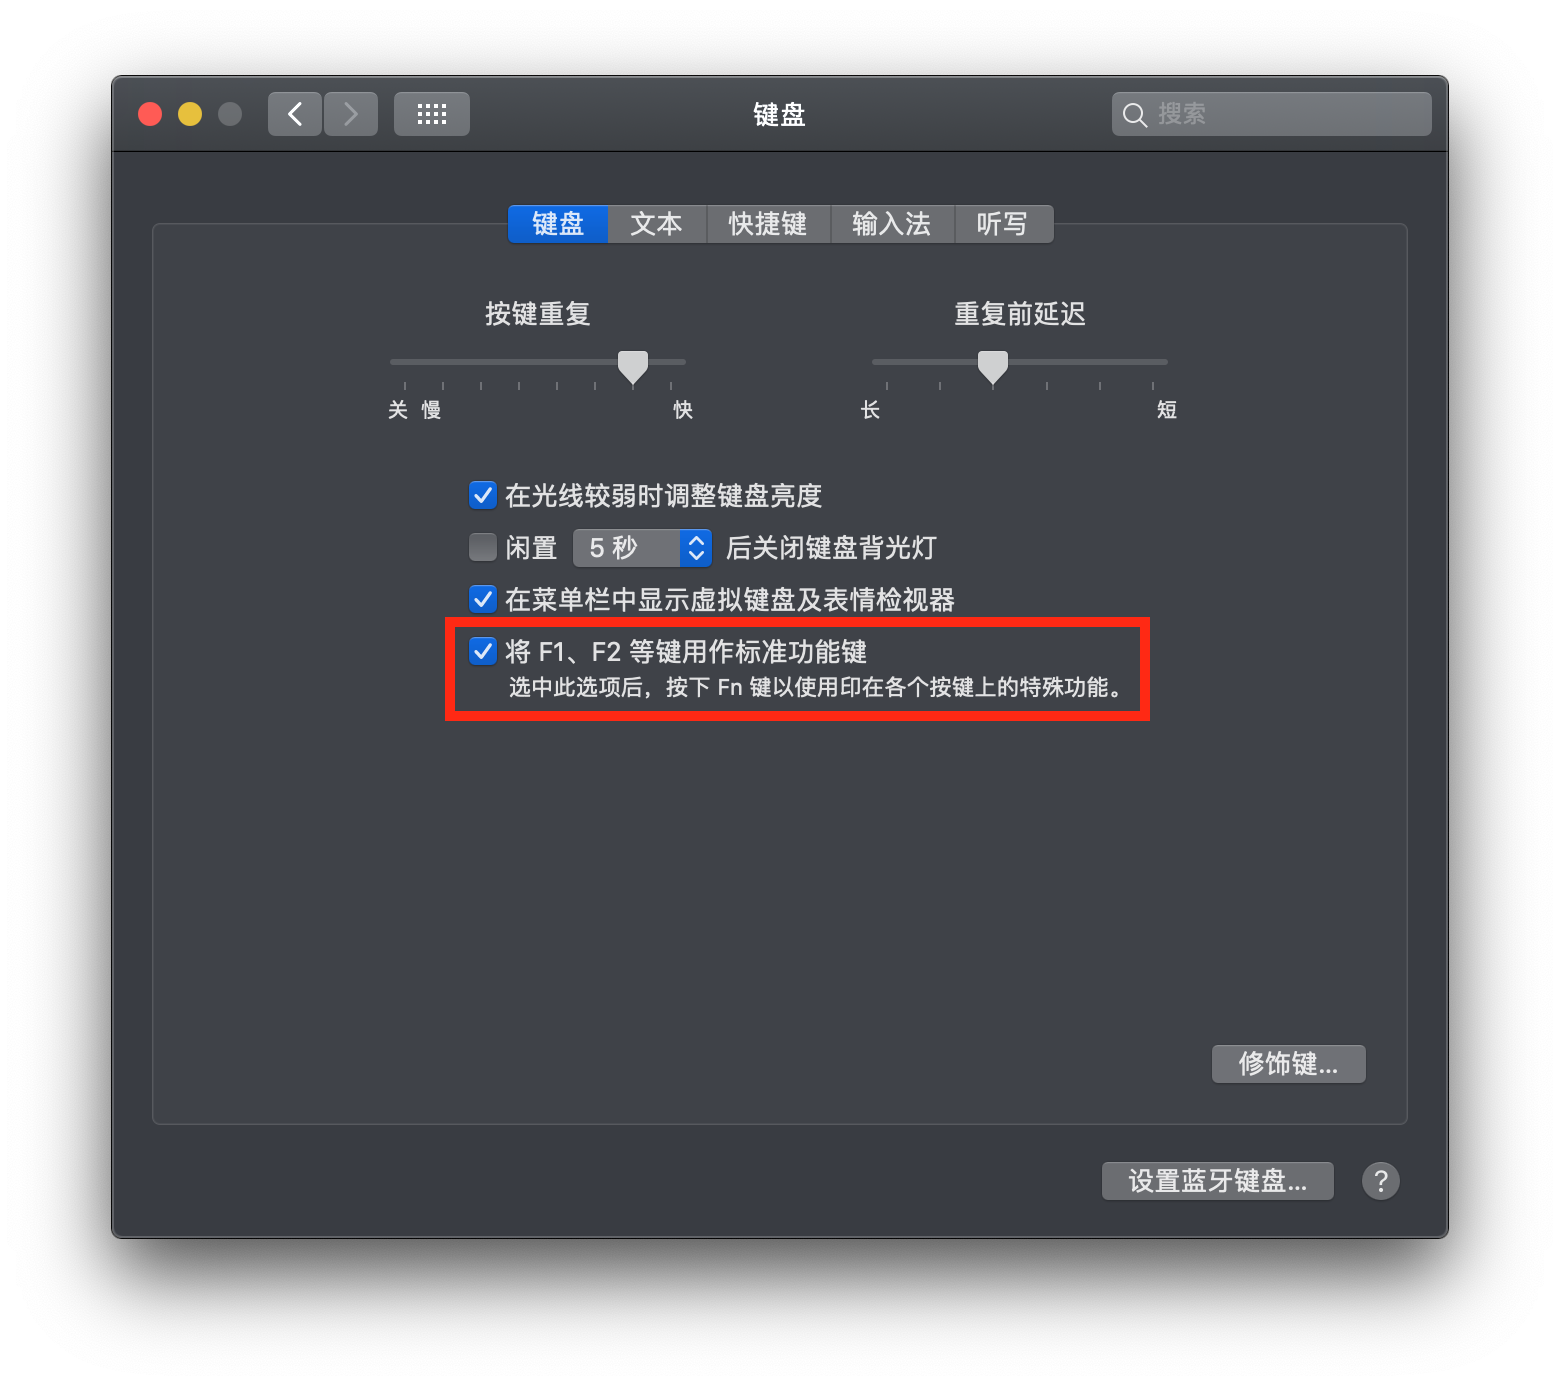
这样你就可以通过 `F12` 来快速打开关闭终端了。
> 请注意:打开了标准功能键之后,以后再想使用功能键的特殊功能,比如 `F11` 减小音量、`F12` 增大音量,必须得和 `Fn` 键组合使用,例如增大音量就是 `Fn+F12`。
对于新款带 `Touch Bar` 的 MacBook,可以这么设置,首先打开系统偏好设置,选择键盘设置。
"按下 Fn 键以" 选择 “显示F1、F2等键”:
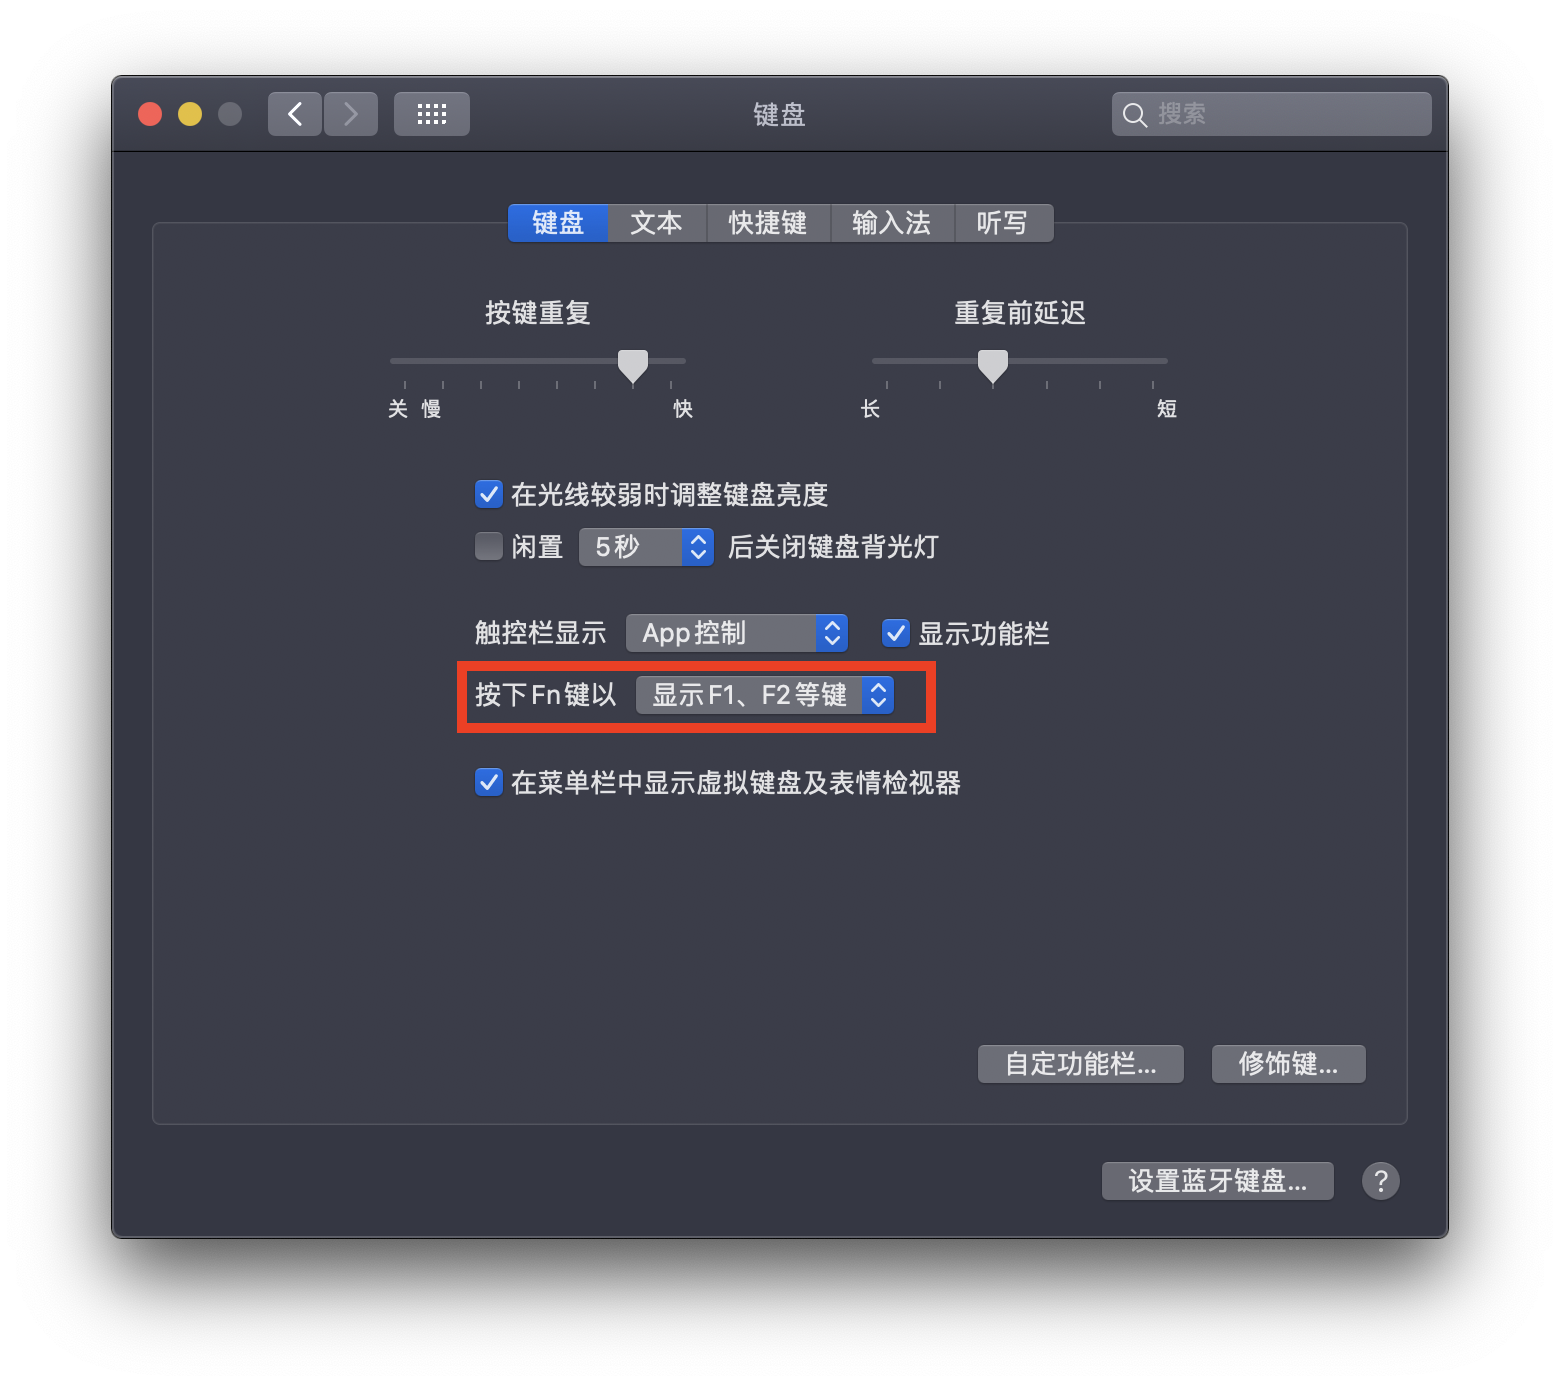
这样就可以使用 `Fn+F12` 来快速打开终端。
同时在 `快捷键 → 功能键` 设置中添加 iTerm 应用,这样打开 iTerm2 窗口时就可以直接使用 `F12` 键来关闭窗口。

到目前为止,悬浮终端的 `Profile` 就配置完成了,你可以按下你设置的`HotKey`来方便快速打开和隐藏命令行。如果你想新建标签页也用这个 Profile,可以将 `Hotkey Window` 设为默认的 Profile:

下面我们来做一些优化工作。
## 2. 改变光标形状
在 `Preperence → Profiles → Text` 进行设置。
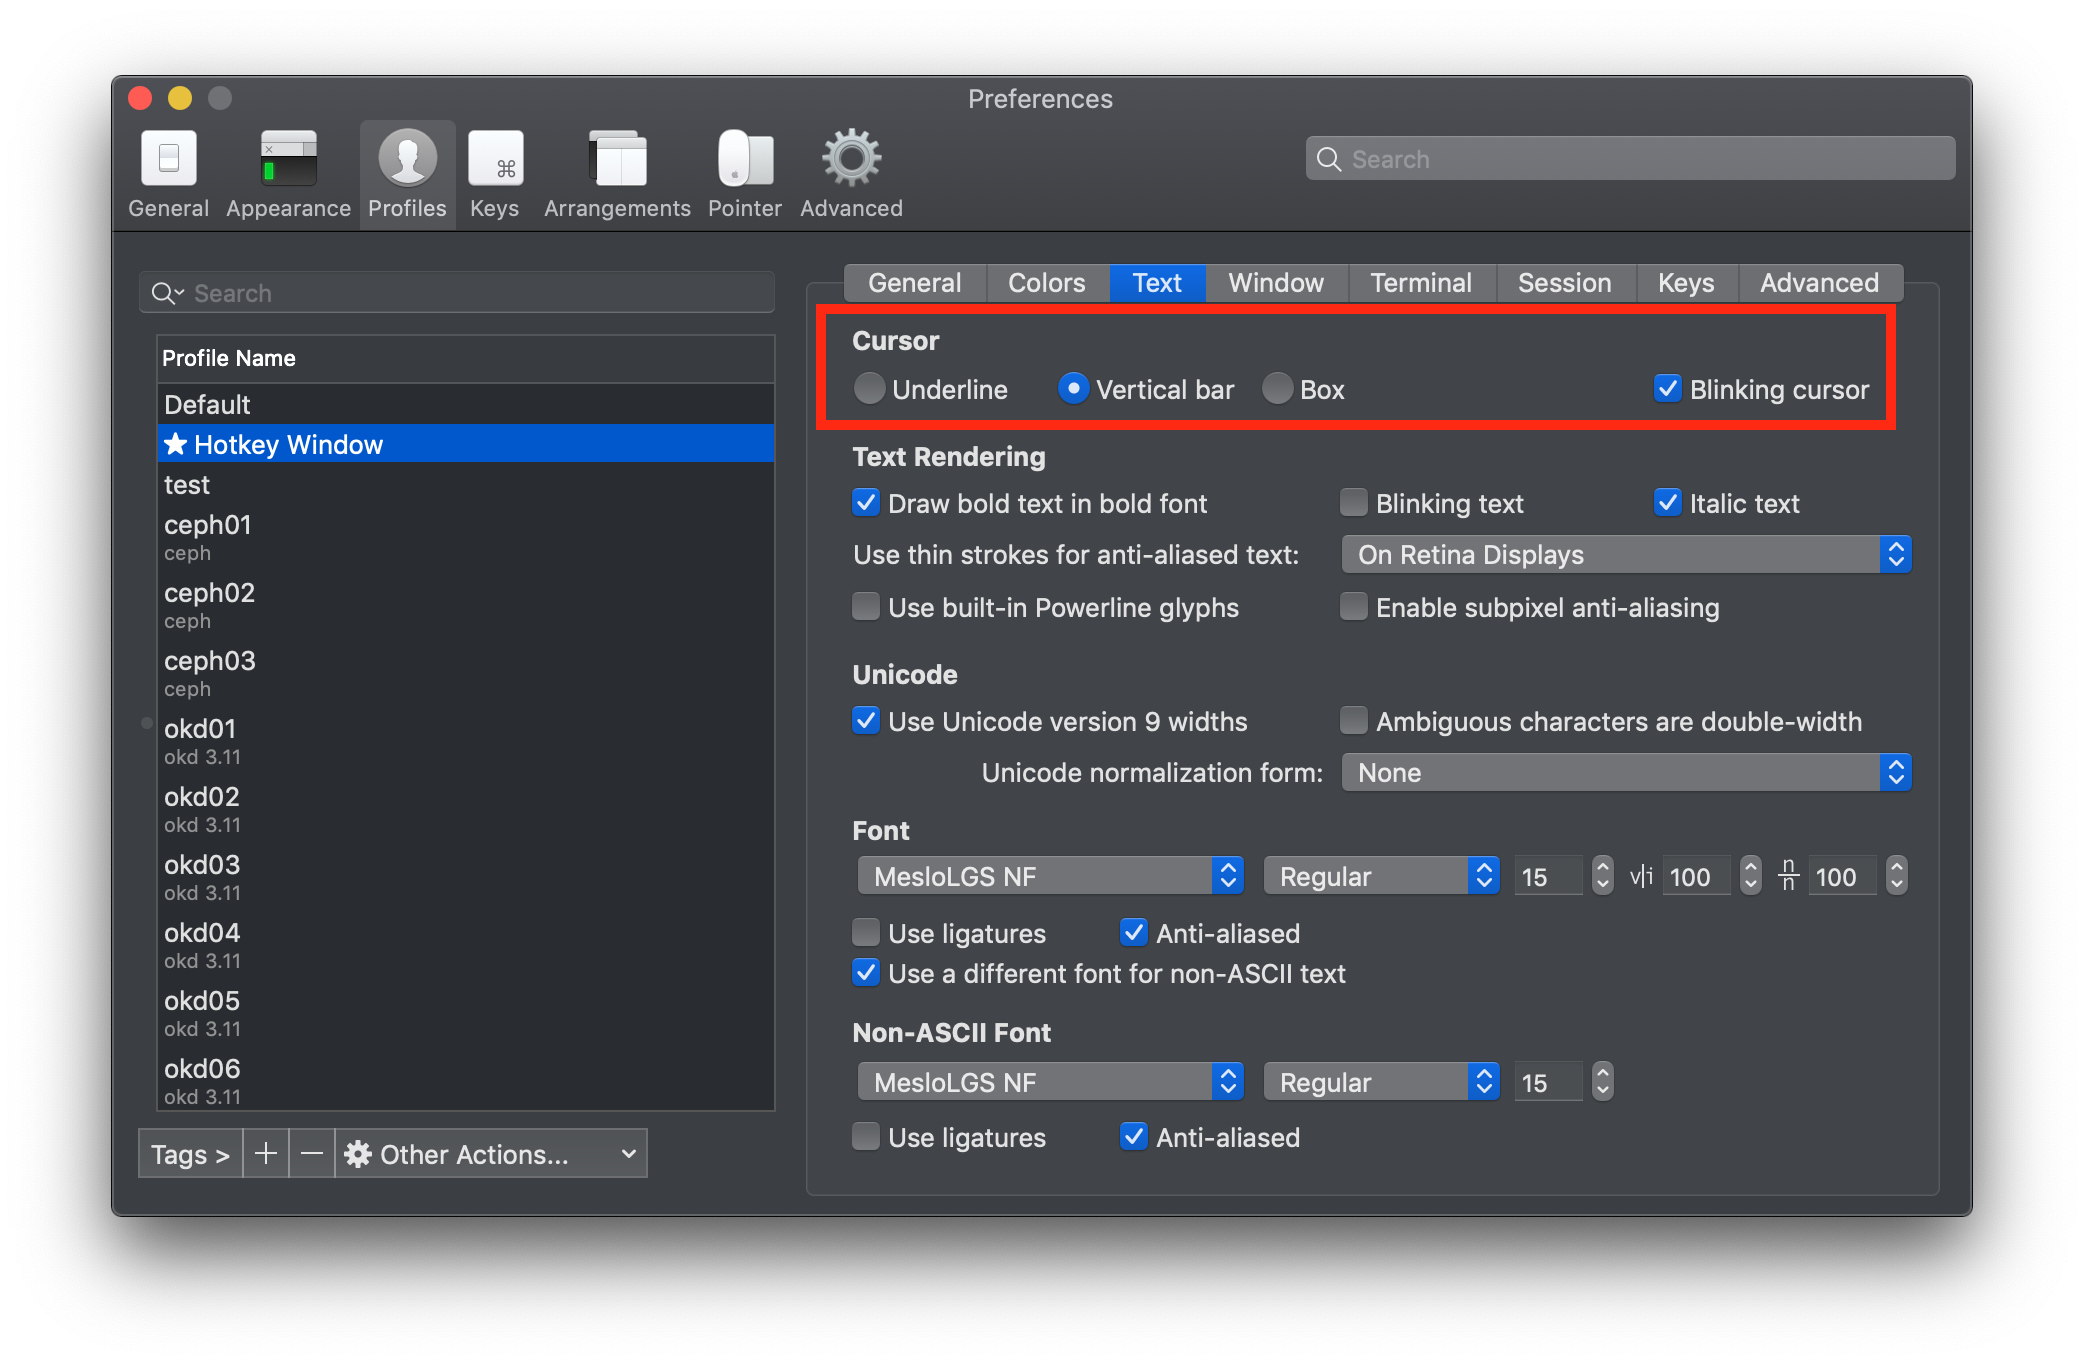
默认光标形状是酱紫的:
更改设置之后光标形状就顺眼多了:

## 3. 为自己代言
如果你要为自己代言,新建任何一个终端窗口都想打上自己的 `Logo`,可以在 `Preperence → Profiles → General` 进行设置。

这样不管我切换到哪个终端,都可以 fuck cloud native!
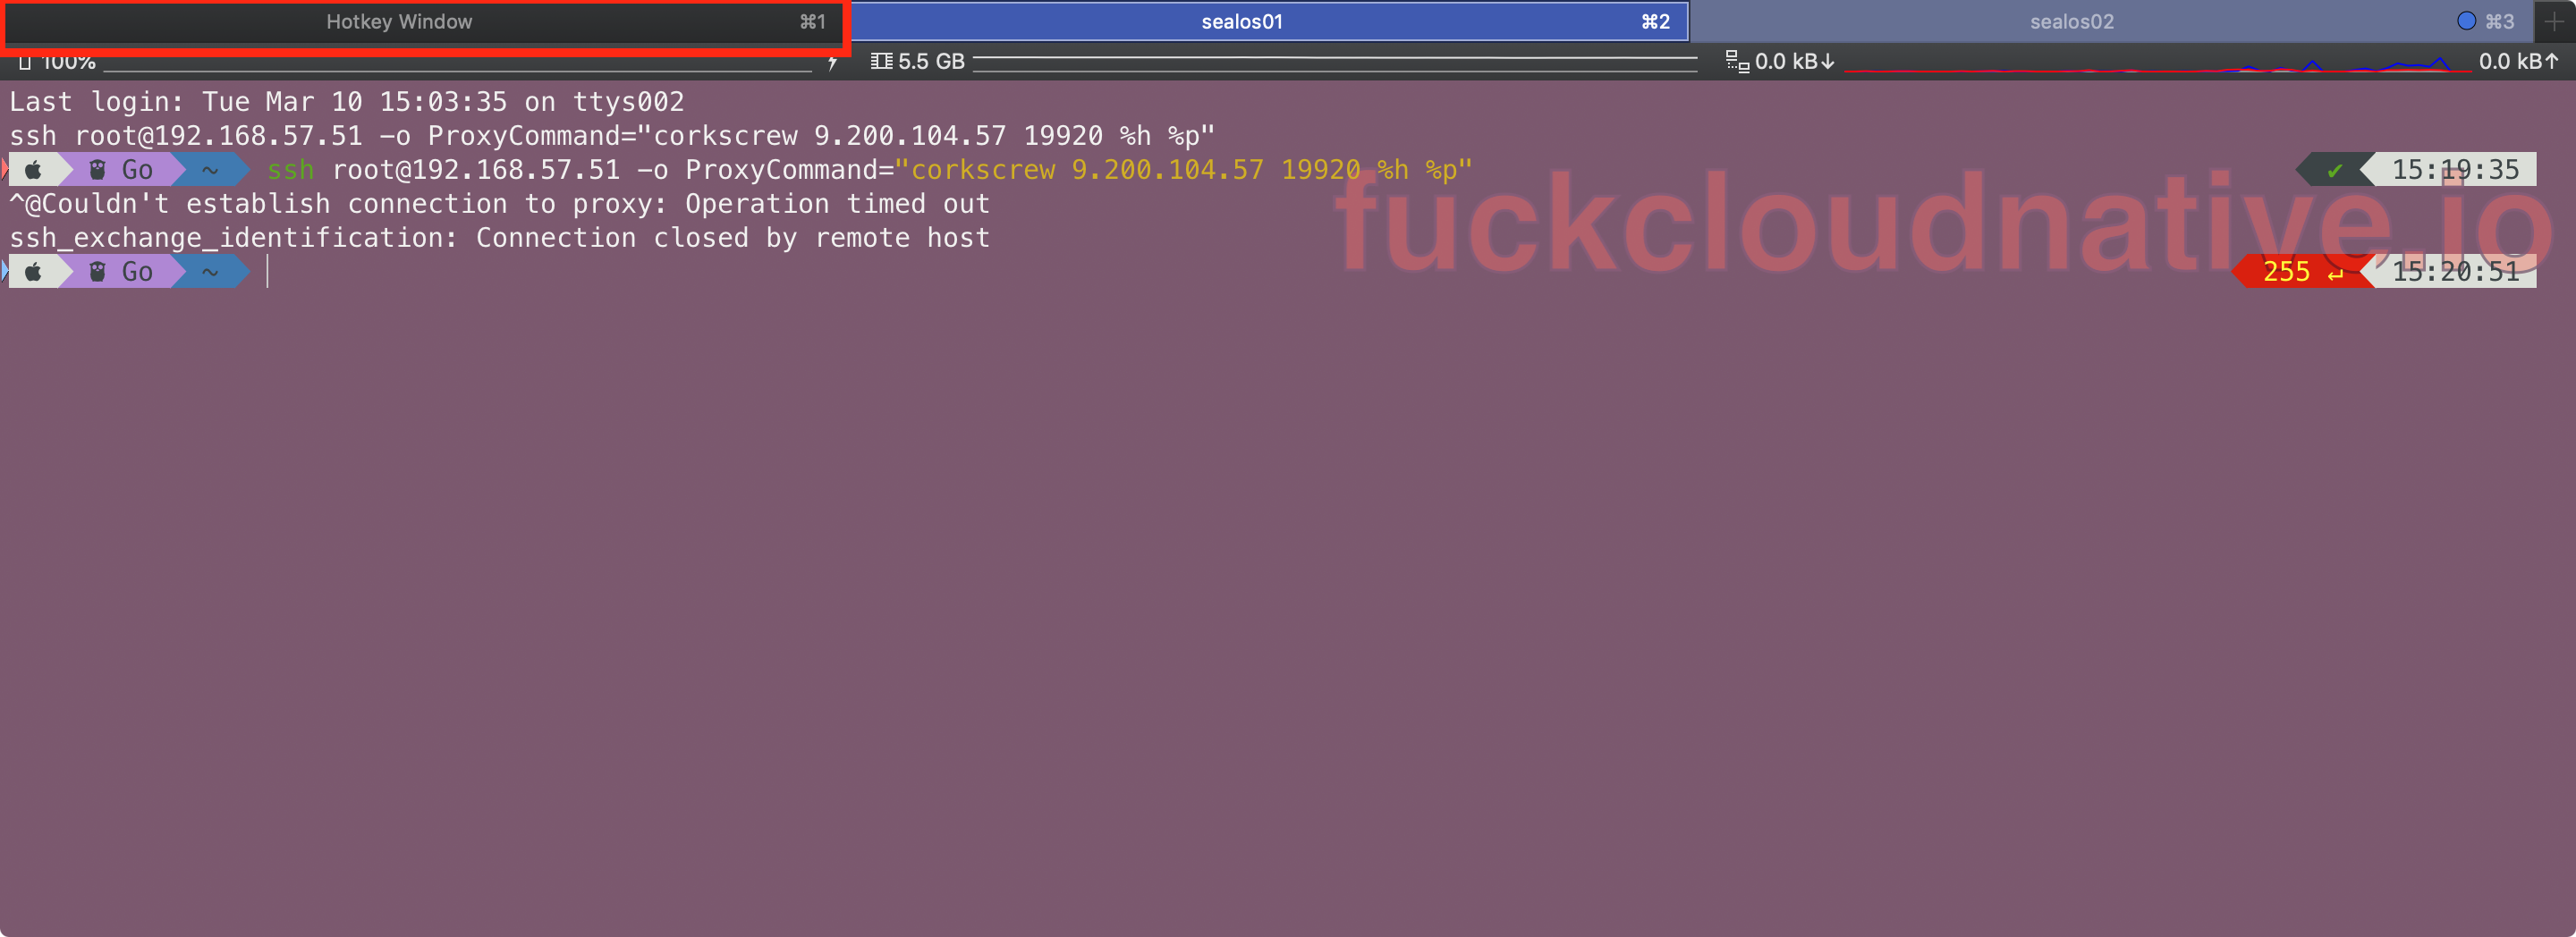
## 4. 自定义标签页标题
在 `Preperence → Profiles → General` 进行设置。
取消勾选 `Applications in terminal may change the title`:

Title 选择 `Profile Name`,取消勾选 `Job Name`:
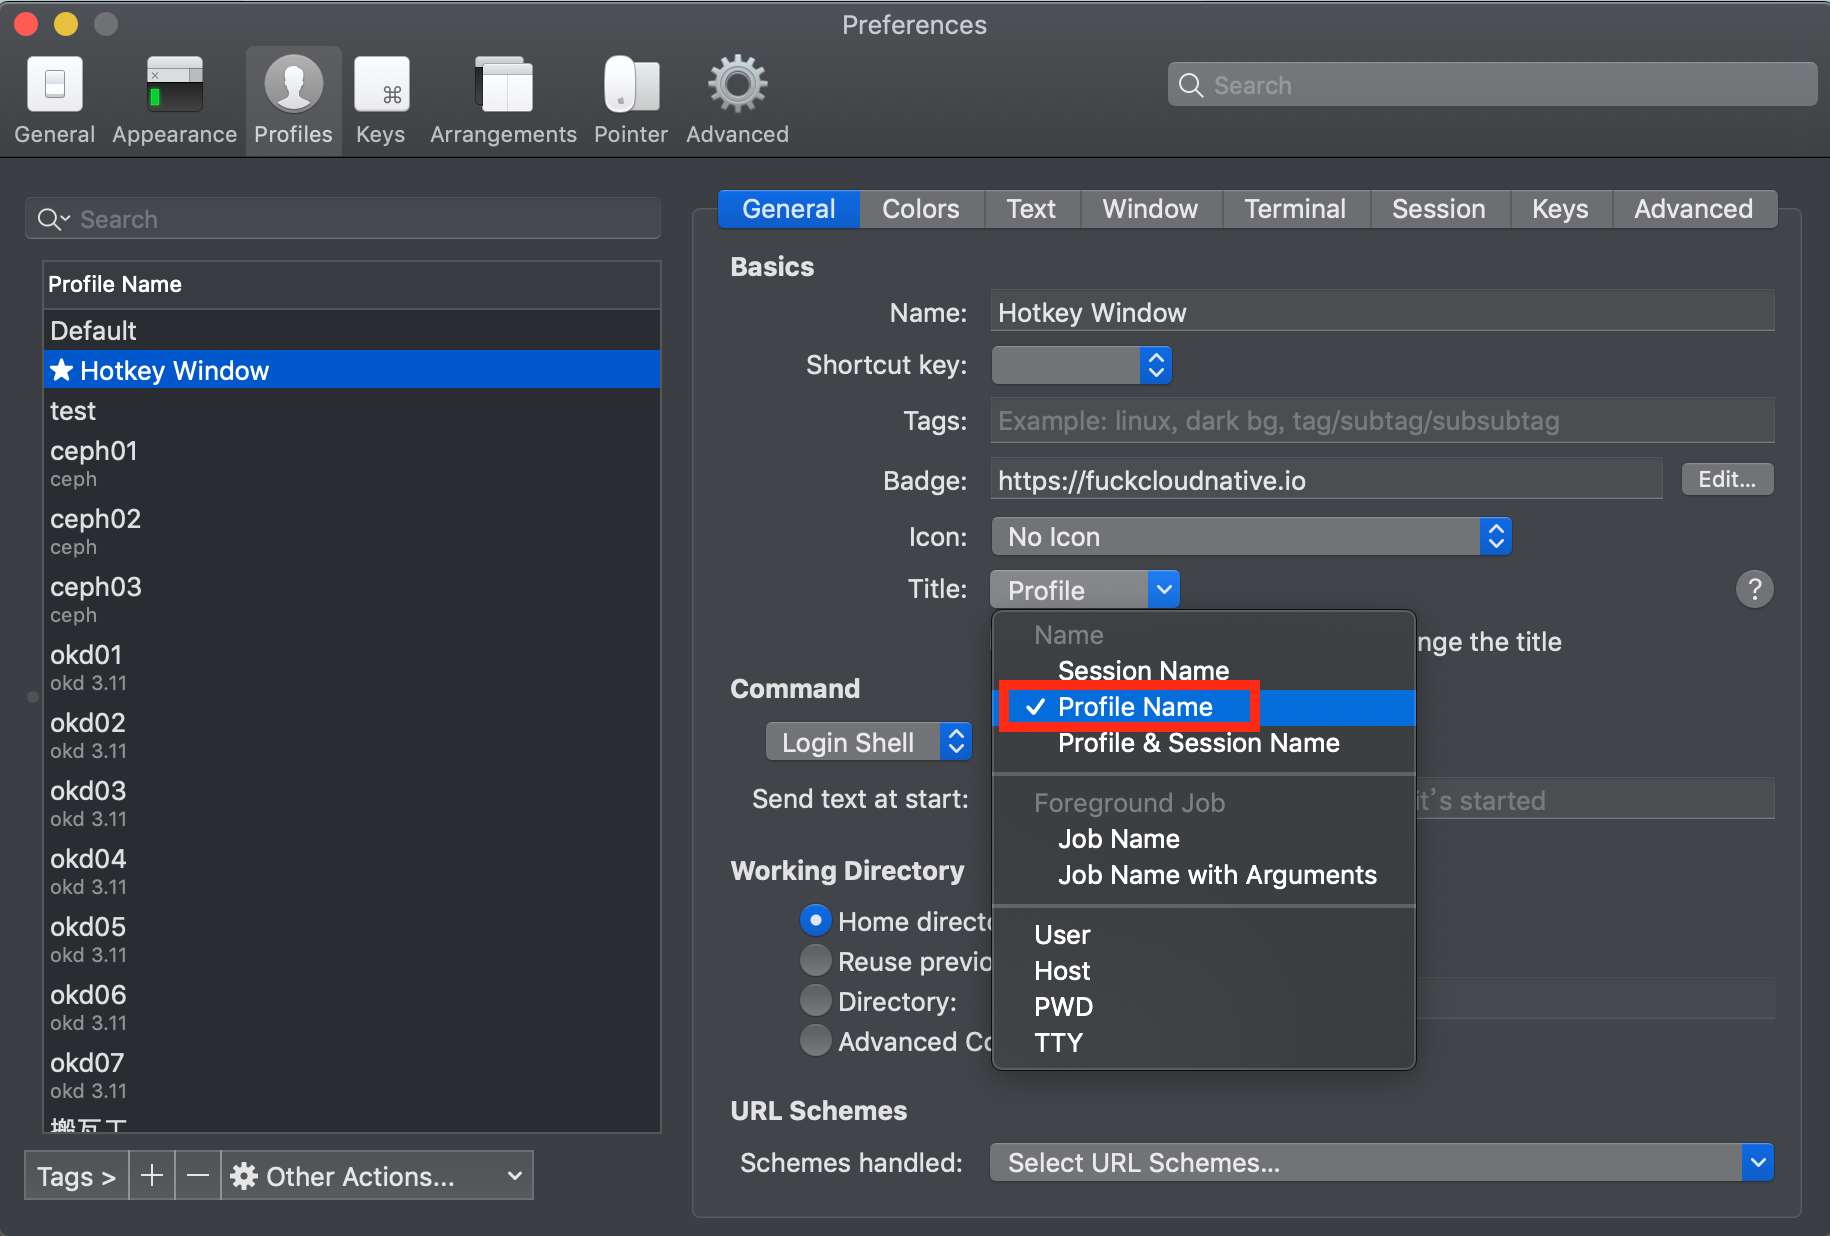
这样每个标签页的标题都会显示为对应的 `Profile Name`:

## 5. 自定义配色方案
网上有现成的配色方案,我们可以直接拿来主义,地址在这里:[https://iterm2colorschemes.com/](https://iterm2colorschemes.com/)。
下载压缩包,解压后,打开 iTerm2 的设置:`Preperence → Profiles → Colors → Color Presets`。点击 `import` 选择解压好的主题目录下 `schemes` 目录下的你想要的主题导入。
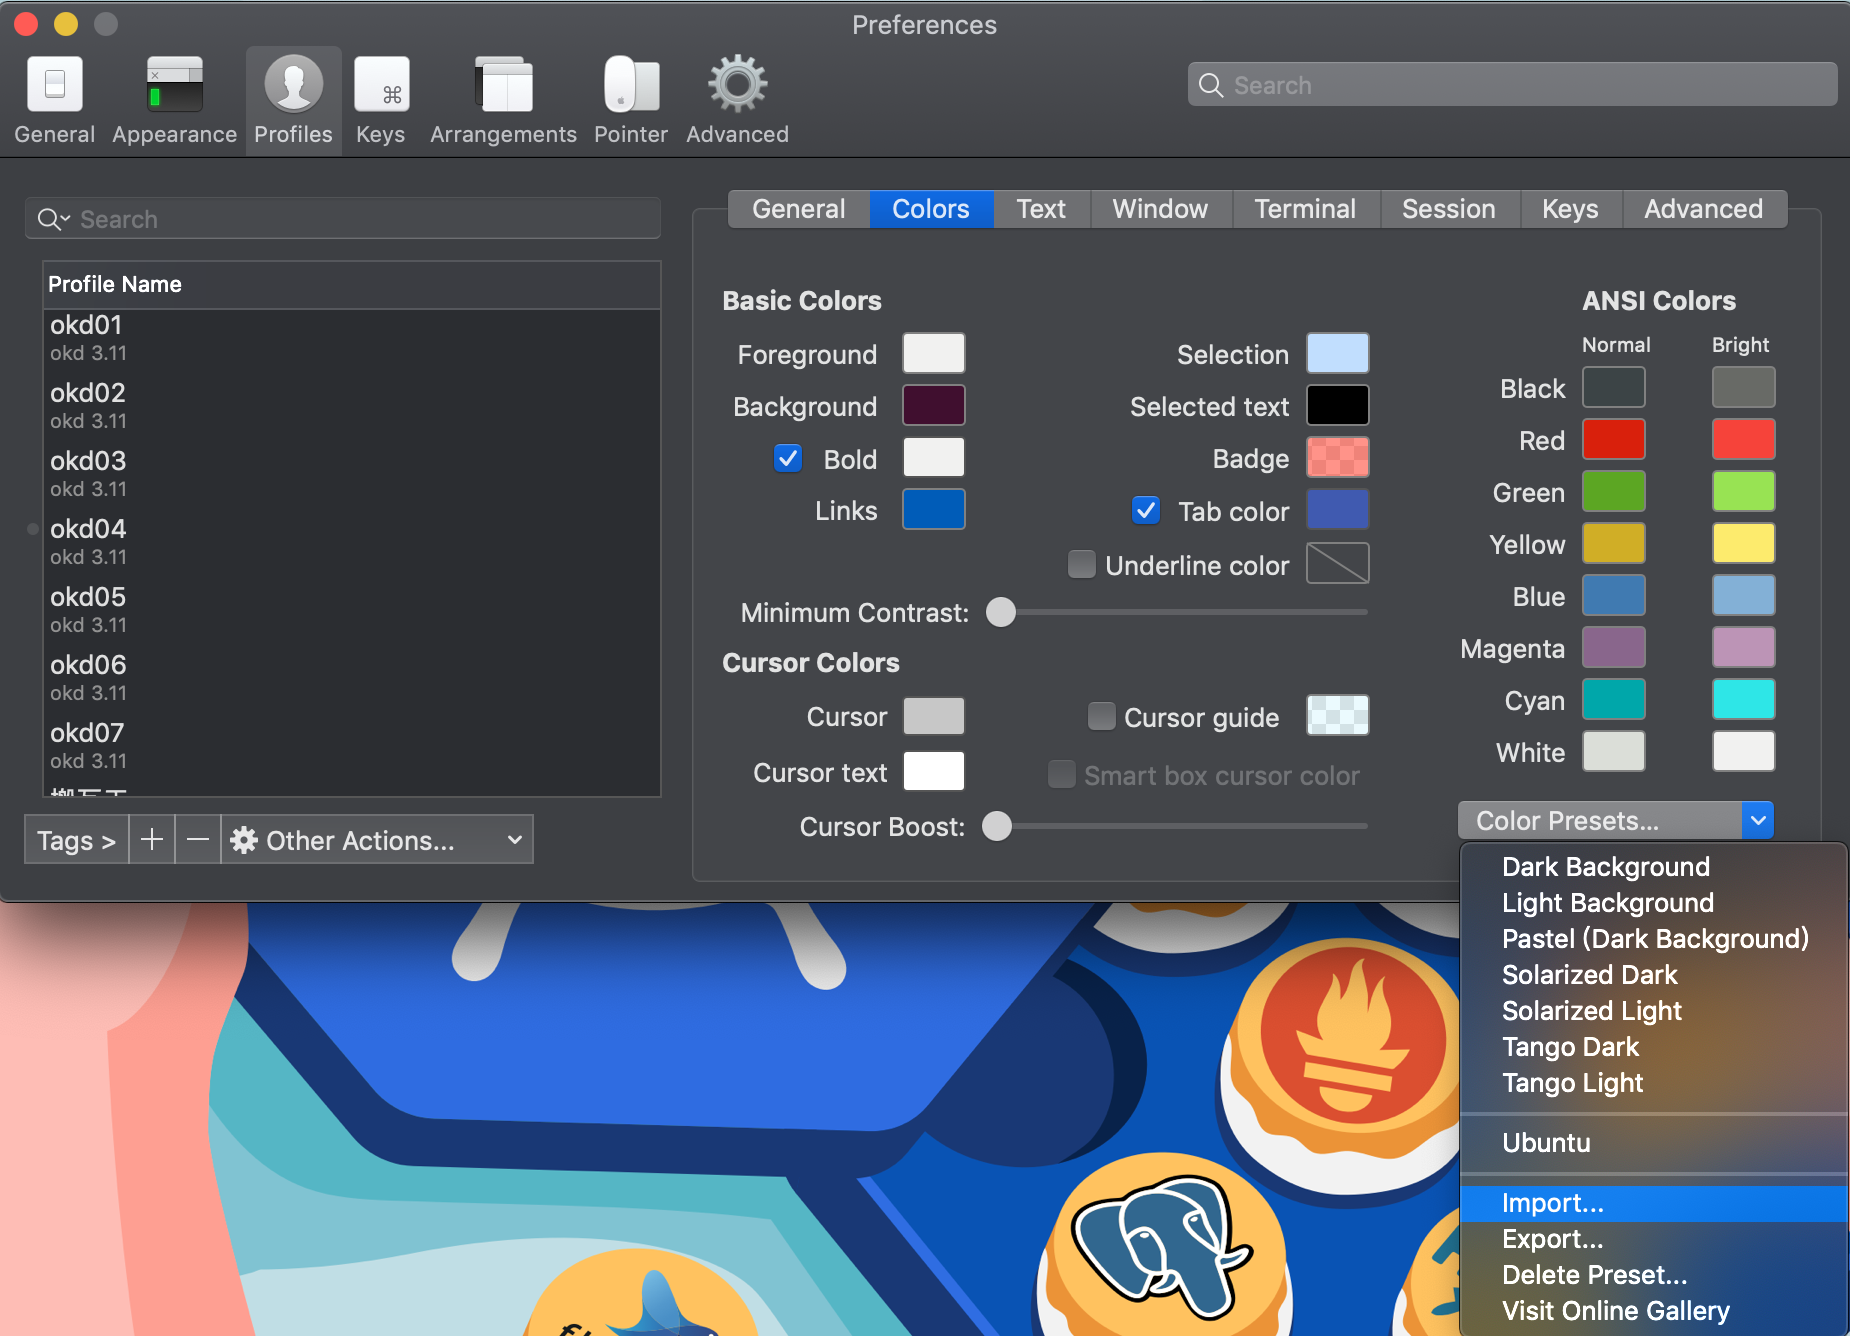
导入之后,再选择你想要的主题就好了,我当然选的是 Ubuntu 骚紫~~
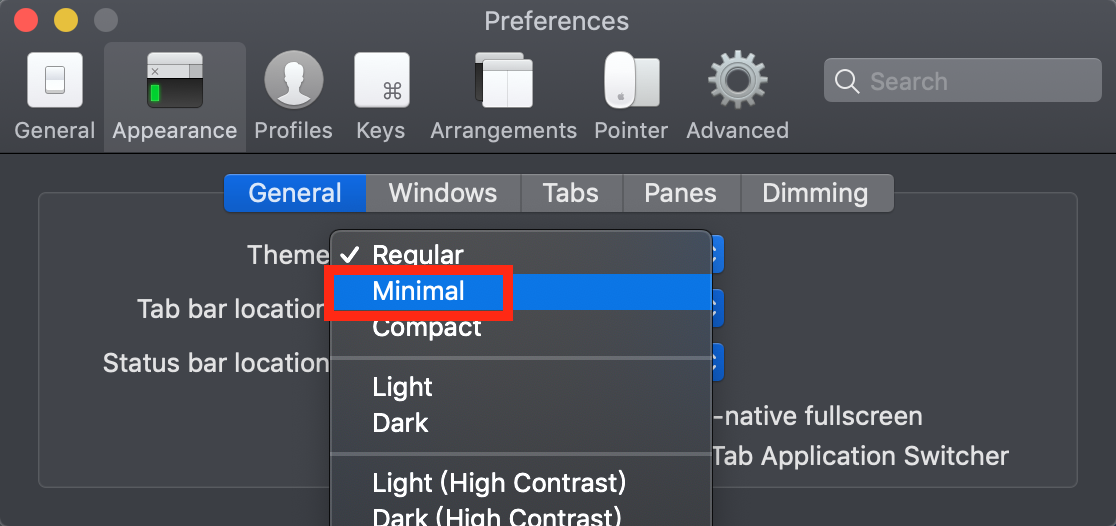
## 6. 统一配色
默认情况下标签的颜色是黑的,即使你改了配色也没用:
如果想统一配色,需要稍微调整一下配置,打开 `Appearence → General`,将 Theme 改为 `Minimal`:
## 7. 关闭启动界面
如果你不想每次打开 iTerm2 都打开默认的窗口,也就是静默打开程序,可以在 `Appearence → General` 设置:

勾选 `Exclude from Dock and ...`,更改设置之后下次你再重新打开 iTerm2 就会变成这个样子:
它再也不会出现在 Dock 中,也不会在启动时给你打开一个默认的窗口,你可以优雅地通过快捷键呼入呼出窗口,完美。
## 8. 使用 shell integration
iTerm2 可以与 unix shell 集成在一起,在安装了 iTerm2 的 shell 集成工具后,可以在 iTerm2 中看到命令历史、当前工作目录、主机名、上传下载文件等。
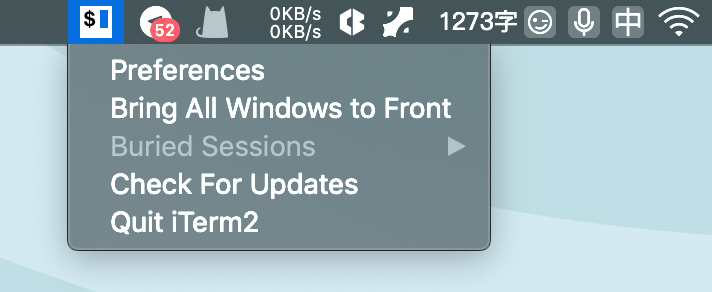
可以点击菜单栏 `iTerm2 > Install Shell Integration` 或者终端输入指令:
```bash
# 如果你的默认 shell 是 bash,请将 zsh 换成 bash
$ curl -L https://iterm2.com/misc/install_shell_integration.sh | zsh
```
该脚本会自动安装当前终端 shell 的对应脚本,并写入到对应的 shell 配置文件中。例如在 zsh shell 中执行完脚本后,`.zshrc` 中间中写入了下面语句:
```bash
$ test -e "${HOME}/.iterm2_shell_integration.zsh" && source "${HOME}/.iterm2_shell_integration.zsh"
```
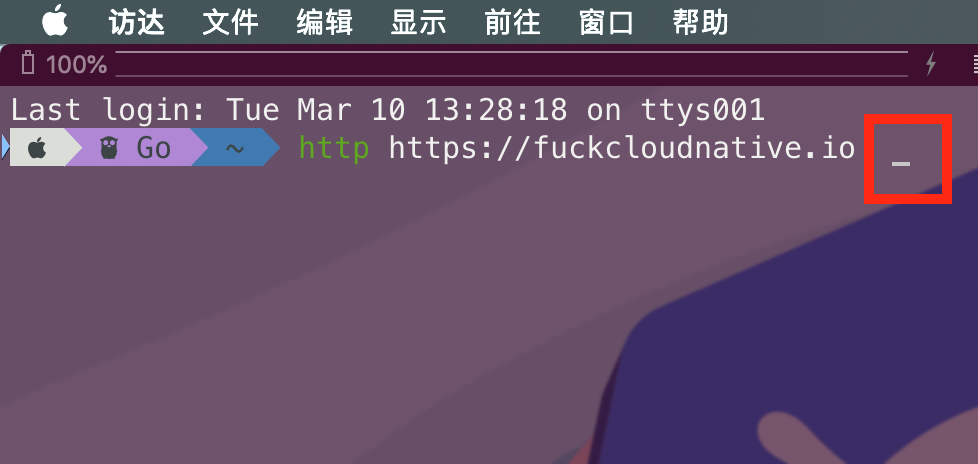
在安装完 iTerm2 的 `shell integration` 后会在终端界面中最左侧多出一个**蓝色三角形**的标记。如图:

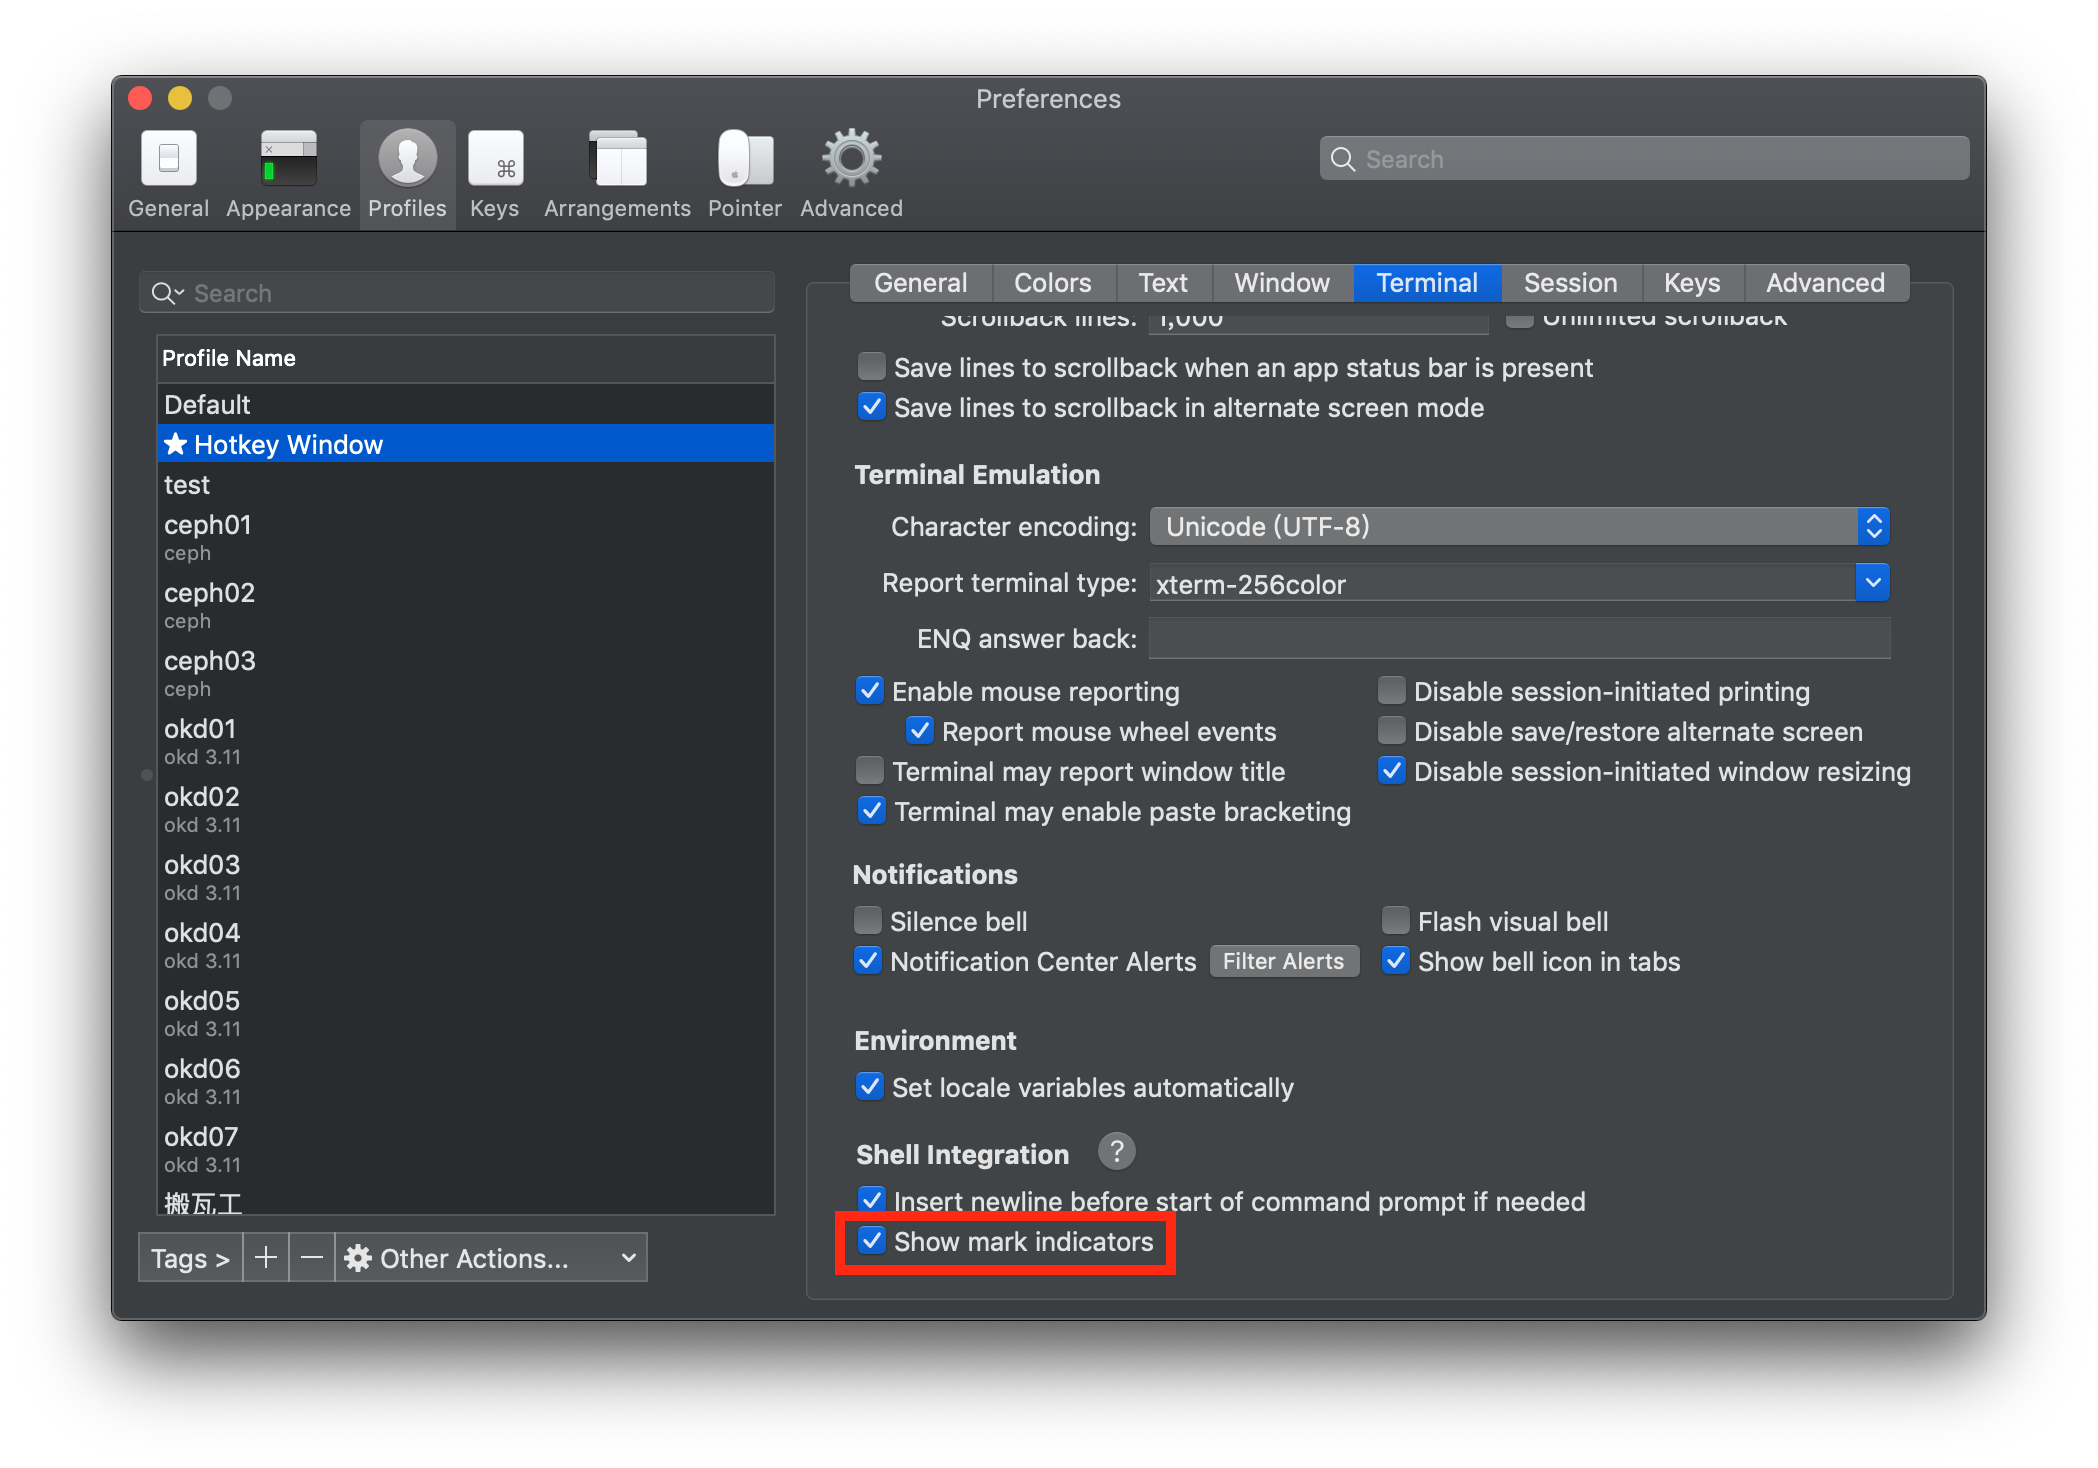
有蓝色三角形的标记说明当前 shell 支持 shell integration。如需关闭标记,可以在 `iTerm2 > Preferences > Profiles > (your profile) > Terminal 最下面 > Shell Integration` 关闭 `Show mark indicators` 。
所有工具:
```bash
imgcat filename
Displays the image inline.
imgls
Shows a directory listing with image thumbnails.
it2api
Command-line utility to manipulate iTerm2.
it2attention start|stop|fireworks
Gets your attention.
it2check
Checks if the terminal is iTerm2.
it2copy [filename]
Copies to the pasteboard.
it2dl filename
Downloads the specified file, saving it in your Downloads folder.
it2setcolor ...
Changes individual color settings or loads a color preset.
it2setkeylabel ...
Changes Touch Bar function key labels.
it2ul
Uploads a file.
it2universion
Sets the current unicode version.
```
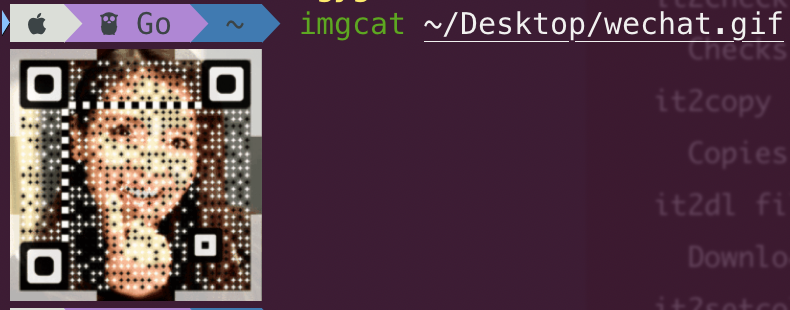
例如,可以用 `imgcat` 直接在终端显示图片:
## 9. 奇技淫巧
最后介绍一些 iTerm2 的奇技淫巧。
### 剪贴板历史记录
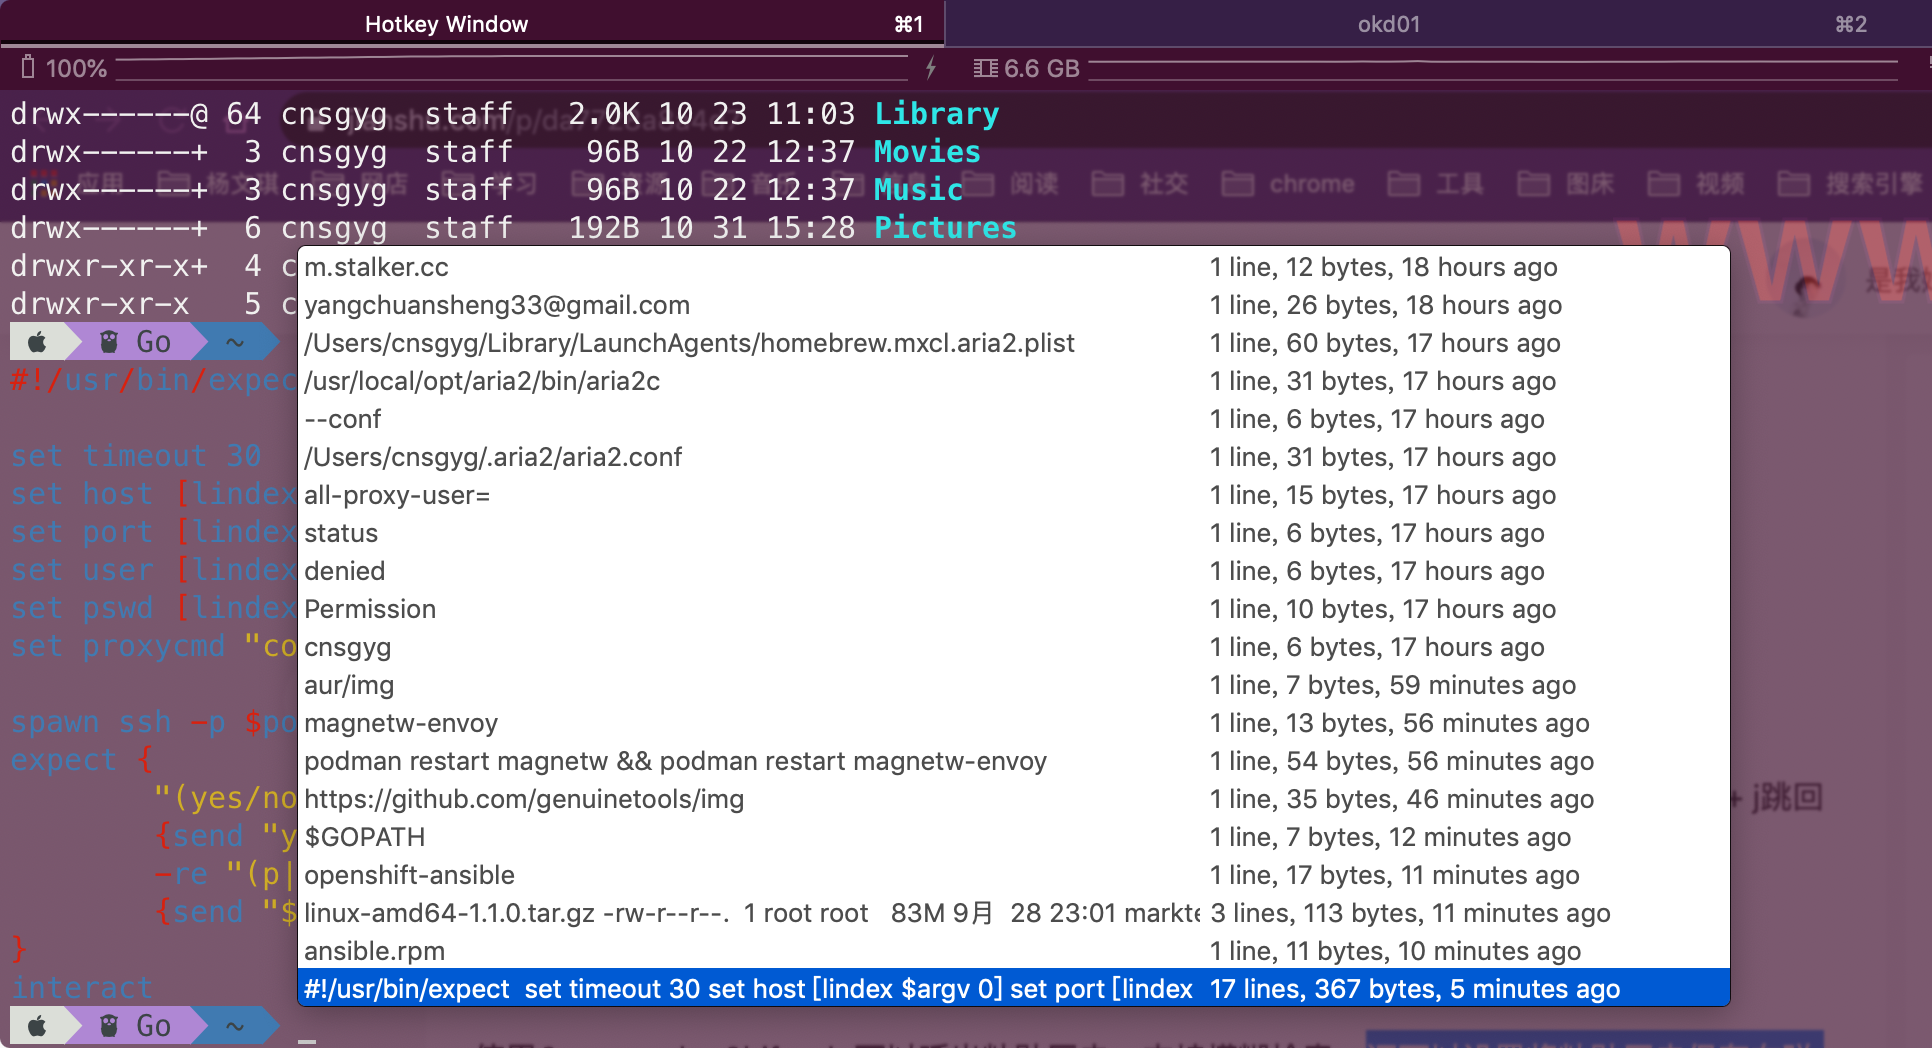
iTerm2 允许我们快速查看剪贴板内容 只需使用 `Command + Shift + h` 可以呼出粘贴历史,支持模糊检索。还可以设置将粘贴历史保存在磁盘上(Preferences -> General)
### 智能选中
在 iTerm2 中,双击选中,三击选中整行,四击智能选中(智能规则可[配置](http://www.iterm2.comhttps://img.qb5200.com/download-x/documentation-smart-selection.html)),可以识别网址,引号引起的字符串,邮箱地址等。(很多时候双击的选中就已经很智能了)
### 巧用 Command 键
按住 ⌘ 键:
- 可以拖拽选中的字符串;
- 点击 url:调用默认浏览器访问该网址;
- 点击文件:调用默认程序打开文件;
- 点击文件夹:在 finder 中打开该文件夹;
- 同时按住 `option` 键,可以以矩形选中,类似于 vim 中的 `ctrl v` 操作。
### 将文本内容复制到剪切板
```bash
$ pbcopy < text.md
```
### 在 Finder 中打开当前目录
```bash
$ open .
```
ok,关于 iTerm 自身的设置和优化到这里就结束了,下一篇将会介绍关于连接远程服务器的设置和优化,敬请期待。
## 微信公众号
扫一扫下面的二维码关注微信公众号,在公众号中回复◉加群◉即可加入我们的云原生交流群,和孙宏亮、张馆长、阳明等大佬一起探讨云原生技术