1.整个 Spring5 框架的代码基于 Java8 ,运行时兼容 JDK9,许多不建议使用的类和方 法在代码库中删除
2.Spring 5框架自带了通用的日志封装
Spring5 已经移除 Log4jConfigListener,官方建议使用 Log4j2
jar包
<!-- 日志 -->
        <!-- https://mvnrepository.com/artifact/org.apache.logging.log4j/log4j-core -->
        <dependency>
            <groupId>org.apache.logging.log4j</groupId>
            <artifactId>log4j-core</artifactId>
            <version>2.14.1</version>
        </dependency>

        <!-- https://mvnrepository.com/artifact/org.apache.logging.log4j/log4j-api -->
        <dependency>
            <groupId>org.apache.logging.log4j</groupId>
            <artifactId>log4j-api</artifactId>
            <version>2.14.1</version>
        </dependency>
        <!-- https://mvnrepository.com/artifact/org.apache.logging.log4j/log4j-slf4j-impl -->
        <dependency>
            <groupId>org.apache.logging.log4j</groupId>
            <artifactId>log4j-slf4j-impl</artifactId>
            <version>2.14.1</version>
            <!--<scope>test</scope>-->
        </dependency>
        <!-- https://mvnrepository.com/artifact/org.slf4j/slf4j-api -->
        <dependency>
            <groupId>org.slf4j</groupId>
            <artifactId>slf4j-api</artifactId>
            <version>1.7.30</version>
        </dependency>
log4j2.xml配置文件
<?xml version= "1.0"  encoding= "UTF-8" ?>
<!--日志级别以及优先级排序: OFF > FATAL > ERROR > WARN > INFO > DEBUG > TRACE > ALL -->
<!--Configuration 后面的 status 用于设置 log4j2 自身内部的信息输出,可以不设置, 当设置成 trace 时,可以看到
    log4j2 内部各种详细输出 -->
<configuration status="INFO">
    <!--先定义所有的 appender -->
    <appenders>
        <!--输出日志信息到控制台 -->
        <console name="Console" target="SYSTEM_OUT">
            <!--控制日志输出的格式 -->
            <PatternLayout
                pattern="%d{yyyy-MM-dd HH:mm:ss.SSS} [%t] %-5level %logger{36} - %msg%n" />
        </console>
    </appenders>
    <!--然后定义 logger,只有定义 logger 并引入的 appender,appender 才会生效 -->
    <!--root:用于指定项目的根日志,如果没有单独指定 Logger,则会使用 root 作为 默认的日志输出 -->
    <loggers>
        <root level="info">
            <appender-ref ref="Console" />
        </root>
    </loggers>
</configuration>
手动日志输出
public class UserLog {

    private static final Logger log=LoggerFactory.getLogger(UserLog.class);

    public static void main(String[] args) {
        log.info("手动控制日志输出1");
        log.warn("手动控制日志输出2");
        System.out.println("测试日志");
    }
}
如果是maven开发,test,这个需要注释掉
@Nullable 注解可以使用在方法上面,属性上面,参数上面,表示方法返回可以为空,属性值可以为空,参数值可以为空
1.注解用在方法上面,方法返回值可以为空
2.注解使用在方法参数里面,方法参数可以为空
3.注解使用在属性上面,属性值可以为
函数式风格 GenericApplicationContext
//函数式风格创建对象,交给 spring 进行管理
    @Test
    public void test4() {
        //1 创建 GenericApplicationContext 对象
        GenericApplicationContext context =  new GenericApplicationContext();
        //2 调用 context 的方法对象注册
        context.refresh();
        context.registerBean( "user1",User. class,() ->  new User());
        //3 获取在 spring 注册的对象
        // User user = (User)context.getBean("com.atguigu.spring5.test.User");
        User user = (User)context.getBean( "user1");
        System. out .println(user);
    }
1.整合JUnit4
jar包
<dependency>
            <groupId>org.springframework</groupId>
            <artifactId>spring-test</artifactId>
            <version>5.3.6</version>
        <!--    <scope>test</scope> -->
        </dependency>
import org.junit.Test;
import org.junit.runner.RunWith;
import org.springframework.beans.factory.annotation.Autowired;
import org.springframework.test.context.ContextConfiguration;
import org.springframework.test.context.junit4.SpringJUnit4ClassRunner;

import cn.zj.service.UserService;

@RunWith(SpringJUnit4ClassRunner.class)
@ContextConfiguration("classpath:bean1.xml") // 加载配置文件
public class JTest4 {
    @Autowired
    private UserService userService;

    @Test
    public void test1() {
        userService.accountMoney();
    }
}
2.整合JUnit5
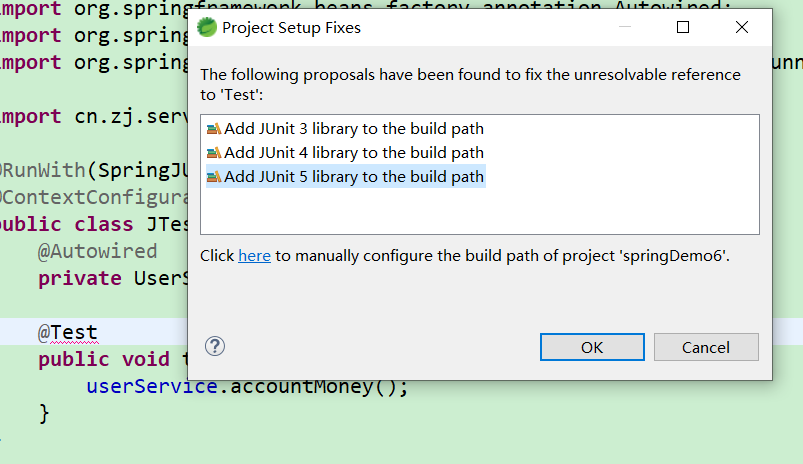
jar包引入


import org.junit.jupiter.api.Test;
import org.springframework.beans.factory.annotation.Autowired;
import org.springframework.test.context.junit.jupiter.SpringJUnitConfig;

import cn.zj.service.UserService;

//@ExtendWith(SpringExtension.class)
//@ContextConfiguration("classpath:bean1.xml")
@SpringJUnitConfig(locations="classpath:bean1.xml")
//复合注解替代上面两个注解完成整合
public class JTest5 {

    @Autowired
    private UserService userService;

    @Test
    public void test1() {
        userService.accountMoney();
    }
}