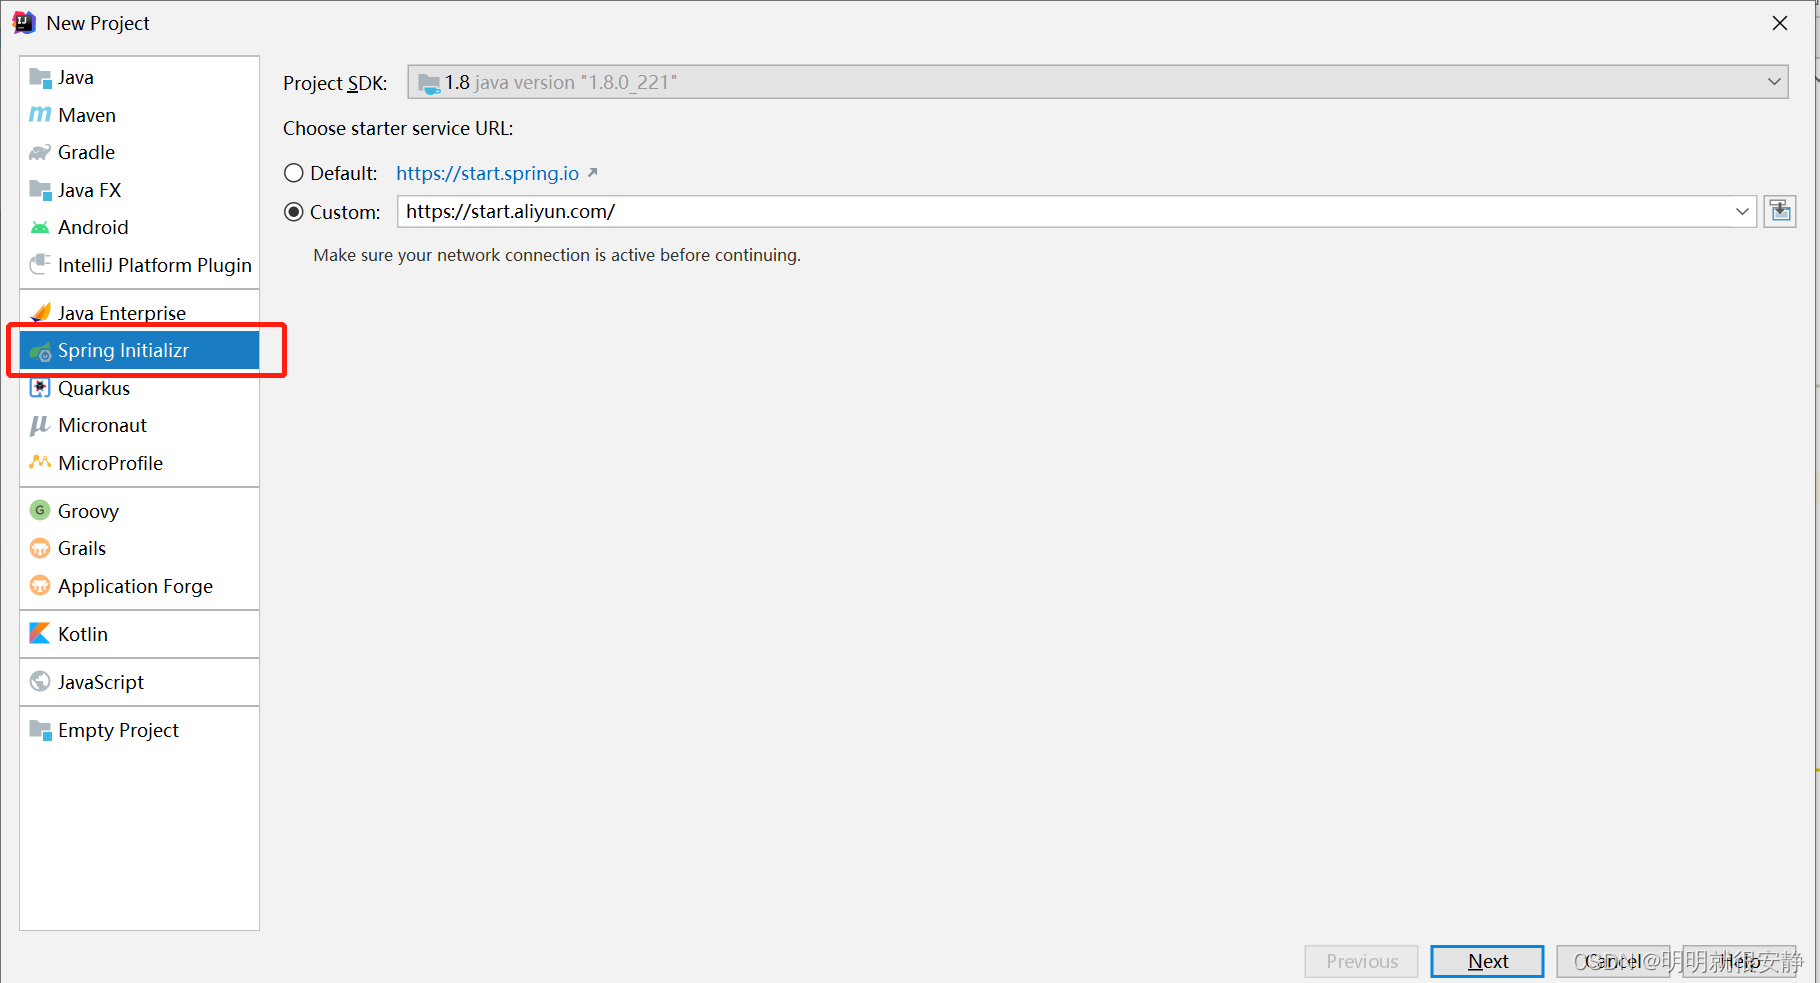
创建一个SpringBoot项目,普通的web项目就可以了,我这里使用的是start.aliyun
引入依赖:
(1)老演员了不多说。
<dependency>
     <groupId>org.springframework.boot</groupId>
     <artifactId>spring-boot-starter-web</artifactId>
</dependency>
(2)整合redis
<dependency>
     <groupId>org.springframework.boot</groupId>
     <artifactId>spring-boot-starter-data-redis</artifactId>
</dependency>
(3) 实体类用到了@Data注解
<dependency>
    <groupId>org.projectlombok</groupId>
    <artifactId>lombok</artifactId>
    <optional>true</optional>
</dependency>
(4)将对象转为json存入redis,取出来时将json转为对象
<dependency>
    <groupId>com.alibaba</groupId>
    <artifactId>fastjson</artifactId>
    <version>1.2.30</version>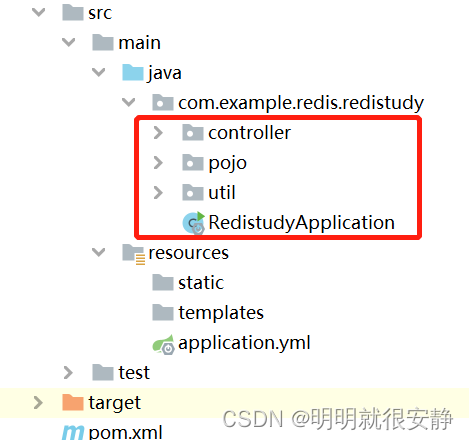
</dependency>(1)在Application启动类的同级目录下创建对应的包
(2)写redis工具类
import org.springframework.beans.factory.annotation.Autowired;
import org.springframework.data.redis.core.StringRedisTemplate;
import org.springframework.stereotype.Component;
import java.util.concurrent.TimeUnit;

@Component
public class RedisUtils {
    /**
     * 获取redis模板
     */
    @Autowired
    private StringRedisTemplate stringRedisTemplate;

    /**
     * 存入String类型
     * @param key
     * @param value
     * @param timeOut
     */
    public void setString(String key, String value, Long timeOut){
        stringRedisTemplate.opsForValue().set(key, value);
        if (timeOut != null){
            //设置Redis的key的有效期
            stringRedisTemplate.expire(key, timeOut, TimeUnit.SECONDS);
        }
    }
    /**
     * 获取String类型
     * @param key
     * @return
     */
    public String getString(String key){
        return stringRedisTemplate.opsForValue().get(key);
    }
}
实体类:
import lombok.Data;

@Data
public class User {
    private String name;
    private Integer age;
}
控制层:
import com.alibaba.fastjson.JSONObject;
import com.example.redis.redistudy.pojo.User;
import com.example.redis.redistudy.util.RedisUtils;
import org.springframework.beans.factory.annotation.Autowired;
import org.springframework.web.bind.annotation.GetMapping;
import org.springframework.web.bind.annotation.RestController;

@RestController
public class RedisController {

    @Autowired
    private RedisUtils redisUtils;

    @GetMapping("/addUser")
    public String addUser(){
        User user = new User();
        user.setName("zhangsan");
        user.setAge(18);
        String userString = JSONObject.toJSONString(user);
        redisUtils.setString("userString",userString, null);
        return "存入成功";
    }

    @GetMapping("/getUser")
    public User getUser(String key){
        String userString= redisUtils.getString(key);
        User user = JSONObject.parseObject(userString, User.class);
        return user;
    }
}
(3)yml文件配置
spring:
  redis:
    host: 服务器公网ip
    password: root   //密码
    port: 6379       //端口号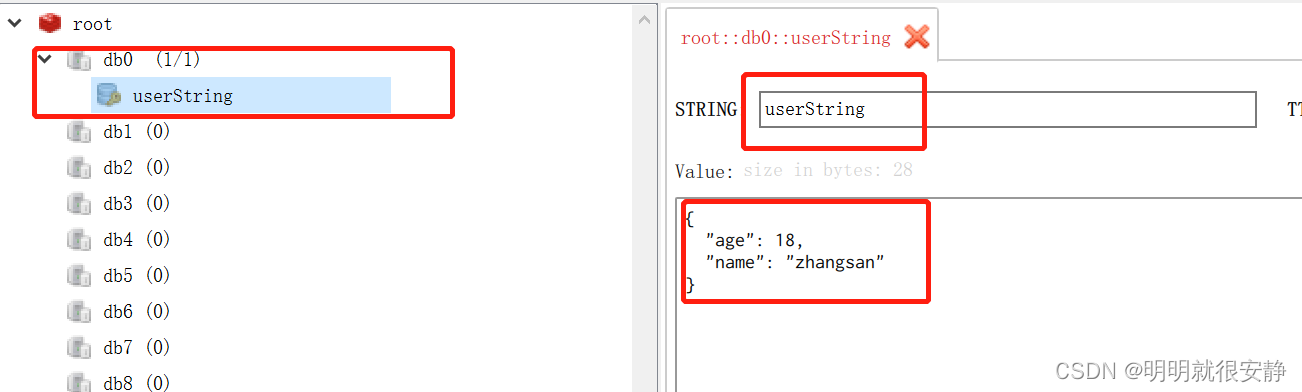
database: 0 //指定存入哪一个库启动程序 ,访问地址:http://localhost:8080/addUser

看一下redis,存入成功
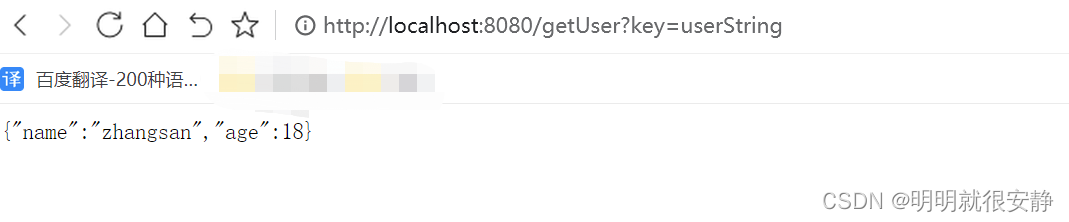
再获取一下,获取成功
地址:http://localhost:8080/getUser?key=userString
到此这篇关于SpringBoot整合Redis将对象写入redis的实现的文章就介绍到这了,更多相关SpringBoot将对象写入redis内容请搜索以前的文章或继续浏览下面的相关文章希望大家以后多多支持!

