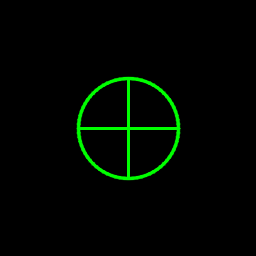
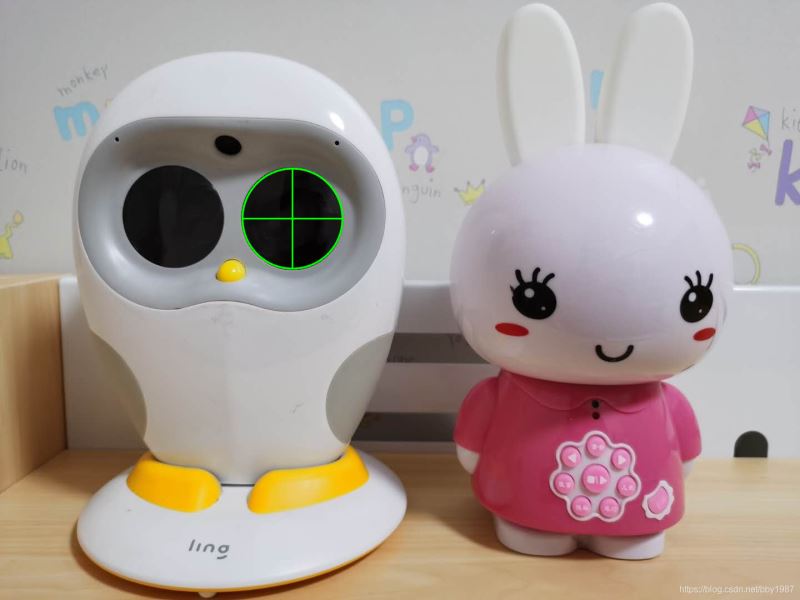
所谓瞄准星指的是一个圆圈加一个圆圈内的十字线,就像玩射击游戏狙击枪开镜的样子一样。这里并不是直接在图上画一个瞄准星,而是让这个瞄准星跟着鼠标走。在图像标注任务中,可以利用瞄准星进行一些辅助,特别是回归类的任务,使用该功能可以使得关键点的标注更加精准。
关于鼠标回调函数的说明可以参考:opencv-python的鼠标交互操作
import cv2后,可以分别help(cv2.circle)和help(cv2.line)查看两个函数的帮助信息:
其中四个必选参数:
img:底图,uint8类型的ndarray
center:圆心坐标,是一个包含两个数字的tuple(必需是tuple),表示(x, y)
radius:圆半径,必需是整数
color:颜色,是一个包含三个数字的tuple或list,表示(b, g, r)
其他是可选参数:
thickness:点的线宽。必需是大于0的整数,必需是整数,不能小于0。默认值是1
lineType:线的类型。可以取的值有cv2.LINE_4,cv2.LINE_8,cv2.LINE_AA。其中cv2.LINE_AA的AA表示抗锯齿,线会更平滑,画圆的时候使用该类型比较好。
line(img, pt1, pt2, color[, thickness[, lineType[, shift]]]) -> img
. @brief Draws a line segment connecting two points.
.
. The function line draws the line segment between pt1 and pt2 points in the image. The line is
. clipped by the image boundaries. For non-antialiased lines with integer coordinates, the 8-connected
. or 4-connected Bresenham algorithm is used. Thick lines are drawn with rounding endings. Antialiased
. lines are drawn using Gaussian filtering.
.
. @param img Image.
. @param pt1 First point of the line segment.
. @param pt2 Second point of the line segment.
. @param color Line color.
. @param thickness Line thickness.
. @param lineType Type of the line. See #LineTypes.
. @param shift Number of fractional bits in the point coordinates.
其中四个必选参数:
img:底图,uint8类型的ndarray
pt1:起点坐标,是一个包含两个数字的tuple(必需是tuple),表示(x, y)
pt2:终点坐标,类型同上
color:颜色,是一个包含三个数字的tuple或list,表示(b, g, r)
其他是可选参数:
thickness:点的线宽。必需是大于0的整数,必需是整数,不能小于0。默认值是1
lineType:线的类型。可以取的值有cv2.LINE_4,cv2.LINE_8,cv2.LINE_AA。其中cv2.LINE_AA的AA表示抗锯齿,线会更平滑,画圆的时候使用该类型比较好。
# -*- coding: utf-8 -*-

import cv2
import numpy as np


def imshow(winname, image):
    cv2.namedWindow(winname, 1)
    cv2.imshow(winname, image)
    cv2.waitKey(0)
    cv2.destroyAllWindows()


if __name__ == '__main__':
    image = np.zeros((256, 256, 3), np.uint8)
    center = (128, 128)
    radius = 50
    color = (0, 255, 0)
    thickness = 2

    pt_left = (center[0] - radius, center[1])
    pt_right = (center[0] + radius, center[1])
    pt_top = (center[0], center[1] - radius)
    pt_bottom = (center[0], center[1] + radius)

    cv2.circle(image, center, radius, color, thickness, lineType=cv2.LINE_AA)
    cv2.line(image, pt_left, pt_right, color, thickness)
    cv2.line(image, pt_top, pt_bottom, color, thickness)
    imshow('draw_crosshair', image)
结果如下:

操作说明:
鼠标移动时以鼠标为圆心跟随一个瞄准星
鼠标滚轮控制瞄准星的大小
+, -号控制鼠标滚轮时瞄准星的变化量
代码如下:
# -*- coding: utf-8 -*-

import cv2

WIN_NAME = 'draw_crosshair'


class DrawCrosshair(object):
    def __init__(self, image, color, center, radius, thickness=1):
        self.original_image = image
        self.image_for_show = image.copy()
        self.color = color
        self.center = center
        self.radius = radius
        self.thichness = thickness
        self.increment = 5

    def increase_radius(self):
        self.radius += self.increment

    def decrease_radius(self):
        self.radius -= self.increment
        self.radius = max(self.radius, 0)

    def increase_increment(self):
        self.increment += 1

    def decrease_increment(self):
        self.increment -= 1
        self.increment = max(self.increment, 1)

    def reset_image(self):
        """
        reset image_for_show using original image
        """
        self.image_for_show = self.original_image.copy()

    def draw_circle(self):
        cv2.circle(self.image_for_show,
                   center=self.center,
                   radius=self.radius,
                   color=self.color,
                   thickness=self.thichness,
                   lineType=cv2.LINE_AA)

    def draw_crossline(self):
        pt_left = (self.center[0] - self.radius, self.center[1])
        pt_right = (self.center[0] + self.radius, self.center[1])
        pt_top = (self.center[0], self.center[1] - self.radius)
        pt_bottom = (self.center[0], self.center[1] + self.radius)
        cv2.line(self.image_for_show, pt_left, pt_right,
                 self.color, self.thichness)
        cv2.line(self.image_for_show, pt_top, pt_bottom,
                 self.color, self.thichness)

    def draw(self):
        self.reset_image()
        self.draw_circle()
        self.draw_crossline()


def onmouse_draw_rect(event, x, y, flags, draw_crosshair):
    if event == cv2.EVENT_MOUSEWHEEL and flags > 0:
        draw_crosshair.increase_radius()
    if event == cv2.EVENT_MOUSEWHEEL and flags < 0:
        draw_crosshair.decrease_radius()

    draw_crosshair.center = (x, y)
    draw_crosshair.draw()


if __name__ == '__main__':
    # image = np.zeros((512, 512, 3), np.uint8)
    image = cv2.imread('luka.jpg')
    draw_crosshair = DrawCrosshair(image,
                                   color=(0, 255, 0),
                                   center=(256, 256),
                                   radius=100,
                                   thickness=2)
    cv2.namedWindow(WIN_NAME, 1)
    cv2.setMouseCallback(WIN_NAME, onmouse_draw_rect, draw_crosshair)
    while True:
        cv2.imshow(WIN_NAME, draw_crosshair.image_for_show)
        key = cv2.waitKey(30)
        if key == 27:  # ESC
            break
        elif key == ord('+'):
            draw_crosshair.increase_increment()
        elif key == ord('-'):
            draw_crosshair.decrease_increment()
    cv2.destroyAllWindows()
结果如下,有了瞄准星的辅助,我们可以更加精准地找到Luka的眼睛中心。同理,我们在做人脸关键点标注时,这个功能也可以让我们更加精准地找到人眼睛的中心。
