格式:
pygame.draw.circle(surface, color, center, radius, width=0, draw_top_right=None, draw_top_left=None, draw_bottom_left=None, draw_bottom_right=None)
参数:
例子:
import pygame
from pygame.locals import *
import sys
# 初始化 pygame
pygame.init()
# 设置窗口大小
screen = pygame.display.set_mode((600, 400))
# 设置背景颜色
screen.fill((255, 205, 232))
# 设置标题
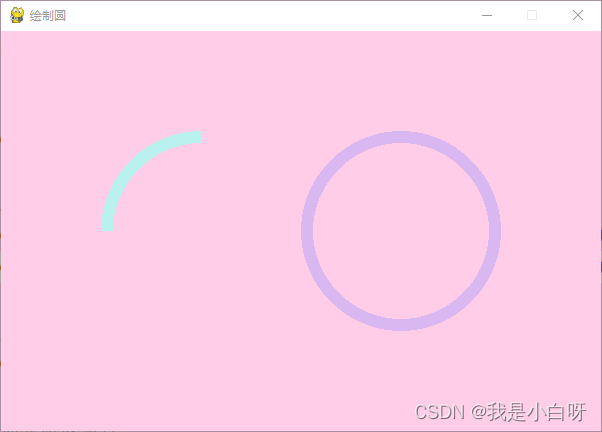
pygame.display.set_caption("绘制圆")
# 绘制圆
pygame.draw.circle(screen, (184, 241, 237), (200, 200), 100, 12, draw_top_left=True)
pygame.draw.circle(screen, (217, 184, 241), (400, 200), 100, 12)
# 更新显示
pygame.display.update()
# 捕获游戏事件
typelist = [QUIT]
while True:
# 获取事件
for event in pygame.event.get():
# 接收到退出事件, 退出程序
if event.type in typelist:
sys.exit() # 退出
输出结果:
格式:
pygame.draw.rect(surface, color, rect, width=0, border_radius=0, border_top_left_radius=-1, border_top_right_radius=-1, border_bottom_left_radius=-1, border_bottom_right_radius=-1)
参数:
例子:
import pygame
from pygame.locals import *
import sys
# 初始化 pygame
pygame.init()
# 设置窗口大小
screen = pygame.display.set_mode((600, 400))
# 设置背景颜色
screen.fill((255, 205, 232))
# 设置标题
pygame.display.set_caption("绘制矩形")
# 绘制矩形
pygame.draw.rect(screen, (184, 241, 204), (50, 200, 150, 150), 12, border_radius=25)  # 圆角矩形
pygame.draw.rect(screen, (184, 241, 237), (250, 200, 150, 150), 12, border_top_right_radius=25)  # 右上角圆角
pygame.draw.rect(screen, (217, 184, 241), (450, 200, 120, 120), 12)
# 更新显示
pygame.display.update()
# 捕获游戏事件
typelist = [QUIT]
while True:
    # 获取事件
    for event in pygame.event.get():
        # 接收到退出事件, 退出程序
        if event.type in typelist:
            sys.exit()  # 退出
输出结果:

格式:
pygame.draw.line(surface, color, start_pos, end_pos, width=1)
参数:
例子:
import pygame
from pygame.locals import *
import sys
# 初始化 pygame
pygame.init()
# 设置窗口大小
screen = pygame.display.set_mode((600, 400))
# 设置背景颜色
screen.fill((255, 205, 232))
# 设置标题
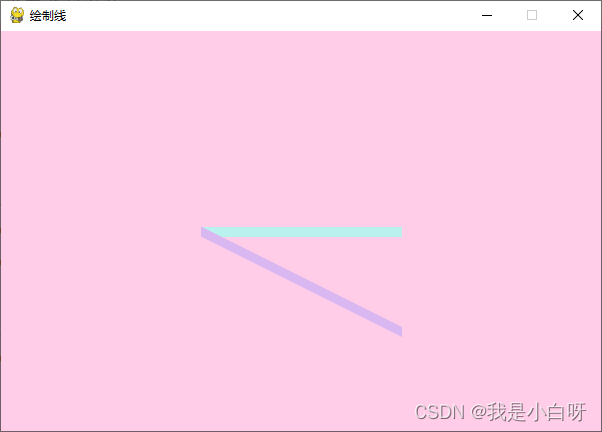
pygame.display.set_caption("绘制线")
# 绘制线
pygame.draw.line(screen, (184, 241, 237), (200, 200), (400, 200), 10) # 直线
pygame.draw.line(screen, (217, 184, 241), (200, 200), (400, 300), 10) # 斜线
# 更新显示
pygame.display.update()
# 捕获游戏事件
typelist = [QUIT]
while True:
# 获取事件
for event in pygame.event.get():
# 接收到退出事件, 退出程序
if event.type in typelist:
sys.exit() # 退出输出结果:
格式:
pygame.draw.arc(surface, color, rect, start_angle, stop_angle, width=1)
参数:
例子:
import pygame
from pygame.locals import *
import sys
import math
# 初始化 pygame
pygame.init()
# 设置窗口大小
screen = pygame.display.set_mode((600, 400))
# 设置背景颜色
screen.fill((255, 205, 232))
# 设置标题
pygame.display.set_caption("绘制圆弧")
# 绘制圆弧
pygame.draw.arc(screen, (184, 241, 237), (100, 100, 200, 200), math.radians(0), math.radians(180), 10)
pygame.draw.arc(screen, (217, 184, 241), (400, 100, 200, 250), math.radians(90), math.radians(270), 10)
# 更新显示
pygame.display.update()
# 捕获游戏事件
typelist = [QUIT]
while True:
    # 获取事件
    for event in pygame.event.get():
        # 接收到退出事件, 退出程序
        if event.type in typelist:
            sys.exit()  # 退出
输出结果:
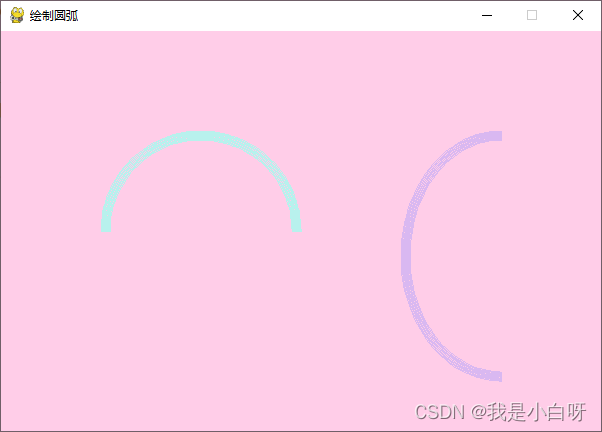
通过math.radians()方法, 将角度值转换为弧度.
pygame 实现矩形移动:
import pygame
from pygame.locals import *
import sys
import time
# 初始化 pygame
pygame.init()
# 设置窗口大小
screen = pygame.display.set_mode((500, 500))
# 设置背景颜色
screen.fill((255, 205, 232))
# 设置标题
pygame.display.set_caption("移动的矩形")
# 捕获游戏事件
typelist = [QUIT]
# 矩形的初始横坐标
pos_x = 300
pos_y = 250
# 矩形移动距离
vel_x = 2
vel_y = 1
while True:
    # 获取事件
    for event in pygame.event.get():
        # 接收到退出事件, 退出程序
        if event.type in typelist:
            sys.exit()  # 退出
    # 刷新背景
    screen.fill((255, 205, 232))
    # 刷新矩形
    pos_x += vel_x
    pos_y += vel_y
    # 边缘反弹
    if pos_x >= 400 or pos_x <= 0:
        vel_x = -vel_x
    if pos_y >= 400 or pos_y <= 0:
        vel_y = -vel_y
    # 绘制矩形
    pygame.draw.rect(screen, (217, 184, 241), (pos_x, pos_y, 100, 100), 0)
    time.sleep(0.01)
    # 更新显示
    pygame.display.update()
输出结果:
pygame.key.get_pressed()会返回一个按键列表, 用 True / False 表示键盘各个键是否按下.
格式:
keys = pygame.key.get_pressed()
例子:
import pygame
from pygame.locals import *
import sys
# 初始化 pygame
pygame.init()
# 设置窗口大小
screen = pygame.display.set_mode((600, 400))
# 设置字体和字号 (仿宋)
myFont = pygame.font.Font("C:\Windows\Fonts\simfang.ttf", 50)
# 设置背景颜色
screen.fill((255, 205, 232))
# 设置标题
pygame.display.set_caption("键盘事件")
# 捕获游戏事件
typelist = [QUIT]
while True:
    # 获取事件
    for event in pygame.event.get():
        # 接收到退出事件, 退出程序
        if event.type  == QUIT:
            sys.exit()  # 退出
    # 获取按键
    keys = pygame.key.get_pressed()
    # 刷新背景
    screen.fill((255, 205, 232))
    # 键盘事件
    if keys[K_LEFT]:
        # 显示文字
        text_img1 = myFont.render("按下左箭头", True, (184, 241, 237))
        screen.blit(text_img1, (10, 50))
    if keys[K_RIGHT]:
        text_img2 = myFont.render("按下右箭头", True, (184, 241, 237))
        screen.blit(text_img2, (10, 120))
    # 更新显示
    pygame.display.update()
输出结果:
event.pos获取事件坐标, event.rel获取事件相对位置.
例子:
import pygame
from pygame.locals import *
import sys
# 初始化 pygame
pygame.init()
# 设置窗口大小
screen = pygame.display.set_mode((600, 400))
# 设置字体和字号 (仿宋)
myFont = pygame.font.Font("C:\Windows\Fonts\simfang.ttf", 50)
# 设置背景颜色
screen.fill((255, 205, 232))
# 设置标题
pygame.display.set_caption("鼠标事件")
# 捕获游戏事件
typelist = [QUIT]
# 初始化变量
mouse_x = mouse_y = 0  # 鼠标位置
move_x = move_y = 0
mouse_down = 0  # 按键按下
mouse_down_x = mouse_down_y = 0  # 按键按下位置
mouse_up = 0  # 按键抬起
mouse_up_x = mouse_up_y = 0  # 按键按下位置
while True:
    # 获取事件
    for event in pygame.event.get():
        # 接收到退出事件, 退出程序
        if event.type  == QUIT:
            sys.exit()  # 退出
        # 获取鼠标位置
        elif event.type == MOUSEMOTION:
            mouse_x, mouse_y = event.pos
            move_x, move_y = event.rel
        # 获取鼠标按键
        elif event.type == MOUSEBUTTONDOWN:
            mouse_down = event.button
            mouse_down_x, mouse_down_y = event.pos
        elif event.type == MOUSEBUTTONUP:
            mouse_up = event.button
            mouse_up_x, mouse_up_y = event.pos
    # 获取按键
    keys = pygame.key.get_pressed()
    # 刷新背景
    screen.fill((255, 205, 232))
    # 鼠标事件
    text_img1 = myFont.render("鼠标位置: " + str(mouse_x) + ", " + str(mouse_y), True, (184, 241, 237))
    text_img2 = myFont.render("鼠标相对位置: " + str(move_x) + ", " + str(move_y), True, (184, 241, 237))
    text_img3 = myFont.render("鼠标按钮按下: " + str(mouse_down) + ", " + str(mouse_down_x) + ", " + str(mouse_down_y), True, (184, 241, 237))
    text_img4 = myFont.render("鼠标按钮抬起: " + str(mouse_up) + ", " + str(mouse_up_x) + ", " + str(mouse_up_y), True, (184, 241, 237))
    screen.blits([(text_img1, (10, 50)), (text_img2, (10, 100)), (text_img3, (10, 150)), (text_img4, (10, 200))])
    # 更新显示
    pygame.display.update()
输出结果: