
图片加水印:
Springboot 图片需要添加水印,怎么办? 1秒就实现
那么word文档替换文字、插入图片,当然也是1秒钟了(jar包引入,工具类代码复制粘贴,调试,完事)。
事不宜迟,开始敲代码。
本篇内容:
1.word文档 替换内容里面的文字 (模板占位符方式传参替换)
2.word文档 插入图片 (指定位置传参插入)
① pom.xml 引入依赖:
<dependency>
            <groupId>org.apache.poi</groupId>
            <artifactId>poi-ooxml</artifactId>
            <version>3.15</version>
        </dependency>

        <dependency>
            <groupId>org.apache.poi</groupId>
            <artifactId>poi-scratchpad</artifactId>
            <version>3.15</version>
        </dependency>
② 工具类 MyDocxUtil.java
import org.apache.poi.POIXMLDocument;
import org.apache.poi.xwpf.usermodel.*;
import java.io.FileOutputStream;
import java.util.*;
import java.util.Map.Entry;
import java.io.FileNotFoundException;
import java.io.IOException;
import java.util.HashMap;
import java.util.Map;

public class MyDocxUtil {
    /**
     * 文字替换
     * @param srcPath
     * @param destPath
     * @param map
     */
    public static void searchAndReplace(String srcPath, String destPath, Map<String, String> map) {
        try {
            //doc文件使用HWPFDocument读取,docx文件使用XWPFDocument读取。
            XWPFDocument document = new XWPFDocument(POIXMLDocument.openPackage(srcPath));
            /**
             * 替换段落中的指定文字
             */
            Iterator<XWPFParagraph> itPara = document.getParagraphsIterator();
            while (itPara.hasNext()) {
                XWPFParagraph paragraph = (XWPFParagraph) itPara.next();
                Set<String> set = map.keySet();
                Iterator<String> iterator = set.iterator();
                while (iterator.hasNext()) {
                    String key = iterator.next();
                    List<XWPFRun> run=paragraph.getRuns();
                    for(int i=0;i<run.size();i++)
                    {
                        if(run.get(i).getText(run.get(i).getTextPosition())!=null &&
                                run.get(i).getText(run.get(i).getTextPosition()).equals(key))
                        {
                            /**
                             * 参数0表示生成的文字是要从哪一个地方开始放置,设置文字从位置0开始
                             * 就可以把原来的文字全部替换掉了
                             */
                            run.get(i).setText(map.get(key),0);
                        }
                    }
                }
            }

            /**
             * 替换表格中的指定文字
             */
            Iterator<XWPFTable> itTable = document.getTablesIterator();
            while (itTable.hasNext()) {
                XWPFTable table = (XWPFTable) itTable.next();
                int count = table.getNumberOfRows();
                for (int i = 0; i < count; i++) {
                    XWPFTableRow row = table.getRow(i);
                    List<XWPFTableCell> cells = row.getTableCells();
                    for (XWPFTableCell cell : cells) {
                        for (Entry<String, String> e : map.entrySet()) {
                            if (cell.getText().equals(e.getKey())) {
                                cell.removeParagraph(0);
                                cell.setText(e.getValue());
                            }
                        }
                    }
                }
            }
            FileOutputStream outStream = null;
            outStream = new FileOutputStream(destPath);
            document.write(outStream);
            outStream.close();
        } catch (Exception e) {
            e.printStackTrace();
        }

    }

    public static void main(String[] args) {
        Map<String, String> map = new HashMap<>();
        map.put("<v1>", "认可");
        map.put("<phone>", "136919xxxxx");
        map.put("<地址>", "中国广东省深圳市");
        String srcPath = "D:\\test.docx";
        String destPath = "D:\\mytestNew.docx";
        searchAndReplace(srcPath, destPath, map);
        System.out.println("操作完毕");
    }
}
③ 调试
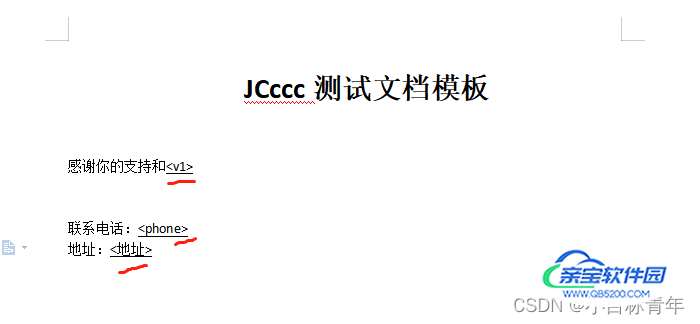
准备一个简单的word内容文档, 假装这就是我们业务需求使用的模板内容:
可以看到 我这个模板内容里面,有三个类似站位符的内容(红色标识)
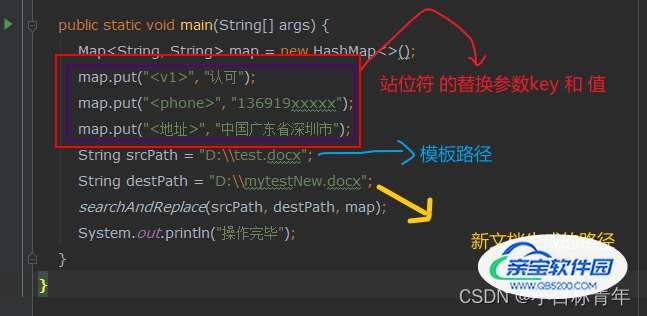
然后对照看下怎么用这个工具类,传参来替换这个模板内容的文字:
    public static void main(String[] args) {
        Map<String, String> map = new HashMap<>();
        map.put("<v1>", "认可");
        map.put("<phone>", "136919xxxxx");
        map.put("<地址>", "中国广东省深圳市");
        String srcPath = "D:\\test.docx";
        String destPath = "D:\\mytestNew.docx";
        searchAndReplace(srcPath, destPath, map);
        System.out.println("操作完毕");
    }
代码简析:
运行方法,看看效果:

效果:

好了文字替换玩了一下,接下来玩下插入图片:
先准备一张 ‘公章’图片:

然后在模板文档里面, 需要盖章的地方 ,设置一个占位标识 :

然后加下插入图片的函数代码:
    /**
     * <b> Word中添加图章
     * </b><br><br><i>Description</i> :
     * String srcPath, 源Word路径
     * String storePath, 添加图章后的路径
     * String sealPath, 图章路径(即图片)
     * tString abText, 在Word中盖图章的标识字符串,如:(签字/盖章)
     * int width, 图章宽度
     * int height, 图章高度
     * int leftOffset, 图章在编辑段落向左偏移量
     * int topOffset, 图章在编辑段落向上偏移量
     * boolean behind,图章是否在文字下面
     *
     * @return void
     * <br><br>Date: 2019/12/26 15:12     <br>Author : dxl
     */
    public static void sealInWord(String srcPath, String storePath, String sealPath, String tabText,
                                  int width, int height, int leftOffset, int topOffset, boolean behind) throws Exception {
        File fileTem = new File(srcPath);
        InputStream is = new FileInputStream(fileTem);
        XWPFDocument document = new XWPFDocument(is);
        List<XWPFParagraph> paragraphs = document.getParagraphs();
        XWPFRun targetRun = null;
        for (XWPFParagraph paragraph : paragraphs) {
            if (!"".equals(paragraph.getText()) && paragraph.getText().contains(tabText)) {
                List<XWPFRun> runs = paragraph.getRuns();
                targetRun = runs.get(runs.size() - 1);
            }
        }
        if (targetRun != null) {
            InputStream in = new FileInputStream(sealPath);//设置图片路径
            if (width <= 0) {
                width = 100;
            }
            if (height <= 0) {
                height = 100;
            }
            //创建Random类对象
            Random random = new Random();
            //产生随机数
            int number = random.nextInt(999) + 1;
            targetRun.addPicture(in, Document.PICTURE_TYPE_PNG, "Seal" + number, Units.toEMU(width), Units.toEMU(height));
            in.close();
            // 2. 获取到图片数据
            CTDrawing drawing = targetRun.getCTR().getDrawingArray(0);
            CTGraphicalObject graphicalobject = drawing.getInlineArray(0).getGraphic();

            //拿到新插入的图片替换添加CTAnchor 设置浮动属性 删除inline属性
            CTAnchor anchor = getAnchorWithGraphic(graphicalobject, "Seal" + number,
                    Units.toEMU(width), Units.toEMU(height),//图片大小
                    Units.toEMU(leftOffset), Units.toEMU(topOffset), behind);//相对当前段落位置 需要计算段落已有内容的左偏移
            drawing.setAnchorArray(new CTAnchor[]{anchor});//添加浮动属性
            drawing.removeInline(0);//删除行内属性
        }
        document.write(new FileOutputStream(storePath));
        document.close();
    }

    /**
     * @param ctGraphicalObject 图片数据
     * @param deskFileName      图片描述
     * @param width             宽
     * @param height            高
     * @param leftOffset        水平偏移 left
     * @param topOffset         垂直偏移 top
     * @param behind            文字上方,文字下方
     * @return
     * @throws Exception
     */
    public static CTAnchor getAnchorWithGraphic(CTGraphicalObject ctGraphicalObject,
                                                String deskFileName, int width, int height,
                                                int leftOffset, int topOffset, boolean behind) {
        System.out.println(">>width>>" + width + "; >>height>>>>" + height);
        String anchorXML =
                "<wp:anchor xmlns:wp=\"http://schemas.openxmlformats.org/drawingml/2006/wordprocessingDrawing\" "
                        + "simplePos=\"0\" relativeHeight=\"0\" behindDoc=\"" + ((behind) ? 1 : 0) + "\" locked=\"0\" layoutInCell=\"1\" allowOverlap=\"1\">"
                        + "<wp:simplePos x=\"0\" y=\"0\"/>"
                        + "<wp:positionH relativeFrom=\"column\">"
                        + "<wp:posOffset>" + leftOffset + "</wp:posOffset>"
                        + "</wp:positionH>"
                        + "<wp:positionV relativeFrom=\"paragraph\">"
                        + "<wp:posOffset>" + topOffset + "</wp:posOffset>" +
                        "</wp:positionV>"
                        + "<wp:extent cx=\"" + width + "\" cy=\"" + height + "\"/>"
                        + "<wp:effectExtent l=\"0\" t=\"0\" r=\"0\" b=\"0\"/>"
                        + "<wp:wrapNone/>"
                        + "<wp:docPr id=\"1\" name=\"Drawing 0\" descr=\"" + deskFileName + "\"/><wp:cNvGraphicFramePr/>"
                        + "</wp:anchor>";

        CTDrawing drawing = null;
        try {
            drawing = CTDrawing.Factory.parse(anchorXML);
        } catch (XmlException e) {
            e.printStackTrace();
        }
        CTAnchor anchor = drawing.getAnchorArray(0);
        anchor.setGraphic(ctGraphicalObject);
        return anchor;
    }
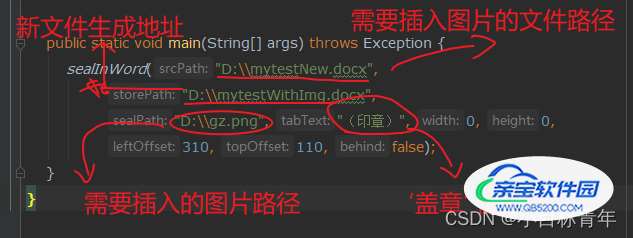
调用一下函数玩下:
    public static void main(String[] args) throws Exception {
        sealInWord("D:\\mytestNew.docx",
                "D:\\mytestWithImg.docx",
                "D:\\gz.png", "(印章)", 0, 0,
                310, 110, false);
    }
代码简析:
运行一下,打开新文件看看效果:

好了,该篇就到这吧。

