Http协议的认识:
Android中发送http网络请求是很常见的,要有GET请求和POST请求。一个完整的http请求需要经历两个过程:客户端发送请求到服务器,然后服务器将结果返回给客户端。
GET表示希望从服务器那里获取数据,而POST则表示希望提交数据给服务器。
通过Http访问网络的三个步骤:
1、发送http请求
2、接受服务响应
3、解析返回数据
HttpURLConnection类位于java.net包中,它用于发送HTTP请求和获取HTTP响应。
话不多说,直接上代码:
首先创建一个安卓项目。在xml中编写如下代码:
<LinearLayout xmlns:android="http://schemas.android.com/apk/res/android"
    xmlns:app="http://schemas.android.com/apk/res-auto"
    xmlns:tools="http://schemas.android.com/tools"
    android:layout_width="match_parent"
    android:layout_height="match_parent"
    android:orientation="vertical"
    tools:context=".MainActivity">
    <Button
        android:id="@+id/button"
        android:layout_width="match_parent"
        android:layout_height="wrap_content"
        android:text="获取"
        />
    <ScrollView
        android:layout_width="match_parent"
        android:layout_height="match_parent"
        >
        <TextView
            android:id="@+id/response"
            android:layout_width="match_parent"
            android:layout_height="wrap_content"
            />
    </ScrollView>
</LinearLayout>
ScrollView是可供用户滚动的层次结构布局容器,允许显示比实际多的内容,借助ScrollView控件,我们就可以以滚动的形式查看屏幕外的那部分内容。
上面的代码主要是实现,当点击按钮时,下面的滚动视图将展示其内容。
在java中编写如下代码:
public class MainActivity extends AppCompatActivity {
   TextView response;
    @Override
    protected void onCreate(Bundle savedInstanceState) {
        super.onCreate(savedInstanceState);
        setContentView(R.layout.activity_main);
        Button button=(Button)findViewById(R.id.button);
        response=(TextView)findViewById(R.id.response);
        button.setOnClickListener(new View.OnClickListener() {
            @Override
            public void onClick(View v) {
                new Thread(new Runnable() {
                    @Override
                    public void run() {
                        try {
                            URL url=new URL("http://www.baidu.com");
                            HttpURLConnection connection=(HttpURLConnection)url.openConnection();
                            connection.setRequestMethod("GET");
                          InputStream inputStream=connection.getInputStream();
                          BufferedReader reader=new BufferedReader(new InputStreamReader(inputStream));
                          StringBuilder stringBuilder=new StringBuilder();
                          String Line;
                          while ((Line=reader.readLine())!=null){
                              stringBuilder.append(Line);
                          }
                          show(stringBuilder);
                        } catch (MalformedURLException e) {
                            e.printStackTrace();
                        } catch (IOException e) {
                            e.printStackTrace();
                        }
                    }
                }).start();
            }
        });
    }
    private void show(final StringBuilder stringBuilder) {
        runOnUiThread(new Runnable() {
            @Override
            public void run() {
                response.setText(stringBuilder);
            }
        });
    }
}
首先需要获取到HttpURLConnection的实例,一般只需new出一个URL对象,并传入目标的网络地址,然后调用一下openConnection()方法即可,如下所示:
   URL url=new URL("http://www.baidu.com");
                            HttpURLConnection connection=(HttpURLConnection)url.openConnection();
在得到了HttpURLConnection的实例后,我们可以设置一下HTTP请求所使用的方法。常用的方法主要有两个:GET和POST。GET表示希望从服务器那里获取数据,而POST则表示希望提交数据给服务器。写法如下:
connection.setRequestMethod(“GET”);
之后在调用getInputStream()方法就可以获取到服务器返回的输入流了,剩下的任务就是对输入流进行读取。
最后别忘了在AndroidManifest.xml中声明一下网络权限和添加如下代码(不加就会有错误):
android:usesCleartextTraffic="true"
<manifest xmlns:android="http://schemas.android.com/apk/res/android"
    package="com.example.http4">
<uses-permission android:name="android.permission.INTERNET"/>
    <application
        android:allowBackup="true"
        android:icon="@mipmap/ic_launcher"
        android:label="@string/app_name"
        android:roundIcon="@mipmap/ic_launcher_round"
        android:supportsRtl="true"
        android:usesCleartextTraffic="true"
        android:theme="@style/AppTheme">
        <activity android:name=".MainActivity">
            <intent-filter>
                <action android:name="android.intent.action.MAIN" />

                <category android:name="android.intent.category.LAUNCHER" />
            </intent-filter>
        </activity>
    </application>
</manifest>
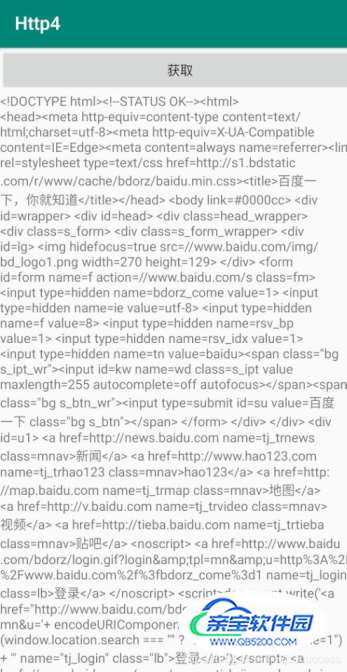
效果图如下所示: