ios触摸精灵
In a recent project I’ve been working on, we needed to provide the user a way of drawing on top of a photo by touching the screen. The user would be able to draw freely over the image, and also they would be able to erase any of their previous drawing simply by touching the erase button and then touching the drawing.
在我最近从事的项目中,我们需要为用户提供一种通过触摸屏幕在照片上方进行绘图的方法。 用户将能够在图像上自由绘图,并且他们将能够仅通过触摸擦除按钮然后触摸该图形来擦除其先前的任何图形。
As it turns out the hard part was not the drawing itself, since a quick internet search threw a fantastic drawing tutorial in the Ray Wenderlich site, the hardest for us was the erasing of a particular drawing.
事实证明,最困难的部分不是图形本身,因为快速的互联网搜索在Ray Wenderlich网站上引发了精彩的图形教程 ,对我们来说最难的是擦除特定图形。
UIGraphicsContext (UIGraphicsContext)
The Ray Wenderlich tutorial has three main functions that comprise most of the drawing logic.
Ray Wenderlich教程具有三个主要功能,其中包括大多数绘制逻辑。
Where lastPoint is being used to save the last known point of the line to draw (in this case the last known point is also the initial point).
使用lastPoint保存要绘制的线的最后一个已知点的情况(在这种情况下,最后一个已知点也是初始点)。
Then touchesMoved:
然后touchesMoved :
As you can see, drawing a line is actually quite simple, you just create a custom UIView and basically paste this code and that view is almost ready to serve as a drawing canvas for your user.
如您所见,绘制线条实际上非常简单,您只需创建一个自定义UIView并基本上粘贴此代码,该视图就几乎可以用作用户的绘图画布了。
The problem we had with this approach is that UIGraphicsGetImageFromCurrentImageContext returns a UIImage? with size of view.frame.size and all of the generated images would have the same size and position making it almost impossible to distinguish between one and another, further complicating the erasing of an individual drawing.
这种方法的问题在于UIGraphicsGetImageFromCurrentImageContext返回UIImage? 使用view.frame.size大小和所有生成的图像将具有相同的大小和位置,从而几乎无法区分彼此,从而使单个图形的擦除变得更加复杂。
Which took us to option number 2:
这使我们进入了选项2:
CAShapeLayer (CAShapeLayer)
Using the same touchesBegan/Moved/Ended functions as before we can create CGPaths, which describe all of the points where the user has moved it's finger, then we add this path to a CAShapeLayer and add this new layer as a sublayer of the "canvas" view this way we get images (layers) for each individual drawing.
使用与之前相同的touchesBegan/Moved/Ended函数,我们可以创建CGPaths ,它描述了用户将手指移动到的所有点,然后将该路径添加到CAShapeLayer并将此新层添加为“ canvas”的子层以这种方式查看,我们可以获得每个单独图形的图像(图层)。
Now let’s really see how using CGPath compares to using UIGraphicContext .
现在,让我们真正地看看使用CGPath与使用UIGraphicContext 。
Show me the code!
给我看看代码!
To begin with we created a custom view called DrawingView and replaced the touchesBegan function with this:
首先,我们创建了一个名为DrawingView的自定义DrawingView ,并将touchesBegan函数替换为:
The touchesMoved function remains the same as previous example and the drawLine gets changed to this:
touchesMoved函数与前面的示例相同,并且drawLine更改为以下示例:
Comparing previous implementation (CGContext) with current implementation (CALayer) you can see they are incredibly similar. They both make almost the same function calls, but in different contexts. Instead of
context.move(to: fromPoint), we usecurrentPath.move(to: fromPoint), instead ofcontext.setLineCap(.round)we now usecurrentLayer.lineCap = .round.将先前的实现(CGContext)与当前的实现(CALayer)进行比较,您会发现它们非常相似。 它们都进行几乎相同的函数调用,但是在不同的上下文中。 代替
context.move(to: fromPoint),我们使用currentPath.move(to: fromPoint),而不是context.setLineCap(.round)我们现在使用currentLayer.lineCap = .round。
Finally the touchesEnded function gets changed to this, since we need to render the added sublayers:
最后, touchesEnded函数更改为此,因为我们需要渲染添加的子层:
At this point the user can draw by moving it’s finger on the screen, each drawing is individual and it’s linked to a CAShapeLayer.
此时,用户可以通过在屏幕上移动手指来进行绘制,每个绘制都是独立的,并且已链接到CAShapeLayer 。
Now how do we erase specific drawings? This is the issue we wanted to solve in the beggining, so let's get to it!
现在我们如何删除特定的图纸? 这是我们在开始时要解决的问题,让我们开始吧!
擦除 (Erasing)
First we will create a function that will help us find the layer that contains the touch point:
首先,我们将创建一个函数来帮助我们找到包含接触点的图层:
Now if you have some worked previously with CAShapeLayers you may have used the hitTest function to check if the layer contains a CGPoint.
现在,如果您以前曾与CAShapeLayers一起工作过, CAShapeLayers可能已经使用hitTest函数检查该图层是否包含CGPoint 。
In our specific case this doesn’t work because for the hitTest function requires that the layer have a frame and we are not assigning one to it, because if the user draws a long diagonal line through the screen the frame that contains the whole drawing would be a really big rectangle which would detect touches even if the finger is far away from the actual drawn line.
在我们的特定情况下,这是行不通的,因为hitTest函数要求layer具有frame并且我们不会为其分配frame ,因为如果用户在屏幕上绘制一条较长的对角线,则包含整个图形的框架会是一个非常大的矩形,即使手指远离实际绘制的线也可以检测到触摸。
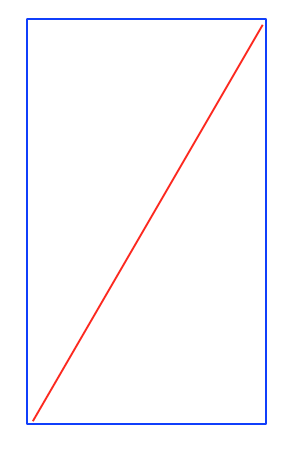
Where the red line is the line drawed by the user, and the blue rectangle is the frame.
其中红线是用户绘制的线,蓝色矩形是框架。
Another thing that pops up in the previous code is that we are creating an outline of the shapeLayer.path and then calling the contains(point) function on it, why not call the contains function directly on the path, why do we need to create an outline?
先前代码中弹出的另一件事是,我们正在创建shapeLayer.path的轮廓 ,然后在其上调用contains(point)函数,为什么不直接在路径上调用contains函数,为什么我们需要创建一份大纲?
Well it turns out that the contains(point) function only works on closed paths, so if the user draws a straight line that funtion would always return false.
事实证明, contains(point)函数仅适用于封闭路径,因此,如果用户绘制直线,函数将始终返回false 。
The outline is something like this:
大纲是这样的:
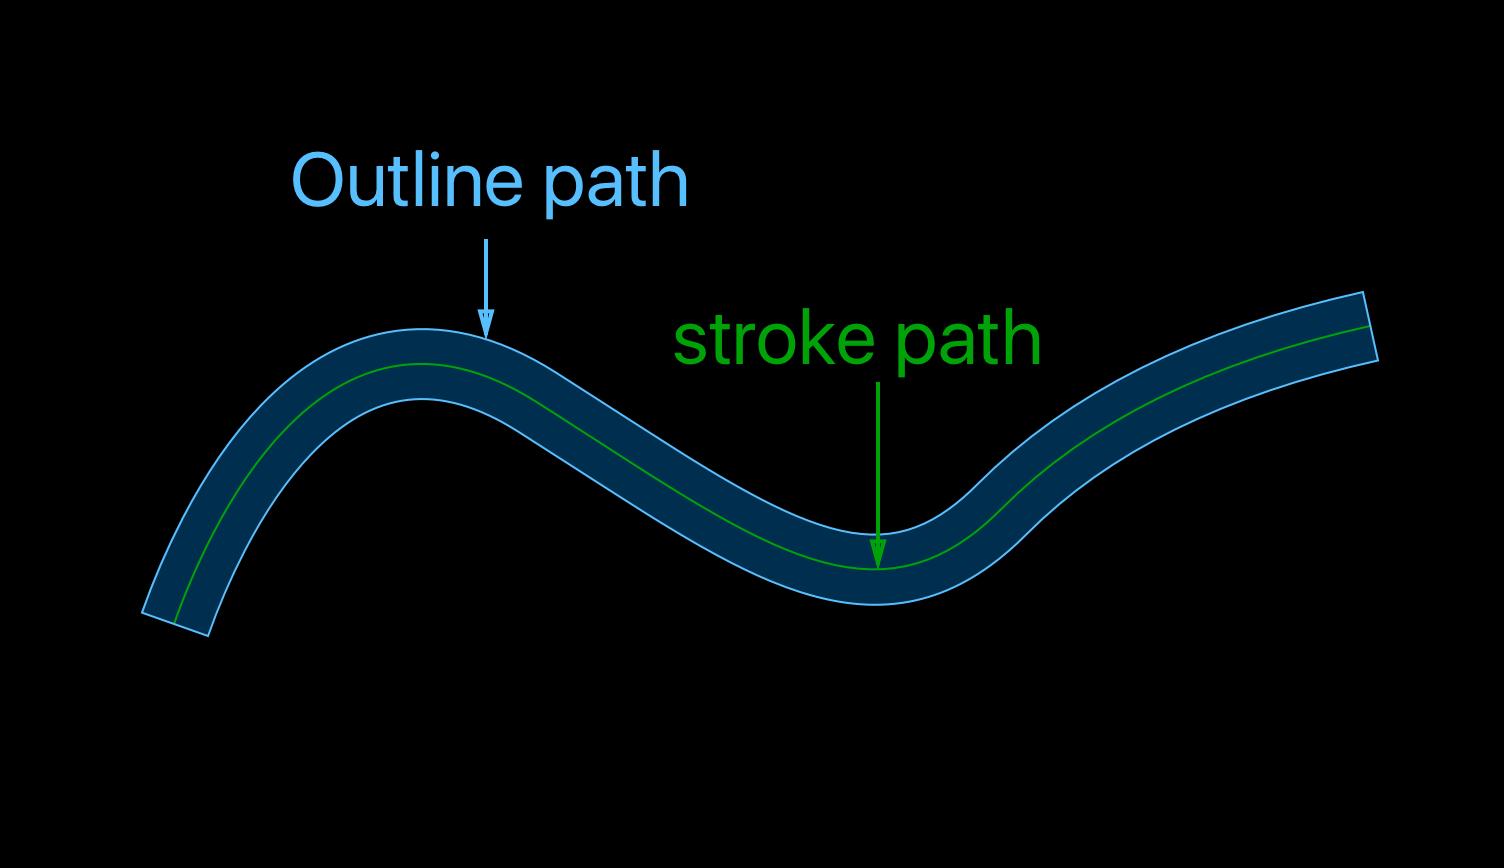
As you can see the outline is a closed shape, so it gives us the required precision we want when deleting shapes by tapping.
如您所见,轮廓是 封闭形状,因此它为我们提供了在点击删除形状时所需的精度。
Great explanation of this here.
这里对此有很好的解释。
Ok let’s carry on, the findLayer function returns the touched layer, so now we need to delete it:
好的,让我们继续, findLayer函数返回被触摸的layer ,所以现在我们需要删除它:
With these two new functions in place, we need a way to switch between drawing and erasing, so we add a control property and use it to limit drawing capabilities in touchesBegan:
有了这两个新功能后,我们需要一种在绘制和擦除之间切换的方法,因此我们添加了一个控件属性,并使用它来限制touchesBegan绘制功能:
and touchesMoved:
和touchesMoved :
In touchesEnded we call the findLayer if isDrawing == false
在touchesEnded ,如果isDrawing == false则调用findLayer
The result is this:
结果是这样的:
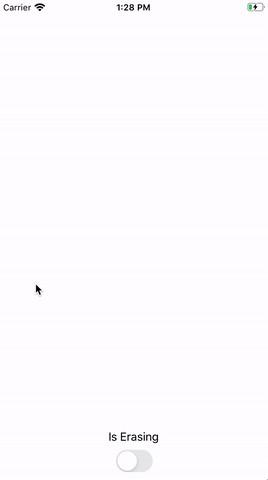
It looks kind of nice! Well this are the basics for drawing in iOS, the code can be found here.
看起来不错! 好吧,这是在iOS中进行绘图的基础,可以在此处找到代码。
This is a very simple example of how drawing and erasing works, this code can be further exapanded and refactored to give the user more drawing options like drawing a square or a circle, or showing the angle between two lines. These options will be covered on a following article.
这是绘制和擦除工作方式的非常简单的示例,可以进一步扩展和重构此代码,以便为用户提供更多绘制选项,例如绘制正方形或圆形或显示两条线之间的角度。 这些选项将在下一篇文章中介绍。
I hope you liked it! Thanks for reading!
我希望你喜欢它! 谢谢阅读!
翻译自: https://levelup.gitconnected.com/ios-touch-drawing-4d5b715d2d35
ios触摸精灵

