1.node版本12以上
npm init @vitejs/app + 项目名
npm init vite@latest +项目名
router-index.ts
npm install vue-router@4 --save
import { createRouter, createWebHashHistory, RouteRecordRaw } from "vue-router";
const routes: Array<RouteRecordRaw> = [
 {
 path: "/",
 name: "Home",
 meta: {
  title: "首页",
  keepAlive: true
 },
 component: () => import("../views/Home/index.vue"),
 },
 {
 path: "/login",
 name: "Login",
 meta: {
  title: "登录",
  keepAlive: true
 },
 component: () => import("../views/Login/index.vue"),
 },
];
const router = createRouter({
 history: createWebHashHistory(),
 routes
});
export default router;npm i vuex@next --save
import { createStore } from "vuex";
export default createStore({
 state: {
 listData:{1:10},
 num:10
 },
 mutations: {
 setData(state,value){
  state.listData=value
 },
 addNum(state){
  state.num=state.num+10
 }
 },
 actions: {
 setData(context,value){
  context.commit('setData',value)
 },
 },
 modules: {}
});
记得挂载
npm i vue-i18n@next -S
npm i js-cookie -S
npm i @types/js-cookie -D
npm i vite-plugin-compression
shime.d.ts
declare moudle ''
npm install @types/node --save-dev
tsconfig.json
"skipLibCheck": true,
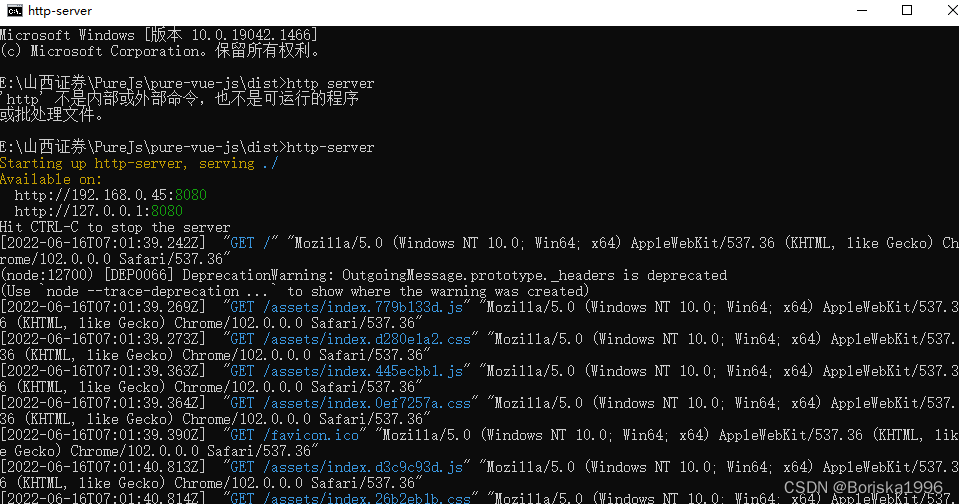
解决办法:,npm 安装 http-server 包。
打开dist文件夹,终端输入
http-server -p 端口号
置esS端S端置td小。。优点果。外面V了出。来。xx可。割。方法属性属性变量参数定:
Options API 约定:
我们需要在 props 里面设置接收参数
我们需要在 data 里面设置变量
我们需要在 computed 里面设置计算属性
我们需要在 watch 里面设置监听属性
我们需要在 methods 里面设置事件方法
你会发现 Options APi 都约定了我们该在哪个位置做什么事,这反倒在一定程度上也强制我们进行了代码分割。
现在用 Composition API,不再这么约定了,于是乎,代码组织非常灵活,我们的控制代码写在 setup 里面即可。
setup函数提供了两个参数 props和context,重要的是在setup函数里没有了this,在 vue3.0 中,访问他们变成以下形式: this.xxx=》context.xxx
我们没有了 this 上下文,没有了 Options API 的强制代码分离。Composition API 给了我们更加广阔的天地,那么我们更加需要慎重自约起来。
对于复杂的逻辑代码,我们要更加重视起 Composition API 的初心,不要吝啬使用 Composition API 来分离代码,用来切割成各种模块导出。
1、**template标签下面可以有多个节点了**,终于不用先写一个DIV了
2、**setup函数可以代替之前的data,methods,computed,watch,Mounted等对象**,但是props声明还是在外面
ref与reactive方法的区别是什么?一个是把值类型添加一层包装,使其变成响应式的引用类型的值。另一个则是引用类型的值变成响应式的值。所以**两者的区别只是在于是否需要添加一层引用包装**?其目的都是对数据添加响应式效果。
##### 思想优点
**vue2采用面向对象编程的思想,vue3则采用函数式编程的思想。**
原因:充分利用函数式编程组合大于继承的优势,采用函数式编程更利于逻辑功能的复用,webpack打包时更有利于tree-shaking,更利于代码的压缩,更利于返回值类型校验,压缩后的文件体积更小。
<script setup lang="ts">
// imported components are also directly usable in template
import Foo from "../Foo/index.vue";
import { ref } from "vue";
// write Composition API code just like in a normal setup()
// but no need to manually return everything
const count = ref(0);
const inc = () => {
  count.value++;
};
</script>
<template>
  <div>
    <Foo />
    HomePage组件
  </div>
</template>
Css中使用变量
.Title {
  font-size: 30px;
  @media screen and (max-width: 1000px) {
    font-size: 12px;
  }
  color: v-bind(colorRed);
}
Css去掉scope
:root {
  --varColor: red;
}
.aColor {
  color: var(--varColor);
}
Ref拷贝出来的值不能直接进行算数运算,必须使用.value
let qq = ref<number>(1);
  qq.value++;
Ref和Reactive,在不影响数据源的情况下可以将一般数据类型转化成响应式数据类型。
当响应式对象里头数据变化的时候原始对象的数据也会变化
toRef和toRefs是引用型,是在不影响数据源的情况下,将原始数据转化为响应式数据。且不更新UI界面,但是如果页面中有Reactive等其他响应式,则会同时更新UI界面。
defineProps父子传值
定义子组件props(子组件的data)
defineProps({
 msg: String,
});
defineEmits
const emit = defineEmits(['click']);
v-model 指令扩展为 modelValue 和 onUpdate:modelValue 在模板编译过程中,我们必须自己提供这些 props:
export default {
  props: ['modelValue'],
  emits: ['update:modelValue'],
  render() {
    return h(SomeComponent, {
      modelValue: this.modelValue,
      'onUpdate:modelValue': (value) => this.$emit('update:modelValue', value)
    })
  }
}
假如我有一个todoItem 组件,需要item 信息属性,需要准守 TodoItem interface。
1、引入
import { PropType } from 'vue'2、定义接口
export interface TodoItem {
  text: string
  done: boolean
}
3、属性验证
props: {
    todo: {
      type: Object as PropType<TodoItem>,
      default: {
        text: '',
        done: false
      }
    }
}对于以上代码,toRefs()将响应式的对象 state 变为普通对象 stateAsRefs 后,return 时使用 ES6 的扩展运算符,在模版中可以直接使用其内部属性,且仍具有响应性( 对响应式对象 state 使用扩展运算符后,其内部属性就失去了响应性 )。
对响应式对象进行 toRefs 后,可以对其进行解构方便 vue 模版使用,但是不会使其失去响应性。
ref()接收一个 js 基本数据类型的参数;toRef()接收两个参数,第一个为对象,第二个为对象中的某个属性;
ref()创建的数据会触发 vue 模版更新;toRef()创建的响应式数据并不会触发 vue 模版更新,所以toRef()的本质是引用,与原始数据有关联
toRef[data]
toRef针对的是响应式,针对的不是普通对象,如果用于非响应式,产出的结果不具有响应式
toRef 用于为源响应式对象上的属性新建一个ref,从而保持对其源对象属性的响应式连接。
接收两个参数:源响应式对象和属性名,返回一个ref数据。例如使用父组件传递的props数据时,要引用props的某个属性且要保持响应式连接时就很有用。
<template>
  <div>
    <h1 style="color: royalblue" @click="clickHandler">
      {{ names }}
    </h1>
  </div>
</template>
<script lang="ts" setup>
import { ref, defineProps, toRef } from "vue";
const props = defineProps({
  kindleValue: {
    type: Object,
    default: () => {
      return {};
    },
  },
});
const clickHandler = () => {
  names.value++;
  console.log(names.value, props.kindleValue);
};
const names = toRef(props.kindleValue, "name");
</script>
<style scoped lang="less"></style>
接受一个对象 (响应式或纯对象) 或 ref 并返回原始对象的只读代理。只读代理是深层的:任何被访问的嵌套 property 也是只读的。
检查对象是否是由 reactive 或 readonly 创建的 proxy
作用:将一个由reactive生成的响应式对象转为普通对象
使用场景:用于读取响应式对象对应的普通对象,对这个普通对象的所有操作,不会引起页面更新。
const props = defineProps({
  navbarList: {
    type: Object,
    default: () => {
      return {};
    },
  },
  activeKey: {
    type: Number,
    default: () => {
      return 0;
    },
  },
  isBlur: Boolean,
});
const emit = defineEmits(['change']);
// 选择Tab
const changeActiveKey = (key: number) => {
  const { navbarList } = props;
  const linkUrl = toRaw(navbarList) as Array<linkType>;
  console.log(key);
  emit('change', key);
  router.push(`${linkUrl[key].children[0].linkUrl}`);
};
作用:标记一个对象,使其永远不会再成为响应式对象。
应用场景:
1.有些值不应被设置为响应式的,例如复杂的第三方类库等。
2.当渲染具有不可变数据源的大列表时,跳过响应式转换可以提高性能。
返回值是readOnly,属性是只读的。
用法一
const show = computed({
  get() {
    return props.value;
  },
  set(val: boolean) {
    emit("update:modelValue", val);
  }
});
用法二
const itemStyle = computed(() => {
  return item => {
    return {
      background:
        item?.path === active.value ? useEpThemeStoreHook().epThemeColor : "",
      color: item.path === active.value ? "#fff" : "",
      fontSize: item.path === active.value ? "16px" : "14px"
    };
  };
});
const navbarList = computed(() => {
  return store.state.user.menu;
});
defineComponent
多层组件传值:Provide-inject
父子组件传值:defineProps、defineEmits
watch和watchEffect的区别
1、watch 是需要传入侦听的数据源,而 watchEffect 是自动收集数据源作为依赖。
2、watch 可以访问侦听状态变化前后的值,而 watchEffect 没有。
3、watch 是属性改变的时候执行,而 watchEffect 是默认会执行一次,然后属性改变也会执行。
// imported components are also directly usable in template
import { ref, reactive, watch, watchEffect } from "vue";
// write Composition API code just like in a normal setup()
// but no need to manually return everything
const count = ref(0);
let a = ref<number>(0);
type obj = {
  name: string;
  age: number;
};
const Person = reactive<Array<obj>>([{ name: "LKK", age: 10 }]);
watch(
  () => Person[0].age,
  (newVal, oldVal) => {
    console.log(newVal, oldVal, "ssss");
  }
);
watchEffect(() => {
  console.log(Person[0].age); // 即使 testObject.a 没有发生变化,也会在组件更新之前输出一遍
});
const inc = () => {
  count.value++;
};
const clickHandler = function () {
  Person[0].age += 1;
  // a.value++;
};
监听多个数据
  watch(() => [state.province, state.country], ([newprovince,newcountry],[oldprovince,oldcountry]) => {
        console.log(oldprovince,'省份---', newprovince);
        console.log(newcountry,'cs---', oldcountry);
        // 判断是不是省份发生的变化
        if(oldprovince !== newprovince) {
        const arr = state.allCity.filter((item) => item.province == state.province);
        state.countries = arr[0].cities;
        console.log(arr);
        state.country = "";
        }
        state.detailedAdress = "";
        console.log(state.countries);
      }
    );
类型“unknown”上不存在属性“name”
import type { PropType } from 'vue';子元素需要用defineComponent导出写法
<template>
  <div>
    <a-modal title="Title" v-model:visible="visible" :confirm-loading="confirmLoading" @ok="handleOk">
      <p>{{ modalText }}</p>
    </a-modal>
  </div>
</template>
<script lang="ts">
import { ref, defineComponent } from 'vue';
export default defineComponent({
  setup() {
    const modalText = ref<string>('Content of the modal');
    const visible = ref<boolean>(false);
    const confirmLoading = ref<boolean>(false);
    const showModal = () => {
      visible.value = true;
    };
    const handleOk = () => {
      modalText.value = 'The modal will be closed after two seconds';
      confirmLoading.value = true;
      setTimeout(() => {
        visible.value = false;
        confirmLoading.value = false;
      }, 2000);
    };
    return {
      modalText,
      visible,
      confirmLoading,
      showModal,
      handleOk,
    };
  },
});
</script>
defineComponent无法获取父组件传过来的后台数据。
defineExpose
// 子组件
<script setup>
import { defineExpose } from 'vue'
const childFun = () => {
	console.log('我是子组件方法')
}
// 重点!!这里需要使用defineExpose暴露出去
defineExpose({
	childFun
})
</script>
// 父组件
<template>
	<child ref="childRef"></child>
</template>
<script setup>
import { ref } from "vue";
// 引入子组件
import child from "./child.vue";
// 获取子组件
const childRef = ref(null);
const fun = () => {
	childRef.value.childFun();// 调用子组件的方法
}
</script >
其实h()函数和createVNode()函数都是创建dom节点,他们的作用是一样的,但是在VUE3中createVNode()函数的功能比h()函数要多且做了性能优化,渲染节点的速度也更快。
import { createApp } from "vue";
//import App from "./App.vue";
import { defineComponent, h, createVNode } from "vue";
import HelloWorld from "./components/HelloWorld.vue";
const img = require('./assets/logo.png'); // eslint-disable-line
const App = defineComponent({
  render() {
        return h("div", { id: "app" }, [
            h("img", { src: img }),
            h(HelloWorld, { msg: "HelloWorld" }),
            createVNode("h1", { class: "hello" }, "HelloWorld")
        ]
        );
  },
});
createApp(App).mount("#app");
beforeCreate -> 使用 setup()
created -> 使用 setup()
beforeMount -> onBeforeMount
mounted -> onMounted
beforeUpdate -> onBeforeUpdate
updated -> onUpdated
beforeDestroy -> onBeforeUnmount
destroyed -> onUnmounted
errorCaptured -> onErrorCaptured
以上为个人经验,希望能给大家一个参考,也希望大家多多支持。

