npm install svg-sprite-loader -D
或者
yarn add svg-sprite-loader -D
const path = require('path');
module.exports = {
  chainWebpack:config =>{
    const dir = path.resolve(__dirname,'src/assets/icons')
    config.module
      .rule('svg-sprite')
      .test(/\.svg$/)
      .include.add(dir).end() //设置 icons 目录走 svg-sprite 规则
      .use('svg-sprite-loader').loader('svg-sprite-loader').options({extract : false}).end()
      .use('svgo-loader').loader('svgo-loader')
      .tap(options => ({...options,plugins:[{removeAttrs:{attrs:'fill'}}]})).end()//安装插件去除svg中的fill属性
    config.plugin('svg-sprite').use(require('svg-sprite-loader/plugin'),[{plainSprite: true}])
    config.module.rule('svg').exclude.add(dir)//其他svg loader 排除 icons 目录
  }
}
也可以这么配置
const { defineConfig } = require('@vue/cli-service')

// 加在头部
const path = require('path')


function resolve (dir) {
  return path.join(__dirname, dir)
}


module.exports = defineConfig({
  transpileDependencies: true,
  chainWebpack (config) {
    config.plugins.delete('prefetch')

    // set svg-sprite-loader
    config.module
      .rule('svg')
      .exclude.add(resolve('src/assets/icons'))
      .end()
    config.module
      .rule('icons')
      .test(/\.svg$/)
      .include.add(resolve('src/assets/icons'))
      .end()
      .use('svg-sprite-loader')
      .loader('svg-sprite-loader')
      .options({
        // symbolId: 'icon-[name]'
        symbolId: '[name]'
      })
      .end()
    }

})
注意:src/assets/icons这个文件夹放着你的svg文件
<template>
  <div class="icon-wrapper">
    <svg class="icon" aria-hidden="true">
      <use :href="iconName" rel="external nofollow" ></use>
    </svg>
  </div>
</template>

<script>
export default {
  name: 'IconSvg',
  props: {
    name: String,
    prefix: {
      type: String,
      default: 'icon-'
    }
  },
  computed: {
    iconName() {
      // return `#${this.prefix}${this.name}`
      return `#${this.name}`
    }
  }
}
</script>

<style scoped>
.icon-wrapper {
  display: inline-block;
}
.icon {
  width: 100%;
  height: 100%;
  vertical-align: -0.15em;
  fill: currentColor;
  overflow: hidden;
}
</style>import Vue from 'vue'
import App from './App.vue'
import router from './router'
// 引入本地的svg文件
// 定义一个加载目录的函数
const requireAll = requireContext => requireContext.keys().map(requireContext)
const req = require.context('./assets/icons', false, /\.svg$/)
// 加载目录下的所有的 svg 文件
requireAll(req)
// 全局注册IconSvg组件
const IconSvg = () => import('./components/svg/IconSvg');
const components = {
IconSvg
}
Object.keys(components).forEach(item => {
Vue.component(item, components[item])
})
Vue.config.productionTip = false
new Vue({
router,
render: h => h(App)
}).$mount('#app')使用的话有多种形式,我们一个一个来看。
1、使用自己编写的svg文件
在src/assets/icons文件夹下面创建circle.svg(一定是这个文件夹,因为这个文件夹下的svg文件会被你的svg插件解析)
<?xml version="1.0"?>
<svg viewBox="0 0 120 120" version="1.1"
  xmlns="http://www.w3.org/2000/svg">
  <circle cx="60" cy="60" r="50"/>
</svg>
经过svg-sprite-loader插件的解析,你在html里面可以看到有个id为circle(和svg名称一样)的一个symbol标签挂载在svg标签下面

这个时候直接使用就可以了
<template>
  <div class="home">
    <IconSvg name="circle"/>
  </div>
</template>

<script>

export default {
  name: 'HomeView',
  components: {
  }
}
</script>

<style scoped>

</style>
2、将svg标签封装到一个vue文件中
创建SvgList.vue组件
<template>
  <svg width="0" height="0" preserveAspectRatio="none">
    <defs>
      <!-- 这是个圆 -->
      <symbol id="icon-circle" viewBox="0 0 200 200">
        <circle cx="60" cy="60" r="50" />
      </symbol>
      <!-- 这是个动画 -->
      <symbol id="icon-circle" viewBox="0 0 200 200">
        <rect width="10" height="10">
          <animate attributeName="rx" values="0;5;0" dur="10s" repeatCount="indefinite" />
        </rect>
      </symbol>
      <!-- 这是个正方形 -->
      <symbol id="icon-circle" viewBox="0 0 200 200">
        <rect x="10" y="10" width="100" height="100"/>
      </symbol>
    </defs>
  </svg>
</template>

<script>
export default {

};
使用如下
<template>
  <div class="home">
    <!-- 这里要使用这个组件,否则svg标签引入不进来 -->
    <svg-list />
    <IconSvg name="icon-circle" class="icon1"/>
    <IconSvg name="icon-rect" class="icon1"/>
  </div>
</template>

<script>
import SvgList from '../components/SvgList.vue'

export default {
  name: 'HomeView',
  components: {
    SvgList
  }
}
</script>

<style scoped>
.icon1 {
  width: 100px;
  height:100px;
  color: red;
}
</style>

3、使用iconfont的svg代码

在src/assets/icons这个文件夹下面去创建heart.svg(一定是这个文件夹,因为这个文件夹下的svg文件会被你的svg插件解析)
<svg t="1660895988570" class="icon" viewBox="0 0 1171 1024" version="1.1" xmlns="http://www.w3.org/2000/svg" p-id="1570" width="200" height="200">
  <path d="M1001.6 153.6s0-3.2 0 0c-118.4-118.4-304-121.6-425.6-12.8-121.6-108.8-307.2-105.6-422.4 9.6-118.4 118.4-121.6 310.4-3.2 428.8l3.2 3.2 355.2 352c38.4 38.4 99.2 38.4 137.6 0l355.2-352c118.4-118.4 118.4-310.4 0-428.8z m-115.2 249.6c-9.6 0-16-6.4-16-16 0-57.6-48-105.6-105.6-105.6-9.6 0-16-6.4-16-16s6.4-16 16-16c76.8 0 137.6 60.8 137.6 137.6 0 9.6-6.4 16-16 16z" fill="#343231" p-id="1571">
  </path>
</svg>
使用
<template>
  <div class="home">
    <IconSvg name="heart" class="icon1"/>
  </div>
</template>

<script>

export default {
  name: 'HomeView',
  components: {
  }
}
</script>

<style scoped>
.icon1 {
  width: 100px;
  height:100px;
  color: chocolate;
}
</style>
效果

在这里你会遇到一个问题,那就是给这个svg改颜色改不掉,你只要把svg标签里的fill属性去掉就可以了,或者把fill属性设置成none。还有一个stroke轮廓颜色也是可以设置的。
4、直接引入整个iconfont的svg图片
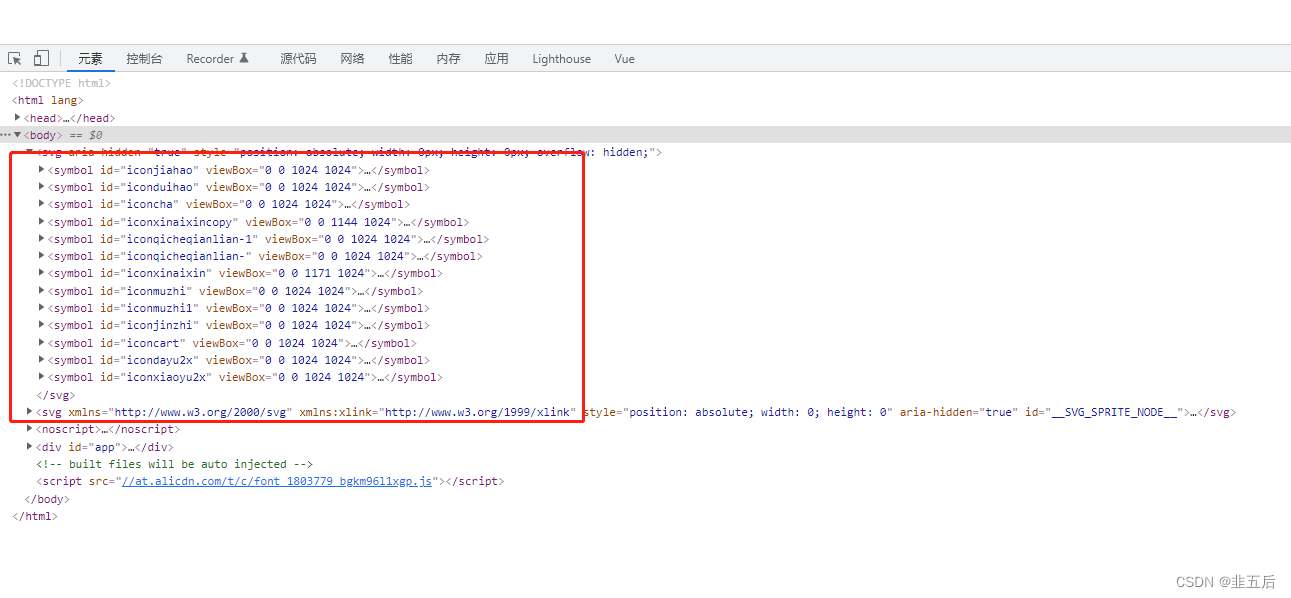
生成symbol代码

在index.html中引入上面的symbol代码
<!DOCTYPE html>
<html lang="">
  <head>
    <meta charset="utf-8">
    <meta http-equiv="X-UA-Compatible" content="IE=edge">
    <meta name="viewport" content="width=device-width,initial-scale=1.0">
    <link rel="icon" href="<%= BASE_URL %>favicon.ico" rel="external nofollow" >
    <title><%= htmlWebpackPlugin.options.title %></title>
  </head>
  <body>
    <noscript>
      <strong>We're sorry but <%= htmlWebpackPlugin.options.title %> doesn't work properly without JavaScript enabled. Please enable it to continue.</strong>
    </noscript>
    <div id="app"></div>
    <!-- built files will be auto injected -->

    <!-- 引入svg代码 -->
    <script src="//at.alicdn.com/t/c/font_1803779_bgkm96l1xgp.js"></script>
  </body>
</html>
看控制台已经全部引入进来了
使用
<template>
  <div class="home">
    <IconSvg name="iconjiahao" class="icon1"/>
    <IconSvg name="iconqicheqianlian-1" class="icon2"/>
    <IconSvg name="iconxinaixin" class="icon2"/>
    <IconSvg name="iconjinzhi" class="icon1"/>
    <IconSvg name="iconcart" class="icon1"/>
  </div>
</template>

<script>

export default {
  name: 'HomeView',
  components: {
  }
}
</script>

<style scoped>
.icon1 {
  width: 100px;
  height:100px;
  color: chocolate;
}
.icon2 {
  width: 100px;
  height:100px;
  color: darkorange;
}
</style>
效果

提示:当然你也可以上传svg图片到iconfont平台,然后再下载下来使用,但是在下载下来的时候一定要去去除颜色并提交,这样你的svg图片就可以随心所欲的改颜色了

